Showing posts with label Leaves. Show all posts

Wednesday, 10 September 2025

September 2025 - With 3 Things - Autumn Book & Box {by Helen Ranger}


Hello, Helen Ranger (butterflywings_beautifulthings) here with you today on the PaperArtsy blog. I was surprised and excited when PaperArtsy asked me to be a guest blogger for the September 'with 3 things' challenge. Some of you may have seen some of my creations on the PaperArtsy People Group on Facebook. I haven't been creating for very long compared to some and still consider myself to be a beginner with a lot to learn. 

For this feature on the PaperArtsy Blog 3 identical items are sent to 3 crafters. Typically we will receive a stamp, a stencil and a couple of Fresco Paints. We have no clue what PaperArtsy HQ is going to send, the whole idea of this challenge is to do something crafty in our personal style with these 3 items. We can incorporate other PA products into the mix if we feel it is necessary.

When my parcel arrived, I carefully opened the beautiful bird paper wrapping to find a autumn inspired selection of Fresco Finish acrylic paints with Rusty and Kiwi Gold, a lovely Lin Brown stamp set ELB34 and PaperArtsy stencil PS002, also by Lin Brown. Ideas began to race through my mind.


Today I have made a mini book and its box, inspired by nature in the fall.

I have to admit nerves set in a little at this point along with a little self doubt for good measure. My usual style is to have delicate stencil backgrounds with very defined focals but this selection was possibly the opposite of that? 


I was feeling a little overwhelmed so I started with some exploration before taking any decision. I began to test the beautiful colors of paint with ink colours and paints that I thought might work well. All those rusty leaves gave me the idea to create a box with an autumn walk themed mini booklet inside.


I began my project by enjoy myself using my gel plate to make some backgrounds. I added small blobs of the two paint colours and used my brayer to blend them, then removing paint onto a spare sheet of copier paper through the stencil. This created a beautiful distressed textures.

I pulled the prints using the Heavy Cream Fresco Finish which toned down the colours a little. Perfect for a background!

Next I trimmed two of the backgrounds to the height of the reclaimed box I had chosen and glued the strips together to create a snippet roll. I used most of the stamps in the stamp set in various colors of ink all the way along the snippet roll. I did a lot of overlapping and some partial stamping. I finished it off with stitching along both edges.


I also needed to decorate the base of the box. Using embossing ink, I stamped onto one of the gel printed backgrounds using the distressed floral stamp. I coated this for two colours of embossing glaze then I added additional stamping and stitching. This way the base coordinates perfectly with the sides but has more texture!


I cut the snippet roll to size and painted the edges of the box in French Roast Fresco Finish I then glued the snippet roll inside and out fitting the base into the bottom of the box.


With the bow all pretty, it was time to begin creating my booklet. I sprayed some Distress stain and oxide through PaperArtsy stencil PS002 onto some card, adding water splats and drying. I brayered on a little of the Kiwi Gold Fresco, mainly around the edges. I glued another piece of the gel printed paper to the back. This will be the cover for my booklet


I wanted the booklet to fit snuggly in the box so I used the measurements of the box reduced by half a centimeter to determine to size of my covers. I cut a strip of the right height in the stencilled card and marked the covers width on each end. I glued on a second piece of card to the back of the booklet along the three edges, as shown above, to create a little pocket then inked up all the edges.

Then I began concertina folding the remaining strip between the covers. I wanted five pages so I created 5 peak folds, but you could have as many as you like. I finally glued together the valley folds on the outside of the booklet, stopping the concertina from opening. This created raised flaps inside the booklet to adhere my pages to.
I think I should have made the folds larger as folding the doubled card was hard on my hands and gluing the small folds was a bit tricky.


For my pages, I cut five pieces of the gel printed paper to the height of my cover minus half a centimeter and double the width. Each was to be folded in half and glued together sandwiching a flap of the cover, thus creating 5 pages.


Those pages now needed to be decorated! I brayered on matching ink to the one on the cover. I added scraps of the lovely tissue paper used to wrap my parcel (PT11 - Birds) and textures stamps to decorate the background.


I stamped many of the main leaves in the ELB34 set on card using different colour inks then painted them layering the two colours Rusty and Kiwi Gold. I also added a little bit of Claret Fresco Finish paint just around the edges as they felt a little "flat". I fussy cut these out and inked around the edges and the back as I knew that I wanted to bend some and I didn't want any white showing.


The next bit is intuitive to me as I love using fragments of fabric, string, book page and card/paper scraps to my nature work. Very often it can be the smallest of pieces. This process began when I created a junk journal for a year it was a period of healing for me.


I added these to the pages arranging the leaves, stamped words, scraps of snippet roll and text from a digital download.


I then added simple doodles, lines, dots and circles to each page.


Nearly there... I added leaves to the box and set about creating the finishing touches. I added some rusty paint to a metal token with a sentiment fitting the project. I let it partially dry and dapped it with kitchen towel. I glued the string inside the back cover so that the metal token dangled on the outside.


I fussy cut a moth and coated it with frosted crystal for my cover. A process I really enjoy!


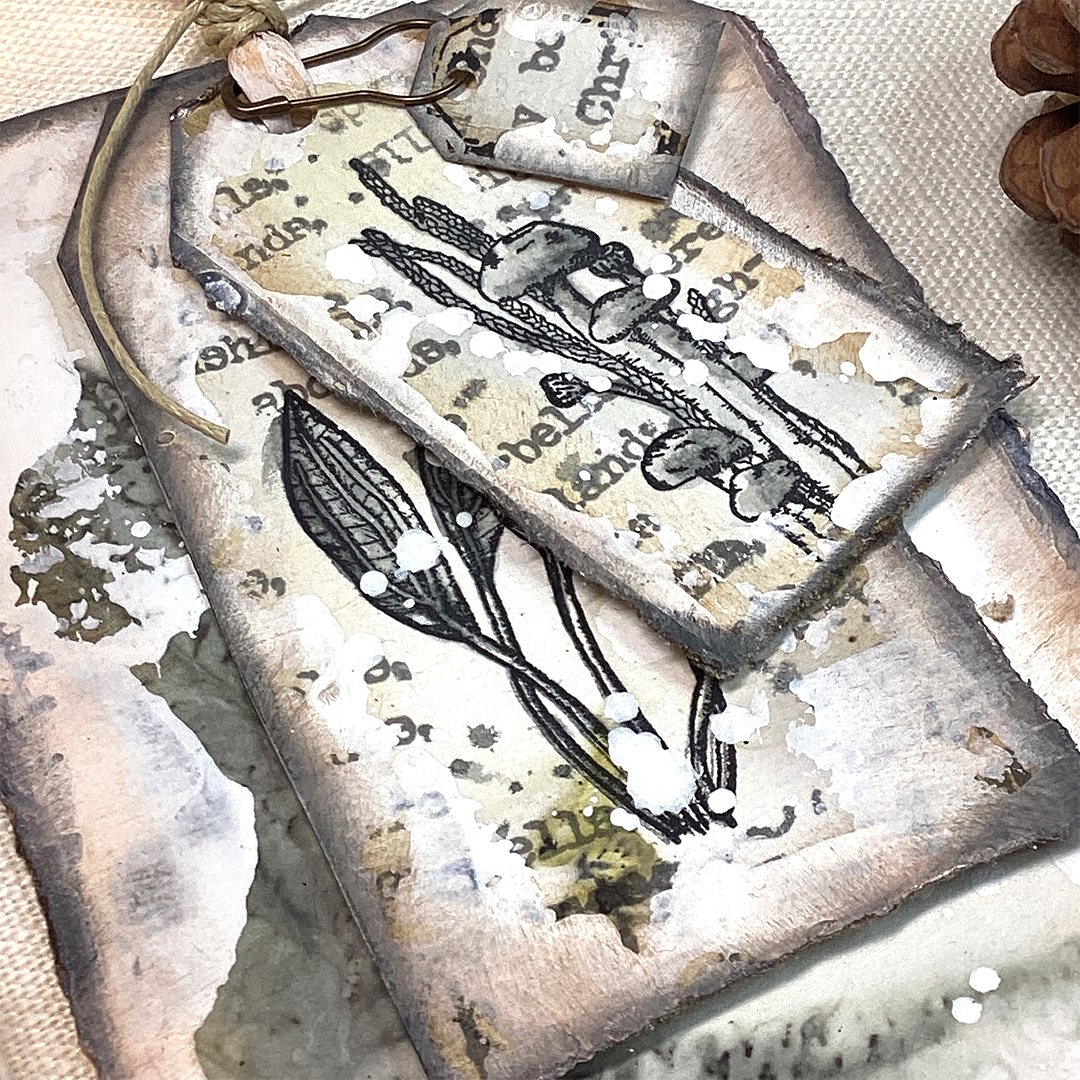
I put cut off pieces of the base into the back pocket to use as a mini tag. (You didn't think I could create all this without a tag did you?).

All done! Here is a look at the different pages:


I loved all the processes to create this mini booklet and box which I can now fill with projects inspired by the upcoming season. I look forward to filling it and sharing my makes with you on PaperArtsy People!

Helen xx

Facebook: Helen Ranger

Friday, 18 November 2022

2022 Topic 15 : Paper, Seeds and Twigs {by Etsuko Noguchi} with Gwen Lafleur stamps


Hi everyone, it's Etsuko (My favorite things) with you today, and I'm here to share with you Eco-Print using a selection of stamps designed by Gwen Lafleur. My project this time was card and tags for the winter season, but I also made the shadowbox using the themes Paper, Seeds and Twigs.


I've been wanting to share some of my eco-printing work on the here for a while, and since the theme this time was Paper, Seeds and Twigs, I thought it would be a good opportunity. It's the season of fallen leaves, so I started by collecting various leaves and nuts that have fallen in the nearby park and our small garden.-I did Crafty Patti's eco-printing as a reference.


I started the project based on these materials.


Now let's take a quick look at the general eco-printing way. I have prepared these goods; this binder is not always necessary but I made a board and a bolt to sandwich papers and leaves and watercolour papers.


Next I have prepared 1/3 cup of Alum mixed with 1 cup hot water added cold water to fill the two each 1.5 litres bottles. And rust water which made with PaperArtsy Rusting Powder.


Brush each piece of paper with Alum water. (Alum is also used medicinally as an astringent so it can be drying to your hands.)


Continue to layer paper and the greenery and flowers. Then a cardboard paper layer on the top and bottom of the watercolour paper.


Then put it in the binder and tighten the screw and place it in the cooking tray on a wire rack. In this case, if you have a large pot, that's fine.


The brick has been placed on top of the binder as a weight. Add the rust water and onion skin to the remaining alum water before heating. Bring to a boil and simmer over low heat for 45 minutes, turn off heat and add 1/2 cup white vinegar to help set the colour, Let it sit overnight.


These were the result of this eco-printing. These were some that worked well and some that didn't, but each of them seemed to be useful for something. In addition to watercolour paper, I also used thin washi paper, but since it was placed at the top of the layer, the colour was dyed but I couldn't print it in a clear shape. I think it would be nice if I could print well on washi, so I'm thinking of trying it at another opportunity.


I made three tags, card and a shadowbox using the eco-prints. I will show you three tags first.


I made the first tag using geranium leaf paper as the background. Print Gwen Lafleur stamp set 32 (EGL32) motif on piece of the eco-printing paper with Tsukineko VersaFine Clair (Acorn) then it tore off and hung it behind. I also painted with PaperArtsy Fresco Finish Chalk Acrylic- Slate on the A4 white card, and the Cyrillic stamp of Gwen Lafleur stamp set 31 (EGL31) was embossed with white powder, cut and layered.


The second tag.


The tag is decorated with three small tags using Gwen Lafleur stamp sets (EGL30 and EGL31against the fern eco-print paper background. The eco-printing paper had the colour of rust water and onion skin that was enough but I added PaperArtsy Fresco Finish Chalk Acrylic - Snowflake to make the motifs stand out. The quote 'Nature' is from Alison Bomber stamp set 21 (EAB21).


The third tag.


The background of this tag was a blurred eco-printing leaf shape, so I added PaperArtsy Fresco Finish Chalk Acrylic - Brown Shed and Toffee to create a natural colour. Also I used the  EGL31 Islamic pattern with Tukineko VersaFine Clair (Acorn) and (Morning Mist) printed on it.


The small leaf part of eco-printing was made by cutting a circle for the focal point, and the EGL32 cell stamp was attached behind the circle.


Small EGL31 circles stamp and EAB21 quote stamp were attached the tag.


I used this eco-printing paper for the card but still don't know what the leaf is. 😅 I decided on this because the flow of leaves little resembled a fir tree.


I wanted to add some variation on the card background, I painted Brown ShedToffee and Little Black Dress and used Snowflake around them to keep the colours down for the paper. On top of that, I wanted a little more variation, I added the Cyrillic stamp of EGL31 with mixed white and gold embossing powder, and randomly stamped the same stamp with Tsukineko-VersaFine Clair (Morning Mist). I cut the circles out of three small leaves eco-printing paper and used Ranger Distress Oxide- Vintage Photo and Distress Ink- Black Soot around them. As you can see in this picture, I originally planned to arrange the quote like this, but the relationship between the circles was unclear, so I abandoned this plan.


Some close up photos of part of the tags...


Finally I made the shadowbox thinking about using this theme Paper, Seeds and Twigs. 


I painted the small circles with PaperArtsy Fresco Finish Chalk Acrylic- Caribbean Sea and Sea Glass on a A4 white card. Stamped EGL32 cell patterns using a stamp positioner, coloured it with a colour pencils and stamped again.


Cut out the cell patterns and drew highlights with a white gel pen.


After arranging the motifs, I found that colours and shapes were OK, so I glued them onto the black cardstock.
 

I measured the inside dimensions of the box, shaped the paper, cut it and pasted it inside the niche, scoring so the interior box walls also were covered.


For the outside of the box, I painted PaperArtsy Fresco Finish Chalk Acrylic- CaramelToffee and Brown Shed onto the A4 white card and stencilled PaperArtsy Stencil by Tracy Scott (PA234 and PA322) with Vintage Lace then I stamped EGL31 stamp with Tsukineko-VersaFine Clair (Acorn).


Once the paper was dry I embossed the EGL32 cell patterns with Ranger embossing powder Gold, Silver, white and Liquid Platinum and cut to the outside dimension and pasted it on.


Now I have created the world inside this using the materials of the theme Paper, Seeds and Twigs. For the rose leaves shape I cut and coloured it a little.


I then laid out collected materials leaves, acorn, rose hip, small pine cones and a twig in this box and splattered with Snow Flake.


The great thing about this project was that my husband and I enjoyed walking around a few parks looking for leaves and nuts and enjoying the wonderful autumn season. The second pleasure was the joy of opening the eco-printing, not knowing how the collected leaves would turn out, and the happiness of working on the organic base. This time I realized the way to create something is to go into nature and take in the smells of the air, the sounds and colours that change with the four seasons without thinking about anything. Thank you for giving me this opportunity of the Topic.
Thank you so much for visiting.
Etsuko xxx


Facebook: Etsuko Noguchi
Instagram: Pixienest
Pinterest: Etsuko N