Hi everyone, it's Victoria Wilding with you today, and I'm here to share with you a gift wrapping project using the latest collection of stamps designed by Alison Bomber. As the gift giving season approaches, there's something very special about sharing with friends and family, the time, thought and energy that goes into something handmade. Handmade gifts have long been something that I have shared with my loved ones and what better way to celebrate the festive season than with a gift on a gift.

As a paper crafter there's always been something exciting about choosing the paper wrappings for presents, so I wanted to use the Paper, Seeds and Twigs topic to get a head start on the seasons preparations. I've also been meaning to have a try at making my own paper for some time and thought this would be the perfect opportunity to create something special for my gifts this year. My idea started with making some paper and I considered making handmade paper packages to give as gifts, however I wasn't sure that they'd be used so I considered how else I might use some handmade paper and I hit upon the idea of incorporating it as a two in one layer and gift, a part of my packaging that could be reused. Something that would look lovely and add something really unique to my presents whilst also not ending up in the recycling bin. And this is where my idea ended up, as a handmade art piece which will look lovely framed and on the wall long after the presents have been opened and enjoyed.

Handmade papers have long been a lovely pairing with my other favourite art supply; watercolours. My handmade paper started with preparing a watery paper pulp by soaking paper scraps. I wanted to create a white paper finish, so I dug into my white paper scraps. For those also trying this for the first time, dyes used in printed papers can affect the final colour of the paper you produce, so I was definitely playing it safe. The process started by cutting my scraps into small scraps that would in theory soften in the water more easily.
Once I had a good amount cut up in the bowl, I filled it with cold water and left the bowl of paper to soak for 24 hours.
I expected at this stage to have a paper mache type consistency to the paper and water, however as you can see from the photo below, the paper had pretty much held its form. I think this was due to the paper type I was using, mostly heavy weight white card stock. So there was only one thing for it and this was to blend the mixture into a pulp.
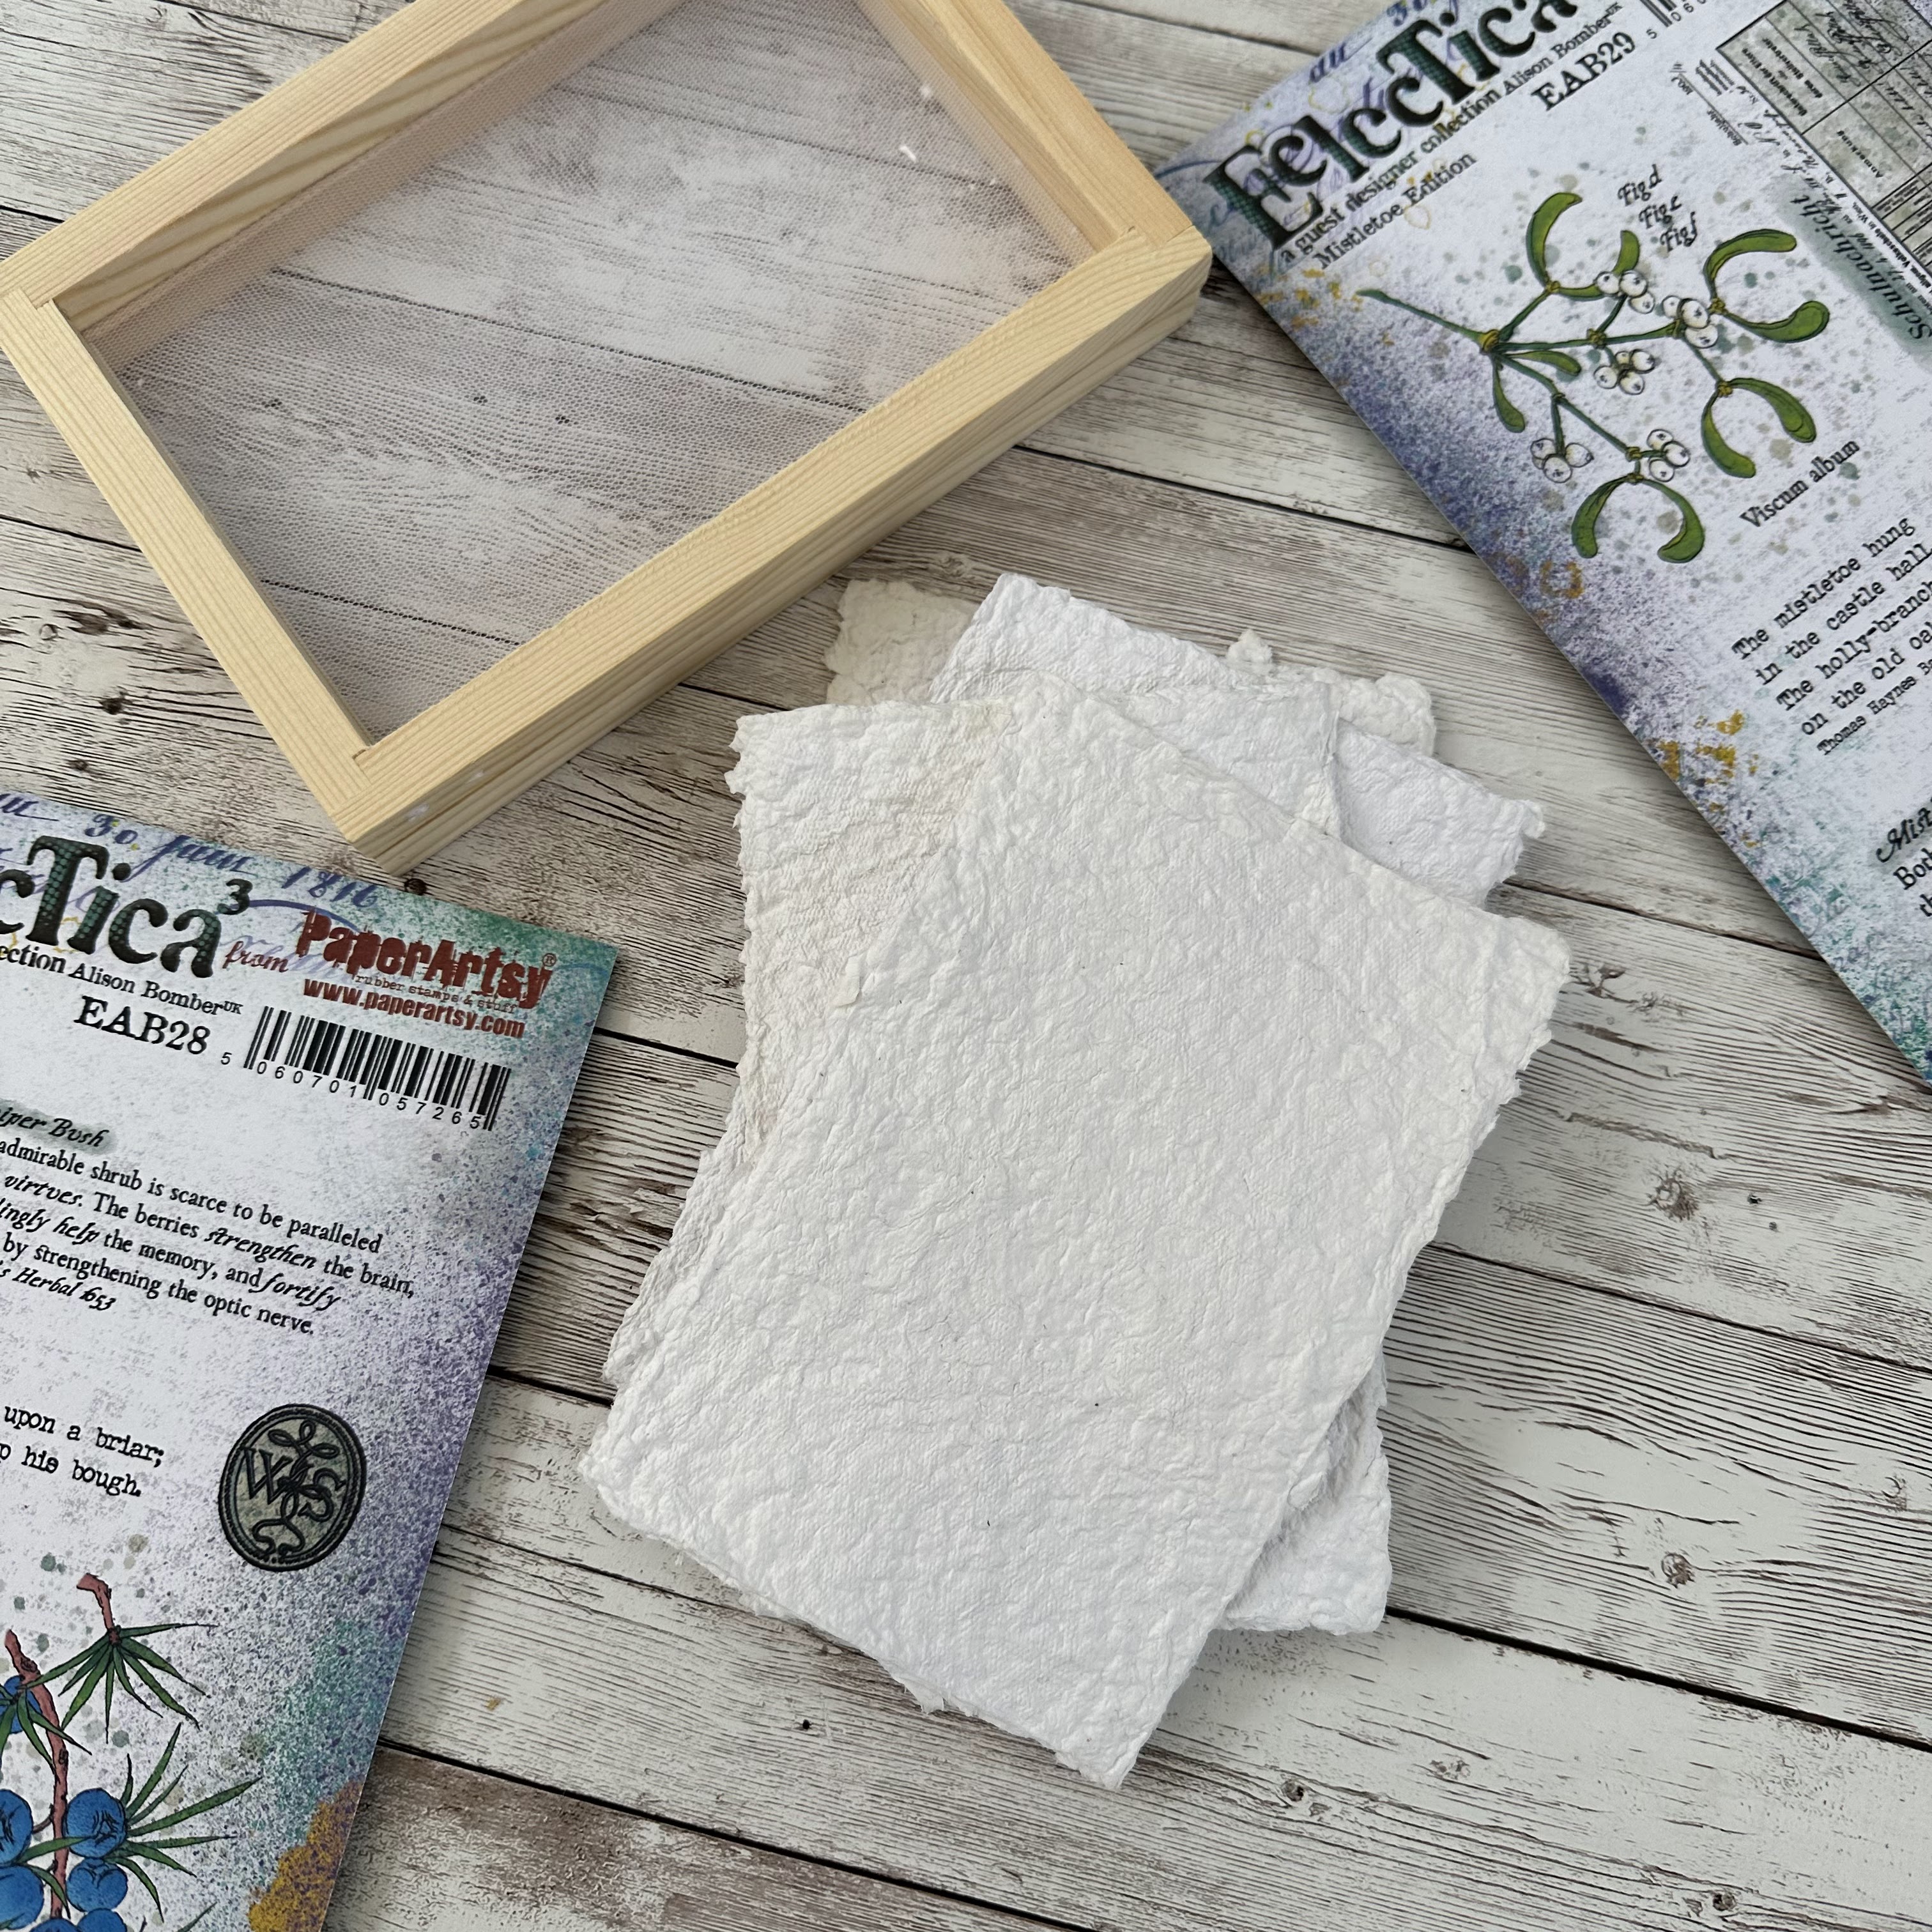
I then poured the pulp mixture through a paper making frame. If you don't have a frame (this wasn't expensive, I bought tit from Amazon for about £7.99) you could use any fine mesh you have lying around you may just end up with slightly less defined edges to your finished paper.
I poured enough of the mixture to give me an even covering across the mesh and patted this firmly down with a tea-towel to remove some of the excess moisture and encourage the pulp to form together.
I then turned the paper out onto a silicone baking sheet and repeated the process until all the pulp had been used, which in this case created 6 sheets, 6x4 inches in size. I love handmade papers which have petals, seeds and threads incorporated and originally wanted to include these too, however, after placing dried petals on one of the sheets, the colour started to bleed and I wasn't sure how this would dry, so I decided to leave the remaining sheets plain.
The drying of the paper was another big learning curve. I'd expected it to dry in a day or so, but it actually took almost five days for the papers to completely dry. This probably wasn't helped by the British weather turning cool and damp, but the climate you live in is definitely worth considering if you were making your paper with specific completion dates in mind.
The final papers has a very rough finish and were a little thicker than I had expected, probably on account of having used the card stock, however this did give them a very obvious handmade quality which actually adds to the finished project. With the papers complete I selected the new stamp sets by Alison Bomber,
EAB28 the Juniper Edition and EAB29 the Mistletoe Edition, to create the artwork as I knew these would give the delicate vintage floral finish that I love.

I knew that the rough texture of the handmade paper was going to prove challenging to stamp on and that I would probably need to re-stamp the images several times, so using a stamping platform was an essential. I also thought that a more opaque medium would help the imagery show up better, so I decided to stamp using PaperArtsy Fresco Finish Chalk Acrylic - Sage (FF66). I selected the large mistletoe stamp from set EAB20 and after several stampings the image was still a little patchy, but visible enough to guide the application of the watercolour I wanted to use to colour the image.

I started to paint in the detail of the image using watercolours in a natural colour palette and the paper absorbed the water and pigment beautifully! Honestly, it was so much better than I had expected, as by this point I had started to worry it was going to look like a complete mess, but as I coloured the image, it really started to pull together, looking less patchy and quite pleasingly, like a hand drawn illustration.
Once I had painted the initial stamped image, I added some charcoal pencil to give a little more definition to the outlines. At this point I decided that I wanted to extend the sprig of mistletoe using the smaller stamp in the set. Curiosity at this point had me turning to a Distress Ink pad (Peeled Paint) to stamp the second part of the image to see if this would work any better of the rough paper surface and I was surprised by how well this worked. Once coloured you can't see much difference in the two parts of the image, so I suppose it just depends on your preference and confidence in the water-colouring.
With the floral image complete, there was still a lot of white paper on display, so I turned to EAB28 for some text detailing for the background and used Distress Ink (Speckled Egg) as I knew at this point that it would give me a slightly crisper stamped image.

Once the handmade paper art is complete the rest of the project pulls together quite quickly. I added some border stitching in gold thread along one corner and edge of the handmade paper art to give one final detail. I also cut a Kraft gift tag and white embossed one of the text stamps from EAB29. To help the art to stand out as a feature in the wrapping, I placed this against a kraft paper wrapped package and chose some luxurious velvet green ribbon to literally tie the elements together.
I love the final look of this gift wrapping and there's something extra special about having part of the gift you are giving on display, but with an element of surprise until you actually get to the unwrapping. I'm so pleased with how this present looks, that I might actually struggle to let go of my gifts this year! Only joking, I'll just have to send a gift to myself so that I get to keep one, haha. I'll definitely try the paper making again too, although I might try doing it with a lighter weight paper scrap to see what difference that makes to the finished paper surface.
I hope I've inspired you to make a start on your festive preparations. I'd love to see what projects you're making so don't forget to tag me on socials.
Wishing you a happy, creative week.
Victoria
Pinterest: www.pinterest.com/victoriawildingcreates


4 comments:
Absolutely magical. I adore how you've extended the mistletoe branch with the larger berries coming into the foreground, and that handmade paper is a magical surface for the image. Wonderful work, Victoria.
Alison x
Thanks Alison. Your stamps create all the magic, they’re beautiful!
You've inspired me to get my paper making mesh out soon :) I find that using more water when making the pulp can thin the paper as the ratio of what gets caught in the mesh is less. Using a sponge under the mesh before you turn the paper out draws some water out and putting them on clean dishcloths helps the drying process too. I love the use of the stamps that you've chosen with this and the added sewing is a great touch.
Truly beautiful, great use of Alison's stamps and an idea to make your own paper. fabulous inspiration
Post a Comment