
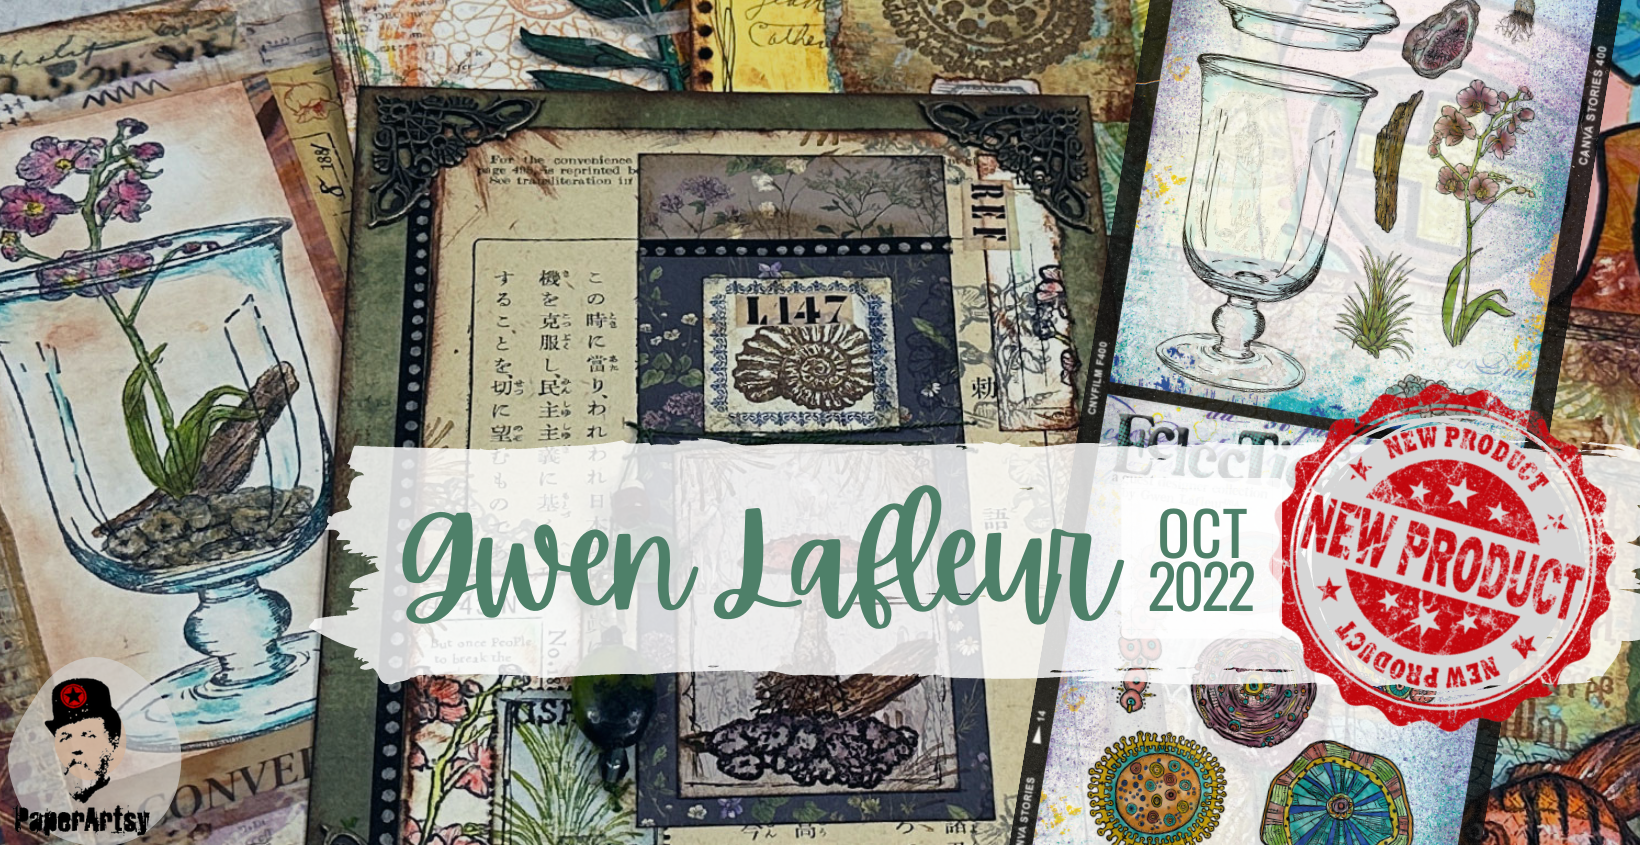
A note from Leandra:
Gwen Lafleur has once again created 3 very unique sets. You might notice a fishy aquarium vibe within the first, and a wonderful alphabet that will be amazing as a background stamp. Her second set is reminiscent of fossilised resins, or they could also be determined as biological cells, whatever you identify them as, these are going to be interesting for patterns. I can totally envision the spots embellished with seeds beads or French knots. The final set offers a gorgeous glass creation that can be a glass goblet, a jar, terrarium and more! An amazing focal for sure. There are various plants to create a leafy, floral habitat too!
Gwen Lafleur has once again created 3 very unique sets. You might notice a fishy aquarium vibe within the first, and a wonderful alphabet that will be amazing as a background stamp. Her second set is reminiscent of fossilised resins, or they could also be determined as biological cells, whatever you identify them as, these are going to be interesting for patterns. I can totally envision the spots embellished with seeds beads or French knots. The final set offers a gorgeous glass creation that can be a glass goblet, a jar, terrarium and more! An amazing focal for sure. There are various plants to create a leafy, floral habitat too!
Gwen will be LIVE with her new products and ideas over in our Facebook Group, PaperArtsy People shortly after this post publishes. I really hope you can drop by or catch the replay. You will love seeing what Gwen has made with these for sure!
For the next few months, these stamps are only available EXCLUSIVELY from our approved stockists. Please check the list at the foot of this post of from the home page tab of the blog.
Hi everyone, Gwen here!
I'm thrilled to share my latest release for PaperArtsy with you which includes three hand-drawn stamp sets. As per my usual, these are all very different from one another, but in my head they all make perfect sense together... lol. They are also designed to integrate beautifully with my previous releases, which will probably become apparent pretty immediately!
My inspiration for these three collections is varied, but travel and nature themes are very prevalent as those things never fail to get my creative juices flowing. I hope you enjoy the new stamps and samples!

Price: RRP €23.00 +VAT Size:5" x 6" (13 x16.5cm)
All stamps are individually trimmed onto cling foam with a laminated storage/index sheet.
All stamps are individually trimmed onto cling foam with a laminated storage/index sheet.
Eclectica³ Gwen Lafleur stamp set 31 (EGL31)

For this first set, EGL31, this is a part of the Build-A-Collage concept that I started a few releases ago and fits perfectly with the previous two sets in this series. The idea is that you can create a collage - from making your own ephemera to accents and focal point, with a single stamp set. The elements here were heavily inspired by two separate train trips across Asia - one which included the Trans Siberian Railroad (hence the Cyrillic,) and another along the Silk Road where I saw countless stunning examples of Islamic or Sacred Geometry. The fish and sea plant came directly from one of my sketchbooks.
But enough about that... time for samples!
For this first piece, I worked small. I love the versatility of the elements in this set which can create ephemera or, in this case, different repeating backgrounds. (And if you notice, the individual "bubbles" from this set happen to fit pretty perfectly inside the circular openings that are created when you repeat the Sacred Geometry patterns!)

This fish is one of my favorites... I love the way the details came out in the stamp and give it so much dimension. It makes it easy to create a more realistic focal point in your work with just a little added color!

That little tag was a last minute addition to my designs for this set... I knew it needed "something," and it just came to me that tags are always fun and this mini size was too adorable. I love stamping partial designs and then cutting it out - it's fantastic as an accent piece.

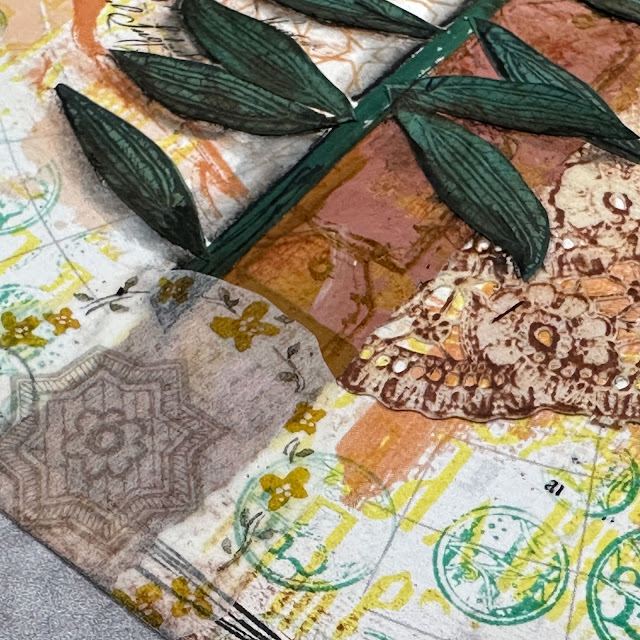
For this second project using EGL31, I wanted to show some of the versatility of the elements. My focal point here was made using the leaves from the sea plant included in this set. One of my favorite things to do is to find ways to make my supplies work for me rather than being tied to the design, and I'm always cutting different designs (diecuts, rubons, stickers, etc...) into different shapes and pieces. Cutting that plant apart and then reconstructing with leaves from several of them combined together gave me an entirely new look.

As much as I love how that custom plant came out, my favorite part of this might be the Sacred Geometry pattern inside the printed circle on my patterned paper background. I just masked off the circle to stamp inside and it totally customized my background paper! And note again... one of those bubbles inside the opening of the design. I can't get enough of combining those stamps together and creating new looks.

Below you can also see how I used the mini tag stamp to create a border. It's so much fun to play and see what different combinations you can come up with!
Eclectica³ Gwen Lafleur stamp set 32 (EGL32)

EGL32 is the set that I call "Cellular." The bottom-right design in the set was my starting point when I set to drawing this one, and I really wanted something that was round, organic, and detailed but in a way that felt both familiar and abstract at the same time. I was sure when I started working with the stamps in this release that I would like and use the other two sets more. I was wrong. The more I play with this one, the more I want to use it. This is one addictive and versatile set of stamps!
For this first sample, I went simple. I have a small stack of old notecards that my grandfather used to use to jot things down while he was working on genealogy. Normally, I'm the first one to tell you not to be afraid to cover things up. But in this case it was important to me to leave some of his handwriting peeking out. It makes the piece more than just layers of paper, ink, and stamps.
"G" for Gwen, "G" for Grandpa :)

I love the variety of looks you get from using the same stamps in different ways here. The background paper (see more in my project tutorial below,) the plainly stamped images, and those fabulous metallic accents from pairing some of the stamp designs with my new Tarnished Brass embossing powder from WOW!.

I love the detail in these designs... it adds so much visual interest to a relatively simple piece of art!

As someone who's been hooked on heat embossing for a good 25 years or more, I never get tired of seeing views like the one above... such a fun and simple way to get a totally different look with your stamps.
With this next sample, it's time for something completely different! When I started working with this set, I immediately saw parts and accents for a kind of abstracted and illustrative styled mixed media portrait. I just love how it came together and how beautifully this stamp set worked to create the image I had in my head.

I loved using the entire design to create facial features and accents, but it was also fun to see where the edges matched the curve of a facial feature or when a pattern was perfect to add some subtle texture somewhere else (like those lips!)

Creating flowers from these was a must-do... I love how easily you can layer the smaller and larger elements together for a fun take on a floral element.

This is one of the few times when I have ever been known to look at a piece of work and say "less is more," but in this case, that's what the art was telling me. I originally intended to add lots of shading, dimensional elements in the center of the flowers, and undoubtedly more would have followed. But as I started on the details, I realized that the pattern from the stamps combined with the colors and the boldness of the outlining was already 95% of the way there. A few marks with different gold pens and she was complete.

Eclectica³ Gwen Lafleur stamp set 33 (EGL33)

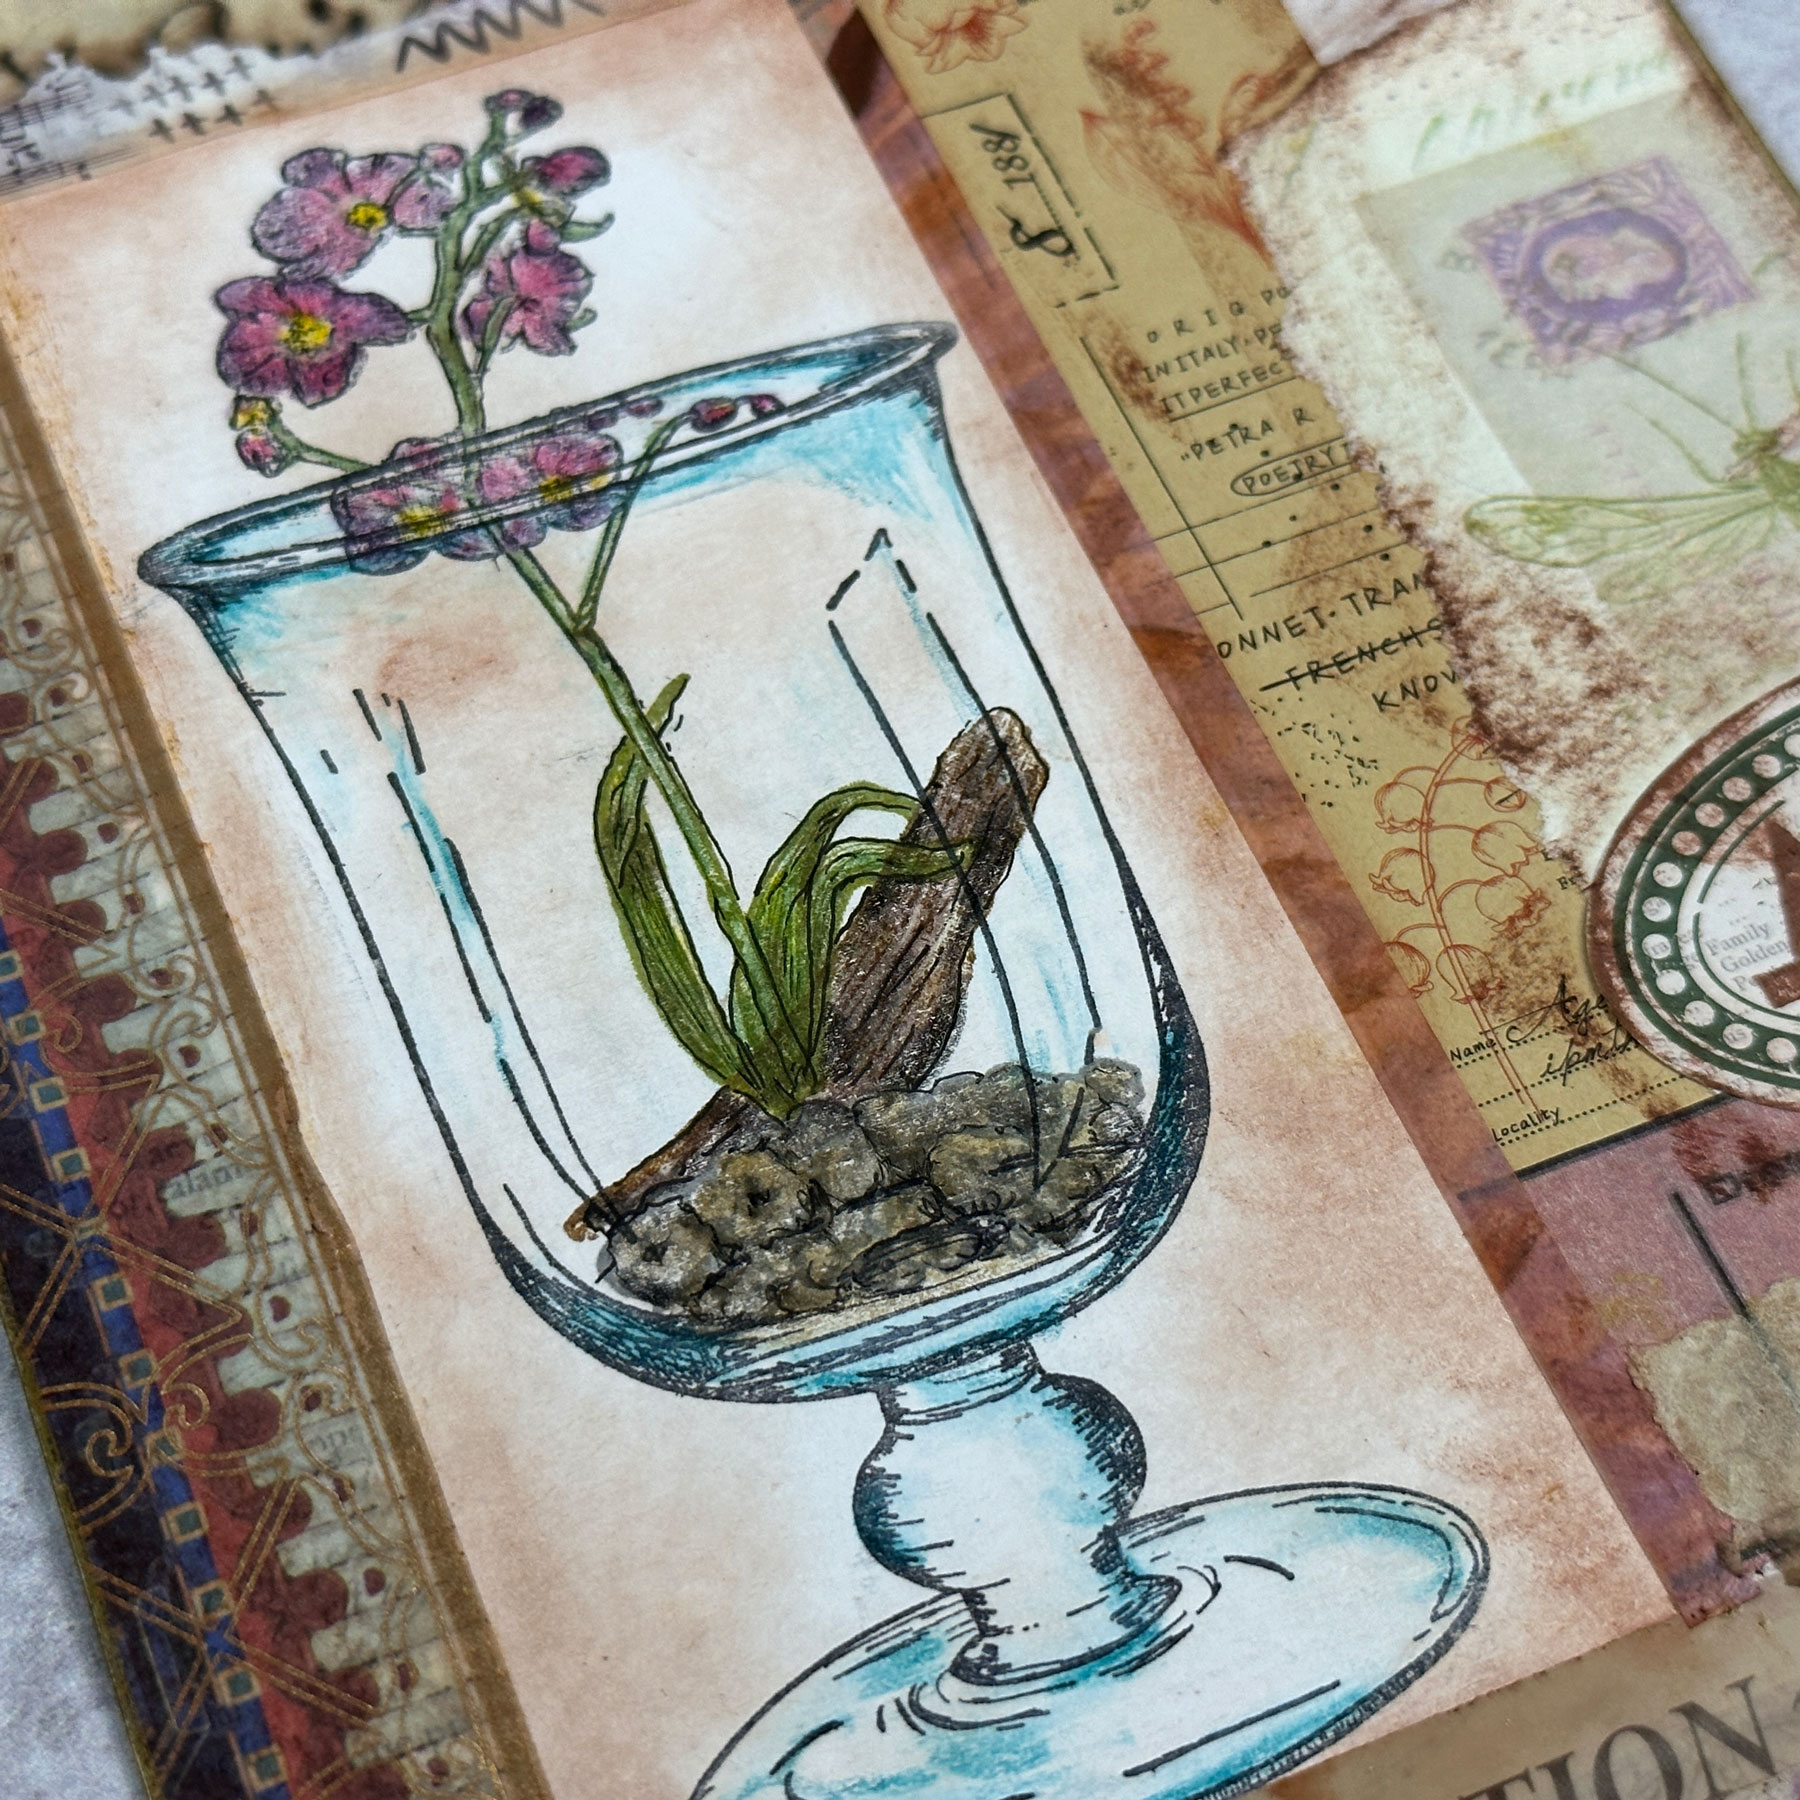
The last set in this release, EGL33, is the one that I refer to as "Terrarium" (for obvious reasons! lol.) Although having a glass element in this set fits perfectly with some of the sets in my previous 2 releases, the other elements may seem a bit out of left field. But as many of you know, I had surgery on my dominant wrist at the end of March of this year and had a two month recovery, and more than half of that I wasn't able to do anything at all in my studio, and the second half I was very limited.
Of course, I couldn't stand going two full months without finding ways to be creative, and that's when I stumbled into the world of terrariums. I hadn't realized how that landscape had exploded in recent years and had never even heard of an air plant. But I embraced the opportunity to create in ways that wouldn't interfere with my recovery and, of course, that new inspiration found its way into my artwork as well.
The idea behind this set is that, like my Build-A-Collage sets, you can create an entire scene from a single stamp set. You can pick and choose the pieces, open or close the apothecary jar, not use the jar at all, and of course, mix and match them with other stamp sets.
For this first set, I wanted to show some of the versatility and how you can use the elements in this collection to create layered pieces and bits of ephemera that can be incorporated into mixed media, art journals, cards, scrapbooks, or whatever you want!

I adore the stamp of the ammonite fossil... using it to create a label was possibly my favorite part of this project. And I love the colored vs. monochromatic stamping on the border with the orchid design.

As we know, I'm a masking fiend, and this set is so fun to mask with. I mixed plain stamped and heat embossed elements for a fun little scene - that toadstool might be my second favorite element! And I may have gotten a bit carried away with creating my own nature-themed ephemera here.

For my second sample, I wanted to demonstrate how beautifully the designs layer to create a vase or terrarium effect. I created this scene without masking - I deliberately drew the elements so that you could still get lovely layered effects without making masks of the different components (especially because they're so detailed.)

This particular piece was done with some stamping, a few colored pencils, and a bit of penwork to add highlights later. I love how I was able to create such a detailed scene with about 15 minutes of work.

This would also make a fabulous tall greeting card, a border in a scrapbook page or bullet journal, or it could be the beginning of a whole cluster or apothecary terrariums in your art journal. I was surprised by how something that seems so niche actually ended up having so much versatility when I started incorporating the designs into my work.
Project: Layering with Stamps and Scraps

For today's project I pulled together all three new stamp sets, some scrap painted and collage papers from my stash, and a few other supplies to make a fun layered mixed media piece with lots of pattern and texture.
To start, I grabbed a 6" x 9" sheet of patterned cardstock and then pulled the Sacred Geometry pattern stamps from EGL31 and used them to create repeating patterned sections on the top and bottom of the page.

I set the background aside and pulled out some of those scrap painted papers (these are papers where I just cleaned off my brayer on sheets of deli paper. The paint was the PaperArtsy Fresco Acrylic Paints - I always love how you can stamp on them without smudging the ink.) I used those painted papers to make my own patterned paper with the Cyrillic stamp from EGL31 as well as almost all of the stamps from EGL32. I just love how they look together!

Next, I brought my background back over and adhered pieces of my painted and stamped papers, filled in more of the background with the "bubble" stamp from EGL31, and added some additional cutouts of shapes from EGL32.

For this next step, I knew that I wanted to bring in some added texture and a different finish into the mix, so I pulled out my brand new embossing powders from WOW! (also just released today!) For this part, I stamped the rocks from EGL33 several times on some scrap paper and embossed them with Vintage Turquoise sprinkled with Turkish Coffee (both from my new Ancient Orient Trio.) Then I cut out each of the stamped images... no need to fussy cut, just a general outline works great.

Then to create my focal point, I stamped the orchid from EGL33 on two different scraps of painted paper using clear embossing ink. Using my new Silk Road Trio, I embossed one of the orchids with Silk Brocade and the other with Vintage Turquoise (which is just slightly transparent, so the green background shifts the color a bit to make it work perfectly for leaves.) To make my orchid two-toned, I cut out the mulberry colored flowers and glued them over the leaves and stem to get the effect I wanted. This part is a bit fussy, but I loved the results.

Time to pull it all together. I had previously made masks of the images in EGL33 by stamping on thin copy paper and cutting them out. I used one of those masks along with the air plant stamp from that set and two colors of green ink to get a layered cluster of foliage, adhered my orchid on top, and then glued down an overlapping cluster of my embossed rocks. To help pop the orchid and rocks off the page even more, I used a black Stabilo All pencil and a water brush to add some shading.
I'm big on framing out my work somehow, so for this piece I stamped partial images of the orchid blossoms and the air plant along the borders, then added some ink and used a pen to draw a scribbly frame.

Finally, I felt like it was still missing something, so I added some pieces of washi tape as well as some washi tape postage stamp images in a visual triangle on the borders and that did the trick.

Here are a few close-ups so that you can see more of the pattern and layering details:


I love how the elements from these three very different sets work together so well, and I love the added texture and dimension from the embossing powder and the shading.

So there you go! I'm so thrilled with how the stamps came out for this release... I can't stop playing with them - so many versatile elements! (IMHO, of course... lol.) I can't wait to see how you all use them.
Thanks for joining me for today's release! Hope to see many of you for the Facebook Live today (or on the replay for those who can't join live.)
Socials...
Website: https://www.gwenlafleur.com
Pinterest: https://www.pinterest.com/GwenLafleur
Facebook: https://www.facebook.com/gwenythlafleur
Instagram: https://www.instagram.com/gwenaval
Teaching Schedule:
I'm thrilled to be returning to teach four workshops at the 20th Anniversary of the Art & Soul Retreat in April 2023. The retreat is held in Portland, OR (USA) and registration is open now. There are tons of wonderful workshops available; you can see all of mine and sign up on the Art & Soul website if you're interested in attending.
I also have several online workshops available on demand. Those and future workshops are all listed and kept up to date on my website.
PaperArtsy Stockist List
Our stockists are your go-to source for all PaperArtsy products, and we suggest that you also use the PaperArtsy People Facebook group to source a retailer in your country. Many are members of our FB group and will happily share links to their online stores.
Australia
Bev's Cross Crafts, Spreyton, Tasmania https://www.bevscrosscrafts.com.au/
Crafters Cupboard, Berwick, Victoria www.crafterscupboard.com.au
Memories on the Murray, Murray Bridge, SA https://www.memoriesonthemurray.net/
Natalie May Scrapbooking, Dover Gardens, SA https://nataliemay.com.au/
Scrapbook Superstore & More, South Penrith, NSW https://www.scrapbooksuperstore.com.au/
The Scrapbooker's Confetti Box, Swansea, NSW https://thescrapbookersconfettibox.com/
The Scrapbook Store, North Perth,WA http://thescrapbookstore.com.au/
Time To Create, www.timetocreate.com.au
Time To Create, www.timetocreate.com.au
Belgium
Cart N Scrap Art, Antwerp, www.cartnscrapart.be
Créatelier Caracolle, Liège, www.createliercaracolle.be
Canada
Clipper Street Scrapbook Company, Langley, BC. www.clipperstreet.com
Paper Art Creations Inc, Leduc, Alberta, www.paperartcreations.com/
Scrapbook Centrale, Dollard Des Ormeaux, Quebec www.scrapbookcentrale.ca
Scrapbook Centrale, Dollard Des Ormeaux, Quebec www.scrapbookcentrale.ca
Scrap Addicts, Edmonton, Alberta www.scrapaddicts.ca/
Scrap and Bean, Edmonton, Alberta scrapandbean.com/
Scrapbooking Fairies, Drayton Valley, Alberta www.scrapbookingfairies.com/
The Paper & ink Boutique, Calgary, Alberta www.paperandinkboutique.com/
The Scrap Yard, Calgary, Alberta, www.thescrapyardcalgary.com/
The Scrap Yard, Calgary, Alberta, www.thescrapyardcalgary.com/
Denmark
Hobbyboden Scrapworld Samso www.hobbyboden.dk
France
Eirl Bancon Cartoscrap, Midi Pyrenees, www.cartoscrap.com
Fée Du Scrap, Saint Sébastien-Sur-Loire, www.feeduscrap.fr/
Horizon Créatif, Ste Jalle www.horizon-creatif.fr
Instant Créatif, La Possession, La Réunion, www.icreatif.re
Katzelkraft, Ingwiller www.katzelkraft.fr/en/
Kerudoc Creation, St Yvi www.kerudoccreation.com
Le Grenier des filles, Pierre Benite
Page de scrap, Saint Pavace, www.pagedescrap.fr/
Scrap Déco Home, Goutrens, www.scrapdecohome.fr/
Toutencolle, Dun sur Avon www.toutencolle.fr
Finland
Heidin Korttipaja, Istunmaki, www.korttipaja.fi/fi
Piia Paper, Kittilä, www.piiapaper.com/fi
Germany
Stempelbar, Berlin, www.stempelbar.de
Stempeloase Munich, Munich www.stempeloase.de
Stempelfee Shop, Hilden www.stempelfee-shop.de
Stempellaedle, Stuttgart, www.stempellaedle.de/shop
Greece
Scraps N Pieces, Kallithea www.scrapsnpieces.gr
Italy
Immagine SAS di Rapaccini, Rome, www.immaginelab.com
Il Negozio Della Mamma Di Cle, Torino, www.ilnegoziodellamammadicle.com
Marte Savona, Savona, www.martesavona.it
Pezze E Colori, Lissone, www.pezzeecolori.it/
Piccole Passioni, Siena, www.piccolepassioni.it
Piccole Passioni, Siena, www.piccolepassioni.it
Japan
La Wadao, Odawara, Kanagawa, www.lawadao.com
Tiny Dots, Funabashi-shi, Chiba www.tinydots.shop-pro.jp
Netherlands
De Hobbystudio, Genemuiden, www.dehobbystudio.nl/
Doe@ding,Spijkenisse doeading.nl/
Hobbycompleet de Duif, Leeuwarden www.hobbycompleet.nl
Stampingcorner, Capelle Aan Den Ijssel www.stampingcorner.nl
Norway
Hobbygarasjen, Kopervik, www.Hobbygarasjen.no
Spain
Cien por Cien Manualidades, Barcelona, www.100x100manualidades.es
Ideas 10 Manualidades Y Scrapbook, Bilbao ideas10manualidades.com/
Marakiscrap, Tarragona, www.marakiscrap.com
Scrap & Papers Experiences, Barcelona, www.scrappapersexperiences.com
The Paradise Corner, Barcelona, www.theparadisecorner.com
Sweden
Butik Elva, Staffanstorp, www.butikelva.se
Taiwan
Mandy's Cards, Taipei www.facebook.com/mandy.card.77
United Kingdom
Amelia's Creative Crafts, Studley, Warwickshire www.ameliascreativecrafts.co.uk
Art from the Heart, Harrogate, Yorkshire www.afth.co.uk
Crafts at The Malthouse, Herstmonceux, East Sussex, www.themalthouse.co.uk/
Loobi Crafts, Leighton Buzzard, Bedfordshire, www.loobicrafts.co.uk
Papermaze, Ipswich, Suffolk www.papermaze.co.uk/
Stampers Grove, Springbank, Lilliesleaf, Melrose,Scotland www.stampersgrove.co.uk
The Artistic Stamper Craft Store, Faversham, Kent www.theartisticstamper.com
The Forget me not Kraft Kabin, Rochford, Essex, www.TheForgetMeNotKraftKabin.co.uk
USA
Artistic Artifacts, Alexandria, VA www.artisticartifacts.com/
Artistic Studio Creations, Fayetteville, Georgia www.facebook.com/ASCbyCrystal
Craftiness, Chatsworth, CA, www.craftinessonline.com/
Ephemera Paducah, Paducah, Kentucky www.ephemerapaducah.com
Everything Scrapbook & Stamps, Lake Worth, Florida https://everythingmixedmedia.com/
Frantic Stamper, Oregon www.franticstamper.com
Free Heart LLC, Denver, Colarado, www.freeheartllc.com/
Joggles, Coventry, Rhode Island, www.joggles.com
PaperCraft Clubhouse, Westbrook, Connecticut, papercraftclubhouse.com/
Qingquing's Stamp Shop, Portland, Oregon
Runaway, Art & Craft Studio, NE Salem, Oregon www.runawayart.com/
Simon Says Stamp, Columbus, Ohio www. simonsaysstamp.com
Topflight Stamps, Irmo, South Carolina topflightstamps.com/
Our brand is only available from established stockists who are VAT/ GST/ sales tax registered and for whom product education is a core principle. If you would like to apply to be a stockist, you can find our more about our supply criteria here.
PaperArtsy Links
Facebook Group PaperArtsy People
Facebook Page PaperArtsy
Twitter twitter.com/paperartsy
Instagram instagram.com/paperartsy
Pinterest uk.pinterest.com/paperartsyhq
YouTube youtube.com/user/PaperArtsy


2 comments:
amazing release Gwen!! Love all your ideas so much! super versatile!
Love the eclectic mixture... and that terrarium is glorious! Congratulations on a great release.
Alison x
Post a Comment