

A note from Leandra:
Sara always creates a range of designs that are super useful for journaling and cards. I just LOVE them as they work so well on top of any mixed media background beautifully! This is mixed-media with elegance! She has such a lovely way of using stencils - did you know she uses her finger to rub Grunge Paste through the stencil for a rustic effect. That kind of perfectly imperfect really appeals to me! She has pulled out all the stops on her samples for this release. Warm tones with that pop of blue that she really likes.
Sara always creates a range of designs that are super useful for journaling and cards. I just LOVE them as they work so well on top of any mixed media background beautifully! This is mixed-media with elegance! She has such a lovely way of using stencils - did you know she uses her finger to rub Grunge Paste through the stencil for a rustic effect. That kind of perfectly imperfect really appeals to me! She has pulled out all the stops on her samples for this release. Warm tones with that pop of blue that she really likes.
Sara will be along to share with you LIVE her new products and ideas over in our Facebook Group, 'PaperArtsy People' shortly after this post publishes, and ho ho ho, jingle those bells for the first time ever, we are doing a product giveaway during Sara's live. Come and join us during the live, leave a comment and you could be our lucky winner for a full set of all 6 new products! We know this is a busy week ahead, particularly for our American friends. The replay will be pinned as a featured post, and please note that the giveaway will be decided during the live.
These stamps are available EXCLUSIVELY from our approved stockists. Please check the list at the foot of this post to find a retailer online or geographically near you, it makes sense to order within your country where possible. Our retailers also endeavour to join the designer's live to share their direct shopping links - this makes it super easy for you to find a store with product in stock immediately.
Hi everyone, Sara Naumann here — I'm so happy to be sharing my newest PaperArtsy release with you!
Today the new PaperArtsy launch features 3 stamps and coordinating stencils.
This collection has some of my favorite motifs: Birds, butterflies, and flowers. I find they're such useful, classic images for cardmaking, art journaling, or whatever papercraft you enjoy doing. I love to explore the symbolism behind the images we use, and to celebrate the ideas of reinvention and possibility with butterflies, flight and togetherness with birds, and the blossoming natural beauty of flowers.
This collection has some of my favorite motifs: Birds, butterflies, and flowers. I find they're such useful, classic images for cardmaking, art journaling, or whatever papercraft you enjoy doing. I love to explore the symbolism behind the images we use, and to celebrate the ideas of reinvention and possibility with butterflies, flight and togetherness with birds, and the blossoming natural beauty of flowers.
As you may know, I am a "wordy" sort of person, which means you always get text stamps to use as backgrounds or to easily cut up and incorporate into your messages. Stencils this time around are on the practical side—I find these geometric patterns, albeit irregular and sometimes a bit wonky, are so easy to use and can create eye-catching patterns or simply support other elements in your artwork.
For the samples you see below, I used my trusty gel plate to create monoprinted backgrounds, using PaperArtsy's Drying Retarder to keep the paints active on the gel plate—a tiny drop is all you need to really extend the open time of the acrylic paints. My color palette includes Zesty Zing, Weathered Copper, Peach Nectar, Sorbet, Wolf Eye, and Forget Me Not plus some Pea Coat.

Price: RRP €23.00 +VAT Size:5" x 6" (13 x16.5cm)
All stamps are individually trimmed onto cling foam with a laminated storage/index sheet.
Eclectica³ Sara Naumann Set 62 (ESN62)

Daydreams & Reveries

I love the symbolism of butterflies: Reinvention, flight, and beauty! This large butterfly collage is a cinch to use as a card focal—when stamped and heat-embossed, you can easily paint it in with watery Fresco Finish.
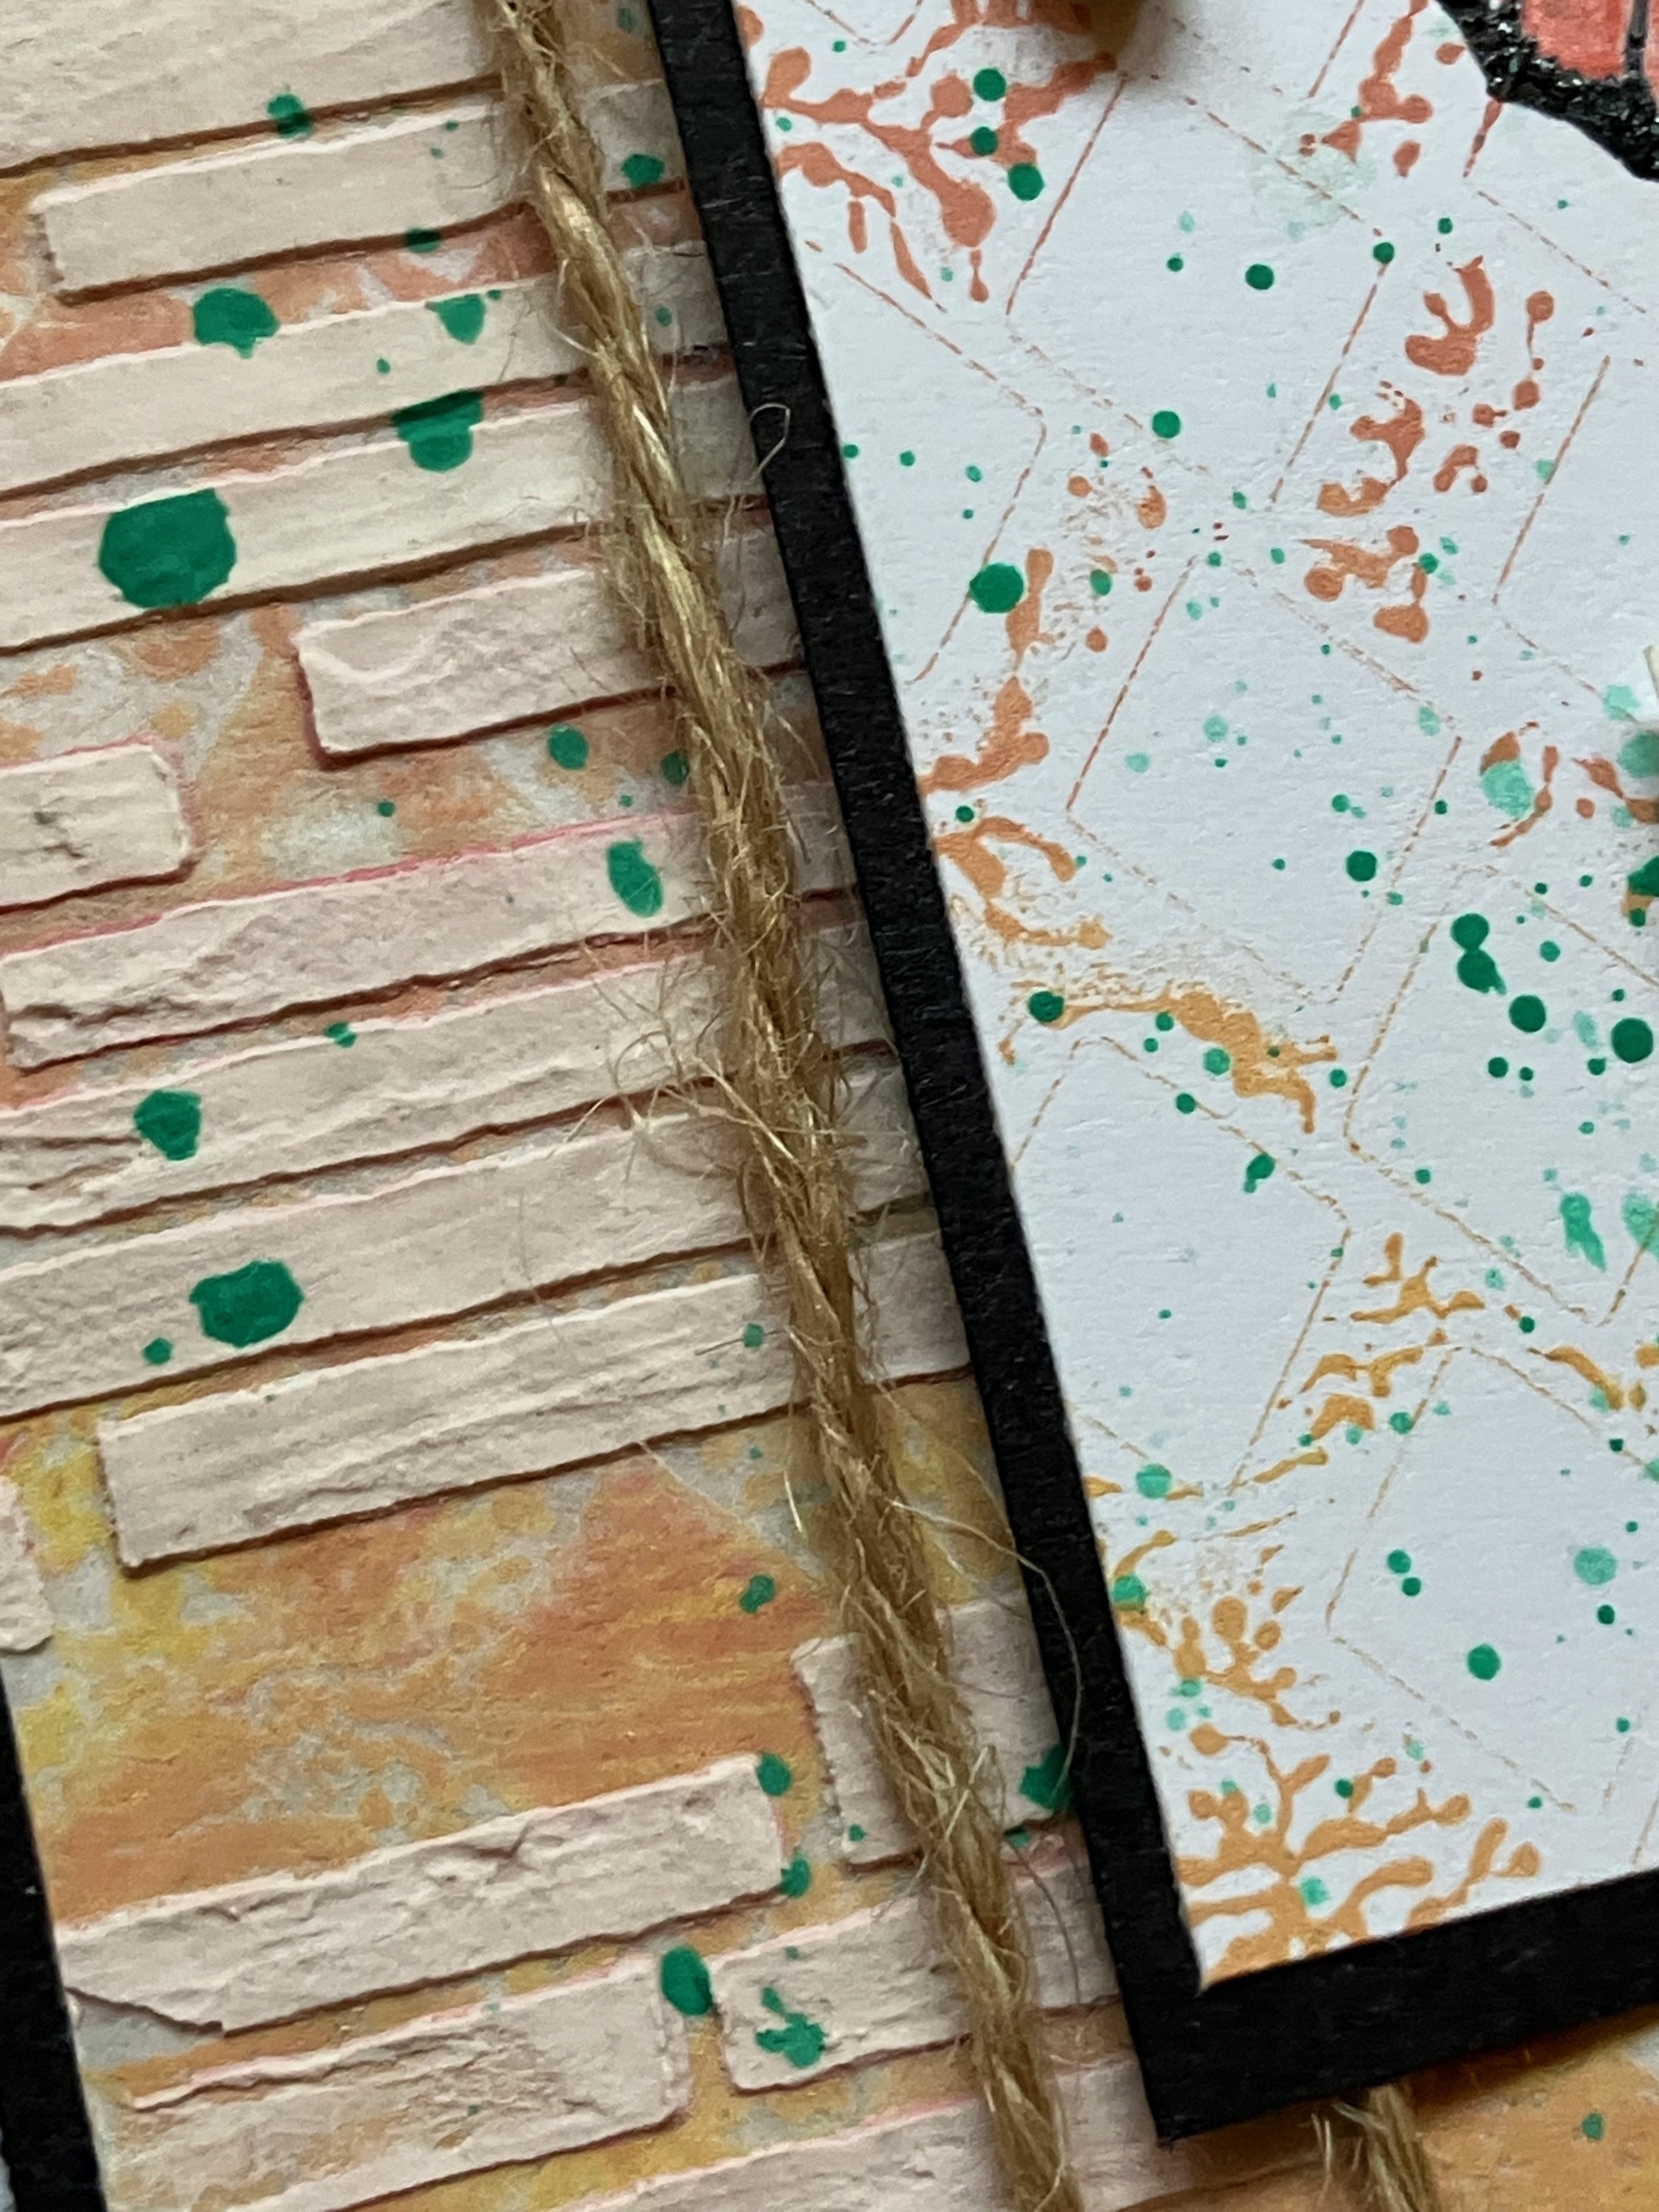
For the butterfly, I used Sorbet and Forget Me Not; the mono-printed background for the butterfly was created Zesty Zing and splatters of Peach Nectar and Weathered Copper. The larger background is a gel plate mishmash of those colors.
Tip: I never clean the gel plate in between prints, but a drop of Drying Retarder can reactivate the colors on the plate, to which you can add more paint and build up layers.

I stamped the word "metamorphosis" from another butterfly image on the set, then cut it into a strip to layer on top of the main image.

The word "daydreamer" is a handy one to add to so many projects—don't forget, you can mask off the "er" to stamp "daydream" as well.

The cluster of postmark images can also easily be cut apart from the main image and used separately—you can also trim out the main butterfly and pop her up with foam tape to create some dimension.
I Dwell in Possibility

The focal here features the two smaller butterfly collages cut apart and secured onto a Grunge-Paste stenciled area. The fun is in arranging the butterflies in flight, but the point I'm sharing is the alternative option - to use the butterflies on their own.

For this butterfly, I stamped and heat-embossed the image onto a mono-printed manila tag - I have a lot of Sorbet and Peach Nectar on there, with an accidental bit of Weathered Copper.
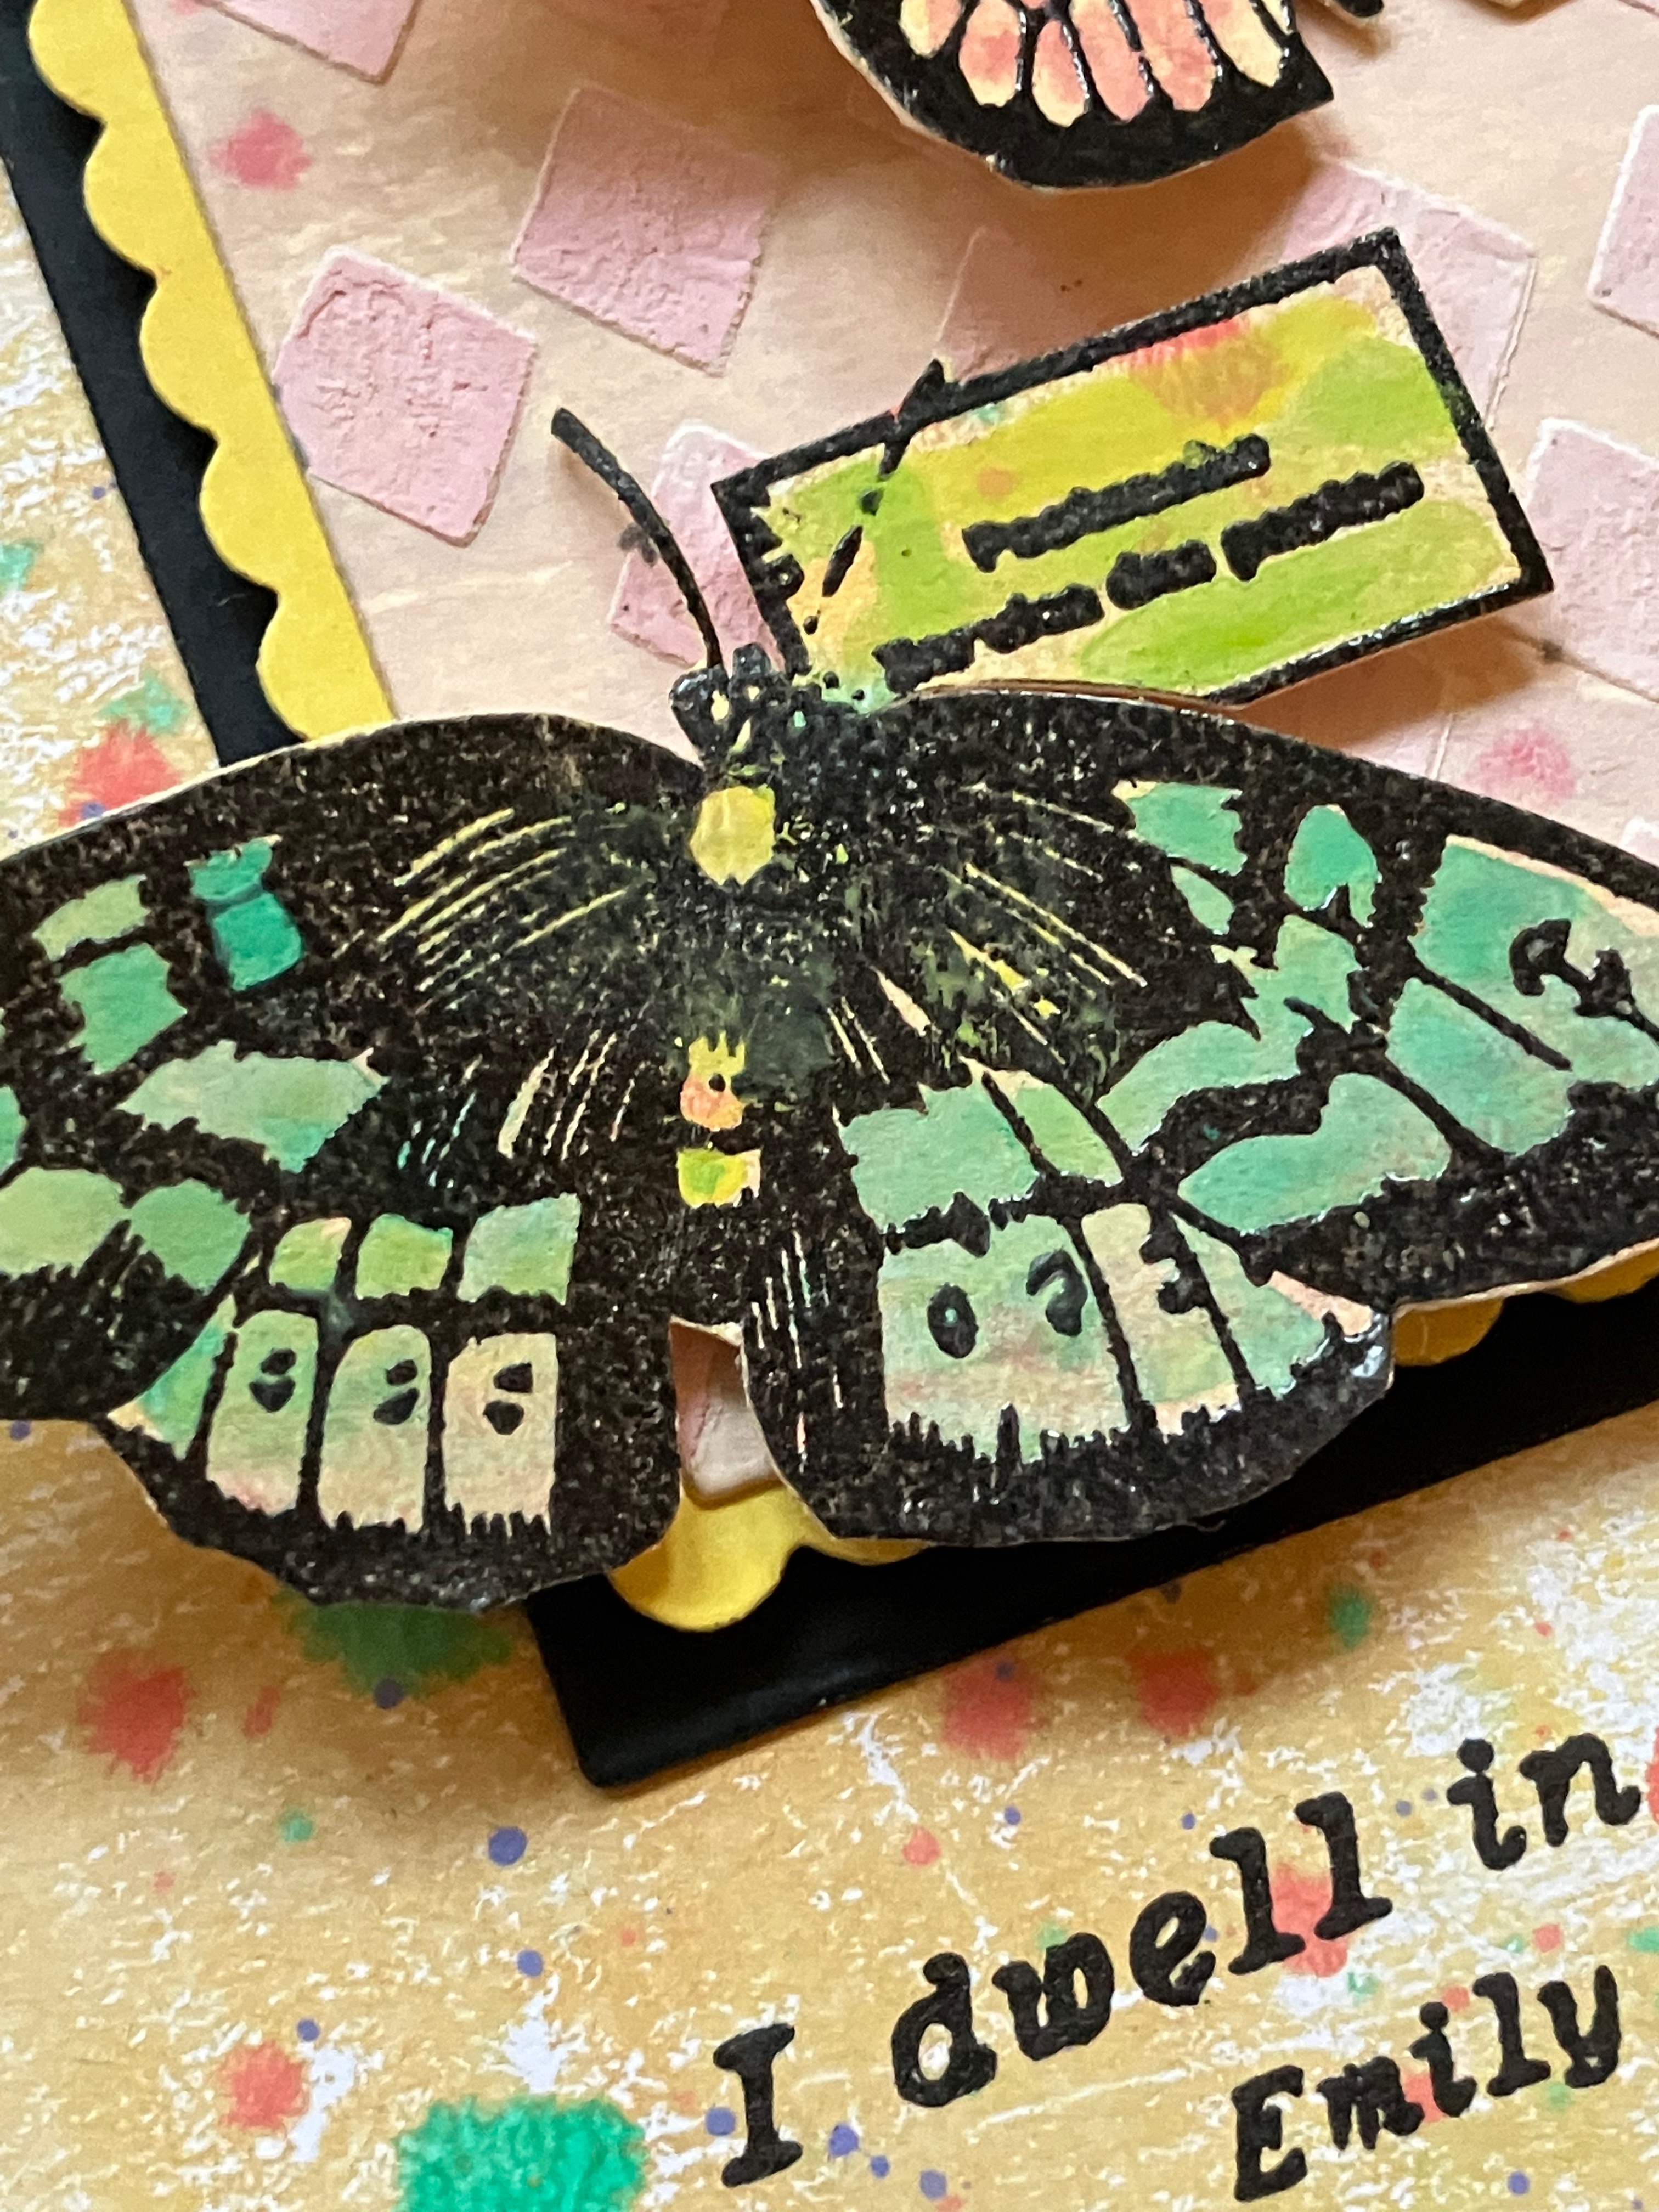
This manila tag was gel printed with Weathered Copper, then I used touches of Zesty Zing to paint in the center of the embossed image.

This quote is a favorite, perfect for card-giving (think cards of congratulations) and also journals. And consider the snippability—the word "possibility" alone is a powerful one!
Eclectica³ Sara Naumann Set 63 (ESN63)

Blossom

Sometimes a large, eye-catching focal is all you need! I love how this flower has such presence, and coloring opportunities are limitless, from painting with paints (as I did here—Zesty Zing and Weathered Copper with hints of Peach Nectar), as well as colored pencils, waterbrush markers, or alcohol markers.

The flower is stamped and embossed on a gel-plate piece of paper, which I created with the reverse stenciled image from PS362 Dashy Stripes stencil (more on that below!).

There's a teeny-tiny "nature" word cut from the larger quote image, rolled a bit and foam-taped on top for dimension. You can see a definition peeking out from behind the focal. Also, yes, more stenciling with that dashy stencil - already a firm fave!

Another fun element on the set is this vintage advert for a "Book and Paper" store. While the text is meant to be in the background, the rectangle shape makes it so easy to cut and use as a layering element.
Bloom
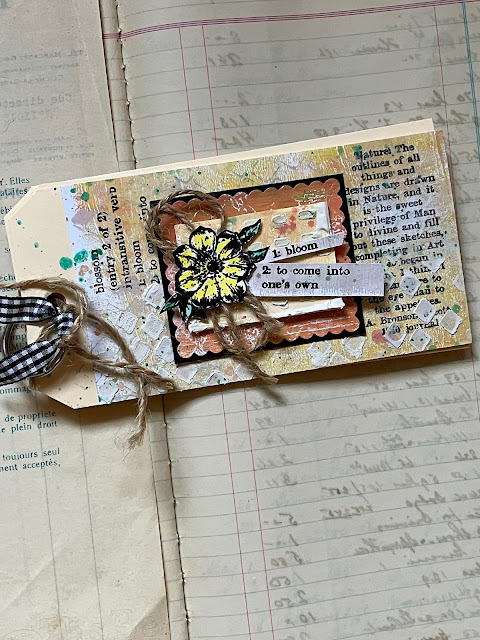


I love tag books—just manila tags bound with a simple metal ring (the kind you can get at the stationery shop, or in my craft room since I just found a box of hundreds of them!). I enjoy the process of working on manila cardstock, as it's so sturdy and the inherent manila color gives warmth to the overall design.

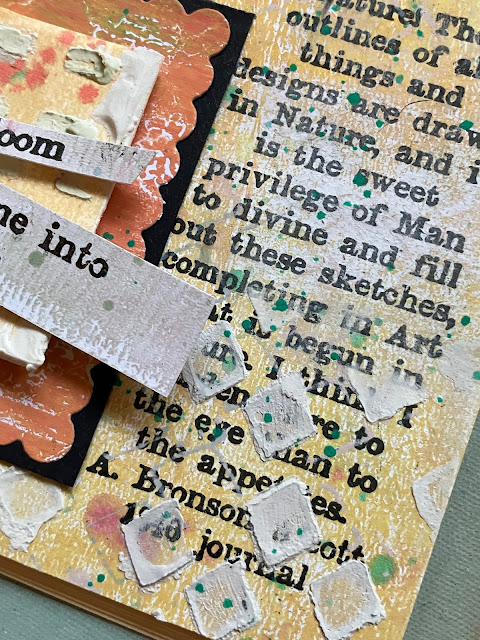
Simply cutting apart the larger flower collage gives even more design options—and layering the cut words also adds texture and dimension.

Using a light application of Grunge Paste through a stencil (you'll also see this stencil in just a mo!) adds a tactile effect without obliterating the nature quote. PS. This quote works beautifully as a card focal, too!

I love definitions as text elements—they're so easy to coordinate with an image, and make great supporting background elements. Here, the "blossom" definition can be used in portions or as is, on top of a gel-plate background and layered with stenciling.
Eclectica³ Sara Naumann Set 64 (ESN64)

Gather Together

Birds! I love them—the classic silhouette, the symbolism, the versatility for cards that can be gifted to so many different people. This focal image is actually larger than the one you see here, as I die-cut it into a smaller piece.

Birds on a wire are a favorite sight for me, especially here in the city—I love how they're all lined up, together... and how there's always at least one bird who's doing her own thing!

Regular Size: 6.5" x 7" (16 x 18cm) Price: RRP €5.60 + VAT
PaperArtsy Stencil 362, regular size (PS362)

Reveries

Geometric designs, like stripes, are such a classic—especially when paired with a more organic shape like circles, florals or butterflies. This Dashy Stripe design is meant to add a linear effect with a touch of whimsy.
I used Grunge Paste straight from the jar for this one—I'm using it on a piece of deli paper that's been mono-printed. Once it's dry, you can add Grunge Paste for a really fun layering element.

I often use a reverse-stenciling technique for my background ... ie putting the stenciling medium, such as paint, directly onto the stencil rather than through it. Here, I've brayered Wolf Eye paint onto the stencil, then pressed it onto the deli paper like a stamp. Then I quickly added clear embossing powder and heat-set for that shine factor.
Birds of a Feather

Here's a closer look at the effect you can get with reverse-stenciling, and how it can add color and texture while still allowing for white space too. A bit like gel prints, it pays to experiment with taking ore than one print for different levels of 'grunge' prints.

I reverse-stenciled with Sorbet onto the manila tag, then clear-embossed the pattern. Then I flipped the stencil and embossed with Zesty Zing to get a cross-hatch look. This also means I could paint in selected dashy stripes, which I did here with Wolf Eye. Layering like this always adds more interest to a project.

Ah.... look at that texture! And from such a simple combination! Swap it up and instead of high-contrast colors, you could go for a subtle tone-on-tone effect with shades of the same color. Endless possibilities!
PaperArtsy Stencil 363, regular size (PS363)

Metamorphosis

Speaking of high-contrast color combinations—what better way to mix and match your color wheel choices that with a bit of paint-tinted Grunge Paste?

For this snippet of leftover manila cardstock, I used Grunge Paste straight from the jar.
My tip? I don't use a palette knife, instead I use my finger to apply the paste through the stencil. I find it gives me better control over the application.

The Wolf Eye blue looks great next to the Peach Nectar-Zesty Zing background. To add color when I stencil, I first use my finger to apply the Grunge Paste, then pick up a bit of the paint on my finger and scrub it on top - through the stencil.

Here's another snippet of gel-plate paper with a bit of reverse-stenciling with Zesty Zing. This was a leftover piece that I cut from a larger gel-plate print—great to have on hand to fill small spaces.
Metamorphosis

Stencils are always ideal for simple, low-fuss backgrounds. For this one, I stenciled Forget Me Not onto deli paper using the gel plate, then splattered the piece with Weathered Copper.

Stenciling onto different types of paper adds an element of surprise – the deli paper is lightweight, transluscent-y, and you can also heat-emboss on it.

A soft, watery look lends contrast to the crisp lines of the stamped and embossed flower.

You can adhere the stenciled deli paper flat on the tag, or allow for some crinkles to appear, as I did for this project.
PaperArtsy Stencil 364, regular size (PS364)


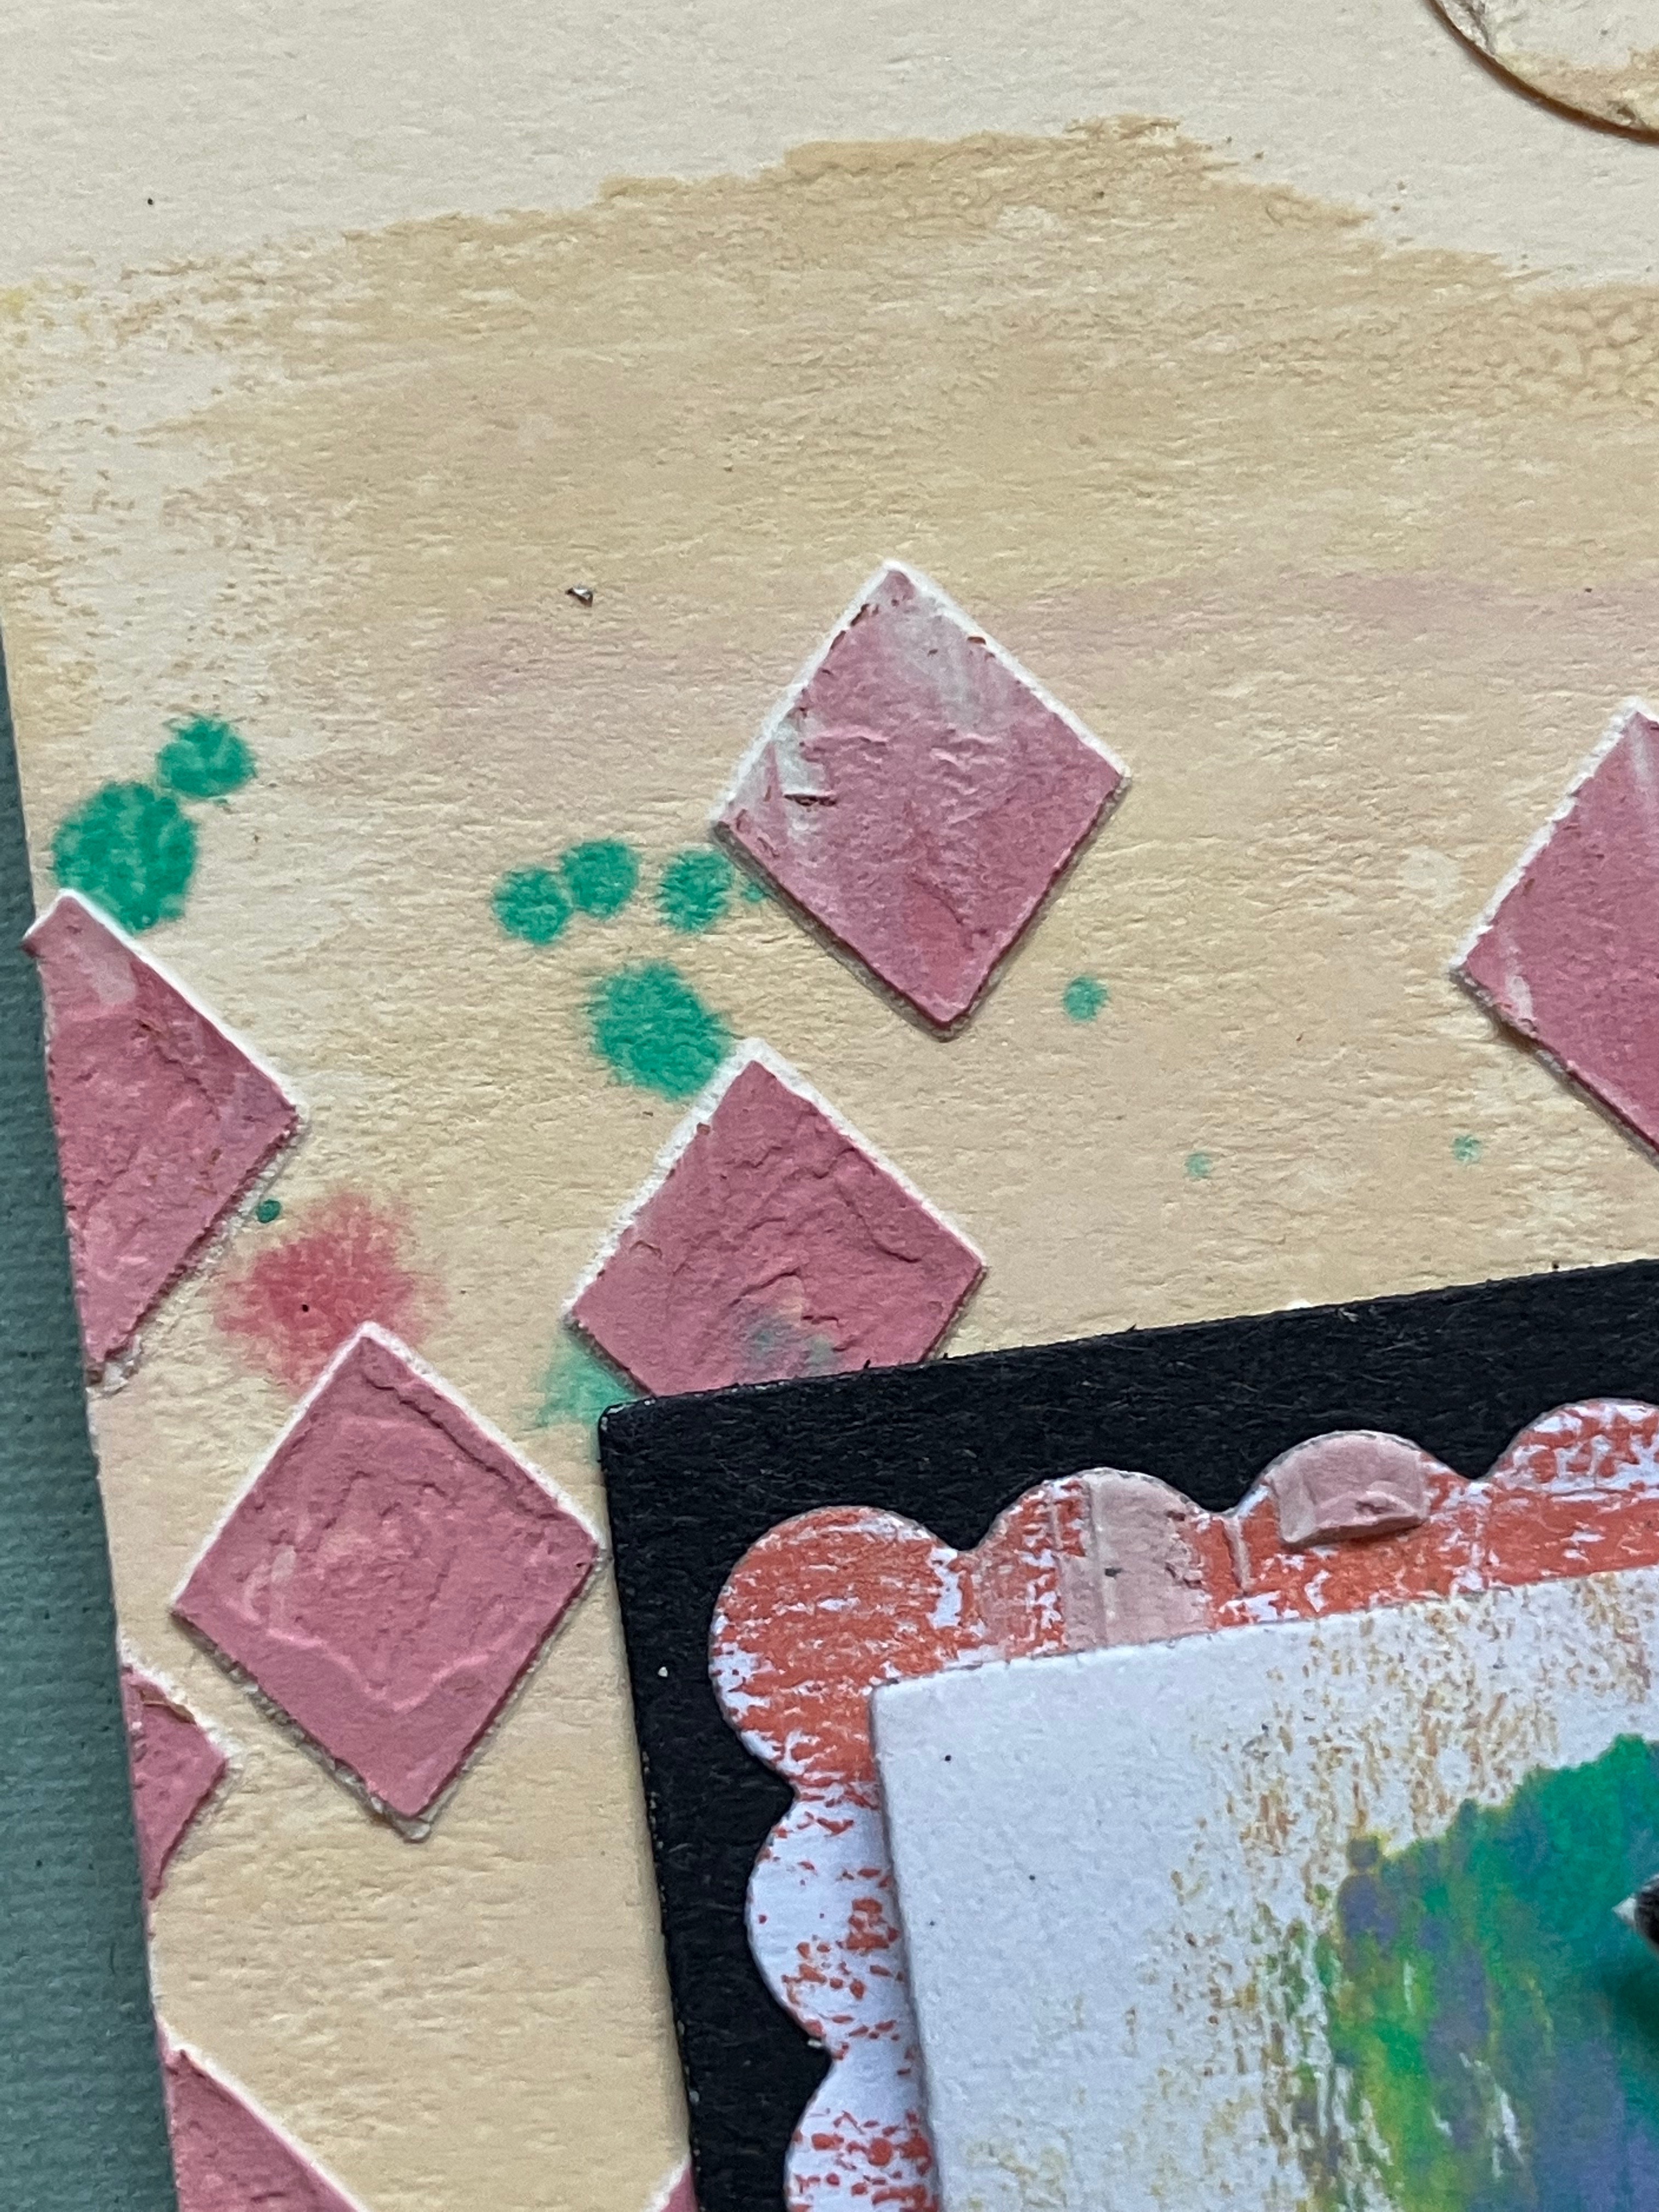
I call this stencil the Uneven Diamonds design—a great, all-over pattern that adds symmetry to your background. Use the whole stencil, or create patches or borders by using only a portion of the design.
A rich, colorful background is easy to personalize with pops of paint. Here, I've used Zesty Zing and Weathered Copper as accents to the Forget Me Not and Wolf Eye background, with reverse-stenciling done with Pea Coat.

Underneath the stamped image, I have another stenciled Diamond design, with Grunge Paste.

Here you can see the detail of the painted diamonds—the heat-embossed edges of the diamond shapes holds in the watery medium. This can work beautifully with other mediums too, like waterbrush markers or dye inks.
Daydreams

A classic stenciling technique: Tinted Grunge Paste through the stencil! It's such a simple way to add color and dimension, and a tactile effect to your projects.

The manila tag was first monoprinted with Weathered Copper, and the stenciling is done first with plain Grunge Paste—then, with the stencil still in place, I add paint on top. In this case, it's Sorbet. Remove the stencil, let it dry, and then if you want, you can sand the Grunge Paste down to reveal a bit more of the white.
Here you can really see the white edges after the painted Grunge Paste has been sanded. You can use a piece of sandpaper for this—I have a large sanding block that comes in handy.
Project: Blossom Tag Book

I'm always poking around in stationery stores—having grown up in the US, I'm used to seeing certain items, and also fascinated by the treasures one can find in stationery shops in other countries. Recently I found a pack of trennstreifen at a particularly well-stocked store in my neighborhood here in Germany—in real life, these are used as separators in office binders but all I saw was really big double-punched tags and I couldn't resist them for bookmaking. They're 9.5" long by 4.25" wide, a really fun size and perfect for tag books.

First I made a monoprint paper with Peach Nectar. This is super easy to do with a gel plate, brayer, and acrylic paint. I'm also using a drop of Drying Retarder, as it extends the open time of the paint.

Use the brayer to spread out the Drying Retarder, then brayer some paint on top. Press a piece of paper onto the wet paint, then lift.


Then I stamped the flower with black pigment ink and embossed it with clear embossing powder.

I painted dabs of watery Zesty Zing and Weathered Copper, then let it dry.

Next up is Grunge Paste stenciling!

I always end up with a stack of papers when I'm mono-printing, so it's great to have a batch to grab for stenciling!

You can see I've used plain Grunge Paste, and stenciled lightly through the uneven diamonds... just enough to get the hint of the pattern.

Next I added some Grunge Paste on a piece of corrugated cardboard and layered it onto the front of the book, along with the embossed focal.
And finally when all of your papers are dry and you've assembled them how you like, you can add them to the cover of the book and bind it together—I used my silver rings and tied on a ton of twine and colorful ribbons for a bohemian look. It means you can still open the book easily, and add or rearrange pages.

And there you go—loads of color, texture, dimension and of course, lots of fun ways to personalize the basic idea to your own color preferences!
Thanks for hanging out with me for this blog post! And a big special thank you to the PaperArtsy team for all their hard work in producing such great quality stamps, paints and supplies!
Socials...
Website:www.saranaumann.com
PaperArtsy Stockist List
Our stockists are your go-to source for all PaperArtsy products, and we suggest that you also use the PaperArtsy People Facebook group to source a retailer in your country. Many are members of our FB group and will happily share links to their online stores.
Australia
Bev's Cross Crafts, Spreyton, Tasmania https://www.bevscrosscrafts.com.au/
Crafters Cupboard, Berwick, Victoria www.crafterscupboard.com.au
Memories on the Murray, Murray Bridge, SA https://www.memoriesonthemurray.net/
Natalie May Scrapbooking, Dover Gardens, SA https://nataliemay.com.au/
Scrapbook Superstore & More, South Penrith, NSW https://www.scrapbooksuperstore.com.au/
The Scrapbooker's Confetti Box, Swansea, NSW https://thescrapbookersconfettibox.com/
The Scrapbook Store, North Perth,WA http://thescrapbookstore.com.au/
Time To Create, www.timetocreate.com.au
Time To Create, www.timetocreate.com.au
Belgium
Cart N Scrap Art, Antwerp, www.cartnscrapart.be
Créatelier Caracolle, Liège, www.createliercaracolle.be
Canada
Clipper Street Scrapbook Company, Langley, BC. www.clipperstreet.com
Paper Art Creations Inc, Leduc, Alberta, www.paperartcreations.com/
Scrapbook Centrale, Dollard Des Ormeaux, Quebec www.scrapbookcentrale.ca
Scrapbook Centrale, Dollard Des Ormeaux, Quebec www.scrapbookcentrale.ca
Scrap Addicts, Edmonton, Alberta www.scrapaddicts.ca/
Scrap and Bean, Edmonton, Alberta scrapandbean.com/
Scrapbooking Fairies, Drayton Valley, Alberta www.scrapbookingfairies.com/
The Paper & ink Boutique, Calgary, Alberta www.paperandinkboutique.com/
The Scrap Yard, Calgary, Alberta, www.thescrapyardcalgary.com/
The Scrap Yard, Calgary, Alberta, www.thescrapyardcalgary.com/
Denmark
Hobbyboden Scrapworld Samso www.hobbyboden.dk
France
Eirl Bancon Cartoscrap, Midi Pyrenees, www.cartoscrap.com
Fée Du Scrap, Saint Sébastien-Sur-Loire, www.feeduscrap.fr/
Horizon Créatif, Ste Jalle www.horizon-creatif.fr
Instant Créatif, La Possession, La Réunion, www.icreatif.re
Katzelkraft, Ingwiller www.katzelkraft.fr/en/
Kerudoc Creation, St Yvi www.kerudoccreation.com
Le Grenier des filles, Pierre Benite
Page de scrap, Saint Pavace, www.pagedescrap.fr/
Scrap Déco Home, Goutrens, www.scrapdecohome.fr/
Toutencolle, Dun sur Avon www.toutencolle.fr
Finland
Heidin Korttipaja, Istunmaki, www.korttipaja.fi/fi
Piia Paper, Kittilä, www.piiapaper.com/fi
Germany
Stempelbar, Berlin, www.stempelbar.de
Stempeloase Munich, Munich www.stempeloase.de
Stempelfee Shop, Hilden www.stempelfee-shop.de
Stempellaedle, Stuttgart, www.stempellaedle.de/shop
Greece
Scraps N Pieces, Kallithea www.scrapsnpieces.gr
Italy
Immagine SAS di Rapaccini, Rome, www.immaginelab.com
Il Negozio Della Mamma Di Cle, Torino, www.ilnegoziodellamammadicle.com
Marte Savona, Savona, www.martesavona.it
Pezze E Colori, Lissone, www.pezzeecolori.it/
Piccole Passioni, Siena, www.piccolepassioni.it
Piccole Passioni, Siena, www.piccolepassioni.it
Japan
La Wadao, Odawara, Kanagawa, www.lawadao.com
Tiny Dots, Funabashi-shi, Chiba www.tinydots.shop-pro.jp
Netherlands
De Hobbystudio, Genemuiden, www.dehobbystudio.nl/
Doe@ding,Spijkenisse doeading.nl/
Hobbycompleet de Duif, Leeuwarden www.hobbycompleet.nl
Stampingcorner, Capelle Aan Den Ijssel www.stampingcorner.nl
Norway
Hobbygarasjen, Kopervik, www.Hobbygarasjen.no
Spain
Cien por Cien Manualidades, Barcelona, www.100x100manualidades.es
Ideas 10 Manualidades Y Scrapbook, Bilbao ideas10manualidades.com/
Marakiscrap, Tarragona, www.marakiscrap.com
Scrap & Papers Experiences, Barcelona, www.scrappapersexperiences.com
The Paradise Corner, Barcelona, www.theparadisecorner.com
Sweden
Butik Elva, Staffanstorp, www.butikelva.se
Taiwan
Mandy's Cards, Taipei www.facebook.com/mandy.card.77
United Kingdom
Amelia's Creative Crafts, Studley, Warwickshire www.ameliascreativecrafts.co.uk
Art from the Heart, Harrogate, Yorkshire www.afth.co.uk
Crafts at The Malthouse, Herstmonceux, East Sussex, www.themalthouse.co.uk/
Loobi Crafts, Leighton Buzzard, Bedfordshire, www.loobicrafts.co.uk
Papermaze, Ipswich, Suffolk www.papermaze.co.uk/
Stampers Grove, Springbank, Lilliesleaf, Melrose,Scotland www.stampersgrove.co.uk
The Artistic Stamper Craft Store, Faversham, Kent www.theartisticstamper.com
The Forget me not Kraft Kabin, Rochford, Essex, www.TheForgetMeNotKraftKabin.co.uk
USA
Artistic Artifacts, Alexandria, VA www.artisticartifacts.com/
Artistic Studio Creations, Fayetteville, Georgia www.facebook.com/ASCbyCrystal
Craftiness, Chatsworth, CA, www.craftinessonline.com/
Ephemera Paducah, Paducah, Kentucky www.ephemerapaducah.com
Everything Scrapbook & Stamps, Lake Worth, Florida https://everythingmixedmedia.com/
Frantic Stamper, Oregon www.franticstamper.com
Free Heart LLC, Denver, Colarado, www.freeheartllc.com/
Joggles, Coventry, Rhode Island, www.joggles.com
PaperCraft Clubhouse, Westbrook, Connecticut, papercraftclubhouse.com/
Qingquing's Stamp Shop, Portland, Oregon
Runaway, Art & Craft Studio, NE Salem, Oregon www.runawayart.com/
Simon Says Stamp, Columbus, Ohio www. simonsaysstamp.com
Topflight Stamps, Irmo, South Carolina topflightstamps.com/
If you are interested in becoming a PaperArtsy stockist contact Dounia@paperartsy.com for more information
PaperArtsy Links
Facebook Group PaperArtsy People
Facebook Page PaperArtsy
Twitter twitter.com/paperartsy
Instagram instagram.com/paperartsy
Pinterest uk.pinterest.com/paperartsyhq
YouTube youtube.com/user/PaperArtsy


4 comments:
Congratulations Sara.... These are awesome.... As usual
the stamps are fabulous, the birds are my favourite set, and the stencils too. Gorgeous samples, of course!!
Beautiful new designs and projects from Sara! I love the birds and butterflies.
Congratulations new releases, I inspired by your techniques with to using reverse-stencil with paints, grunge paste and clear embossing powder. It is so interesting. I'll try soon!! xx
Post a Comment