Showing posts with label EAB21. Show all posts

Friday, 20 June 2025

Piano hinged journal with PaperArtsy Products {by Ann Barnes}

Hi everyone, it is Ann here today, and I am so happy to be back with you again.

This year on the blog, we have free reign to do a deep dive into a PaperArtsy product ranges of our choosing. For this post I have been exploring the PaperArtsy Eclectica products (EPA02, PS449). These stamps and stencils were released earlier this year (January 2025) and have a really nice mixed media vibe. I just love using them in backgrounds to create some graphic interest. For this project I have paired them with a few of the PaperArtsy: Ink & The Dog Mini stamps, botanicals in particular. List of PaperArtsy stockist can be found here.

Today I'm looking forward to sharing with you how I used the same stamp to achieve both positive as well as negative image for a background. I also explored different ways to create a watercolored stamped image. Mostly, I enjoyed playing around with these wonderful stamps (and stencil) and created a fun botanical bound journal.


I love incorporating natural elements into my work, and the PaperArtsy Ink & The Dog mini stamps (MN67, MN68, MN69, MN70, MN71) led to the idea of using a natural floral stem to create the binding for my journal.

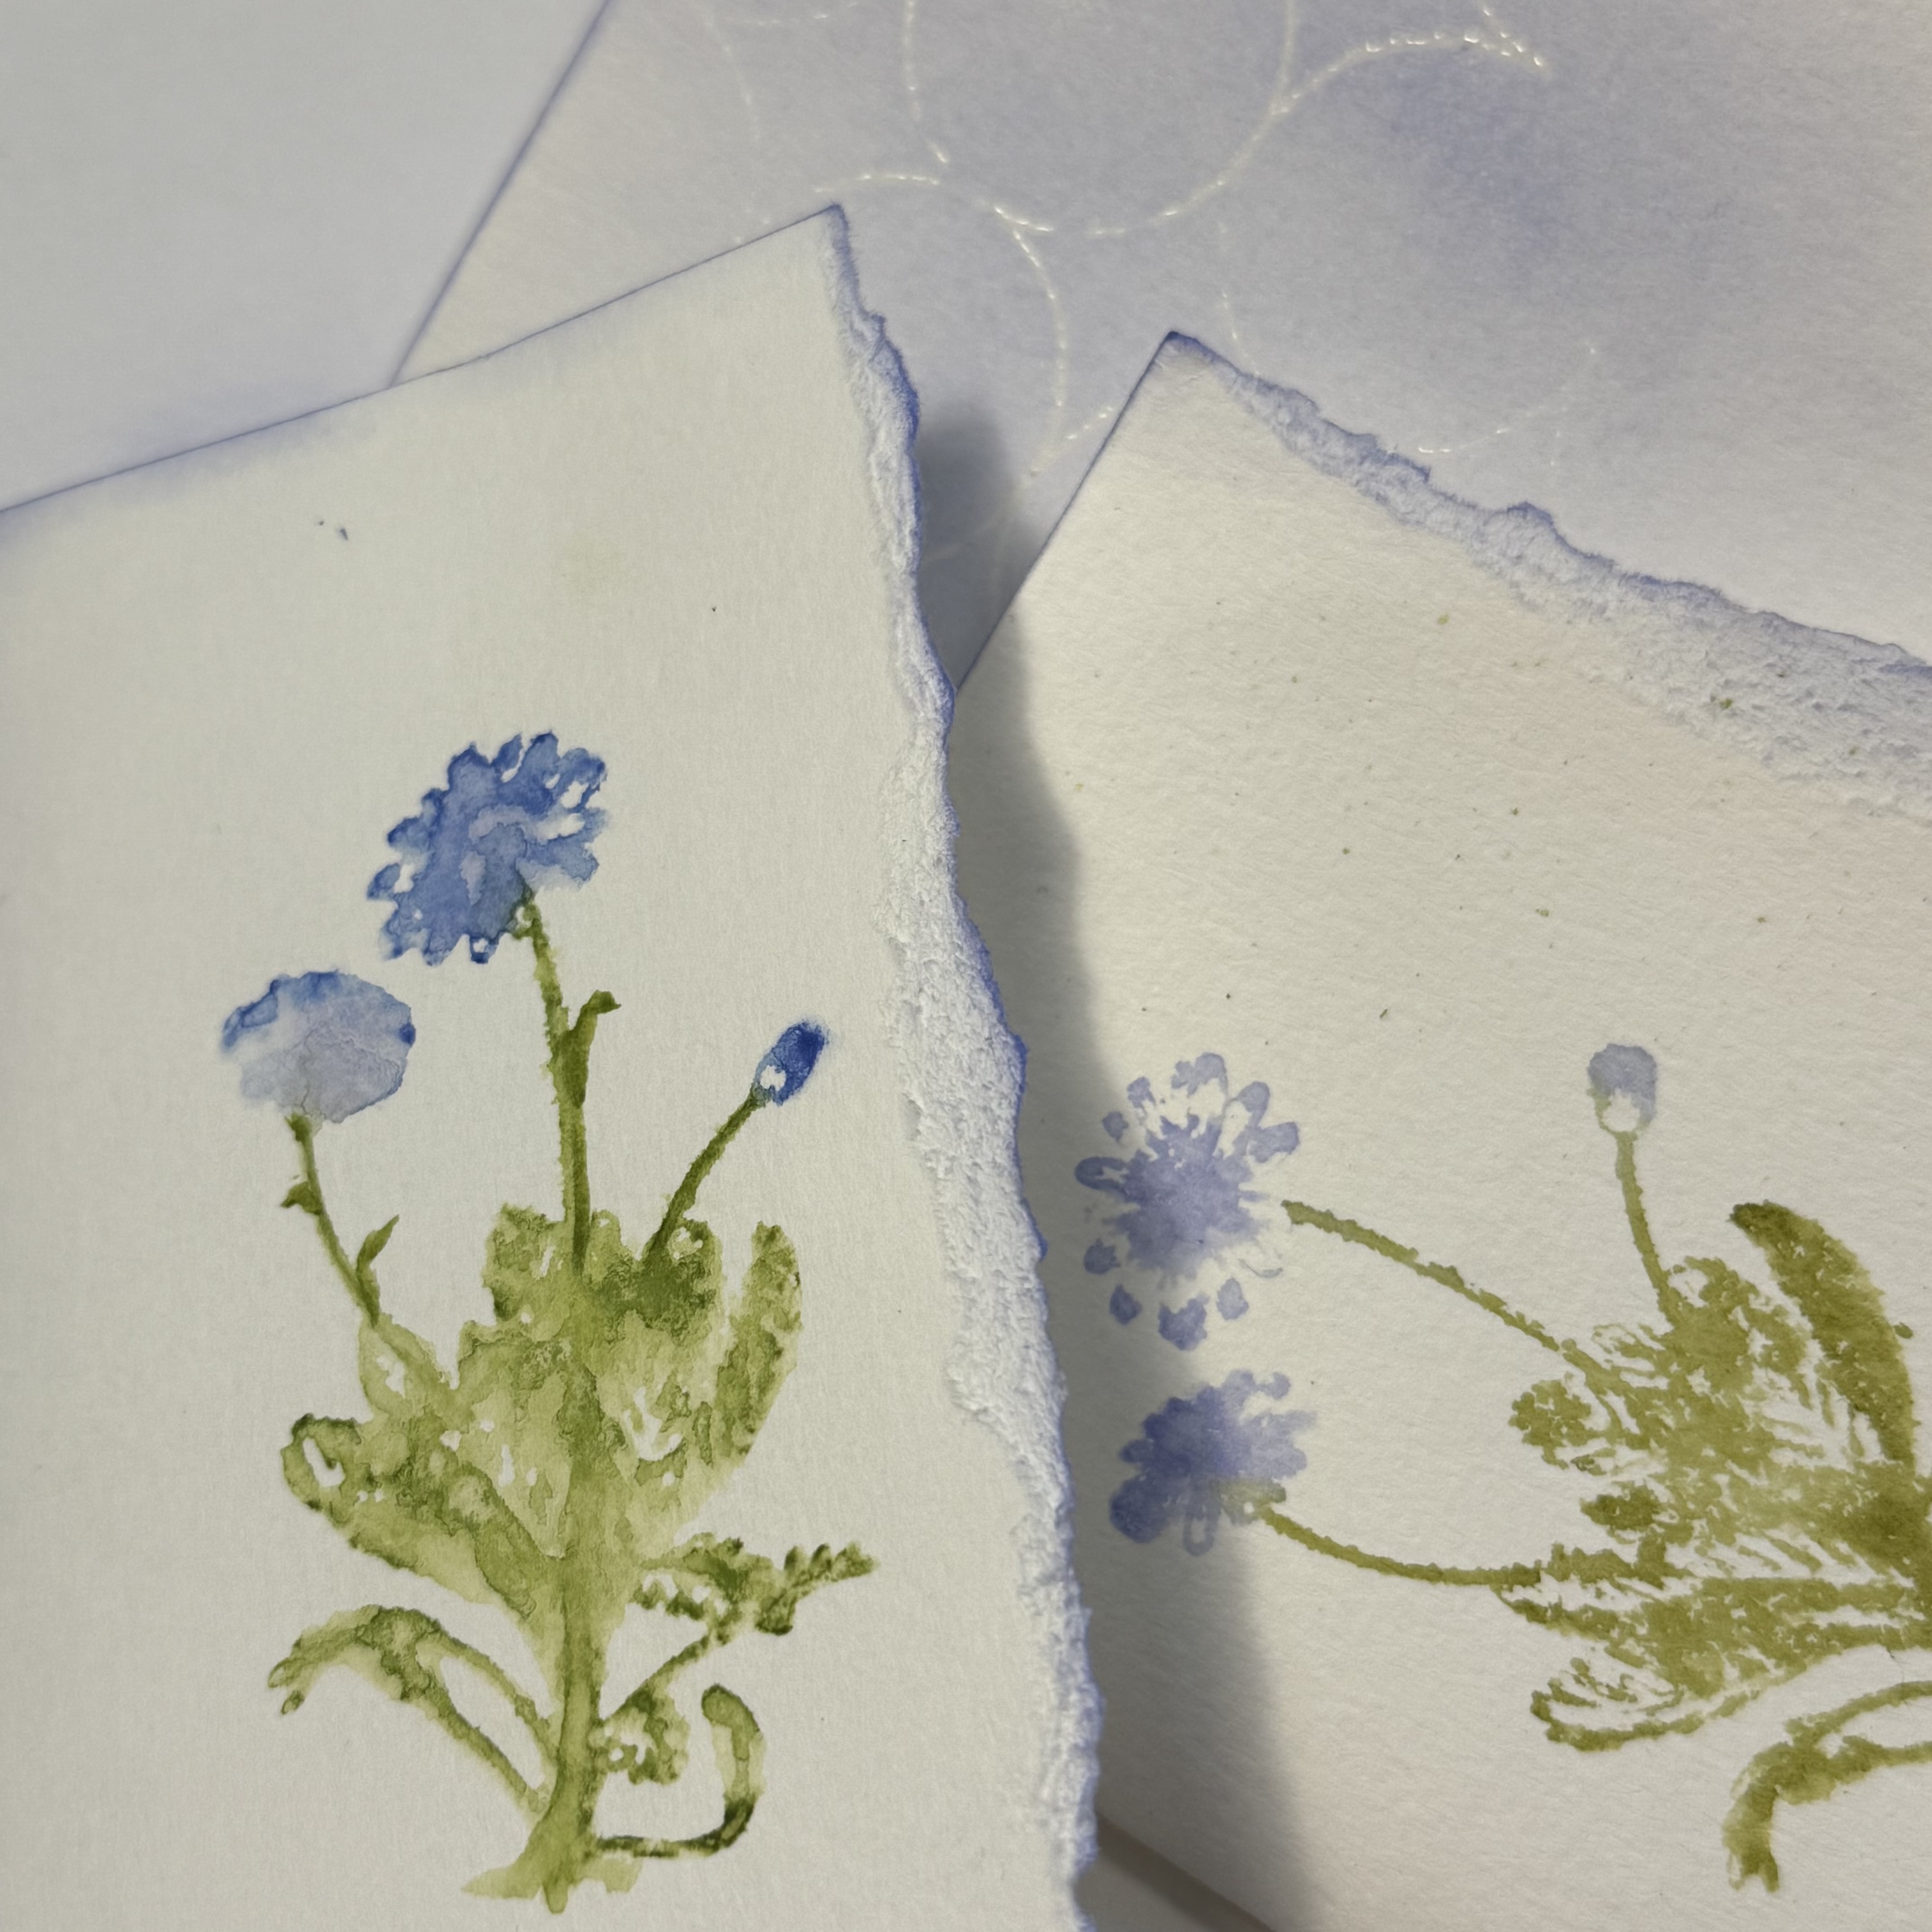
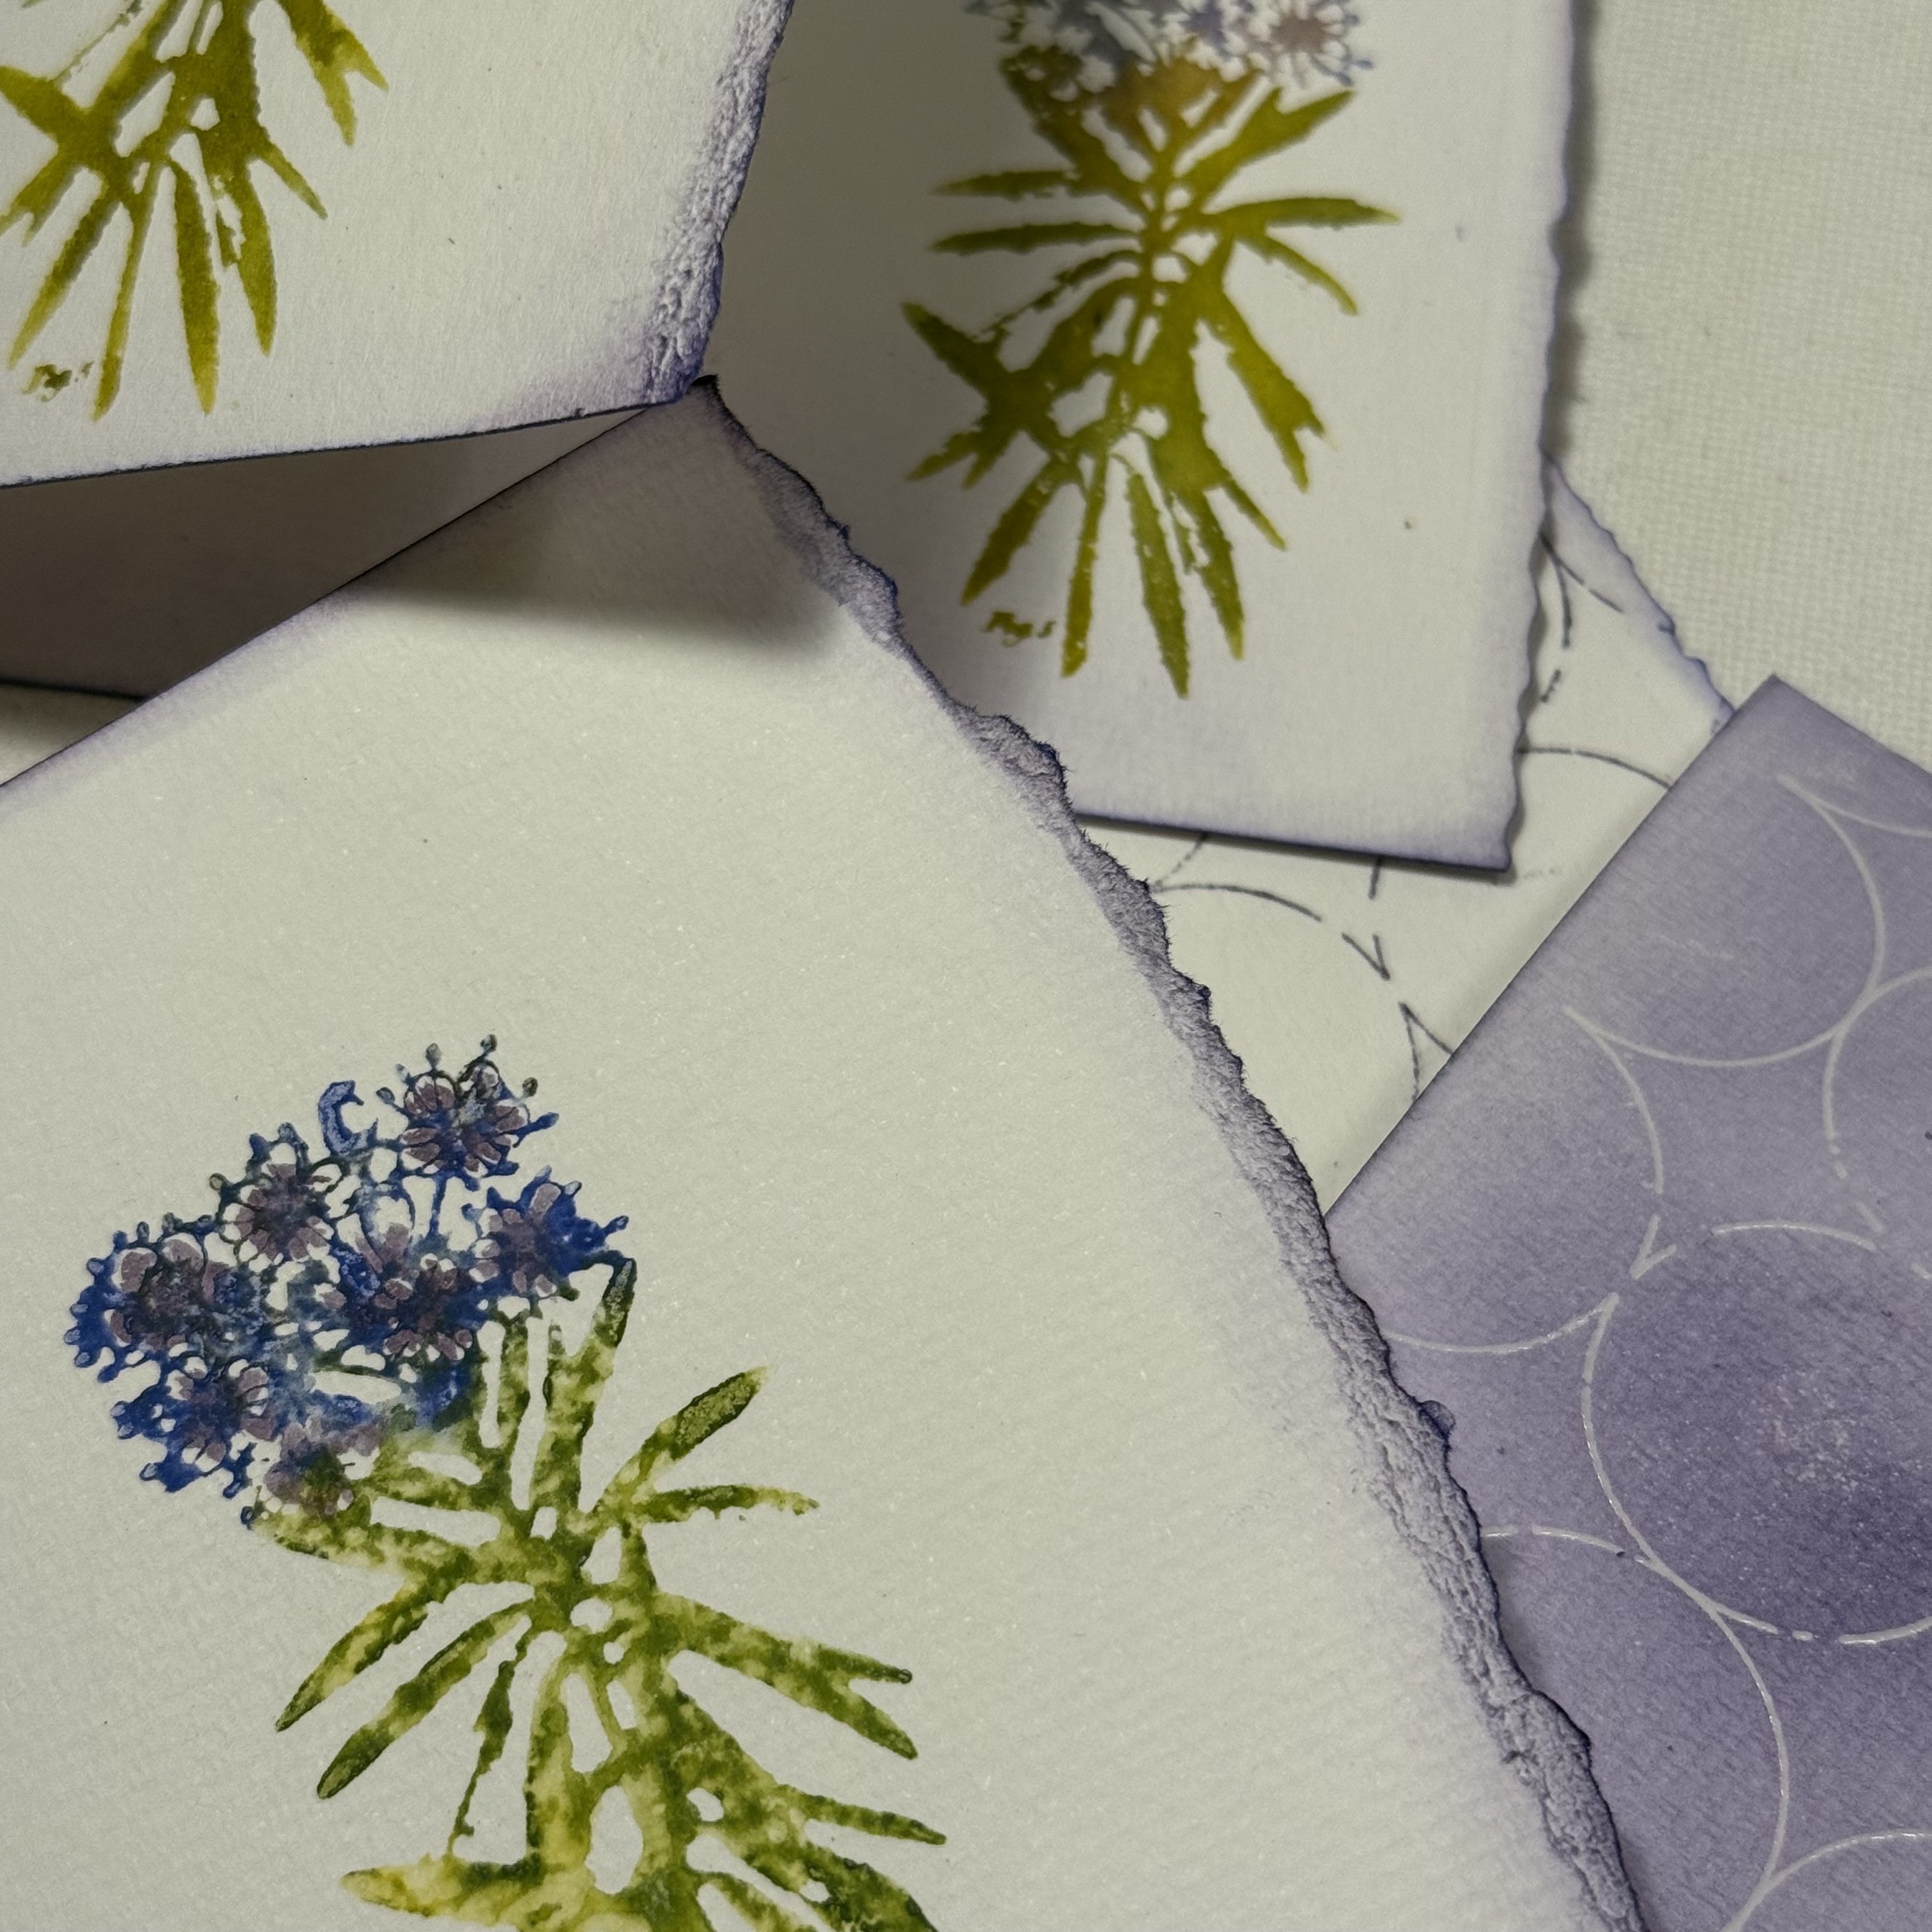
Using water reactive inks and flooding the inked stamps before pressing to create the image created such a beautiful watercolored look. Depending on the amount of water I spritzed, I could create a watery abstract or a detailed impression. These variations on the same stamp design resulted in a lot of interest!

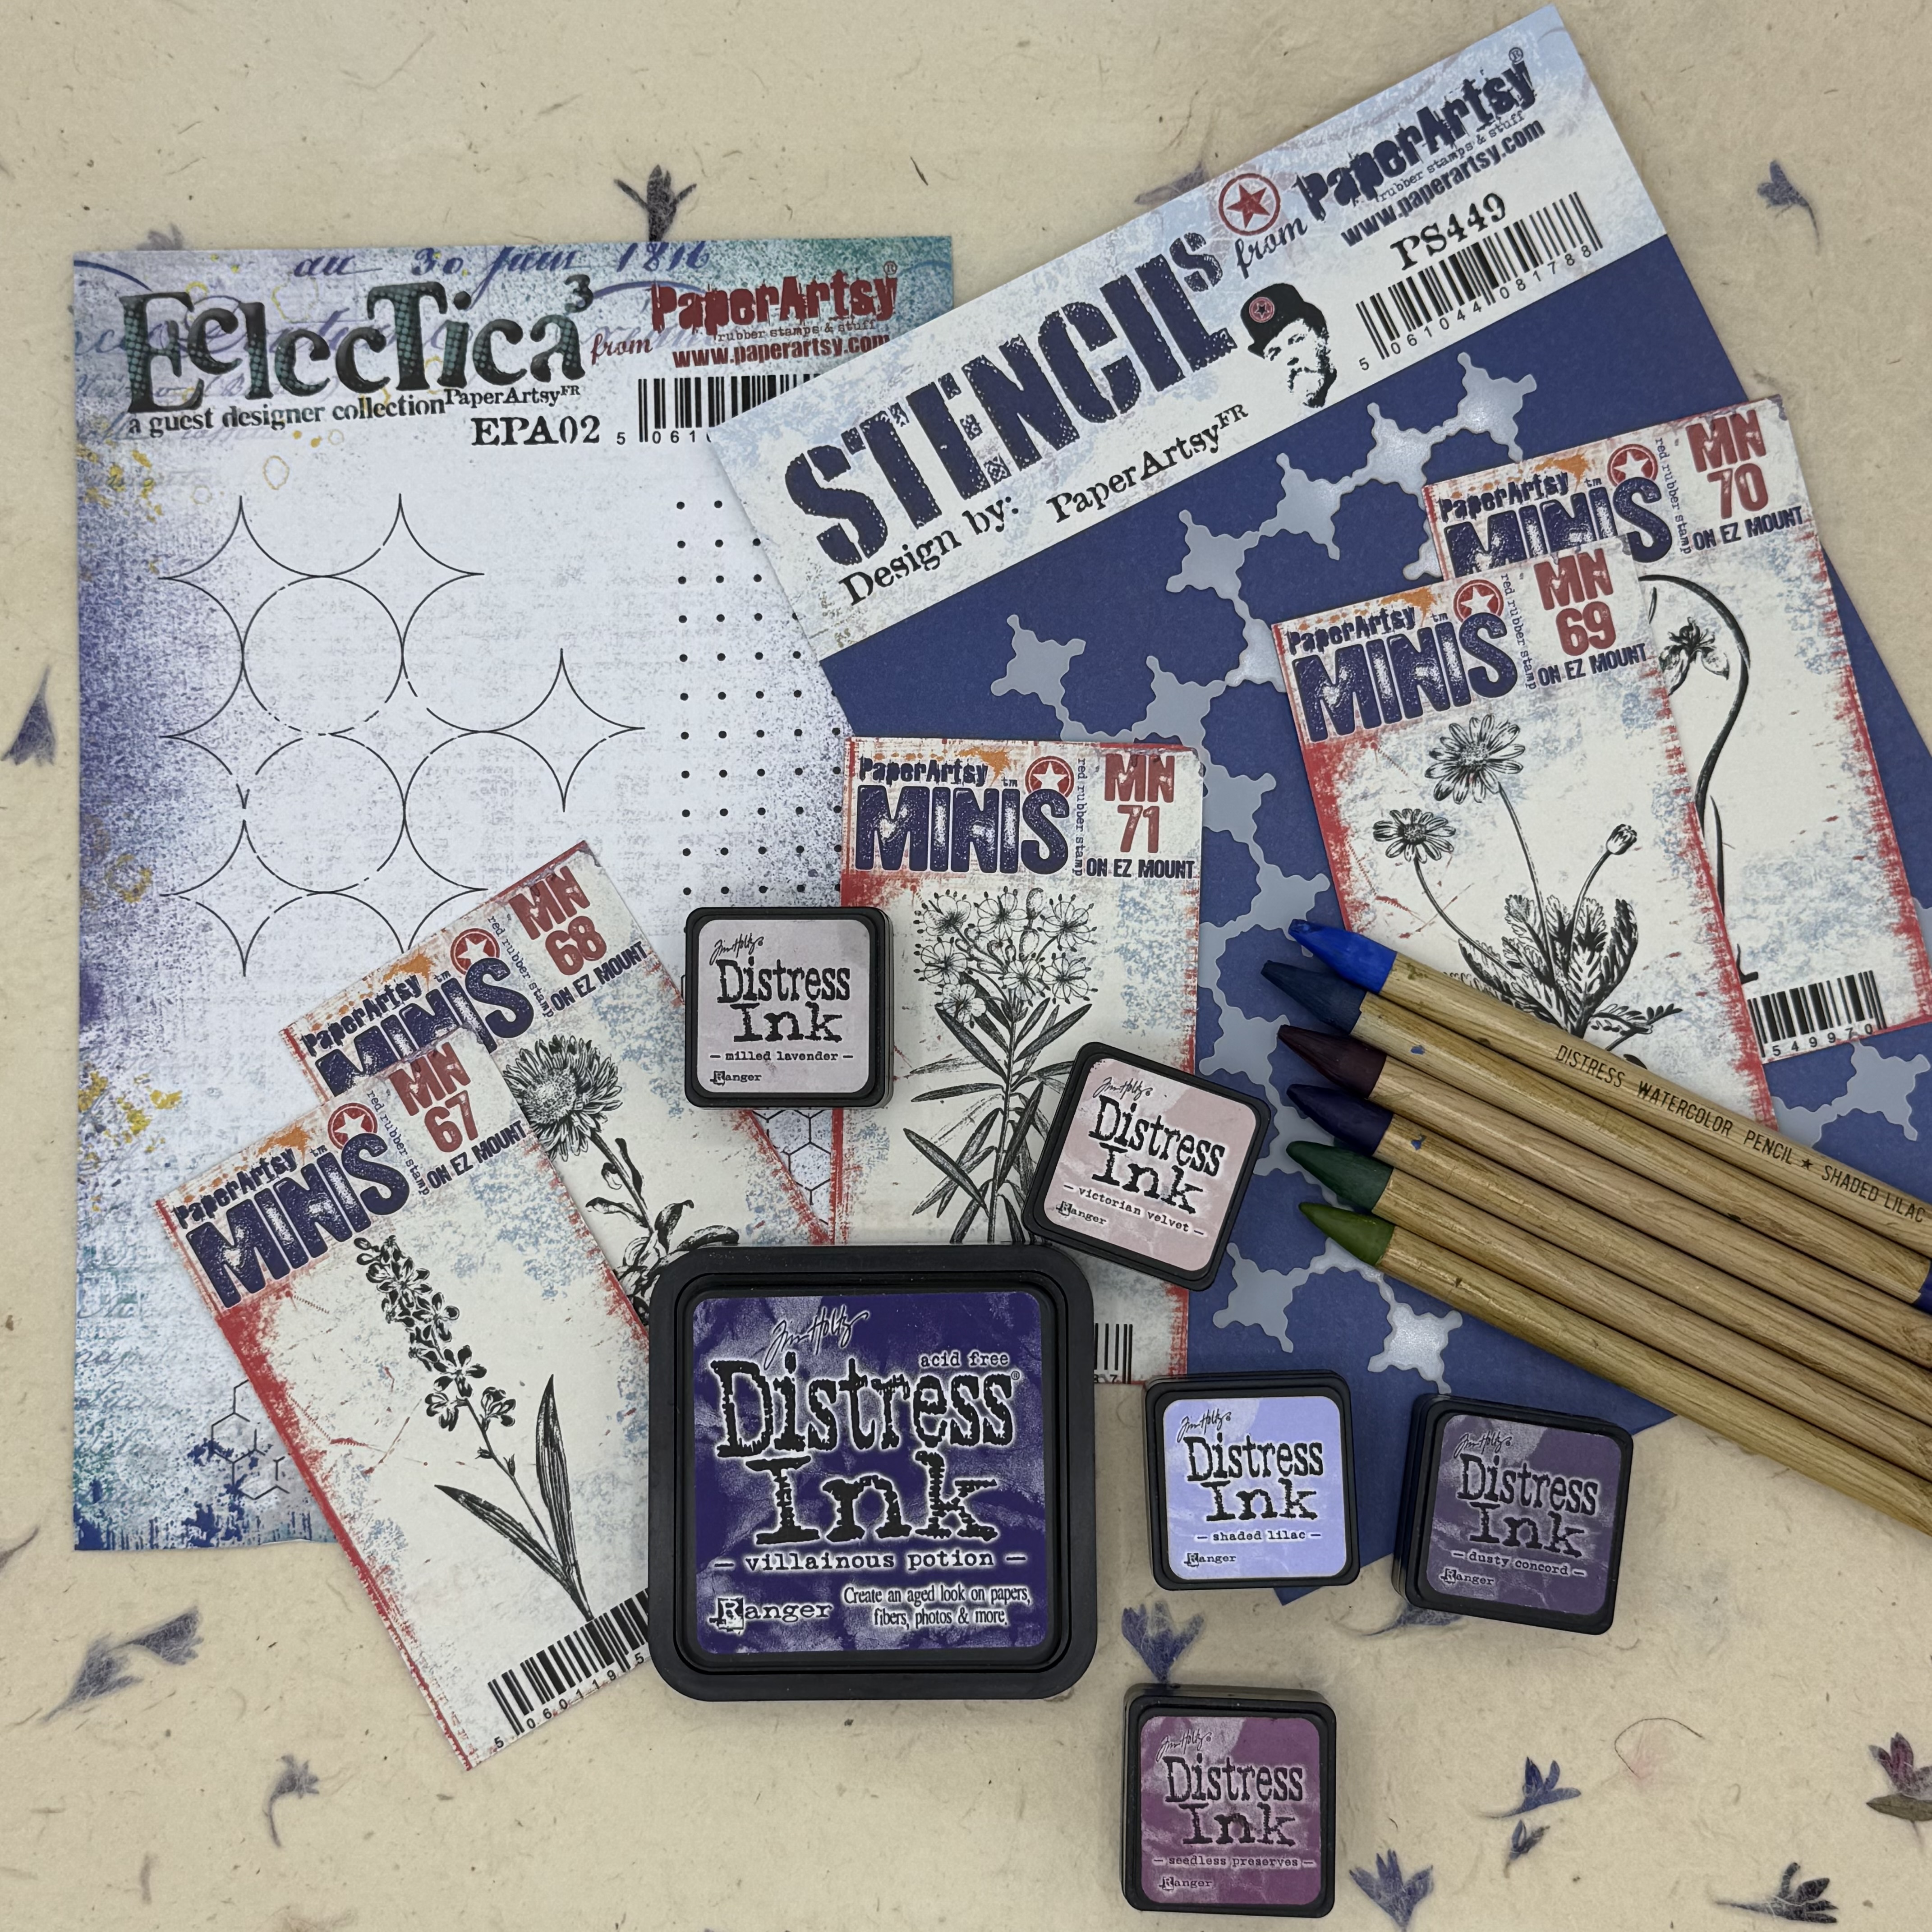

My original plans for this journal involved focusing on one of the PaperArtsy Ink and the Dog Mini floral stamps, but I had a difficult time choosing just one, so I used all five, giving each design its own signature within the book.

My neighbor has a wildflower garden at the street that I pass each day. When I gathered my supplies to create this journal, I remembered seeing some of the same flowers in the garden. These were predominantly purple and so the color scheme was born. When lavender and iris flowers were also in the stamp collection, I knew that this color scheme was meant to be. While any type of water reactive medium could be used, I focused on primarily the Ranger Distress palette.


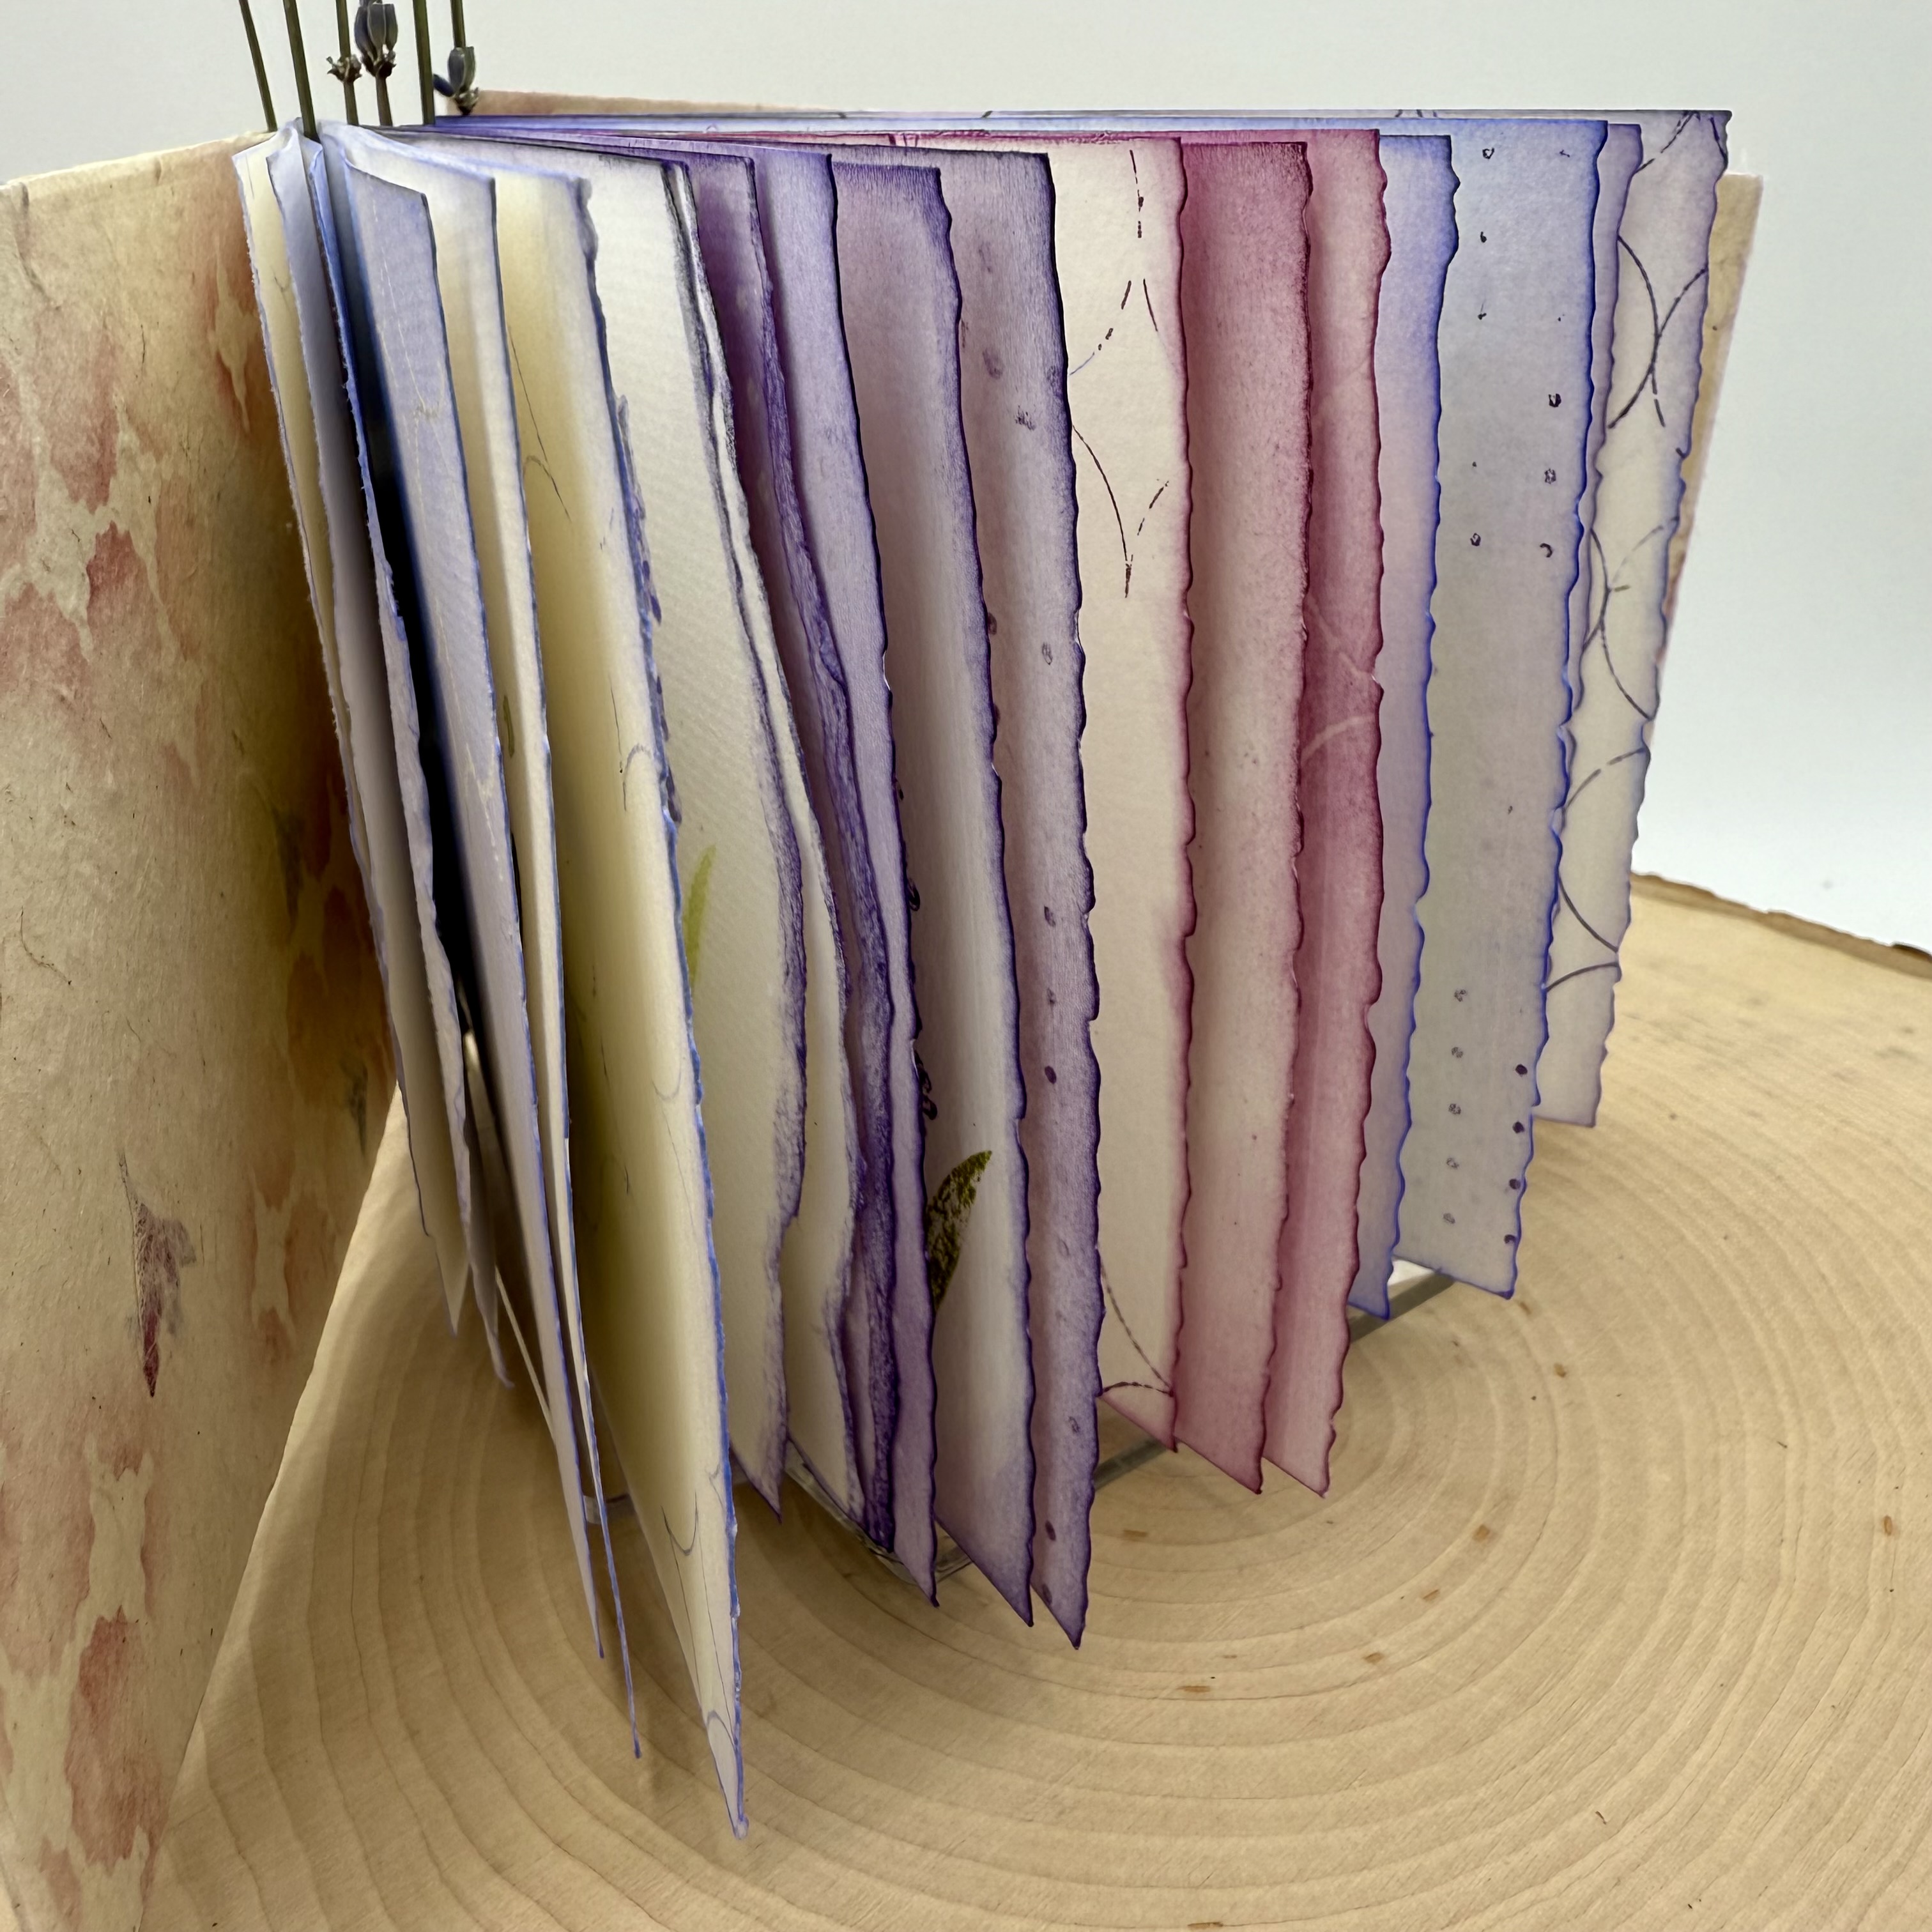
When making a handmade book, one of the initial steps is deciding the size. This includes the number of pages. Since this was my first attempt at making a piano hinged book, I wanted to keep it fairly small. This also worked well since I was using the mini stamps. Each Signature of the book contains three folded pieces of standard watercolor paper. There are five signatures, one for each of the flower designs.


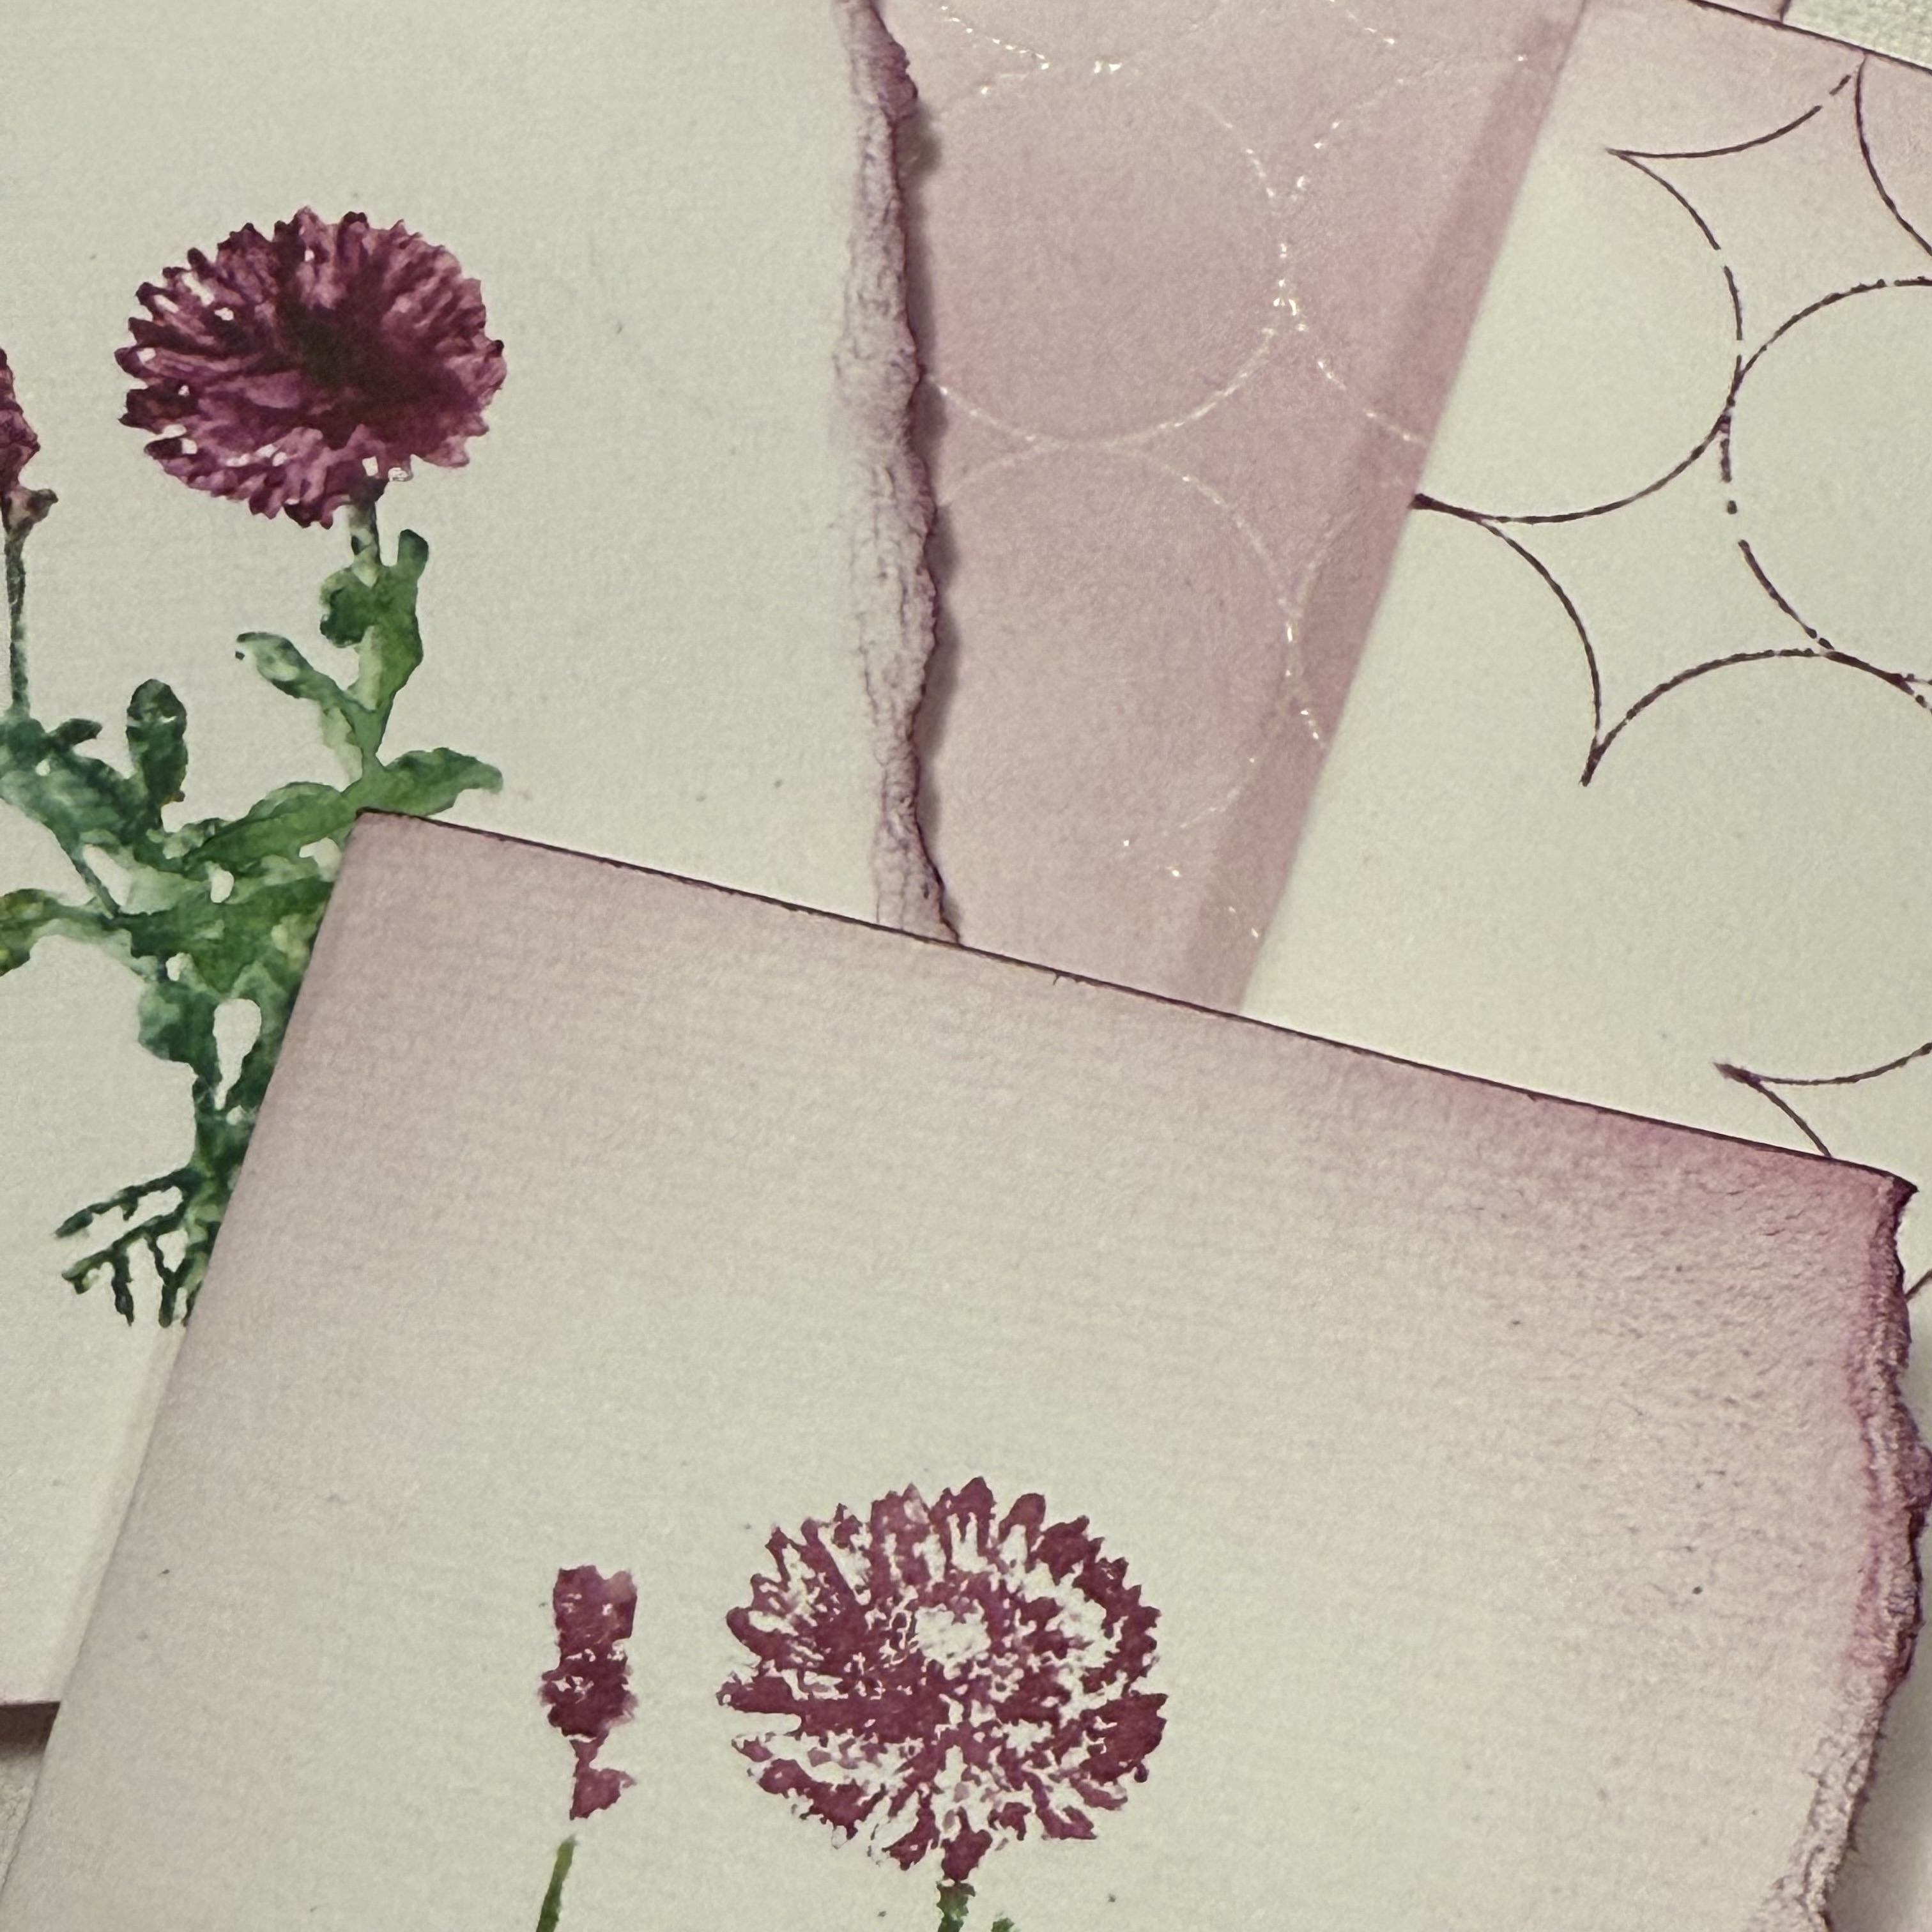
I wanted the first page of each section to be a bold representation of the floral image. For this I used Ranger Distress watercolor pencils. I wet the tip of the pencil and added the dense color to the stamp. I then spritzed the "colored" rubber stamp with water and then created the impression. A couple of the designs are narrower than the others, like the lavender; for these flower designs, I did multiple impressions.


With all of the signatures having a designated flower, I was excited to fill up the additional pages. I noticed how differently the images appear depending on the amount of spritzed water used and decided that I would love to experiment with that on the next pages, only using the stamps with inks and water.


To complete the remainder of the first pages of each signature, I chose one of the graphic design stamps from PaperArtsy Eclectica Stamp Set 02 (EPA02). Wanting to keep with the boldness of the watercolor pencil impression, I inked up the image and added random marks onto the paper. I find it easiest to do this type of stamping without a stamp block. By simply using the stamp loosely in your hand, it is simple to press only on a small area, and to rotate the image freely.


Within each signature, the second pages contain my experiments with watering down the inked stamp. Using Ranger Distress Ink in the same colors that I chose for the water color pencil technique, I added ink to the rubber stamp and then spritzed with water and made an impression.


I also did second (and third) generation stamping, with additional spritzes of water. I continued playing with the water amounts and stamping images all across the page and also on the reverse side. I love how some of the images appear very abstract, with only a subtle indication of the flower type. I could not decide which images I preferred, the crisper versions or the flowy versions. I continued my exploration with each of the floral stamp designs, one per signature.


When considering what I wanted to do on the third pages of each signature, I thought it would be fun to create an embossed resist of the graphic mixed media designs, so the pages would be reverse coloration. For this, I used clear embossing ink and clear embossing powder. When the powder is heat set, and ink is added to the page, the stamped image appears as the original color of the paper.


I randomly placed the mixed media graphic stamp onto the page, sprinkled embossing powder onto the ink then heat set it. Then, using a coordinating color of Ranger Distress Ink to the ones used on the flower petals, I inked up the page.


Note that when the three sheets are folded together into a signature, the floral images will appear adjacent to a page with a different design.


I especially love how the pages look abutted to one another when the three sheets are folded into each other to create the book.
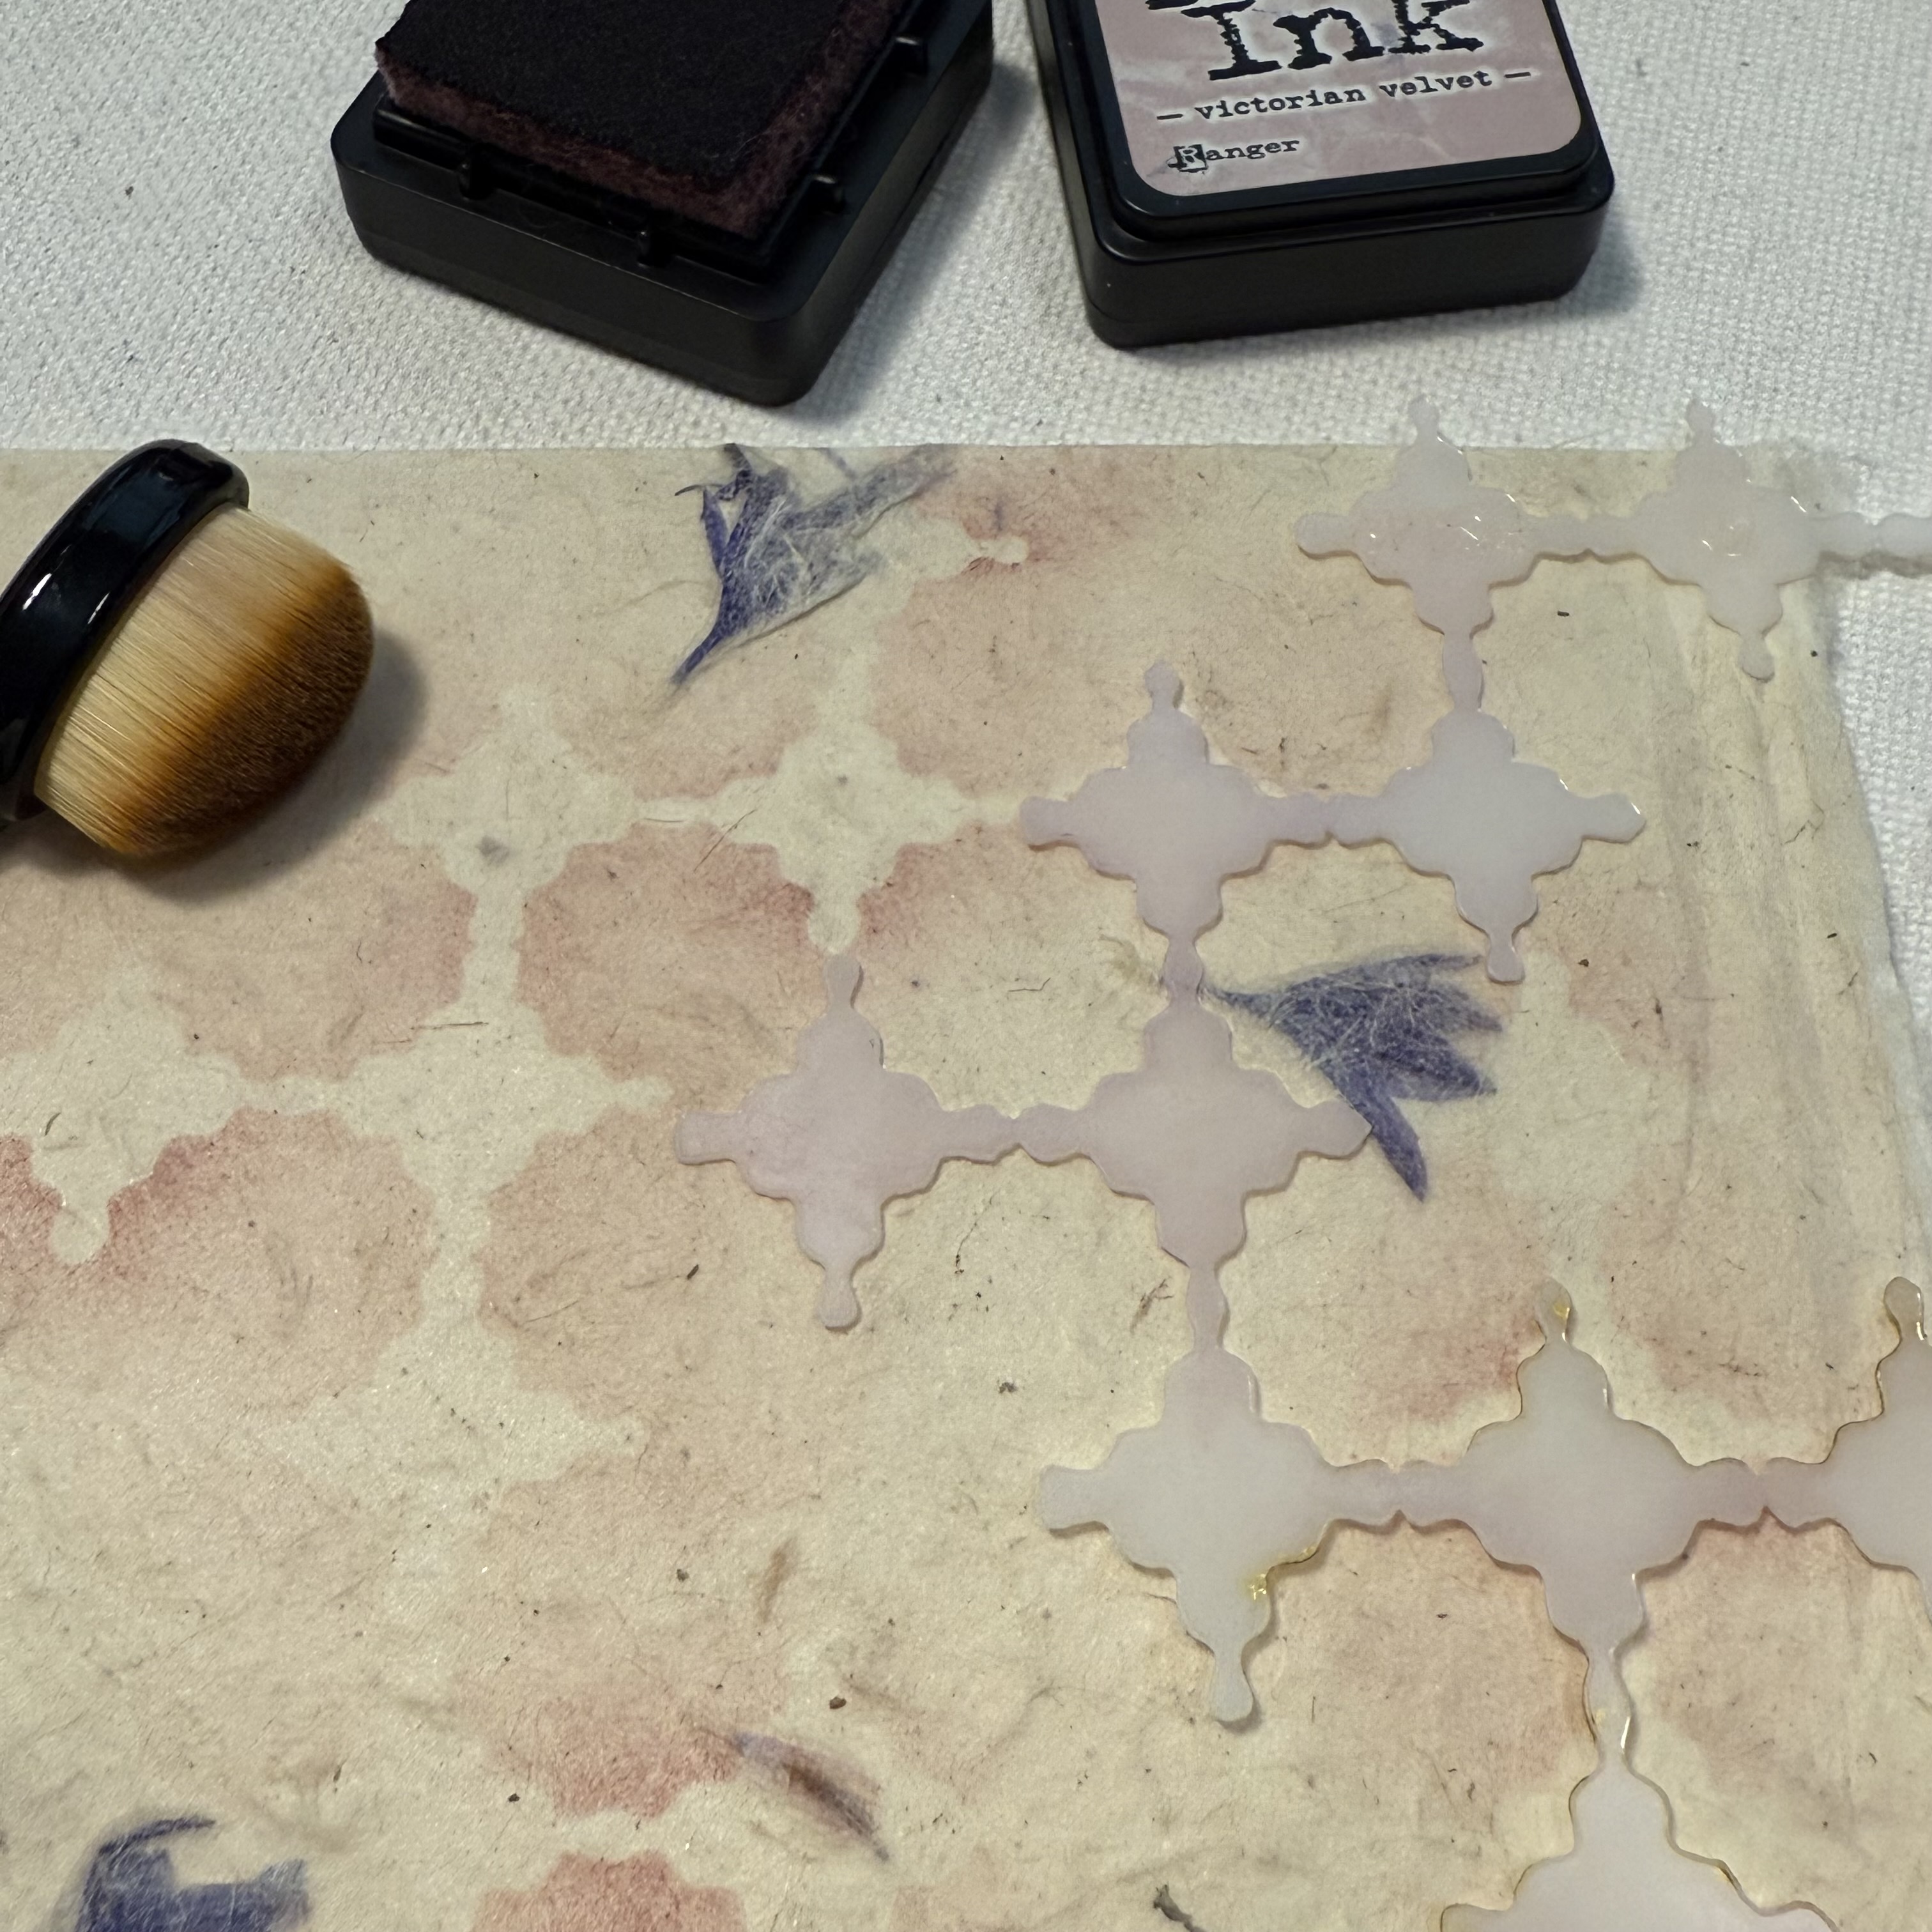
With all of the pages in each signature complete, it is time to create the covers. I had a sheet of natural handmade paper that contained purple flower petals, and decided it would be the perfect cover material. Using the PaperArtsy Stencil (PS449), Ranger Distress Ink and a stencil brush, I added random areas of soft pattern. To achieve the soft effect, be sure to choose a color that is not bold, yet is different from the overall background. I used Victorian Velvet, a subtle pinkish purple that coordinated with the different purples and magenta of my signatures.


There are many tutorials online for how to make piano hinge books. This was the first time I have attempted to use this type of binding, and surprisingly, it was not too difficult. I suggest making a sample before using your finished signatures to ensure it all goes together well. I also suggest perhaps using something a bit more durable to secure the pieces together. My vision was to use these lavender stems and while I did make it work, I am not sure how well it will last when the book is opened and closed a lot. I do however, love the way it turned out!


I love the finished project, especially with the vellum piece that adorns the cover. I used the distress watercolor pencil technique for the intense colored floral stamping and then stamped the graphic dots on the reverse side of the vellum. A stamp from Alison Bomber's PaperArtsy Set 21 (EAB21) onto the handmade, stenciled cover provides the perfect verse for inspiration.

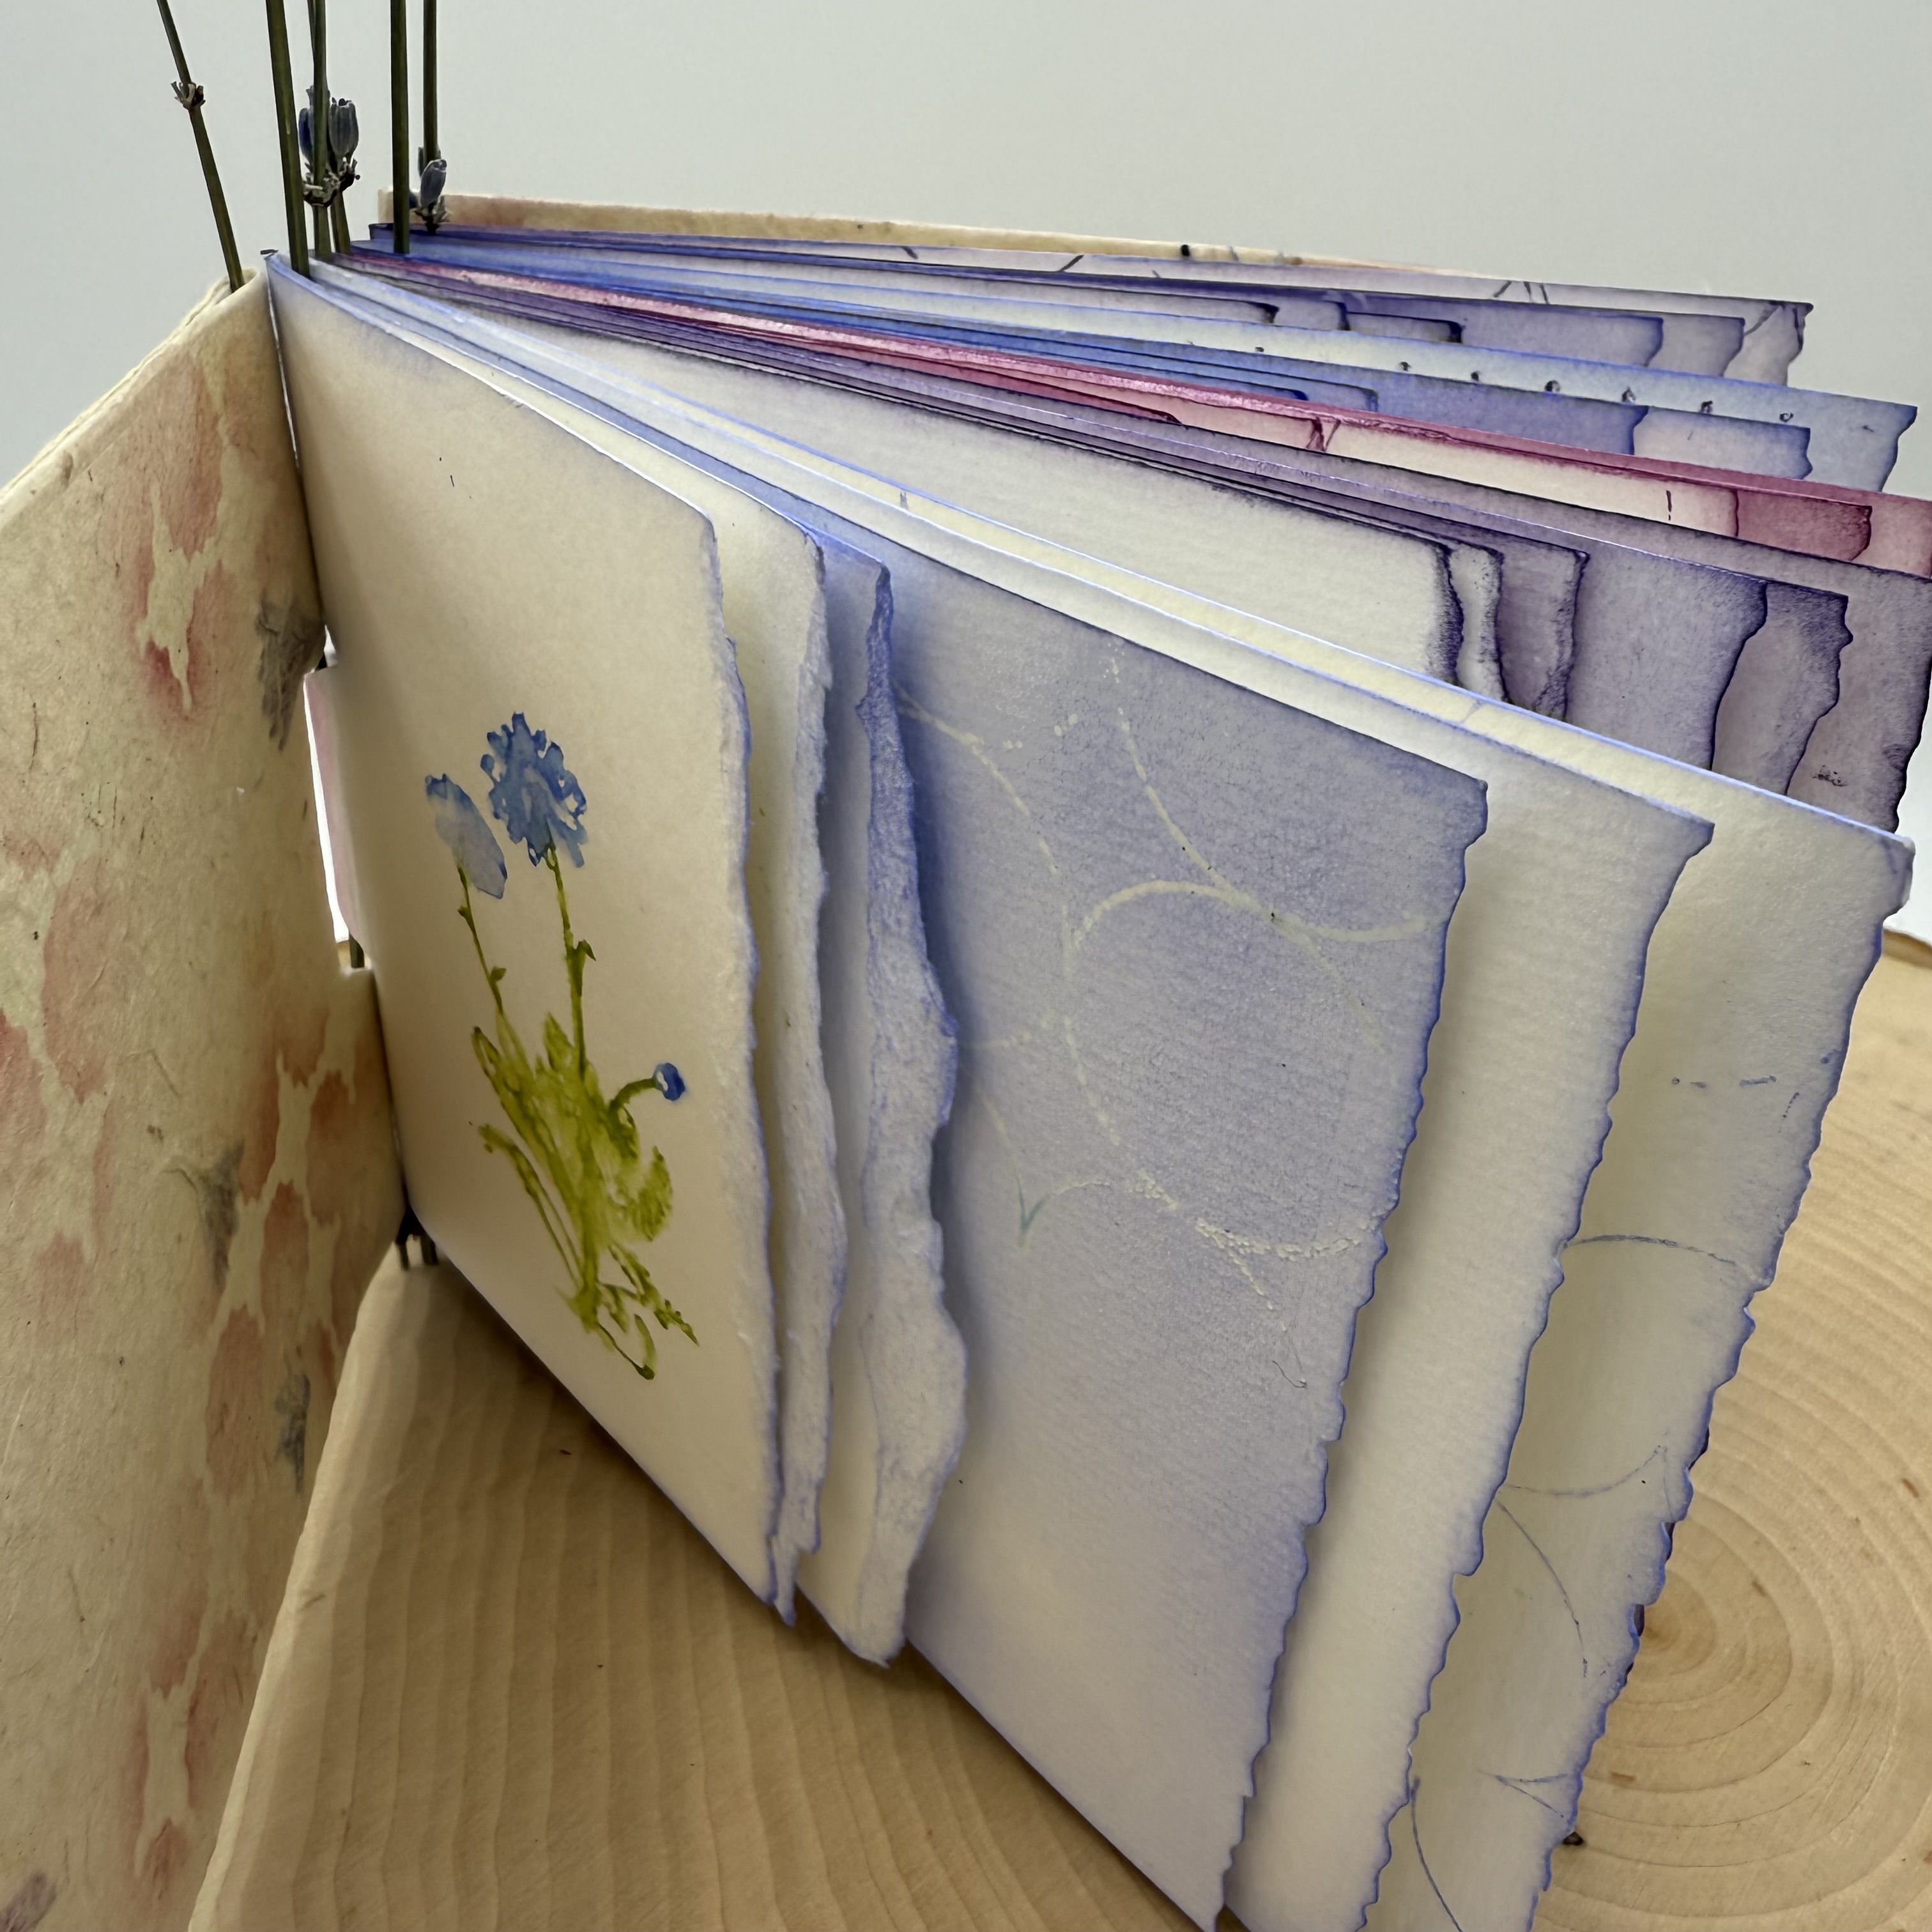
I imagine this book being used for a journal where I can keep wildflowers picked on my nature walks, with notes or thoughts scribbled beside them.


I am hoping that perhaps you have been inspired to create your own wildflower collective handmade book, or even simply to play and experiment with creating watery abstract images from you stamps, either way it's always a good day to get creative.

Thanks for stopping by,
Ann

Friday, 18 November 2022

2022 Topic 15 : Paper, Seeds and Twigs {by Etsuko Noguchi} with Gwen Lafleur stamps


Hi everyone, it's Etsuko (My favorite things) with you today, and I'm here to share with you Eco-Print using a selection of stamps designed by Gwen Lafleur. My project this time was card and tags for the winter season, but I also made the shadowbox using the themes Paper, Seeds and Twigs.


I've been wanting to share some of my eco-printing work on the here for a while, and since the theme this time was Paper, Seeds and Twigs, I thought it would be a good opportunity. It's the season of fallen leaves, so I started by collecting various leaves and nuts that have fallen in the nearby park and our small garden.-I did Crafty Patti's eco-printing as a reference.


I started the project based on these materials.


Now let's take a quick look at the general eco-printing way. I have prepared these goods; this binder is not always necessary but I made a board and a bolt to sandwich papers and leaves and watercolour papers.


Next I have prepared 1/3 cup of Alum mixed with 1 cup hot water added cold water to fill the two each 1.5 litres bottles. And rust water which made with PaperArtsy Rusting Powder.


Brush each piece of paper with Alum water. (Alum is also used medicinally as an astringent so it can be drying to your hands.)


Continue to layer paper and the greenery and flowers. Then a cardboard paper layer on the top and bottom of the watercolour paper.


Then put it in the binder and tighten the screw and place it in the cooking tray on a wire rack. In this case, if you have a large pot, that's fine.


The brick has been placed on top of the binder as a weight. Add the rust water and onion skin to the remaining alum water before heating. Bring to a boil and simmer over low heat for 45 minutes, turn off heat and add 1/2 cup white vinegar to help set the colour, Let it sit overnight.


These were the result of this eco-printing. These were some that worked well and some that didn't, but each of them seemed to be useful for something. In addition to watercolour paper, I also used thin washi paper, but since it was placed at the top of the layer, the colour was dyed but I couldn't print it in a clear shape. I think it would be nice if I could print well on washi, so I'm thinking of trying it at another opportunity.


I made three tags, card and a shadowbox using the eco-prints. I will show you three tags first.


I made the first tag using geranium leaf paper as the background. Print Gwen Lafleur stamp set 32 (EGL32) motif on piece of the eco-printing paper with Tsukineko VersaFine Clair (Acorn) then it tore off and hung it behind. I also painted with PaperArtsy Fresco Finish Chalk Acrylic- Slate on the A4 white card, and the Cyrillic stamp of Gwen Lafleur stamp set 31 (EGL31) was embossed with white powder, cut and layered.


The second tag.


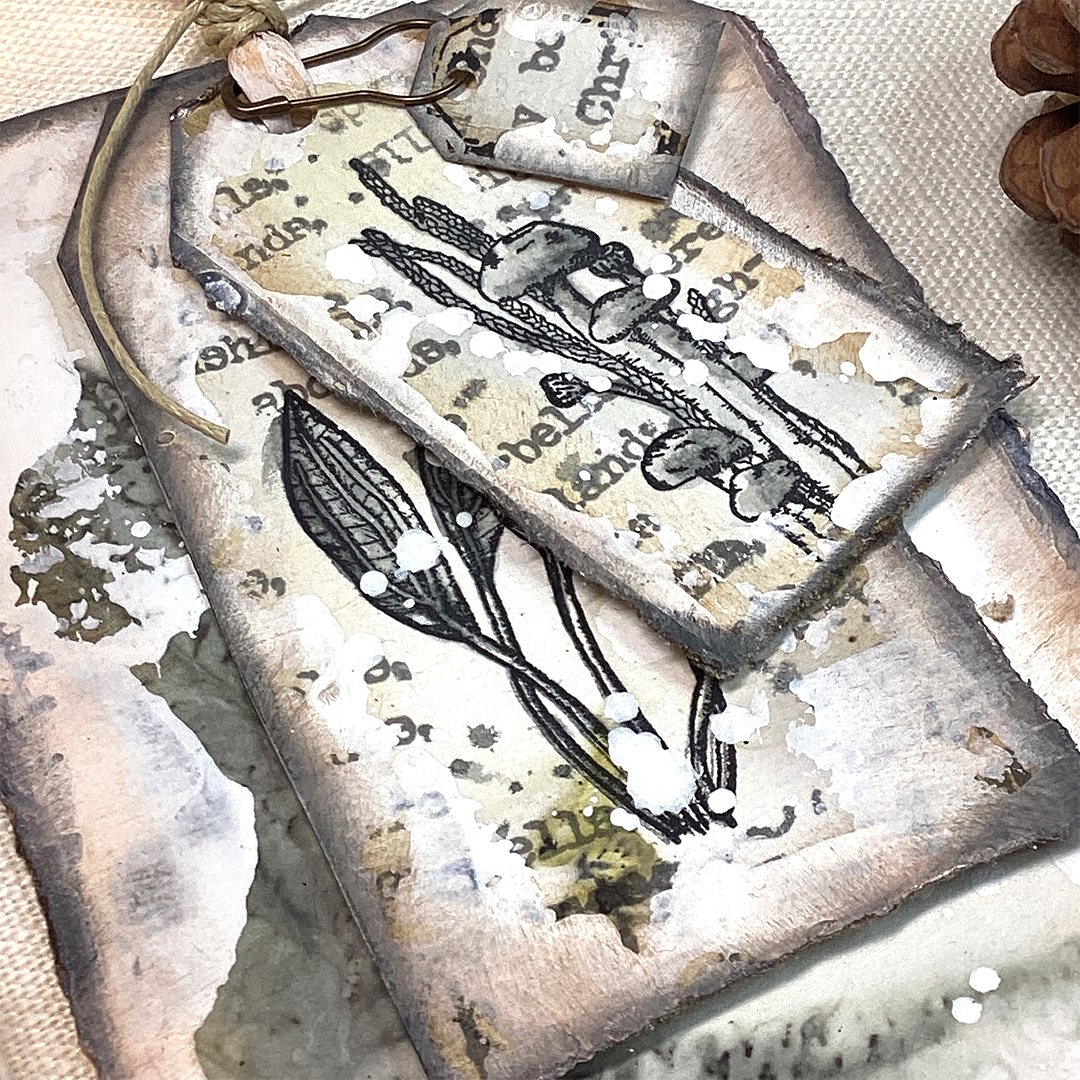
The tag is decorated with three small tags using Gwen Lafleur stamp sets (EGL30 and EGL31against the fern eco-print paper background. The eco-printing paper had the colour of rust water and onion skin that was enough but I added PaperArtsy Fresco Finish Chalk Acrylic - Snowflake to make the motifs stand out. The quote 'Nature' is from Alison Bomber stamp set 21 (EAB21).


The third tag.


The background of this tag was a blurred eco-printing leaf shape, so I added PaperArtsy Fresco Finish Chalk Acrylic - Brown Shed and Toffee to create a natural colour. Also I used the  EGL31 Islamic pattern with Tukineko VersaFine Clair (Acorn) and (Morning Mist) printed on it.


The small leaf part of eco-printing was made by cutting a circle for the focal point, and the EGL32 cell stamp was attached behind the circle.


Small EGL31 circles stamp and EAB21 quote stamp were attached the tag.


I used this eco-printing paper for the card but still don't know what the leaf is. 😅 I decided on this because the flow of leaves little resembled a fir tree.


I wanted to add some variation on the card background, I painted Brown ShedToffee and Little Black Dress and used Snowflake around them to keep the colours down for the paper. On top of that, I wanted a little more variation, I added the Cyrillic stamp of EGL31 with mixed white and gold embossing powder, and randomly stamped the same stamp with Tsukineko-VersaFine Clair (Morning Mist). I cut the circles out of three small leaves eco-printing paper and used Ranger Distress Oxide- Vintage Photo and Distress Ink- Black Soot around them. As you can see in this picture, I originally planned to arrange the quote like this, but the relationship between the circles was unclear, so I abandoned this plan.


Some close up photos of part of the tags...


Finally I made the shadowbox thinking about using this theme Paper, Seeds and Twigs. 


I painted the small circles with PaperArtsy Fresco Finish Chalk Acrylic- Caribbean Sea and Sea Glass on a A4 white card. Stamped EGL32 cell patterns using a stamp positioner, coloured it with a colour pencils and stamped again.


Cut out the cell patterns and drew highlights with a white gel pen.


After arranging the motifs, I found that colours and shapes were OK, so I glued them onto the black cardstock.
 

I measured the inside dimensions of the box, shaped the paper, cut it and pasted it inside the niche, scoring so the interior box walls also were covered.


For the outside of the box, I painted PaperArtsy Fresco Finish Chalk Acrylic- CaramelToffee and Brown Shed onto the A4 white card and stencilled PaperArtsy Stencil by Tracy Scott (PA234 and PA322) with Vintage Lace then I stamped EGL31 stamp with Tsukineko-VersaFine Clair (Acorn).


Once the paper was dry I embossed the EGL32 cell patterns with Ranger embossing powder Gold, Silver, white and Liquid Platinum and cut to the outside dimension and pasted it on.


Now I have created the world inside this using the materials of the theme Paper, Seeds and Twigs. For the rose leaves shape I cut and coloured it a little.


I then laid out collected materials leaves, acorn, rose hip, small pine cones and a twig in this box and splattered with Snow Flake.


The great thing about this project was that my husband and I enjoyed walking around a few parks looking for leaves and nuts and enjoying the wonderful autumn season. The second pleasure was the joy of opening the eco-printing, not knowing how the collected leaves would turn out, and the happiness of working on the organic base. This time I realized the way to create something is to go into nature and take in the smells of the air, the sounds and colours that change with the four seasons without thinking about anything. Thank you for giving me this opportunity of the Topic.
Thank you so much for visiting.
Etsuko xxx


Facebook: Etsuko Noguchi
Instagram: Pixienest
Pinterest: Etsuko N