
2019 Topic 17: A Vintage Christmas

This is a cracking idea for a vintage look to your Christmas decorations! I can imagine a tree full of these! ~ Leandra
Hi everyone, it's Carol with you today, and I'd like to share with you a couple of Christmas Decorations.
I wanted the look of old decorations that had maybe been tucked away in Granny's attic for a while carefully wrapped in tissue so the colours were still vibrant but the whole thing has a faded look about it. With this in mind I decided to use unbleached calico as my fabric instead of my usual smooth white cotton and the roughness of this gave the look I was after.
The Fresco paints worked a treat on it and gave good colour while not smothering the detail on Lynne Perrella's lovely images. I don't have many of her images as I always thought they were too fussy for my style but I am now a convert and I will now need more stamp storage and a bigger Christmas Tree for all the decorations I want to make and as I mention at the end of my post, think of the bunting.

As
the images are fairly symmetrical I just paired them up back to back
when sewing together and stuffing so this way they look good from either
side.

Using the Stamps LPC016 and LPC020 I stamped my images in Black Memento ink, I tried a few different brands on my Calico and this gave the best image.


I coloured in my image using Fresco Paints in shades of Terracotta, Gold, Peachy Keen and layered Red Lipstick over Glacier Ice to give the mottled affect on the neckline. I edged the wings with diluted Infusions in Golden Sands, just dabbed around the edges with a paint brush.


This one I used Fresco's in shades of Gold, Glass Blue, and Red Lipstick to colour them.

I added small bells by sewing jump rings onto the bottom of the doll.

I stamped the greeting from LPC016 onto shrink plastic and attached it to the bottom of my decoration with jump rings, adding bells for that Christmas jingle.
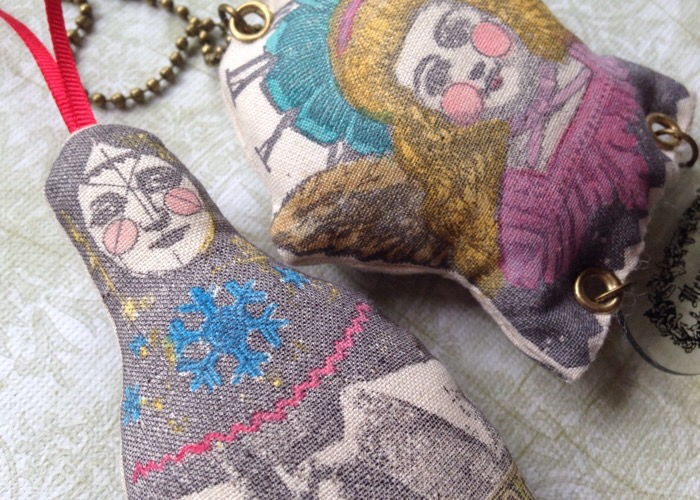
I used eyelets to attach the hanging chain and shrink plastic decoration to my Angel.

This
is my favourite of the two decorations, simply because there was more
open area to colour in the image and I liked having enough area to add
eyelets without interfering with the image too much. I did find with the
eyelets it was best to punch a smaller hole and then add a larger
eyelet to it. I found using the right size hole for the eyelet gave it a
tendency to fray around the hole, but a small hole and an over-sized eyelet kept it all tight. I did have to wriggle the eyelet in before closing it and it was fiddly but it worked the best.
Having done these now I think that the Russian doll would make a lovely row of bunting and if I get time to do a row of fat stuffed dolls for above my fireplace before Christmas I will share the photo on the PaperArtsy People Facebook Group. You can join here.
Thank you for your visit today and I can be found at the following places.
Carol xx
Blog: http://www.gingernonutsbits.blogspot.co.uk/
Facebook: https://www.facebook.com/GingersAlteredBits/
Instagram: https://www.instagram.com/gingernonuts/
Pinterest: https://www.pinterest.co.uk/gingernonuts/


6 comments:
These are gorgeous Carol. Love them. So clever!
These are so pretty, what a beautiful Victorian Christmas tree you could decorate with these :) And all handmade, perfect!
These are lovely, Carol . Such a inspiring seasonal way of using Lynnes stamps designs . You have really brought them to life . TFS x
These are fantastic, Carol - 3D Lynne Perrellas... just brilliant.
Alison x
Brilliant, brilliant!
Lucy x
What a beautiful dolls, lovely work with Lynne's stamps. xx
Post a Comment