The Creative Laboratory - Infused {by Autumn Clark}
Autumn's on a slippery experimental slope here,
and vaseline is the product she's been stamping with - yes! You read
that right! Read on to find out how she used it with infusions! Mind
Blown.
~ Leandra
Hi everyone, it's Autumn Clark from SewPaperPaint with
you today, and I'd like to share with you a new technique that I'm over
the moon excited about, stamping with Vaseline. Yes, you heard that
right, stamping with Vaseline or petroleum jelly.
Many
of us have learned that Vaseline can resist paint to create layered
effects. This got me wondering if it could be used as a stamping medium
to resist ink. And folks, let me tell you, YES it can! Follow along
and see just how easy it can be...
Lately, I've fallen in love all over again with PaperArtsy Infusions. I recently did a post (HERE)
for a PaperArtsy stockist on using Infusions mixed with embossing ink
to create embossing resists. This got my wheels turning at other new
concepts for using Infusions. The current topic, Creative Labs, was all
the push I needed. Today I'm working with the new Seth Apter stamp designs, which are primarily background types of stamps, the perfect accompaniment to Infusions.
My
goal was to determine if Vaseline could be spread in a thin layer and
used for stamping, and if it would repel ink as a result. I find the
gel plate is a good surface for spreading out mediums with which to use
for stamping. So I brayered a glob of Vaseline onto a portion of my
small gel plate to use as an "ink pad". But first I wanted my resist to
show through a secondary color, not just plain white. I colored my
panel by spritzing water onto my kraft mat and adding a generous
sprinkle of Golden Sands Infusions
into the water. I then dipped my panel into the wet powder until I
covered it completely. I sprayed the panel with water where needed to
help it bleed. 
As demonstrated in the video HERE, I used the same dipping method over top, this time with The Sage Infusions. The resist effect worked right off! I let the panel partially dry, then gave it a zap with a heat tool. Here's the magic: the heat tool melts the Vaseline into the paper's surface so that it virtually disappears, no shiny or gooey residue.
Note*
I cleaned all of my tools & stamps with dish soap. Note, any paint
on the gel plate will be washed off. It can be conditioned with baby
oil after if needed.
Of course, I was eager to try another color palette...
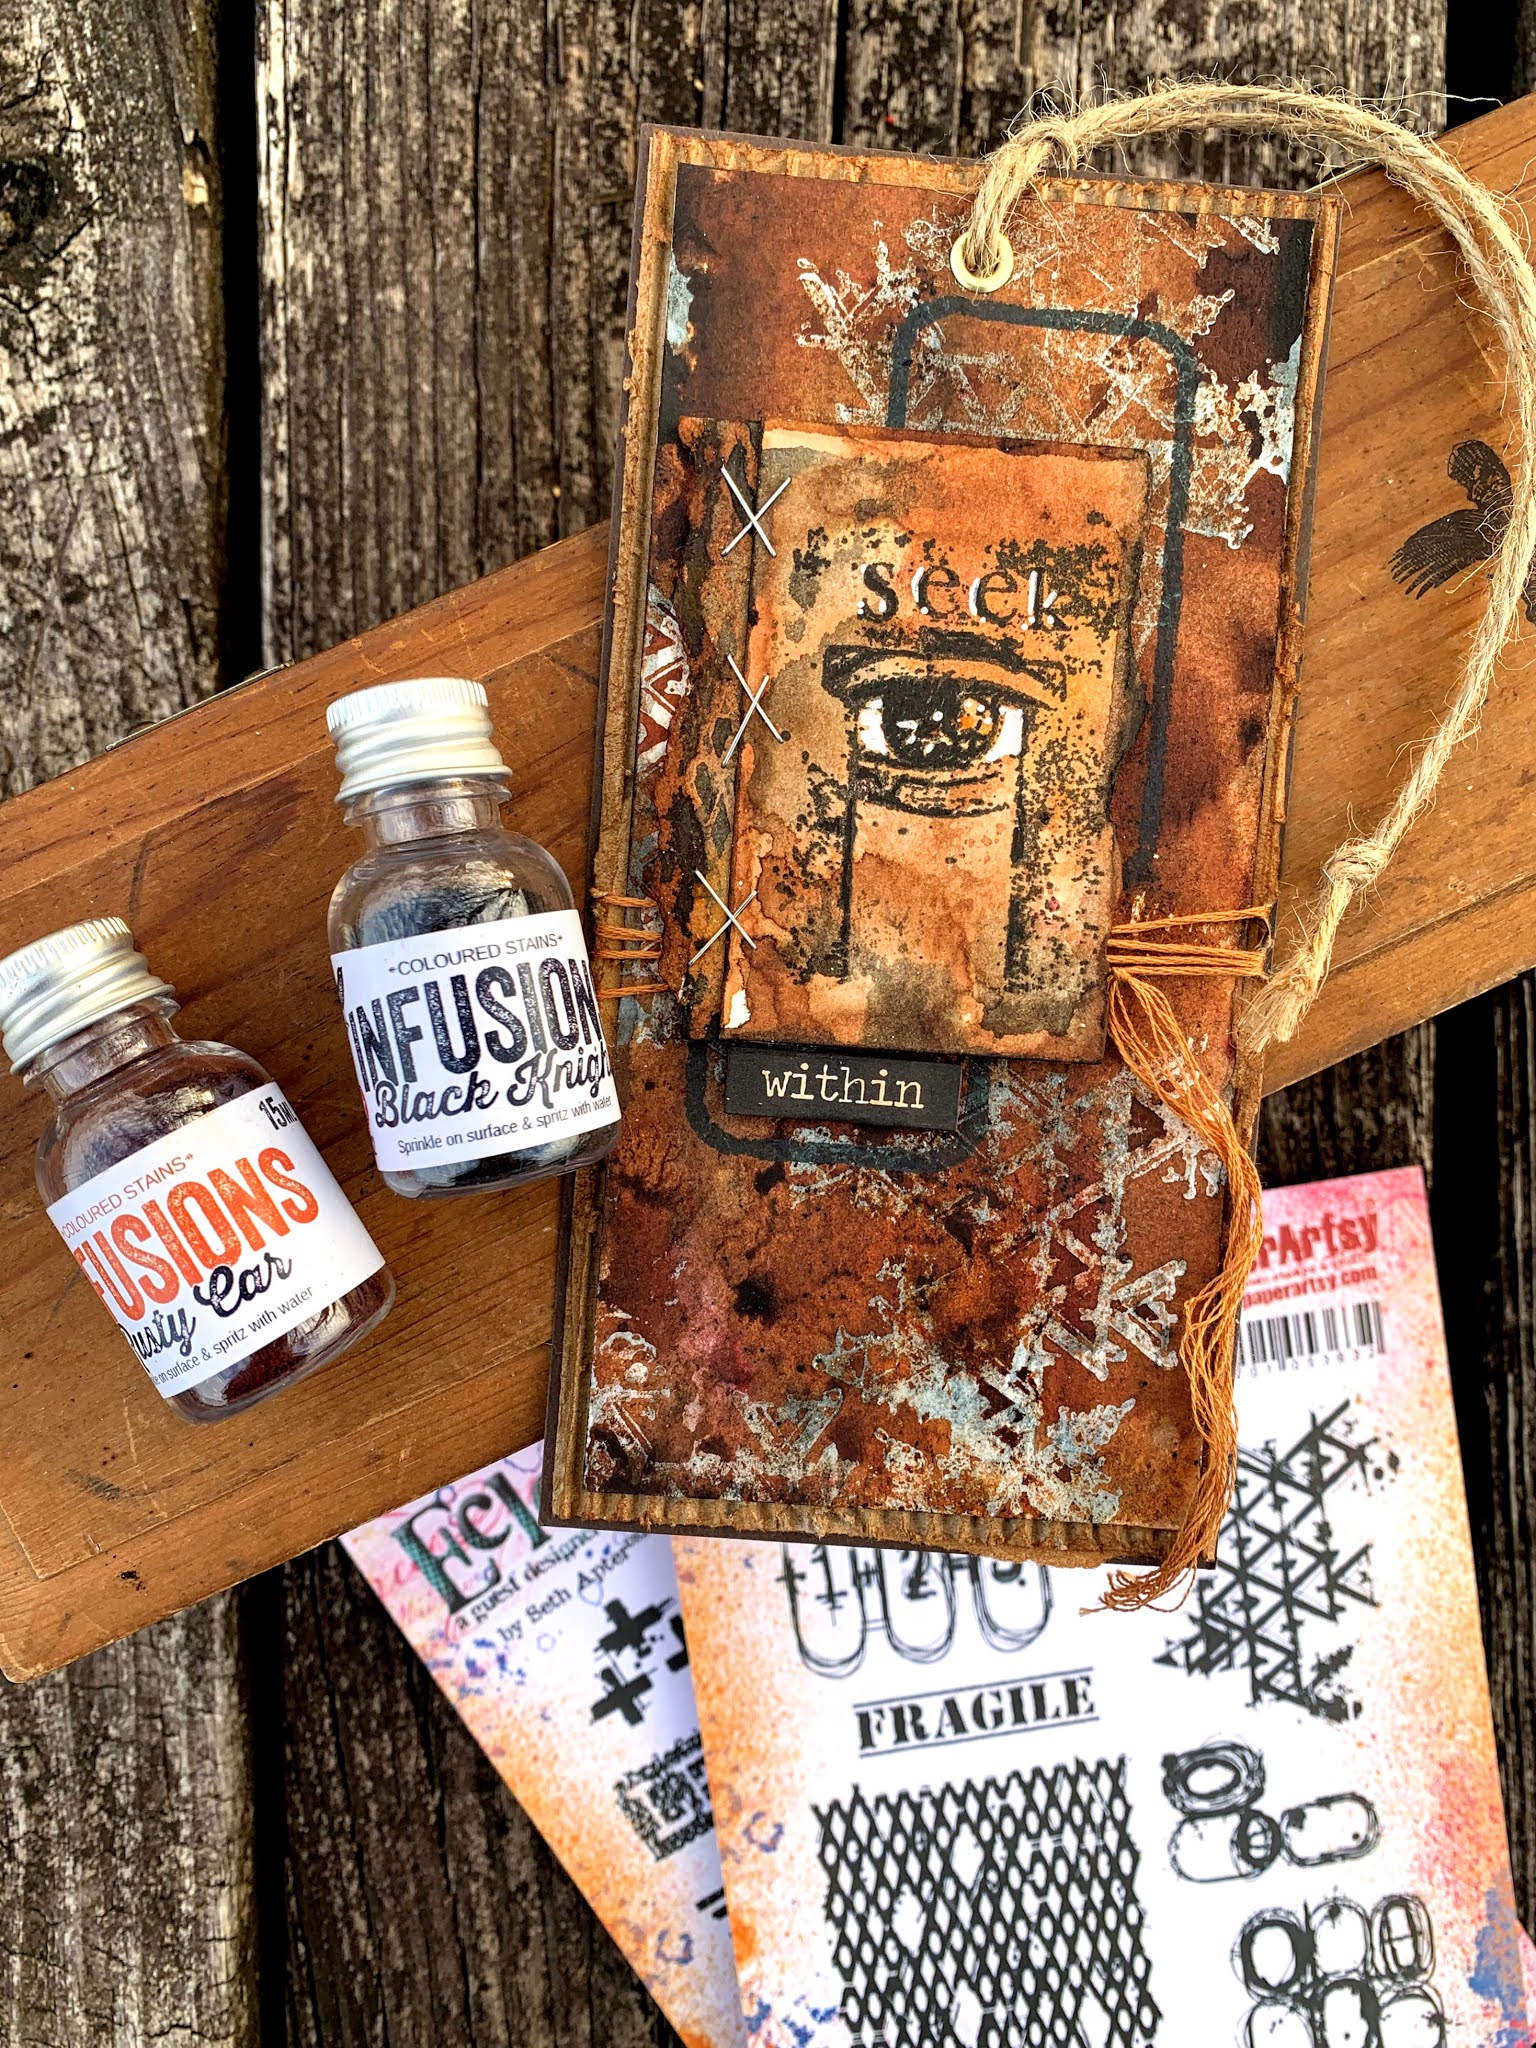
It was hard to stop once I got going. I wanted to try a really unusual color combination next. I first used Black Knight, and atop of my resist (my personal favorite) Rusty Car Infusions. The
colors worked perfectly together. Tip: You can control the richness of
color by the amount of water you add. Here my black is rather grey,
but I kept the rust very saturated. This is all due to the amount of
water vs. pigment.
I inked a small mop up panel with both colors, then stamped PaperArtsy Eclectica {Seth Apter} Collection Mini Stamp 39 (EM39)
onto it. I added white details with a paint pen. The little piece
sticking out beneath the staples was made by using Rusty Car first then
Black Knight over my resist, the opposite of my main background. You
can flip flop the technique to achieve a wide variety of pieces with
which to collage. I like to add water to what's left on my kraft mat
and mop up a shade lighter.
I
carefully cut out the words from the label stamp in set ESA19 with an
exacto knife. This is one of my favorite ways to make the most of my
stamps. When you cut apart stamps, like I did in "Find Your FIRE" and
the label, you can use them separately but still piece them together on
your block to have a whole stamp again. I knew I would use the frame
stamp a ton and think cutting is easier than masking in the long term.
Do you ever cut your stamps?
I
hope the topic of Creative Labs has inspired you in more ways than one,
mainly to make some experiments of your own! I encourage you to try a
new technique at least three times, seeing how you can alternate colors
or mediums each time. These variables will often produce new and
exciting results. Not only did I discover a new way to use a household
staple here, I actually discovered that I enjoy dipping panels into
Infusions (the way I do with ink pads) more than sprinkling it onto my
panel. Why have I never done this before? Perhaps because I haven't
given myself enough time to experiment.

If
really hope you'll try this technique! Please leave us a link so we
can ogle over your creations. I will try to add another video tutorial
to my IGTV this week so you can see this process in action. Thanks for joining, Autumn
Blog: SewPaperPaint
Facebook: Autumn S Clark
YouTube: SewPaperPaint


12 comments:
This is super cool autumn!!’ Great idea for sure!!!
Absolutely amazing - such cool artsy layered effects - there's a mystery and a beauty to the Vaseline stamping. A wonderful collection of laboratory experiments, Autumn - bravo!
Alison x
I love it!! Fantastic technique and I'm definitely going to try one I get my hands on a vaseline pot! 🎉 And your pieces look absolutely beautiful Autumn!! As always they are a joy to see. Have an awesome week! Big hug!!😘😘😘
I absolutely love the experimentation of this, I know I will be trying both aspects of your creative lab work! The SEEK within piece is stunning, I will breaking our my rusty car infusions today! Thanks for sharing!
Superb outcome Autumn xx Love all your samples using the infusions and Vaseline xx Brilliant results/stamp sets
Take care
Annie x
awesome technique!! I'm going to try it too. =)
Fantastic inspiration Autumn! I bought some Vaseline a while back because I had seen someone do some resist work with it and wanted to try it out, but I haven't got round to it yet. Your post has further inspired me to try it out. Great to know that it works with stamps too! ~ Stef
Great technique Autumn!x
Very cool idea! Thanks for sharing your process.
Very cool idea! Thanks for sharing your process.
Very cool idea! Thanks for sharing your process.
It's gorgeous... just watched your YT video on the technique .. wow!
Post a Comment