Showing posts with label ZN37. Show all posts

Tuesday, 14 September 2021

2021 Topic 11: Twinkle Twinkle with ZA {by Tracey Springer}

  2021 Topic 11: Twinkle Twinkle


From a hidden gift card holder to a clever concertinaed tunnel card, Tracey is showing some great kinetic cards washed down with a hearty sprinkle of stars in many forms. Using some of her favourite fun Zini characters, she's twinkled her way to the stars!

Hi everyone, it's Tracey Springer with you today, and I'm here to share a concertina card with a tunnel front for the 'Twinkle twinkle' theme. While I had lots of stamps and an idea it took a while to find my MOJO and know where to start. I ended up with something I really love and explored lots of techniques along the way!


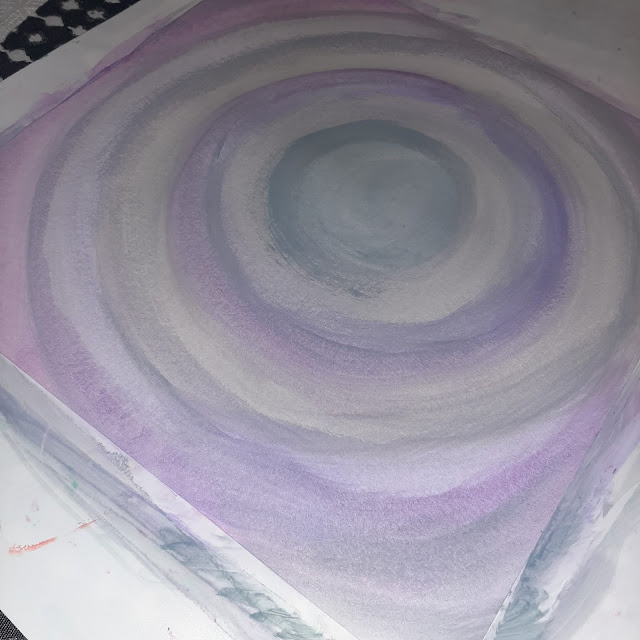
To start I picked out some of my favorite Fresco Finish Chalk Acrylic colours and started painting a very watery wash of circles on my foundation page.


By this stage, I knew I wanted to try a tunnel card (or my version of one) using lots and lots of stars. I cut my page into 5x4in cards and die-cut 3 various-sized circles out of them. I inked the edges with distress ink to really build up more colour (my night sky is certainly not your regular sky lol!).


Then came the fun with Grunge Paste, Fresco Finish paint 'Elephant' and silver stickles. I mixed it all together to give me some grayish silver stars when used with Stencil PS018.


I absolutely love this big star from JOFY 08 set, I colored it in various shades of yellow Copics and decided to add bling and sew it into a shaker star! Really love how it came out.


I then stamped, Copic colored, and cut out lots of stars from these sets: 


I started playing with how and where everything was going to go. To add 'Twinkle' I gold heat embossed some of the stars. I played with the placement of the circle tunnel and well, I ended up liking it better when it was offset.


The circles still needed something more to make them 'pop' so I painted a thin rim of Fresco finish 'Byzantium' (one of my go-to colors!)


Then it was onto gluing on stars and assembling layers with foam tape.


Once I had all of that I knew the perfect Zini character to add (yet another of my favorites!).


By this stage, I decided why not make it a tunnel card with a concertina back?? So I painted a strip on the back of my foundation page with Fresco Finish Lilac FF11.


And wanted to add a surround of stars with Fresco finish 'Byzantium' and Stencil PS018 - It didn't quite look like I imagined (as I watered it down too much and it bled under the Stencil and I smeared it) BUT...I could have started again but instead I played around with it and added inks and gold embossed stars and my 'oops' became an 'actually I like this'.


To finish it all off I added white pen around some of the stars, added lots more cutout stars, these gorgeous word stamps from Eclectica EEG20.
I really couldn't resist adding another fab Zini character, and a pocket slot to hold a gift card.


I really hope you have enjoyed this as much as I did creating it! Run with your ideas, no matter how crazy they seem, make your 'oops' become a 'wow'.

Excuse the two different colours of my project...that's what happens when you take pics in two different lights, oops!

Have fun, take care,
Tracey xx


Instagram: @tracey_Springer


Monday, 10 June 2019

2019 #9 Arty Wood Blocks: Monster Mash with Zinis {by Chris Dark}

2019 Topic 9: Arty Wood Blocks


Chris brings these new lovelies our to play in a wonderful project which includes them all, of course, they are up to their tricks, as you would expect of any cheeky Zini! THe expression Elena brings to each face is absolute gold! ~ Leandra

Hi everyone, it's Chris Dark with you today, and I'd like to share my project for this lovely new topic of arty wood blocks.

These are a lot of fun to create and there are so many ways to customise them! I didn't have any suitable fixings to embellish my block, I think they look better if they have legs of some kind and something on top to finish it so I popped in to the local DIY store. I bought some inexpensive small plastic door knobs, I used one for the top simply glued on with PVA. I also found some little plastic spacer fixings which made great feet, it's surprising what will work and cost very little.

As soon as I saw Elena's fantastic new collection of Zini's (stockists list at the foot of the post here), I thought of Dr. Seuss; green Eggs and ham, the cat in the hat, the Grinch etc., so I knew I would be using bright colours and straight away colour blocked my ATC sized Wood Block with Fresco Finish Chalk Acrylics.


I painted each side of the wood block with a different bright colour after first giving it an all over coat of Snowflake. I worked with SlimedBananaChinaCherry RedBeach Hut, Midnight,  and Bubble Gum. The China isn't visible as it's on the bottom of the blockin theory I could have left it white but at that point I wasn't sure which side would be at the top. I stamped in a similar colour of ink over the top for a tone on tone effect.using the monster sayings stamp set ZA12, I'm fond of the sentiment 'whatever it is I didn't do it' which reminds me of my boys when they were little, apparently Mr. Nobody was the culprit when any naughty stuff happened in our house :D! 


Here is my favourite! Love those goofy teeth and big eyes and he looks as if he's about to jump up! He is stamped onto Smoothy Card then coloured with Inktense and coloured pencils. I knew straight off that he would be swinging in the air above the block suspended on a strip of acetate.


It fitted that this little chap on the left would be looking up at the elevated character, he's my second favourite! 


I love all the expressions, Elena is the master of giving her characters personality! This chap is just taking it all in his stride! 


This is the opposite side of the block and we have the adoring couple looking at each other. 


Suspended above, the cat is looking unamused or may be he knows he's about to take a tumble!!


I had some chipboard hearts in my stash which I painted and then covered in glitter glue. This chap is just smiling at it all going on :D.


May be she's reaching up to catch the cat above!  I added dots of paint around all the edges, it seems to be my answer when something doesn't feel quite finished.


I had to think about how I photographed as I took my pictures outside and there was a lot of reflection on the acetate strips so I bent the acetate and character down behind the block, photographed it then turned it round to the other side and repeated the process.

It's always happiness working with Elena's images, these new Zini's are just lovely and I wonder which are your favourites? 

I hope you'll join in with us this fortnight and create your own arty wood blocks, there are so many ways you can go with them as you'll see from all the projects to come. 

Thanks for joining me today and I hope you have a creative week!

Chris x

Blog: www.sketchingstamper.blogspot.co.uk
Facebook: https://www.facebook.com/christine.dark.7
Instgram: @chrisd999
Pinterest: https://uk.pinterest.com/cdark4163/