Showing posts with label JOFY08. Show all posts

Tuesday, 14 September 2021

2021 Topic 11: Twinkle Twinkle with ZA {by Tracey Springer}

  2021 Topic 11: Twinkle Twinkle


From a hidden gift card holder to a clever concertinaed tunnel card, Tracey is showing some great kinetic cards washed down with a hearty sprinkle of stars in many forms. Using some of her favourite fun Zini characters, she's twinkled her way to the stars!

Hi everyone, it's Tracey Springer with you today, and I'm here to share a concertina card with a tunnel front for the 'Twinkle twinkle' theme. While I had lots of stamps and an idea it took a while to find my MOJO and know where to start. I ended up with something I really love and explored lots of techniques along the way!


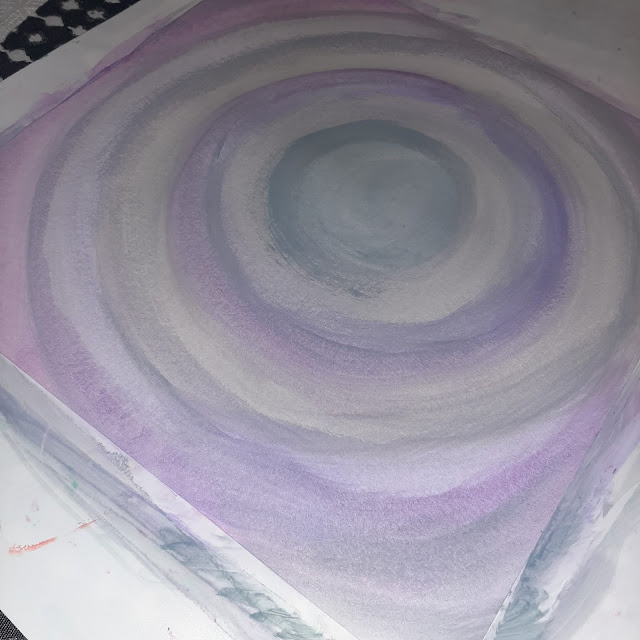
To start I picked out some of my favorite Fresco Finish Chalk Acrylic colours and started painting a very watery wash of circles on my foundation page.


By this stage, I knew I wanted to try a tunnel card (or my version of one) using lots and lots of stars. I cut my page into 5x4in cards and die-cut 3 various-sized circles out of them. I inked the edges with distress ink to really build up more colour (my night sky is certainly not your regular sky lol!).


Then came the fun with Grunge Paste, Fresco Finish paint 'Elephant' and silver stickles. I mixed it all together to give me some grayish silver stars when used with Stencil PS018.


I absolutely love this big star from JOFY 08 set, I colored it in various shades of yellow Copics and decided to add bling and sew it into a shaker star! Really love how it came out.


I then stamped, Copic colored, and cut out lots of stars from these sets: 


I started playing with how and where everything was going to go. To add 'Twinkle' I gold heat embossed some of the stars. I played with the placement of the circle tunnel and well, I ended up liking it better when it was offset.


The circles still needed something more to make them 'pop' so I painted a thin rim of Fresco finish 'Byzantium' (one of my go-to colors!)


Then it was onto gluing on stars and assembling layers with foam tape.


Once I had all of that I knew the perfect Zini character to add (yet another of my favorites!).


By this stage, I decided why not make it a tunnel card with a concertina back?? So I painted a strip on the back of my foundation page with Fresco Finish Lilac FF11.


And wanted to add a surround of stars with Fresco finish 'Byzantium' and Stencil PS018 - It didn't quite look like I imagined (as I watered it down too much and it bled under the Stencil and I smeared it) BUT...I could have started again but instead I played around with it and added inks and gold embossed stars and my 'oops' became an 'actually I like this'.


To finish it all off I added white pen around some of the stars, added lots more cutout stars, these gorgeous word stamps from Eclectica EEG20.
I really couldn't resist adding another fab Zini character, and a pocket slot to hold a gift card.


I really hope you have enjoyed this as much as I did creating it! Run with your ideas, no matter how crazy they seem, make your 'oops' become a 'wow'.

Excuse the two different colours of my project...that's what happens when you take pics in two different lights, oops!

Have fun, take care,
Tracey xx


Instagram: @tracey_Springer


Monday, 29 October 2018

2018 #19 Tissue Paper: Christmas Cards with JoFY {by Anneke De Clerck}

 2018 Topic 17: Tissue Paper


Here's a bright and cheery idea for you using Tissue Paper. Our new topic is kicked off by Anneke with a powerful colour punch. And topped off with some wonderful JoFY toppings! Love it! ~Leandra
Hi everyone, it's Anneke with you today. I'd like to share with you a set of Christmas cards I made. For the backgrounds as well as for the focal images I used tissue paper. I transformed leftover pieces of white tissue paper into colorful paper by painting it with Fresco Finish Chalk Acrylics. I made collaged backgrounds and did some stamping on the painted tissue paper as well.

I've chosen to work with JoFY stamps. It was hard to make a choice because the JoFY collection includes lots of beautiful Christmas stamps.


I cut 3 panels (10,5 x 15 cm) out of Smoothy Regular A4 White Stamping Card to work on. I folded cards from the same paper and adhered the finished panels to the top fold cards using double sided tape.


I started by painting white tissue paper with Fresco Finish Chalk Acrylics Hey Pesto, Granny Smith, Bubble Gum, Bougainvillea, Blah Mange, Banana, Mermaid, Caribbean Sea, Teresa Green and London Bus.


I looked through my stash for matching tissue paper as well. These are leftover gel prints from a previous project.


Next I cut the tissue paper into small squares and rectangles. There was no measuring involved.


With all those bits and pieces I created collages. I randomly adhered the tissue paper to the panels using Golden Matte Medium. I applied a coat of Matte Medium on top of the finished collages to seal the surface.


These are the 3 finished collages above.


To create the focal images I worked with stamps from the JOFY27, JOFY20 & JOFY08 stamp sets.


To make the tissue paper stronger and more workable I glued it on scraps of Smoothy Regular A4 White Stamping Card. After drying I stamped the focal images on top using Archival Ink Jet Black and cut out.


 I added marks to the background by scribbling with a white pen.


I used the paper-piecing technique on the tree. I worked with blue, green and orange tissue paper. 


For a festive look I decorated the tree with mini pompoms.


I'm very fond of the new JOFY 68 stamp set. 


The large words look awesome on cards in my believe.


I love making Christmas cards in non traditional colors but I'm sure these collaged backgrounds would look lovely in red and green too!

As you can imagine the surface of the finished collaged panels was a bit bumpy. When it comes to stamping text I'm aiming for a crisp outcome. That's why I used my MISTI to stamp the text.

Tissue paper is very forgiving to work with. Small imperfections on the tissue paper disappear after collaging and the wrinkles only add more interest to the background.

Keep in mind to avoid adhering dark colored tissue paper on the areas where you want to stamp text. I made a small mistake by adding a dark blue piece of tissue paper on the right side of the card. After stamping the word 'Christmas' on top I noticed a small part of the word wasn't visible anymore. Luckily I could fix that mistake because both the card and the stamp were still in position on the MISTI. I glued a light blue piece of tissue paper on top of the dark one and restamped the word.

I hope I could inspire you to grab some tissue paper yourself and start creating. Don't forget to link your project to the challenge page. I can't wait to see what you come up with!
To join our challenge and win a PaperArtsy voucher:

Simply make something arty relevant to the topic, and link your creation from any social URL (eg. Instagram, Pinterest, Blog Post etc) sharing your original make to this challenge page.

The current topic link Topic 19: Tissue Paper will close 17:00 (London Time) Sunday, 11th November 2018, and the winner will be announced 2 hours later at 19:00.

All links go in the draw to win a PaperArtsy voucher Please make sure we can contact you as a prize winner - it helps if you share your contact info from the platform you opt to use.

Good Luck! If you have any questions, don't hesitate to ask!