Showing posts with label Darcy. Show all posts

Friday, 21 October 2022

2022 Topic 14 : Colour Study: Triads {by Autumn Clark} with Darcy stamps


Hi everyone, it's Autumn Clark from SewPaperPaint with you today, and I'm here to share with you a couple of circle canvases I created using a selection of stamps designed by Darcy.  


Because I am totally addicted to stamping, it will be no surprise to you to find out that I've experimented with just about every substrate known to man, ha ha!  I've spent a good amount of time pondering project types and trying to think of a new surface on which I could experiment and for today's project decided upon circular canvases.  These 6" canvases I thought would be something fun and new, which could easily be recreated as 6" circular cards if desired.  Because at the end of the day, let's face it, we often make more cards than anything!


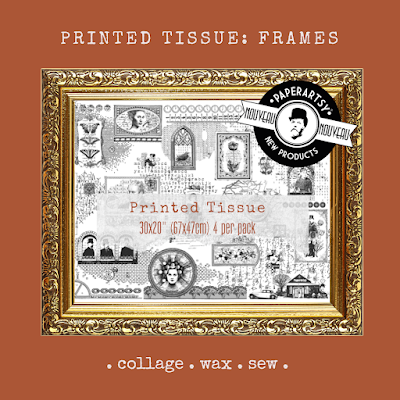
It so funny that almost every blog post I write here at PaperArtsy starts off with me saying how I adore starting any project by choosing my color palette, yet for a color topic I did not start with color!  Go figure!  I wanted to show how easily this type of project could relate to ANY colors you choose from the PaperArtsy Fresco Chalk Acrylic range or ANY that you mix from them.  I was also super excited to play with the brand new PaperArtsy Printed Tissue: Frames.  I adhered some torn strips to my canvases with Mod Podge so some of that yummy pattern would seep through the finished painted product.


At this point any colors imaginable would have made a beautiful canvas, but I decided to pick some primaries that would give my finished projects an earthy feel.  I chose PaperArtsy Fresco Chalk Acrylics in Space Cadet for my blue, London Bus for my red and Caramel for my yellow.  I did not have access to a printer to print Leandra's fabulous color wheel, which you can find in the PaperArtsy People Facebook group files HERE, so I had to draw my own with a sharpie marker.  I must say, my favorite portion of my color wheel was the analogous portion starting with the olive green, then Caramel, then pumpkin, then rust.  Mixing up random colors will always result in happy accidents.   


For the Triads color scheme, I first chose to play with the selection below, a dark plum, deep teal and the richest orange/rust.


With my palette mixed and my canvases dry, I was ready to get some color down!  I applied my orange to the top of the canvas and sprayed water to let it drip down, trying to focus the dripping around the stenciled stems.  When this was mostly dry, I turned upside down and repeated that process with my teal.  I blotted with a towel as needed to try to keep the colors from dripping too far down.  Once the base colors were dry, I gave a good splash of my third triadic color, plum.  I also continued to spritze my entire mixed palette with water so the paints didn't dry too quickly.


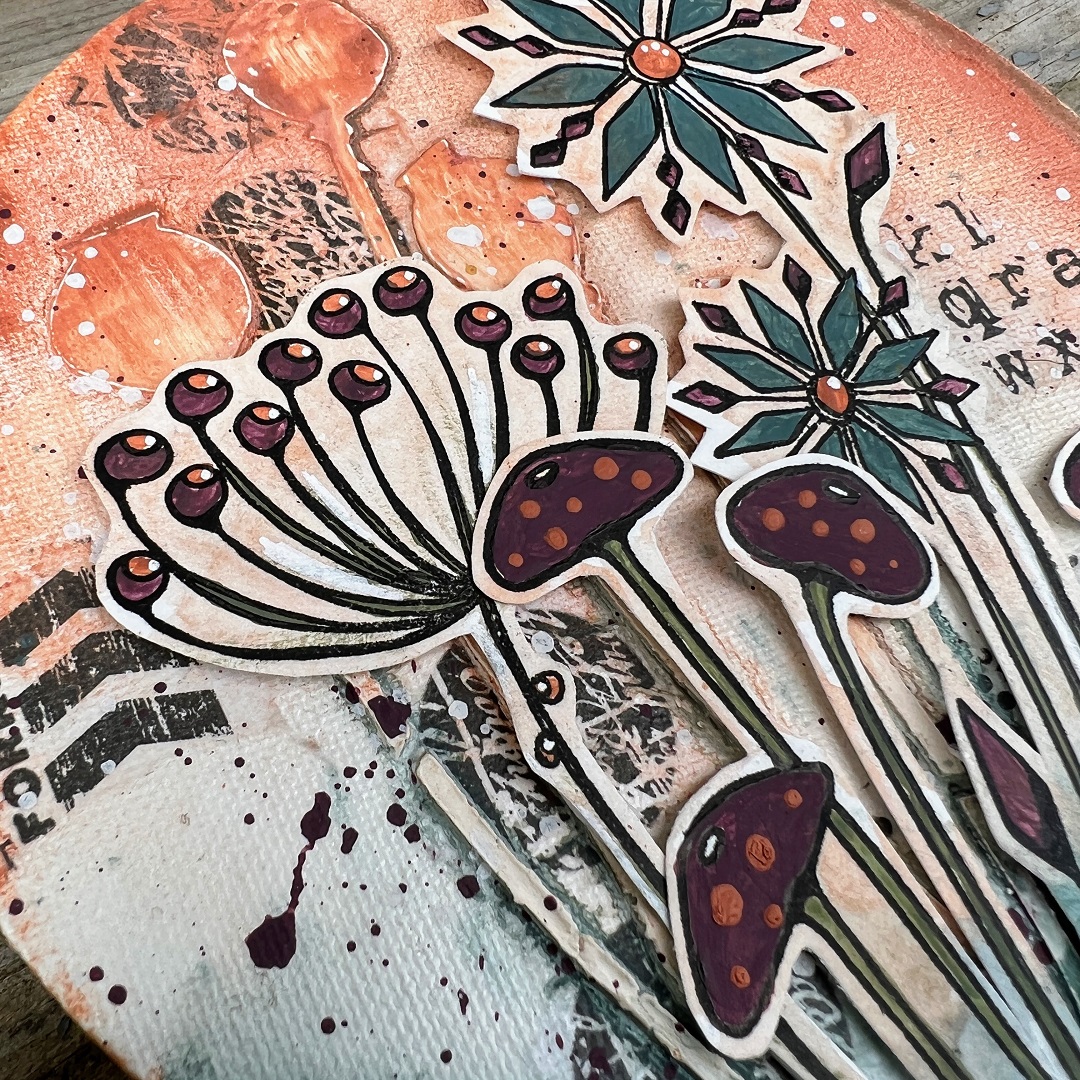
Once I was happy with my canvas background, I moved onto adding my focal elements.  I chose PaperArtsy stamp sets (by Darcy) EDY12 and EDY09.  I used my stamp positioner to stamp the flowers, then painted them with my chosen mixed Fresco Chalk Acrylics, then repositioned the stamps into my platform and restamped to get keep all of the detail.  After they were painted, I added a very light wash so I could cut them easily and the outlines would blend into my canvas background.  


I was so pleased with how well the images looked after they were mounted onto the canvas!  Because stamp set EDY09 is so open, I was afraid of how this would work, hence the background wash and excess in the cutting.  But it worked a charm.  


My favorite detail is the PaperArtsy Printed Tissue peeping through.  It adds just the right amount of grunge to these fun flowers in my opinion, but with the light Fresco wash over it, is toned down just enough.
 

I've said in plenty of my posts how I always choose floral images that have both an open and closed design, whenever possible, because it is the perfect balance.  The mushroom stems look so good paired with the open flowers because of this contrast.  
 

And with any color scheme, you can always pick main players.  For this panel I let plum be the sidekick and teal and rust be the stars, but plum still adds the perfect amount of contrast to complete the triadic scheme.  
 

With one more canvas ready and waiting, I decided to go with a second triadic color scheme and chose the lighter variation of the colors I used for my first piece. 


For this panel, I focused on the larger mushroom from set EDY12.  I completely switched up my background colors too, so you can see the difference it makes using the lighter orange as the sidekick color and the lighter teal and lighter plum as the focus.  


I did add a little more of the orange in this panel, with the additional leaves at the bottom.  


I even added some to the mushroom caps by dipping a skewer into my paint and making the dots with it.  The fun of these color challenges is to play and see what mix works best for you and just how much of each color to add to your finished creation.  


I hope these little canvases have inspired you today.  It may seem daunting to mix up your own palette, but trust me when I say it is a joy!  You will learn so much about color theory by mixing colors yourself and seeing first hand how one color affects another.  And by all means, I hope you will decide to paint some flowers and make some arrangements of your own.  I've shown just two options, but truly the possibilities are endless.  Just take some time for yourself and have a play.  One final thought, do make the most of your mixed up paints!  You can scape them onto your gel printing plate and pull a quick print, or you can use some to paint the reverse of your PaperArtsy Printed Tissue to use for future projects.  


I look forward to seeing what you come up with!
Autumn


YouTube: SewPaperPaint
Facebook: Autumn Clark
Instagram: @sewpaperpaint
Pinterest: SewPaperPaint

Friday, 10 April 2015

Spring 2015 #3UP {Red, Grey, White, Black}

3UP is a feature we run at the conclusion of each semester. We highlight the creativity of our blog and PaperArtsy fans who follow via various social media.The #3UPpers volunteer blind, are given a brief. This time they were asked to work with a specific colour palette and at the same time, incorporate one of the themes explored on the blog of the last 6 topics.

A reminder of those topics:
1. Fragile Papers
2. Shiny Stuff
3. Paint
4. Miniature Art
5. Deconstruction
6. Grunge Paste
Each night this week, Leandra has asked one of our regular bloggers to curate the evening. As you are probably aware, #3UP falls in the middle of 2 shows and PaperArtsy has a team at both: Ally Pally on April  11-12, and Version Scrap in Paris from April 9-12, so the administrative assistance is very much appreciated!

Hi everyone Darcy here, curating day 5 of a fabulous week of #3UP posts. It was my task to choose tonight's colour palette: Red, Grey, White, Black. When Leandra asked me for a colour scheme, these immediately came to mind. I am an 80's girl, and back in the day, red and grey were everywhere. I love the very graphic feel of these 4 together: in some ways hard to control as they are each so dominant. I was excited to see what my 3uppers would create.  

Leandra gave me a randomly selected team from all the applicants, and they are each focusing on some of the themes we have explored on the blog this semester. Let's see what the 3 people up tonight suggest you could do. Enjoy!

First up it's Kate Vansuch from Every Day Needs A Little Glitter
My first guest this evening is Kate, do go and take a look at her blog where you will find some great mixed media pieces combined with lovely watercolours. There are lots of nature themed pieces and I love the way she does trees. This technique has transferred brilliantly into miniature art for tonight. 

Kate says: 
I am a Hospice nurse and mother of 3 who finds art to be therapeutic. I am inspired by the world around me-relationships, nature, emotion. I chose miniature art because I enjoy having limited space to express myself and I think diminutive objects are unique because a lot of the detail has to be imagined by the observer.


I used gesso, water color pencils, acrylic paint in Bright Red and Black, Retro Flakes, and water color paper for the birch trees.  


Lace and cardboard are the border and an old playing card is my canvas.
Kate. 

Next it's Sue Butler from Scrumplescrunch

My next guest is Sue, I was blown away looking on her blog. So much inspiration, layers,textures, journals,art dolls, you name it and Sue does it.. and does it beautifully. Go and visit, there is something to inspire everyone over there. Tonight Sue has chosen the theme of paint. 

Sue says: Hello, I am Sue  and I live in New Zealand.  I have been blogging for 5years, but I have been using my hands for a variety of crafts for many years. All are self taught, through initially books and now the internet. I love the process of learning new skills, and my ideas are formed by my innate curiosity in everything around me; another word for this is nosey! I am inspired by colour, the challenge is the ability to give a new design to what already exists. 
I cover many genres, from Shabby Chic to Mixed Media, there is a nothing more satisfying to me than getting my hands all dirtied up with paint;  I see it like feeding myself to the point of bursting! Blogging allows me to share my ideas and make connections, which is key to my creativity.


​ I often include stitching in my work along with fibres, as I believe Art should be touched, I encourage this in my designs by using tactile elements.


​I also enjoy layering and fussy cutting.
More details can be found on how I made this on my blog.
Sue. 

Finally it's Catherine Johnson from Inky Fingered Cat

My third guest tonight is Catherine, if you visit her blog you will see that Catherine is a prolific crafter/blogger. From journal pages to fabric projects and all kinds of inky pieces, Catherine's pieces are diverse in style but also use of supplies. Tonight Catherine is using the grunge paste theme and also the shiny stuff theme. 
 
Catherine says: Hi Catherine (aka Catiecuddles) here. So pleased to bring you my texture and shiny theme for this semesters #3UP.  I chose texture (altered grunge paste) because I love creating things that have depth in them, and shiny because who doesn't like a bit of bling, even when creating something grungy? 

I combined layer upon layer using, texture paste, stencils and stamping with ink and paint to make my little hanging plaque.  Circles are my thing at the moment... Don't seem to be able to finish a piece without adding them somehow.  May have gone a tad overboard on the circles in this case, but love how they worked overlapping each other and with different finishes.


The shiny finish was provided by using treasure gold, glossy accents and glitter glue.  I softened the plaque by trimming the wire hanger with yarns and ribbons - some of which were also shiny although it was difficult to get that to show in a photo.


I love the final piece, and the only thing I think I would have done differently was to try and add some stamping into the texture paste circles before they were dry to add a different finish to those circles... Hindsight is of course a wonderful thing, but hey I love it nonetheless!


Well, three very striking pieces and all in my favourite colour scheme. I feel thoroughly spoiled. I adore Kate's tiny cardinals perched in trees. Sue's layered,butterfly canvas is so striking with perfect finishing touches of stitching. Finally, Catherine's texture piece just needs to be touched. I too love circles, these call to me. I know that this piece is going to be a gift and I am sure her friend will adore it. 

Many thanks to all three of my guests, curating these ladies has been an absolute pleasure. please do visit all their blogs and say hi to them. 

Remember the challenge for the  current Blog Topic of Altered Grunge (or any kind of Texture) Paste is still open until April 12th, you are Welcome to link your creativity here until 17:00 that Evening, Winners will be announced 2 hours later at 19:00. 

Wednesday, 4 March 2015

2015 #4 Under the Microscope {by Penny Nuttall}

2015 Theme 4: Miniature Art

Hi everyone Penny here, joining you this evening with a microscopic look into the world of miniature art. I first started to experiment with Darcy's wonderful new stamps when I was happily asked to take part in her new product launch, and was inspired by the theme of "Cabinets of Curiosities". 


I discovered that it is very simple to stamp using Jet Black Archival Ink onto glass microscope slides (clean the slide careful with a soft cloth to remove dirt and greasy fingerprints!). Leave the ink to dry, or if you are impatient like me, use a heat gun.


Choose a selection of sizes of slides and images. I used Eclectica EDY12 and EDY13,


...but all the images in this collection are brilliant for this.

The next step is also inspired by something popular with the Victorians...painting in reverse!

This backward technique requires a bit of forward thinking :) You now paint over your stamped image using Fresco Finish Acrylic Paints and a small brush, letting each layer dry, in the order you want the colours to be seen when you finally turn the slide over.


When turned over all the stamped details are revealed. Detail the edge of the glass with a metallic gold pen.


Now to make the display.


For each slide, paint a cotton reel with Fresco Brown Shed, stamp the word labels on copy paper.

Glue short lengths of matchstick on the top of the reel leaving a gap of TWO glass slides thickness.

Back the painted slide with a matching plain one (to protect you art work!) and clip together at the top with a mini bulldog clip, then add this to the stand, with a bit of clear glue in the groove.

Why not remind yourself how you can make more microscope art on Darcy's launch blog.

I hope you enjoy making your own mini curiosities.

Bye for now,    Penny.     cuttingmycoat.blogspot.com

I loved the samples you made for Darcy, but these are very cool too!! Yes Darcy's stamps do look a bit like microbial organisms, you have latched onto a funky mini display! Thankyou for sharing this great idea with us!! ~Leandra

We would love you to join in with challenge #4: Miniature Art. 

Perhaps one of our guests has triggered an idea you might like to try, or perhaps you have other mini pieces of art you want to explore, whatever you decide, we'd love to have you join in our fortnighly challenge on this topic and link up your creativity HERE. 

All links go in the draw to win a £50 voucher (includes freight cost) to spend on products of your choice from the PaperArtsy online store. The Fresco Paints link will close 17:00 (London Time) Sunday, March 8th, winner will be announced 2 hours later at 19:00.

Wednesday, 4 February 2015

NEW {2015} PaperArtsy Products: Eclectica - Darcy Wilkinson

Hi everyone, Darcy Wilkinson here to introduce my newest stamps. 

First up, it's the introductory video from Leandra...


Tonight I'm going to show you a few samples I have made with the new stamps, and I have a couple of other people who have joined me to show you their ideas too, more of that later.

First, here is an explanation of how I came up with these designs, the story behind them...

I have always loved pattern and texture, whenever I am out and about  I can be found taking photos of rusty metal railings, the gaps in the ironwork or bridges, windows, walls...When it comes to nature, my first love is trees. I am fascinated by the texture of bark, and the patterns in tree rings. 


Just look at these stunning rings and especially the cracks spiralling outwards.


I was never very good at science at school, but I clearly remember looking through microscopes at the cells in plants. I found them beautiful, and plant microscopy has attracted me ever since. How can nature be this clever, this creative?


In museums and art galleries I am drawn to the ancient rocks and minerals, the striations formed over time are quite mesmerizing.

So these were my starting point, circles, spirals, repeating patterns, but how to fit those into something that somewhat resembles a flower?... well maybe a flower from outer space! i sat and doodled shapes, patterns, and real flowers. One image leads to another, happy accidents happen...


Emails and texts start to fly back and forth, not all images make the cut... you will be happy to know something with a freaky eye in it did not make it through lol Before I knew it they were done, and then the wait begins... till they arrive at my house like this. 

It is always so weird, exciting, surreal to see them transformed into rubber. I stroke them for a while before allowing them to get inky. 


So here they are...

The A5 stamp sets...

My son thinks the border on the right looks like Celtic runes ( he is an archaeologist) , he thinks the next set should be inspired by ancient history?


EDY11
In this set, my favourite part is the stem on the largest flower, an odd choice you might think... but when I look at it I see not just a flower stem, but a border, or  a frame, It is super skinny so it can be bent on your acrylic block to make beautiful curves... I have even used it to make letters. 
EDY12
I just love the starry background stamp on this one, use it for dandelion clocks, texture, or small flower heads like daisies.. stamp in white or yellow and they become stars. The stamp at the top (rings with dashes) was inspired by the Van Gogh painting 'Starry night' I love his brushstrokes and use of markmaking. The phrase is one I made up years ago, it has stuck with me and I am so pleased to see it on a stamp. 
EDY13
This plate has a definite spikey feel to it, the arrow shaped leaf, the chevrons, spikey grasses and the alien spikes on the flower head. My favourite stamp has to be the leaf, depending on the colour used, it can be a leaf or petals... if you extend the stem then it becomes a small tree. 
EDY14
These are the minis, and you will definitely see the tree rings represented here. Along with Alfie the owl and Wilbur the Chicken King. I just love EM11, these can be kept as a group, or cut the heads and use them as flower centres or buttons. I am really looking forward to using EM13 for all kinds of journalling spots. 


So lets see what can be made with these...

Project One: Drawers by Darcy using EDY11, EDY12,EDY13 and EM09

I started with a set of wooden drawers, and as I was using some translucent paints I gave the drawers a coat of gesso first. This solid white base enables the colour of the translucent paints to be bright and true.  On the bottom half I used, Guacamole, Tinned Peas and Hyde Park.. on the top I used Beach Hut and Inky Pool.

Using coordinating Archival ink, I stamped the small background stamps from EDY11 and EDY13 onto white tissue paper, and used this to line the drawers. 

This is one of my favourite techniques when using fiddly stamps, or stamps with small areas that need colouring. I colour my substrate first, in this case tissue paper. it means you can add a pattern with stencils and then stamp over that. I added extra shading with Fibralo pens, these are translucent and allow the colour and pattern from underneath to show through. 

I used this technique to stamp the border from EDY13. 

I used the same technique on tissue to create the mushroom from EM09 for the side of the drawers. .

I used almost all of the flower heads to create the pediment. First I painted some smoothy card in greens, yellows, oranges and blues then went crazy stamping the flowers and leaves. I also stamped the text from EDY11. The text was glued on hinged card to the top of the drawers and all the flowers and leaves piled up around it. 


Project Two: Tea Cup by Darcy using EDY13, EDY14, EM13, and EM14

I first made the cup and saucer by applying papier mache over a real china cup and saucer. It was then painted and crackled before being decorated with the leaf stamp from EDY14. ( Stamped onto tissue and then glued to the cup and saucer)

This could be  a lovely gift, for a birthday or Mother's Day.. especially when filled. I made this tag using the flower from EDY13 and Alfie the Owl from EM14. The corrugated card adds great texture over the brayered background. 

I also added  this little pouch made from painted tissue paper. Inside is a teabag, you could also include chocolates or a wrapped cookie for a really sweet gift. The journalling stamp from EM13 works perfectly here. 

As a finishing touch I added the bottom part of the double bird house from EM15, this is hanging from the cup handle. 


Project Three: Duct Tape Bag by Darcy using EDY12, EDY14 and EM15. 

What do you get if you combine 2 rolls of duct tape, a piece of broken jewellery and some paint.stencils.stamps?... well a bag of course!

I made the basic bag first, entirely from duct tape. This is incredibly shiny tape, so I added 2 coats of matte medium, and then added Fresco paints. 

I brayered more paints, added some stencilling (Seth Apter stencils), more paint and then I stamped the notepaper from EM13 and the text from all 4 of my large plates. I also masked off the centre of the 'Van gogh' stamp and just stamped the dashed outer rings. 

Then on more duct tape I stamped the large flower head  and leaf from EDY12 , and on a separate piece the leaf from EDY14. The base colours are Fresco paints, topped with liquid pearls and a white posca pen. 

Here is the finished bag, I am super excited by this. I think it's really cool, and it will be my summer bag this year... As it is a 'designer' bag it needed a little tag, so that is make from, yes you guessed it, more duct tape and stamped with EM15. 


Project Four: Big Haired Mermaid by Darcy using EDY11, EDY12, EDY13,EDY14

A launch wouldn't be the same without a 'big-haired' girl, this time our girl is a mermaid called Miss. Selena. 

I began by blending lots of the brand new limited edition paints using the black side of cut n dry foam. over this I added a little stencilling. 


Then I stamped the grasses from EDY12 and EDY14 to complete the background. I blocked in the mermaid again with new limited edition paints. The hair is Banana and Tangerine Twist, the tail is Caribbean Sea and Jade. 

Here you can see I have blended out 3 areas of paint. I like blending into wet paint with a contrasting colour, you have to do this quickly as Fresco paints do dry quickly. once dry I stamped the leaves and the pebbles. 

Here she is all finished, lots of layers and bright pops of colour. Do you see those strings of pearls in her hair? they are the pearls from the side of the heart on EM16.... I love to use bits of stamps. 
Starting next week on my own blog, I will be showing step by step instructions for all my projects shown here tonight, do pop by as there will be lots of posts and lots of photos. 

So, onto my guests for this evening, 3 wonderful  ladies who have added their fantastic ideas to the design melting pot. 

First up is Penny Nuttall her projects are always bright,bold and quirky. Here is what she had to say.

"Darcy's wonderful organic stamp sets put me in mind of a Victorian 'cabinet of curiosities', a collection of jars and slides in a display case of imagination. I don't normally work to a theme but......I can't stop!"
Specimen Jar 1
In this curious cabinet are images from stamp set EDY13, stamped in Archival ink on Smoothy card and painted with Fresco Finish Acrylics (Tinned peas, Pumpkin soup, Autumn Fire, Beach hut, Inky Pool and Orchid). I cut out the dome stand and background frame in Kraft card and painted and stamped in Brown Shed (my new fave colour...for this week!) and played around with the words.

Specimen Jar 2
The second collection of microscopic marvels is from EDY12. The dome is sponged round the edges with Beach Hut to give some glassy depth.I love layers (never quite manage flat!). Watch out for these microscope slides on a future PaperArtsy blog post.


Specimen Jar 3
I really enjoyed layering up all these elements, and again playing with the available text to create new phrases. The crisp white corrugate is a great contrast to the kraft card.

Specimen Jar 4
So much fun to be had colouring in all the shapes, done here with Fresco paints, but you could also use Fibralo pens.

My second guest this evening is Alison Bomber, a regular on the PaperArtsy blog, Alison is known for her layers and often vintage tones, so seeing her work with this colour scheme is so exciting. Her samples really pop!

"I can't resist book pages at the moment, and I loved the contrast between the old-fashioned text and Darcy's fabulous quirky images, so I really played on that..." 
Nature's Blossoms
This piece is created with EDY11.  You have bare book pages, and kraft card and then a hit of really glossy colour.  Lots of careful stamp positioning for this one - and it was perfect, but then I glued the panel down a millimetre out of place - grrrr!!  Love how the Gloss Glaze gleams in the sunshine though.

Wise Owl
This adorable little chap is one of Darcy's new minis - EM14 - and I've paired him with the words from EDY14.  I love how the translucent paint lets the book text shine through, and again there's a good coat of Gloss Glaze to catch the sun. I stamped in black and clear embossed the images, which makes painting them lots easier!

Spikey Flowers
This jumbo tag is made with EDY14, plus the quote from EDY11, all stamped in black archival.  The painted ones and the words were also clear-embossed for glossy definition, but the eggs on the kraft card were left "naked" to intensify the matte kraft look. I love those spiky flowers, and the stamp which could be a leaf or could be a tiny tree - it's doing duty as a leaf for me here, added to the stem of the large flower.

Envelope Trio
This trio of ATCs has a quirky twist - they're stamped and painted on little cash envelopes.  I did this with last year's release, I remember - in my brain the offbeat envelope ATC somehow fits with the offbeat look of the images from Darcy's crazy imagination! The stamps are a combination of EDY11, EDY14 and mini EM11.  Still working the glossy colour against the "naked" kraft and book pages, with some more colourful book pages providing the background.

Illuminated Jar
Well, my candle obsession continues...  I couldn't resist creating a 3D version of some of my samples, so I grabbed a helpfully just-emptied mayonnaise jar (it had to be a tall jar for these long elegant flower stems) and stamps from EDY11 and EDY14. 


Some of the stamping went a bit wonky, but I'm embracing quirky imperfection, and rather than a close-up (though there are some of those over at Words and Pictures of course), I'm giving you one shot of it in the light - apparently opaque - and then one shot illuminated from within, which is when the magic really happens!

My next guest tonight is Anneke De Clerck, I just love Anneke's style, crisp, fresh and modern. Tonight, as ever, she has some wonderful ideas for you.

Patchwork card
For the background I painted coffee filters and punched squares out of the filters. I made a layered flower with the same paper. I covered the white buttons with washi tape.

Splattered Flower
I started by making a background with Grunge Paste, Gesso, Guacamole, Tinned Peas and Snowflake.  I also used a circle stencil (TCW) Stamped and painted the image in white to make it pop off the background. Added a few embellishments and some contrasting orange squares.

Mixed-Media Card
For this card I made a background with my gelli plate and Fresco paints. I used stencils from Tim Holtz and TCW. Stamped and layered the flowers on top, and added a word embellishment and some black details to the edges.

Blossom Tag
I coloured the flowers with Orchid, Spanish Mulberry, Pumpkin Soup and Autumn Fire. Did the sponging in the background with paint and a JOFY stencil (PS007). Adding some stitching details, and the words. 

Striped Chicken
I made strips out of painted coffee filters. The bird and leaves were stamped on old book paper.On the background I used a JOFY stencil (PS007)

Next up this evening I would like to welcome Miriam Grazier. Her samples, I think you will agree are just wow! bright and zingy and her enthusiasm for the stamps shines through. 

This is what Miriam had to say when she first saw the stamps. 
"When I first saw Darcy's new stamp sets I loved the possibilities that I could see.  I used them as flowers on my projects but thought they could be used as individual petals, teardrops, and even hearts.  I loved the steampunk look of them and all of the individual stamps and borders.  The one thing that grabbed me was the versatility of the sets as all of the sets work so well together - and as soon as I saw the new paints - it just screamed at me and I couldn't wait to get creating!"
Background 
I added tissue papers and borders to a blank journal page then painted over them in various colours from Lin Brown's new Limited Edition paints. 

Top Layers
I then added lots of stamped images in ink, paint and pencil until I was happy with the page. I love the  images and textures and just how the colour pops!

Card
The background for the card was painted in the same way as the journal.  I then stamped the leaves and coloured them in pencil, and further stamped images in paint. The main image was stamped onto a painted label then mounted onto foam pads and onto the card background. I love this quote....actually I have a thing for collecting quote stamps!  This was stamped in Archival.

Lastly, Leandra received this journal page from Lin Brown via email yesterday...she's been having a sneaky play with my stamps too! So its lovely to share this with you !

Didn't all mu assistants do an amazing job!!! I am beyond thrilled that they were on 'my team' this evening. A huge bearhug thankyou to each of them, for their inspirational projects. 

If you want to catch me teaching a class, then contact your local PaperArtsy stockist and encourage them to get in touch with me. I am situated in Middlesborough, so North of England is my area.

Otherwise, my blog is Art and Sole . and my Twitter is Darcy _UK_

I don't do a lot on Facebook but my stamps do have a page of their own. Darcy UK Eclectica  and I attempt to keep up with Pinterest

I really hope you are going to enjoy using these stamps this year, and I look forward to seeing all of your creations. 

Darcy x

Don't forget, Shiny Stuff was the PaperArtsy blog theme for the 2 weeks prior to the New Product launches. We have held the challenge open until Sunday night, Feb 8th. Link your art here.