Showing posts with label penny nuttall. Show all posts

Wednesday, 8 June 2016

2016 #11 Our House in Space {by Penny Nuttall}

2016 Topic 11: Our House


Hi everyone Penny here. Tonight I'd like to share with you a post about a rather unusual family in a very unusual house!

I recently came across a DVD box set of an early television series ( be careful before you admit to remembering so far back....) "Lost In Space". I think that is what gave me the idea for this contribution to the "Our House" topic.


It is very easy to make technique-wise....no complicated methods involved....but it took a lot of head scratching in the design department! How best to showcase Jo's happy robot friends. JOFY44.

Step One: I started with the "house", by cutting a basic rocket shape from an A3 piece of foam core board. Any kind of firm card or mount board will do. I covered it with some cheap silver metallic fabric, but metallic Fresco Acrylic paint would be just as good....


...and glued on bright coloured felt fabric shapes as background. If you remember the TV series you might also remember Fuzzy Felts?

Step Two: Next to add the window: 


and a distant planet in a glittered black sky ( recognise the stamp from JOFY09).

JOFY09
All the elements are stamped on card in black, embossed with clear powder and coloured with watercolour paints.


I layered the shapes onto felt (felt sticks to felt). At this point I decided that I would like to hang my space rocket on the wall, but I still wanted to be able to move the pieces around so I added a layer of card and a velcro dot to the back for extra stickiness.


Then a few finishing touches


Metal bolts and ribbon flames 


And a few plants and pets in the basement (Kim's Dellow's hedgehogs get everywhere!)


I have tried to make this project as small-child-friendly as possible, all the bits can be moved around with lots of possibilities for play and story telling. Or it could just be something happy on the wall for a grown up child (like me).

Why not take your own journey into space, maybe greeting card size.

Bye for now, Penny.

Squeal! I remember fuzzy felts, I loved them. I wonder if you can still get them? Your rocket fuzzy felt is superb Penny, absolute genius! How perfect are the Jofy robots! ~Darcy

We would love to see how you interpret this House topic by linking what you make to our 2016 Challenge #11: Our House, on this page HERE.
All of our bloggers love to see your twist on their ideas, particularly if you were inspired directly by their post. 
ll links go in the draw to win a £50 voucher to spend on products of your choice from the PaperArtsy online store. The Our House link will close 17:00 (London Time) Sunday, June 12th 2016. The winner will be announced 2 hours later at 19:00.

Friday, 20 May 2016

2016 #10 Stitch A-Doodle {by Penny Nuttall}

 2016 Topic 10: Doodles

Hi everyone Penny here.
Tonight I'd like to share with you this evening a post about doodling with your sewing machine to tell a story with your stamps.
I never can stay away from the sewing machine for very long, so when the subject of doodling came up it seemed natural to reach for some fabric and thread.I actually find it easier to draw with a needle than with a pencil....something to do with the spontaneity and the relative lack of control probably. So this doodle stitched triptych happened...
Part One.....


Kim's lovely stamp sets EKD01 and EKD02 once again inspired me to make this project, telling a happy story. 
Once upon a time.....


There were two little hedgehogs, stamped onto a post-it note and carefully cut out using a craft knife to make a stencil.


EKD01 


Their shapes were sponged on a background of natural cotton calico, using Fresco Acrylic paints, which make a great sealed surface for stamping.


The two little hedgehogs were under a tree, waiting for the juicy red cherries to fall....


The grass was cool and green, and the fluffy grey clouds drifted across the sky.....


The biggest hedgehog tried and tried, but he could not reach the cherries.

So he asked the little blue birds to help, and happily they obliged......


EKD02 


Thank you little blue birds. And they all lived happily ever.......

This is how the three hanging panels were mounted on foam board pieces, and then they were neatened on the back with a piece of card.


I hope you have enjoyed this little story and maybe will be inspired to create one of your own and get your sewing machine out, or alternatively add a bit of doodle stitching by hand.
Thank you for listening, Penny.


This is so adorable Penny, I love the doodled stitching. the story you have told is so lovelyi am glad the little birds helped out so that the hedgehogs could have their juicy cherry. ~Darcy 

We would love to see how you interpret this Doodles topic by linking what you make to our 2016 Challenge #10: Doodles, on this page HERE.
All of our bloggers love to see your twist on their ideas,  particularly if you were inspired directly by their post. 
All links go in the draw to win a £50 voucher to spend on products of your choice from the PaperArtsy online store. The Doodles link will close 17:00 (London Time) Sunday, May 29th 2016. The winner will be announced 2 hours later at 19:00.

Saturday, 26 March 2016

2016 #6 The Wide Mouthed Frog {by Penny Nutttall}

2016 Topic 6: Liquid Sculpting Medium

Hi again everyone, Penny here.
Tonight I was supposed to share with you a post about Powertex...but I didn't have any...
So I checked with Leandra and she said it was ok to use plaster bandage instead. But actually, I was still clueless about where to go with this, and the result is a bit whacky even for me!

Ever heard the expression "mad as a box of frogs"?


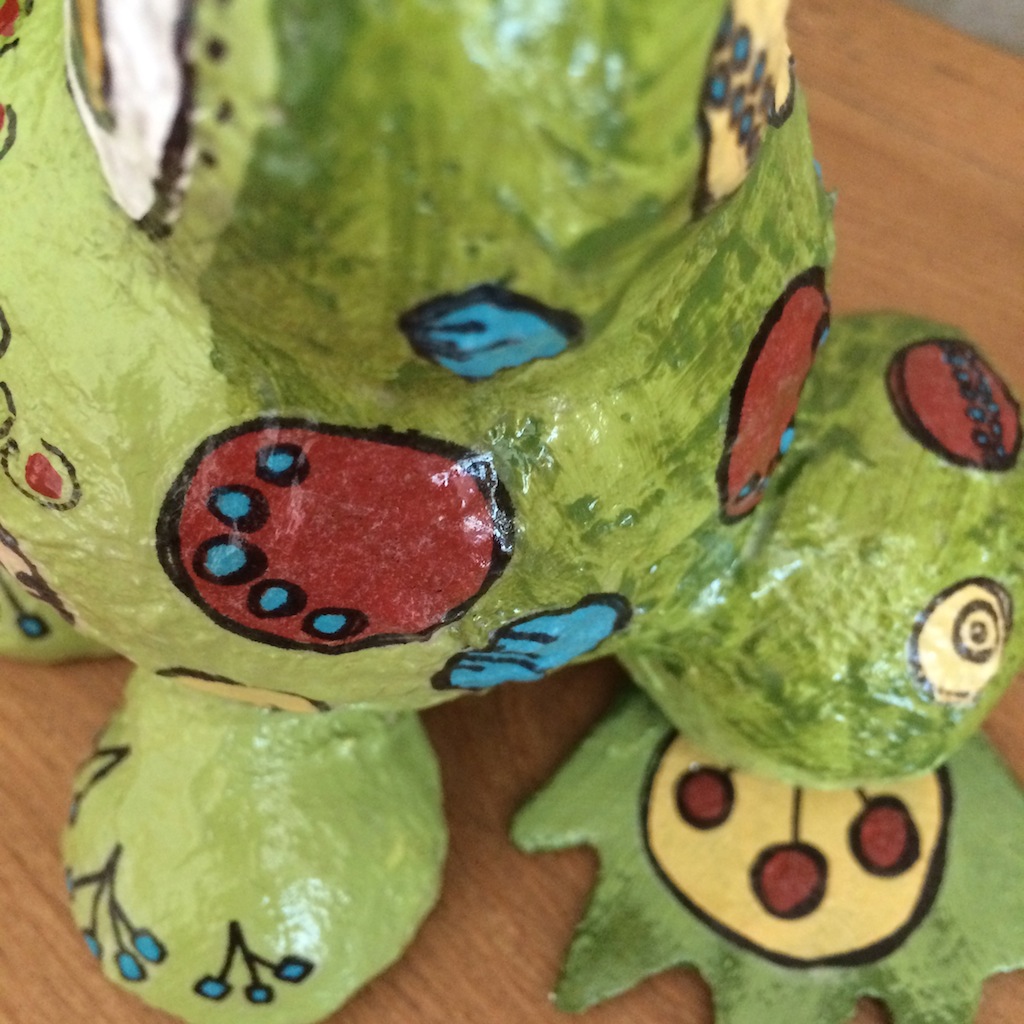
I looked round for something suitable to model with, to create a form to cover with the plaster bandage, and found some old polystyrene shapes (been there for years). I played around for a while, until Froggy appeared!


I loosely pinned the pieces together with straightened paper clips. Then the messy bit...ever worked with plaster bandage?


Modroc is an open weave gauze infused with plaster of paris. The plaster is reactivated by dipping the bandage srtips into water.


Top tip: use a disposable container for you warm water....I didn't want to pour it down the sink (blocked pipes, I worked that one out!) so my baking bowl is still sitting there with a solid lump of plaster of paris in the bottom. Good job I don't bake.


Easy going all the way from there. The feet are simple shapes in mountboard, covered with bandage. Granny Smith Fresco is opaque and a good base colour all over, then the translucent Hey Pesto for the mottled skin on his back.

I am totally in love with Kim's new stamps, EKD01 and EKD02, and saw straight away how to use them here.


 EKD01
EKD02

I went back to my favourite technique of stamping on tissue paper and painting on the back: it makes dealing with awkward lumpy surfaces really easy.I used Dolly Mix, Snowflake, Captain Peacock, Haystack and Brown Shed. 


Spots, eyes, toes and warts and all! and a nice shiny coat of gloss medium.


I won't bore you with the wide mouthed frog joke....


I hope you have enjoyed this amphibian ramble and are inspired to have a go (if you're tough enough!) with plaster bandage.I must hop off now (groans) and think of something for next time.
Bye for now, Penny. 

Oh Penny how much fun, this made me smile, almost as wide as your froggie. Kim's stamps are amazingly perfect for this. The combination of the robust modroc and the delicate tissue is a great partnership. ~Darcy 

We would love to see how you interpret this topic by linking what you make to our 2016 Challenge #6: Liquid Sculpting Medium, on this page HERE.
All of our bloggers love to see your twist on their ideas, particularly if you were inspired directly by their post. 
All links go in the draw to win a £50 voucher to spend on products of your choice from the PaperArtsy online store. The Liquid Sculpting Medium link will close 17:00 (London Time) Sunday, April 3rd. The winner will be announced 2 hours later at 19:00.
.

Saturday, 27 February 2016

2016 #4 Enjoy the Little Things {by Penny Nuttall}

 2016 Topic 4: Image Transfers

Hi everyone Penny here, with a post to share this evening on the subject of image transfers.

I have often used this method of transferring drawings onto canvas using a black inkjet photocopy, but had never tried a colour copy.....until now. The project developed step by step with no real idea at the start of colour or material choice, it just grew. More exciting that way!


The first step was to gesso a background piece of canvas board, (ooooo nooo not the gesso!). Thankfully I managed this without major carpet incident.


Next, the choice of photocopy: it needs to be an inkjet printed image as this type of ink is water-based. I applied a layer of matt medium to the canvas board and placing the image ink DOWN, smoothed it carefully and then burnished with the back of a spoon.DO NOT get any medium on the upper side of the paper.(Note: the image is reversed so allow for this when photocopying if it matters). It needs to dry thoroughly overnight.


When dry, I sprayed it with water and carefully rubbed the paper with my finger to reveal the ink underneath. Magic.


That's my boy!
To meld the picture into the background, I brushed on a generous layer of gesso around the edges, and stamped texture into it with Kim Dellow's circles stamp (EKD01).


Until this point I had not chosen a colour palette, but as soon as the lovely faded colours of the photocopy appeared, it was obvious......I picked the Fresco colours that matched and extended the edges outwards onto the canvas.(Dolly Mix, Dusty Teal, Coral, Granny Smith and Haystack), spritzing with water to blend.


Then the stamping. I love Kim's joyful, happy designs (EKD02). In keeping with the delicacy of the background colours, I thought.......vellum and white embossing powder.

Vellum does not like a lot of water, so I used the Fresco paint straight from the bottle, in some of the background colours.


AWWWW the little birds!


I collaged the cut out stampings. If you put the glue in little dots with a wooden toothpick behind the painted bits you cant see it :).
And finally...... "Enjoy the little things"


I intend to work more like this....not trying to think of an end result but just letting one step lead to the next. Why not try it?

Thank you for joining me, back again soon,
Penny.

Aww Penny I am love with this lil guy, so utterly gorgeous. You have done him proud with this wonderful project, a true keepsake. I didn't think Kim's stamps could get any better but using them on vellum has added a whole new look; combining the bold with the delicate. ~Darcy 

We would love to see how you interpret this Image Transfers  topic by linking what you make to our 2016 Challenge #4: Image Transfers, on this page HERE.
All of our bloggers love to see your twist on their ideas,  particularly if you were inspired directly by their post. 
All links go in the draw to win a £50 voucher to spend on products of your choice from the PaperArtsy online store. The Image Transfers link will close 17:00 (London Time) Sunday, March 6th. The winner will be announced 2 hours later at 19:00.

Wednesday, 21 October 2015

2015 #19 Thinking Outside... {by Penny Nuttall}

 2015 Topic 19: Faces

Hi everyone Penny here, joining you this evening not with a new technique... you have seen this way of using stamps for rock art in some of my previous posts... but more about going out, away from the desk, and taking inspiration from the landscape. 

I am always out and about with my boys (dogs) and it is really good thinking time. This week I decided to put rock art back on the rocks.


Look carefully and see what's hiding there! The 'faces' I chose to create for this topic just don't happen to have skin on them.


I stamped on tissue, selecting the parts of the images from Hot Picks HPHW05...


... which gives good clear skulls for cutting out, and then looked back through my other PA stamp sets for something bone like. It's great to mix and match and look beyond the obvious. The spine is from Eclectica ELB04....


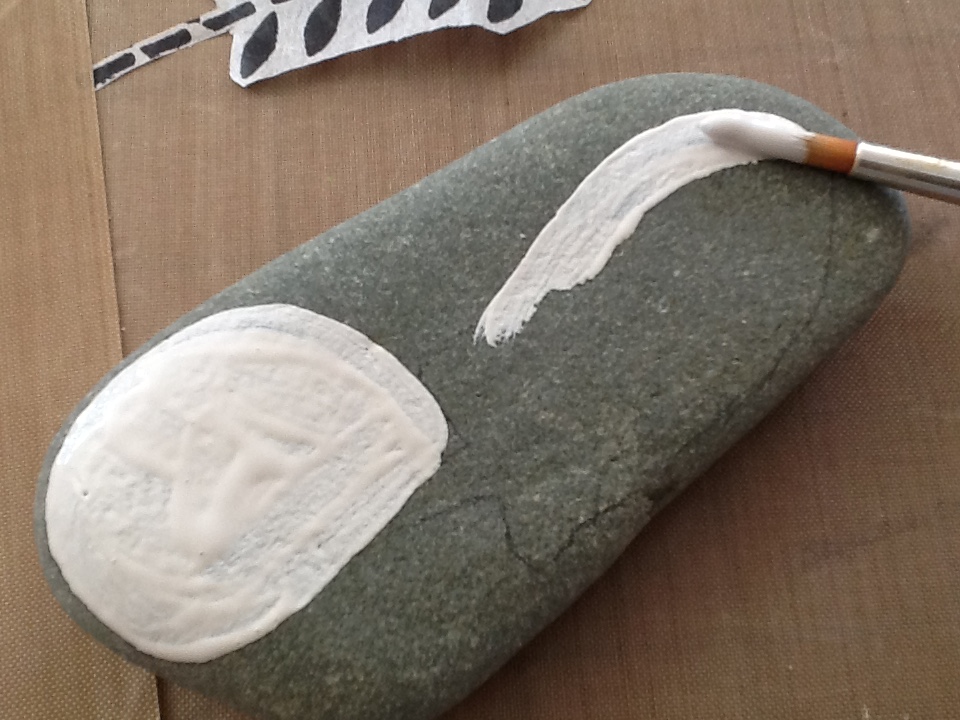
I selected a group of stones to transform, and placed the cut out shapes, drawing loosely round them, as a guide for painting with opaque colours of Fresco Finish Acrylic Paints.


(I used Chalk, Vintage Lace, Teresa Green and Concrete) and then applied the shapes using gloss medium.


They needed eyes...


...with a little bit of glazed Cherry Red Fresco (discontinued JOFY colour), try London Bus instead. Instantly alive. And of course a few grisly grave goods (I like a bit of textile and glitz).


Then it was time to take them out to their tomb in the rocks (fortunately no one was around during the photo session so I didn't have to explain my oddness)...


...and these guys looked great in the landscape.


I hope you feel inspired to leave your desk and take some thinking time in the great outdoors (before the winter sets in!).

Bye for now, Penny.
Blog: Cutting My Coat

Goodness Penny, you never cease to amaze with the hi-jinx you get up to! It could well have been a bit odd if you were spotted for this photo shoot! Loving the play on 'skeleton' leaves too! Thanks for a wonderful post. ~Leandra

We would love you to join in with challenge #19: Faces If you are inspired by any of our guests who blog with us over the fortnight, then please join in and link up your creativity HERE

All links go in the draw to win a voucher to spend on products of your choice from the PaperArtsy online store. The Faces link will close 17:00 (London Time) Sunday, Oct 25th winner will be announced 2 hours later at 19:00.