Showing posts with label Chalk. Show all posts

Friday, 1 August 2025

Envelope Pocket Tags with Sara Naumann products {by Victoria Wilding}


Hi everyone, nice to be back with you again.

Victoria here with you today.

This year on the blog, we have free rein to do a deep dive into a PaperArtsy product range of our choosing. For this post I have been exploring Sara Naumann products, many of which provide a mix of text, vintage ephemera and nature themed images. Sara’s designs call to my creative being and my love of paper projects.


Today I'm looking forward to sharing with you a project, turning envelopes into pocket tags, which hold a range of ephemera. Playing with lots of different elements in a project is a lot of fun and makes use of so many of the stamps in a set.

There’s an endless range of options with this project, from how you decorate the envelope pockets, to what ephemera you include. I kept things fun and playful, with the gel plate and simple stamping.


I decided to use two of Sara’s stamp sets, ESN21 and ESN34. The insects and birds work nicely together and the mix of stamps and text gave me lots of options for creating the ephemera.

I love a soft and dreamy colour palette, so I selected four PaperArtsy Fresco Finish Acrylics in Chalk (FF83), Haze (FF217), Powder Pink (FF220), Stardust (FF222). And I picked out stencil PS449 for some subtle background detailing, as it has some big open space in the design.


To start, I decided to add some background colour and texture to the envelopes using the gel plate. I added a layer of Stardust Fresco Finish Acrylic to the gel plate and put the stencil on top. I then pulled a print on a piece of Smoothy White Card (SCA4).


Next I added a layer of Chalk Fresco Finish Acrylic and pulled the print on an envelope.


I repeated this with another two envelopes, using a different combination of coloured Fresco Finish Acrylic (Haze then Powder Pink) and Chalk Fresco Finish Acrylic.


To finish the enveloped and create the tag appearance, I opened out the top of each one and punched a small hole, before adding a reinforcer for extra strength.


The next step was creating the ephemera to go into the envelope pocket tags. Using the card prints from the gel plate, I die cut several tags and labels in different shapes and sizes. I chose sizes which would extend out of the pocket and add extra visual interest in the finished piece.


I then used the ephemera stamps for the sets to create some labels, simply stamping the images in Archival Ink.


Next I added some of the text stamps to the tags. The quotes added larger visual details, but I also wanted some smaller background text, so I picked out stamp Mini 61 (MN61) from my stash.


I then added the bird images from ESN34 to the rounded tags and the leaves from the same set to the rectangular tags.


This is the ephemera stash complete.


Now I wanted to add some final decorative details to the envelope pocket tags. I decided to add a main focal point to the bottom of each one, stamping the images first in Archival Ink. I then used Distress Watercolor Pencils to colour the images on the stamps and print again on white card. This technique creates stamping with a watercolour effect. Once dry I fussy cut these and glued them over the top of that part of the stamped image.

I then selected some blue and green fibres and threaded these into the holes at the top of each envelope tag, and added a selection of the ephemera to the pocket.


For one final little detail I added some silver foiling to the outside edges of the envelopes.


I love how all these tiny little details transform a simple envelope into something different.


The finished envelope pocket tags are a great showcase for Sara’s designs. They invite you to look more carefully to discover new details and whilst each one is similar, they are all unique. Here are some close ups of each envelope pocket tag.


I hope you are inspired to have a go at creating your own envelope pocket tags. I’d love to see what you make, so find and tag me on socials (links below).

Until next time, wishing you a happy, creative week.

Victoria


Thursday, 19 June 2025

June 2025 - With 3 Things - Hoop wall hanging {by Robin Riley}


Hi everyone!

This is Robin Riley (Robin Rileywith you tonight. I was invited as a guest blogger by the PaperArtsy team and I am so very excited to take the “With 3 Things” challenge. This is my very first time doing this and I had such a good time creating this project!

For this feature on the PaperArtsy Blog, 3 identical items are sent to 3 members of the PaperArtsy blogging team. Typically, we receive a stamp, a stencil and some paint. We have no clue what PaperArtsy HQ is going to send. The whole idea of this challenge is to do something crafty in our personal style with these 3 items.

Let me share with you what I received. The stamp set is  Allison Bomber’s EAB 30. Wish you could have heard my happy squeal when I first saw this! I also received a package of printed tissue, Backgrounds PT07 and to top this off I received the brand new Mattint color Bellflower. Again, there was a little squeal!


Three were also a few freebies in my package (this was the third squeal!) from other Alison Bomber and JoFY sets, that I decided to include in my project.

 
I really wanted to create something different than my usual cards. I hope you find this unique. So, looking through my craft closet (which would probably make you squeal), I came upon an embroidery hoop and that got my wheels turning! I decided to use it as the base for a framed and layered piece.


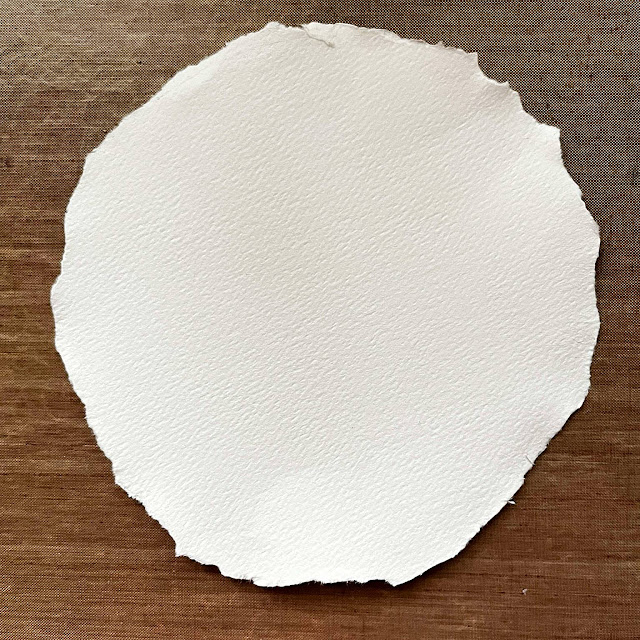
To prepare the main piece of paper that would fill the hoop, I first used the hoop to lightly trace a circle onto a piece of watercolor paper. I then used my water brush to apply water around the circle to softened it. I carefully tore the paper along the waterline, trying to keep close to the drawn outline. I always teared towards me, not away.


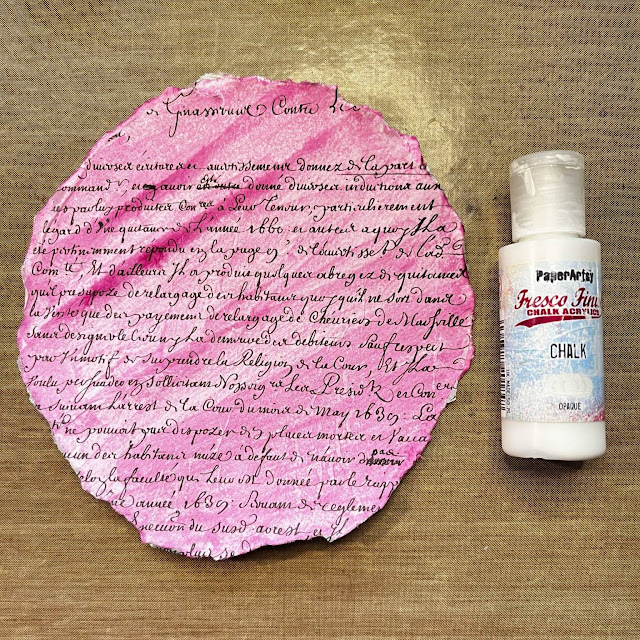
I first applied a coat of Mattint Foxglove to the circle. OH no ….too pink for me. I decided the tissue paper was going to rescue me. Quickly I applied a piece from PT07 while the Mattint was still wet.


Oh geez, it's still too pink for me! So one more try to save this! I decided to add a layer of Fresco Finish acrylic paint in Chalk, which is opaque to knock down the colour. Finally, a result I was happy with! I let this dry naturally before I moved on to the next step.


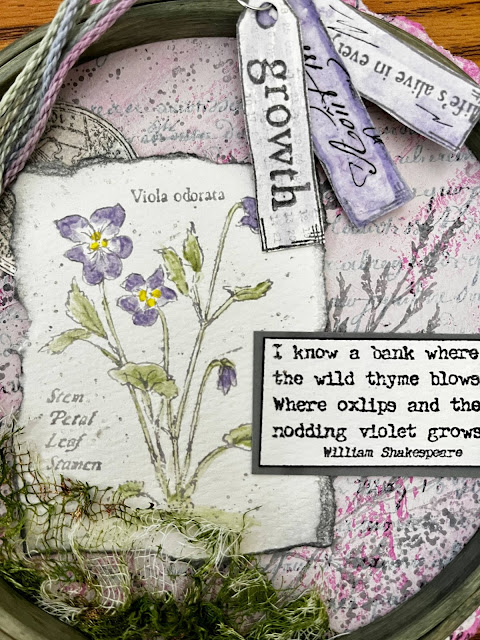
Time to begin the stamping with Alison Bomber's set EAB30I wanted a lighter color for this, something similar to a watercolor effect so the next step was to stamp the beautiful image of the violets onto the smooth side of the watercolor paper in VersaFine Morning Mist. Then another tear around this image. I love doing this to watercolor paper. The results are imperfect, yet so perfect for me!


Using a small scrap piece of watercolor paper, I also used the round ephemera stamp from the set. This time I stamped in VersaFine Clair Morning Mist. I wanted a more detailed image and I wanted to eventually be able to paint over it so I needed an ink that resist water. I made sure to use the smoothest side of the paper for stamping.

I just love the Shakespeare quote from this set (EAB30). To stamp it, I used a combination of inks, VersaFine Clair Nocturne and Morning Mist. I really did not want a full on black, so I thought the Morning Mist would tone it down. I cut around this quote, instead of tearing, to give it a more finished look.

Slowly things started to come together. I laid out the pieces….hmmm this didn’t feel right yet!


Another Alison Bomber set to the rescue! This time EAB40I stamped some solid images of the grass on the background using VersaFine Morning Mist. I also added some splatters of the Distress Oxide Hickory Smoke over all of the pieces. This is now starting to feel right to me!


Now it was time for some real fun. I love using the Mattints to add subtle color. Here I used my water brush to add Bellflower and Fern. Using a dotting tool, I added Acid Mattint dots to the centers of the violets.


The pieces needed to pop more. Using the Distress Oxide Hickory Smoke, I edged the violet piece. I ran a black Sharpie around the edge of the quote. I happened to find a piece of gray scrap to back the quote too. That’s what was needed! Now everything was coming together for me and it was time to assemble.


First I decided to paint the wooden embroidery hoop with the Mattint Shadow. I applied 3 coats, drying in between each coat. To decorate it more, I used a piece of the tissue paper again (Printed Tissue Backgrounds PT07). I took some gray washi tape and adhered it to the back of the tissue to be my guide.


I cut the washi tape from the tissue and glued it to the outer ring of the embroidery hoop.


I really wanted to add another element to this design and I wanted some type of texture, a different material. I felt like the picture needed to be grounded. So what to use? Oh, guess what, recently I made a unique element using cheese cloth and some Fern colored stencil butter from The Crafter’s Workshop. I had also put some PaperArtsy Rusting Powder into the mix.


My go to adhesive for fabrics and heavier elements is Beacon’s 3 in 1 glue. It has never failed me! I used this to attach the cheese cloth along with the hoop. I placed a heavy book on the top and let everything dry. This is exactly what I was hoping for!


I thought another element to finish this project was needed. With the extra stamps I received, I created 3 tags. A little Bellflower Mattint and tissue created the perfect little trio! Finally a little bit of scrap yarn tied around the top of the hoop just seemed to finish this project perfectly.


I really hope you enjoyed seeing me create this fun wall hanging from an embroidery hoop. The products I received sure did make this easier and fun! Thank you PA HQ for giving me this opportunity!

Robin X


Instagram: robin.riley.77
Facebook: Robin Riley

Tuesday, 10 December 2024

2024 Topic 10 : Gilded {by Jo Firth Young}


Hi everyone

Jo Firth-Young here today to talk about shiny things!! 
(instagram: @jofyjo, fb:JoFY.JoFirthYoung, www.jofy.co.uk)

When I saw the 'gilded' topic come up I was very happy!! I like things that sparkle and shine!  It got me thinking - how many metallic, shiny, sparkly, 'gilded' types of media do I have in my crafting materials??  I started to make a list - embossing powders, Fresco Finish Gold paint (such a fabulous gold!), imitation Gold Leaf (sheets and flakes - several colours), gilding powders, paper/card, metallic threads, Stickles, glitter, metallic Gelatos... so many options!!

I really like gilding objects - I've gilded several pieces of furniture in my home & its much easier than you might initially think.  Its been fun using imitation gold leaf again - it adds a little bit of 'glamour' to a project.


I've created a group of cards each with a different type of 'gilding' but all starting with the same background paper. This A3 paper was created when I rolled-off paint from my brayer when gel printing - I really like the random, blended stripes & blocks of colour that are created. 
I added stars using stencil PS438 (find a PaperArtsy stockist here) leaving enough open space for additional decoration for each card.

What I really like about all these projects is the contrast between the chalk matte finish of the Fresco Finish paints and the shiny gilded finishes. (Fresco Finish: Gold, Bubble Gum, Sherbet, Butternut, Cheesecake, Aqua Duck Egg, Chalk)


Gilded cards


Imitation gold leaf generally comes in two forms - flakes and sheets (sheets come in books supported with layers of tissue paper).  I've used both types on my cards.


'Love Christmas!'


I used a page of gilding leaf on this card to evenly cover the greyboard heart. The gold leaf is VERY thin and will pick up all the textures of the surface it is applied to - great for picking up detail. You could apply this on top of textured card for a different effect.


I added several layers of stenciling to this card - big white dots (PS309) and an arch of pink dots (PS308).


The snowflakes, embossed in white, are from this stamp set JOFY106.


'JOY'


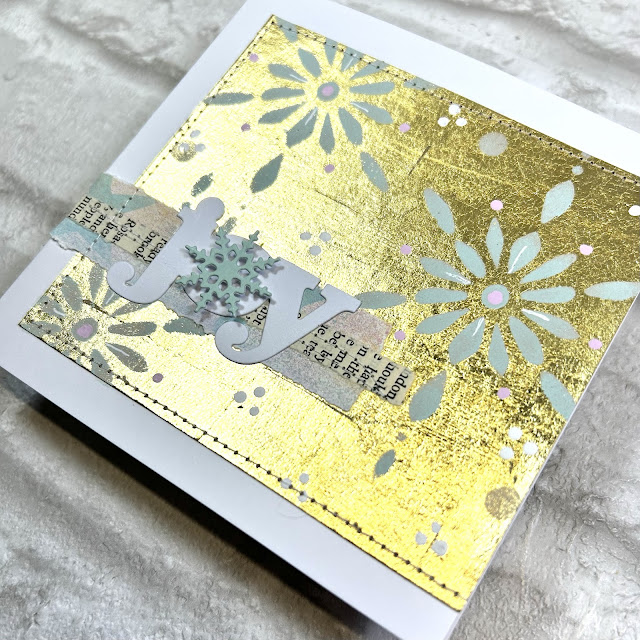
This card uses gilding flakes, adhered with a glue stick and a soft brush. The flakes create a subtle distressed surface, sometimes little gaps are left and an uneven edge created.


'Snowflake Joy'


I decided to cover the front of this card with a sheet of gold leaf that I'd cut into 2.5-3cm squares to create a subtle tiled effect. PaperArtsy Fresco Finish paints can be used on any surface and so of course I had to use them on the gold leaf!! I love how the matte paints look against the sheen of the gold leaf! Great contrast!

This was a tricky card to photograph because of the reflective quality of the gold leaf! lol


'Hi'


This card features embossing powders. There is something magical about watching embossing powders turn from powder to molten liquid and then solidifying. 


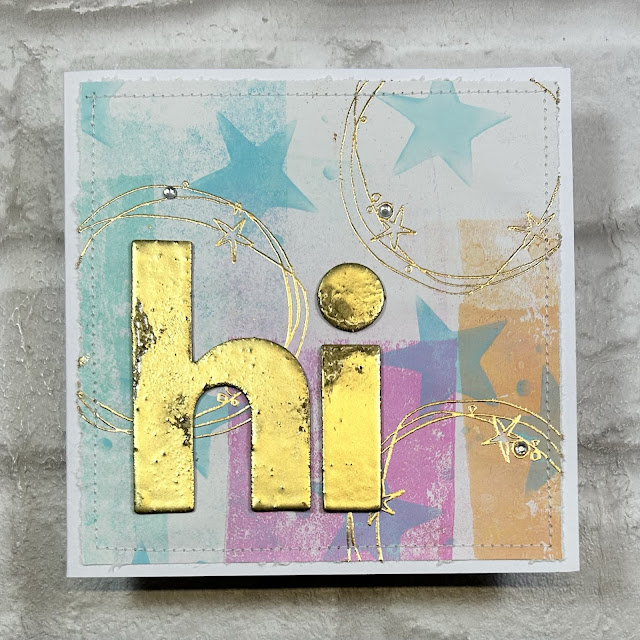
I embossed chipboard letters with several layers of {WOW} embossing powders - the first layer was a Platinum ('dirty' silver) powder followed with 2 layers of 'Gold Rich'. I agitated different areas of the surface of the letters (while still hot) to mix the powders which revealed the first layer - this created a subtle distressed look.  


I stamped circles (JOFY136, available now from PaperArtsy Stockists) on the background using WOW Pale Gold embossing powder.


'Happy Birthday'


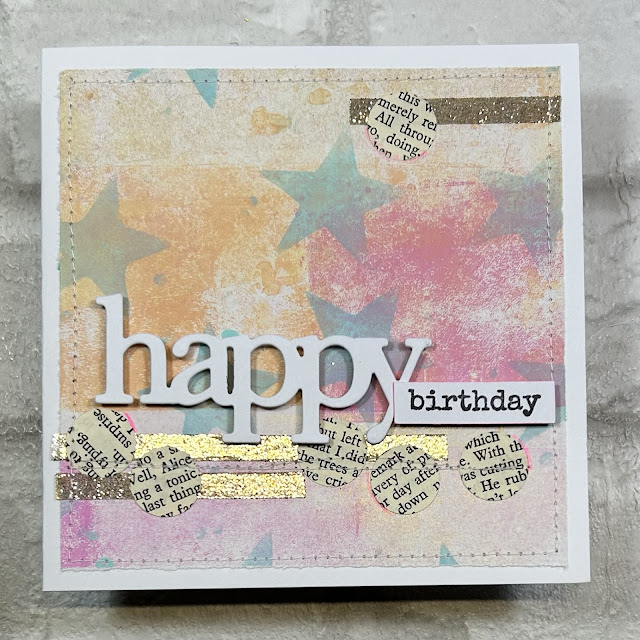
The Stickles Dry Fine Glitter is made up of tiny smooth particles that, when adhered to the surface (here I used strong double sided tape), creates a sparkly gilded effect.

Flowery Happy Birthday

 
The Gold Fresco Finish is the best gold paint I've worked with! It is so glossy and is a great tone of gold, really rich, and you can use it on your stamps too!


Here I used the Gold paint to stamp the flowers from JOFY132 (available from stockists)


... and teamed it with Ranger's Perfect Pearls - there is a gold mica powder available, but instead I used Mint here to compliment the colours of the background papers. I love how the colour changes when it catches the light as shown in the photos below.


It was fun to use gold leaf and and revisit using Perfect Pearls with the Fresco paints - I'd forgotten what a great combination they are!

I hope these ideas have inspired you to delve into your crafting stash, dig out the blingy things and add a bit of sparkle & shine to your next project - even adding a distressed gold leaf edge to a panel (as in the 'joy' card I shared earlier in this post) can make all the difference!  or a touch or two of glitter! (remember: glitter is not just for Christmas! lol)

Have fun!!

Jo


YouTube: Jo Firth-Young
Pinterest: @jofyjo
Facebook: JoFY Jamboree!
Twitter: @jofyjo
Instagram: @jofyjo