Showing posts with label Acid. Show all posts

Wednesday, 29 July 2026

Summer Party Pennants with ESC {by Jenny Marples}


Hello everyone, Jenny here with you today to share my ideas for creating fabric pennants, perfect for decorating your garden at a Summer party. Fabrics are such forgiving surfaces to work on so it's actually easier than you might think to get great results! 

The new collection of stamps and stencils from Raquel Burillo (Scrapcosy) are just perfect for this purpose, with beautiful floral images, lovely words and clever accent pieces.

Here's a peek at what's coming up...


The stamp sets used all come from the latest release and include ESC56, ESC57 and ESC58, combined with stencils PS528 and PS529. These are all available from your local stockists now.

The pastel palette of colours used for these pennants include PaperArtsy Fresco Finish Acrylic Paints (Cloud 9, Sand, Lemon Meringue, Guacamole, Spring, Cloudy, Mauve and Dolly Mix) which combine so well with Mattints (Acid, Fern, Bellflower and Foxglove).


To get started on these pennants you need to raid your fabric stash, ideally looking for non-patterned pieces in complimentary shades. I chose a neutral, vintage selection, dying some scraps with diluted Just Walnut and Lemoncello Infusions, though you may decide on a different colour scheme to suit your party theme.


Now grab those stencils and get to work, repeating patterns if needed to fill space. The fabric may absorb more paint than you are used to with paper so lift the corner of your stencils to check before you remove them completely.

I find ironing my fabrics before stencilling really helps to achieve that crisp finish. You can also re-iron them once the paint is fully dry. I know, ironing, but it's the fun sort!


Tear apart your stencilled fabrics into smaller pieces and begin to assemble them into rectangular pennants, adding in other scraps as required. A piece of muslin and a damaged lace tablecloth did the trick for me.

Make sure to overlap your pieces and I highly recommend temporarily attaching them together with a fabric glue pen.


A quick running stitch along the edges helps to make those joins secure and you can add extra translucent layers over the top to break up some of the larger areas.


Now it's time to add some colour with those floral images.


I felt nervous about stamping directly onto the fabric pennants so decided to make use of PaperArtsy's Blank Printed Tissue (PT10) using grey permanent ink to transfer the images onto one side.


It's a lot simpler to paint in blocks of colour on the reverse of your stamped images - the tissue allows for the colour to show through.


On the right side add a touch of shading with your Mattints.


Try adding a coat of Acid Mattint to the centre of your unpainted glass to make it look like it's been filled with an enticing beverage!


The Acid Mattint with also add that pop of yellow when painted over Cloud 9 paint.


You end up with a much larger range of colours to play with by adding Mattints over your painted images and it's worth experimenting on a scrap of tissue if you are unsure about any of the combinations.


With coloured images at the ready it's time to add them to your fabric pennants.


Use a matte medium like PaperArtsy Fresco Finish Matte Glaze to stick your tissue images to the pennants. Be generous with your application because the fabric will absorb more than paper. And notice how the colour becomes slightly stronger with the glaze applied.

Your tissue images will take longer to become fixed in place so allow for drying time. The upside to this is that you have a small amount of 'wiggle room' to reposition your images needed.
 

The ticket image from set ESC56 is perfect for letting you add some lovely sentiments. I added some extra pieces of lace trim to the pennants and repeat stamped the Greek key motif from set ESC56 on grosgrain ribbon to join them together. You can disguise the joins with little flowers for a seamless look!


And with that these Summer Party Pennants are complete.


Let's give you a closer look at my finished examples;


You can divide your images up to extend across several pennants - I did this with one of the butterflies, some tickets and the mixed flower clusters. 


I'm now thinking this could look good with a warm colour palette, possibly even more vibrant! Which colours would you choose?


Thank you for joining me today.

Jenny

Facebook: Jenny Marples
Instagram: Jenny Marples
Pinterest: Jenny Marples

Thursday, 19 June 2025

June 2025 - With 3 Things - Hoop wall hanging {by Robin Riley}


Hi everyone!

This is Robin Riley (Robin Rileywith you tonight. I was invited as a guest blogger by the PaperArtsy team and I am so very excited to take the “With 3 Things” challenge. This is my very first time doing this and I had such a good time creating this project!

For this feature on the PaperArtsy Blog, 3 identical items are sent to 3 members of the PaperArtsy blogging team. Typically, we receive a stamp, a stencil and some paint. We have no clue what PaperArtsy HQ is going to send. The whole idea of this challenge is to do something crafty in our personal style with these 3 items.

Let me share with you what I received. The stamp set is  Allison Bomber’s EAB 30. Wish you could have heard my happy squeal when I first saw this! I also received a package of printed tissue, Backgrounds PT07 and to top this off I received the brand new Mattint color Bellflower. Again, there was a little squeal!


Three were also a few freebies in my package (this was the third squeal!) from other Alison Bomber and JoFY sets, that I decided to include in my project.

 
I really wanted to create something different than my usual cards. I hope you find this unique. So, looking through my craft closet (which would probably make you squeal), I came upon an embroidery hoop and that got my wheels turning! I decided to use it as the base for a framed and layered piece.


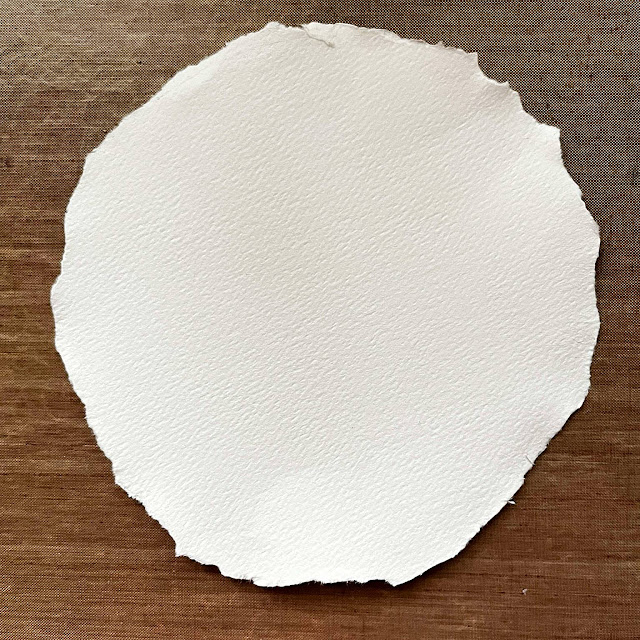
To prepare the main piece of paper that would fill the hoop, I first used the hoop to lightly trace a circle onto a piece of watercolor paper. I then used my water brush to apply water around the circle to softened it. I carefully tore the paper along the waterline, trying to keep close to the drawn outline. I always teared towards me, not away.


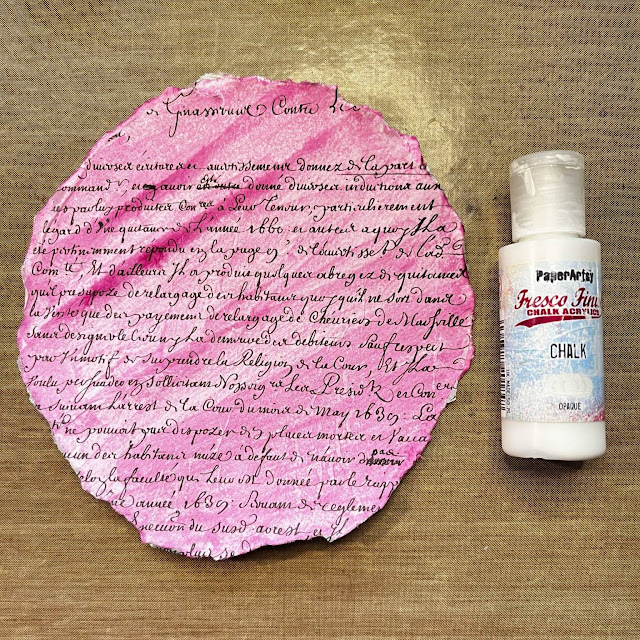
I first applied a coat of Mattint Foxglove to the circle. OH no ….too pink for me. I decided the tissue paper was going to rescue me. Quickly I applied a piece from PT07 while the Mattint was still wet.


Oh geez, it's still too pink for me! So one more try to save this! I decided to add a layer of Fresco Finish acrylic paint in Chalk, which is opaque to knock down the colour. Finally, a result I was happy with! I let this dry naturally before I moved on to the next step.


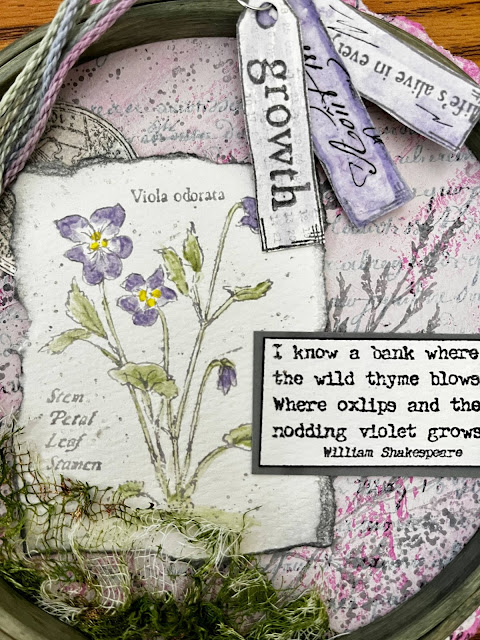
Time to begin the stamping with Alison Bomber's set EAB30I wanted a lighter color for this, something similar to a watercolor effect so the next step was to stamp the beautiful image of the violets onto the smooth side of the watercolor paper in VersaFine Morning Mist. Then another tear around this image. I love doing this to watercolor paper. The results are imperfect, yet so perfect for me!


Using a small scrap piece of watercolor paper, I also used the round ephemera stamp from the set. This time I stamped in VersaFine Clair Morning Mist. I wanted a more detailed image and I wanted to eventually be able to paint over it so I needed an ink that resist water. I made sure to use the smoothest side of the paper for stamping.

I just love the Shakespeare quote from this set (EAB30). To stamp it, I used a combination of inks, VersaFine Clair Nocturne and Morning Mist. I really did not want a full on black, so I thought the Morning Mist would tone it down. I cut around this quote, instead of tearing, to give it a more finished look.

Slowly things started to come together. I laid out the pieces….hmmm this didn’t feel right yet!


Another Alison Bomber set to the rescue! This time EAB40I stamped some solid images of the grass on the background using VersaFine Morning Mist. I also added some splatters of the Distress Oxide Hickory Smoke over all of the pieces. This is now starting to feel right to me!


Now it was time for some real fun. I love using the Mattints to add subtle color. Here I used my water brush to add Bellflower and Fern. Using a dotting tool, I added Acid Mattint dots to the centers of the violets.


The pieces needed to pop more. Using the Distress Oxide Hickory Smoke, I edged the violet piece. I ran a black Sharpie around the edge of the quote. I happened to find a piece of gray scrap to back the quote too. That’s what was needed! Now everything was coming together for me and it was time to assemble.


First I decided to paint the wooden embroidery hoop with the Mattint Shadow. I applied 3 coats, drying in between each coat. To decorate it more, I used a piece of the tissue paper again (Printed Tissue Backgrounds PT07). I took some gray washi tape and adhered it to the back of the tissue to be my guide.


I cut the washi tape from the tissue and glued it to the outer ring of the embroidery hoop.


I really wanted to add another element to this design and I wanted some type of texture, a different material. I felt like the picture needed to be grounded. So what to use? Oh, guess what, recently I made a unique element using cheese cloth and some Fern colored stencil butter from The Crafter’s Workshop. I had also put some PaperArtsy Rusting Powder into the mix.


My go to adhesive for fabrics and heavier elements is Beacon’s 3 in 1 glue. It has never failed me! I used this to attach the cheese cloth along with the hoop. I placed a heavy book on the top and let everything dry. This is exactly what I was hoping for!


I thought another element to finish this project was needed. With the extra stamps I received, I created 3 tags. A little Bellflower Mattint and tissue created the perfect little trio! Finally a little bit of scrap yarn tied around the top of the hoop just seemed to finish this project perfectly.


I really hope you enjoyed seeing me create this fun wall hanging from an embroidery hoop. The products I received sure did make this easier and fun! Thank you PA HQ for giving me this opportunity!

Robin X


Instagram: robin.riley.77
Facebook: Robin Riley