Showing posts with label Gilding Flakes. Show all posts

Tuesday, 10 December 2024

2024 Topic 10 : Gilded {by Jo Firth Young}


Hi everyone

Jo Firth-Young here today to talk about shiny things!! 
(instagram: @jofyjo, fb:JoFY.JoFirthYoung, www.jofy.co.uk)

When I saw the 'gilded' topic come up I was very happy!! I like things that sparkle and shine!  It got me thinking - how many metallic, shiny, sparkly, 'gilded' types of media do I have in my crafting materials??  I started to make a list - embossing powders, Fresco Finish Gold paint (such a fabulous gold!), imitation Gold Leaf (sheets and flakes - several colours), gilding powders, paper/card, metallic threads, Stickles, glitter, metallic Gelatos... so many options!!

I really like gilding objects - I've gilded several pieces of furniture in my home & its much easier than you might initially think.  Its been fun using imitation gold leaf again - it adds a little bit of 'glamour' to a project.


I've created a group of cards each with a different type of 'gilding' but all starting with the same background paper. This A3 paper was created when I rolled-off paint from my brayer when gel printing - I really like the random, blended stripes & blocks of colour that are created. 
I added stars using stencil PS438 (find a PaperArtsy stockist here) leaving enough open space for additional decoration for each card.

What I really like about all these projects is the contrast between the chalk matte finish of the Fresco Finish paints and the shiny gilded finishes. (Fresco Finish: Gold, Bubble Gum, Sherbet, Butternut, Cheesecake, Aqua Duck Egg, Chalk)


Gilded cards


Imitation gold leaf generally comes in two forms - flakes and sheets (sheets come in books supported with layers of tissue paper).  I've used both types on my cards.


'Love Christmas!'


I used a page of gilding leaf on this card to evenly cover the greyboard heart. The gold leaf is VERY thin and will pick up all the textures of the surface it is applied to - great for picking up detail. You could apply this on top of textured card for a different effect.


I added several layers of stenciling to this card - big white dots (PS309) and an arch of pink dots (PS308).


The snowflakes, embossed in white, are from this stamp set JOFY106.


'JOY'


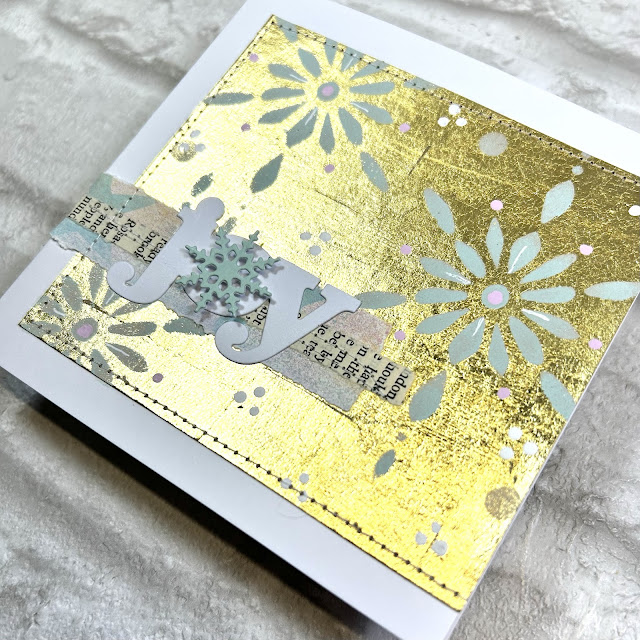
This card uses gilding flakes, adhered with a glue stick and a soft brush. The flakes create a subtle distressed surface, sometimes little gaps are left and an uneven edge created.


'Snowflake Joy'


I decided to cover the front of this card with a sheet of gold leaf that I'd cut into 2.5-3cm squares to create a subtle tiled effect. PaperArtsy Fresco Finish paints can be used on any surface and so of course I had to use them on the gold leaf!! I love how the matte paints look against the sheen of the gold leaf! Great contrast!

This was a tricky card to photograph because of the reflective quality of the gold leaf! lol

'Hi'
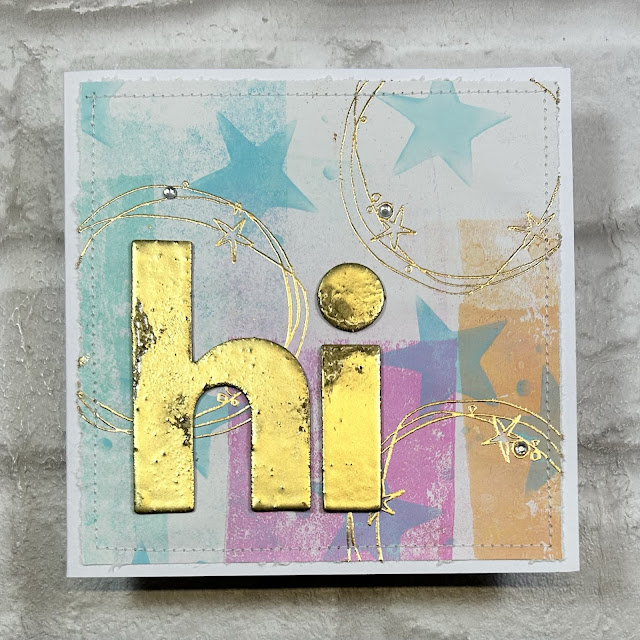

This card features embossing powders. There is something magical about watching embossing powders turn from powder to molten liquid and then solidifying. 


I embossed chipboard letters with several layers of {WOW} embossing powders - the first layer was a Platinum ('dirty' silver) powder followed with 2 layers of 'Gold Rich'. I agitated different areas of the surface of the letters (while still hot) to mix the powders which revealed the first layer - this created a subtle distressed look.  


I stamped circles (JOFY136, available now from PaperArtsy Stockists) on the background using WOW Pale Gold embossing powder.


'Happy Birthday'


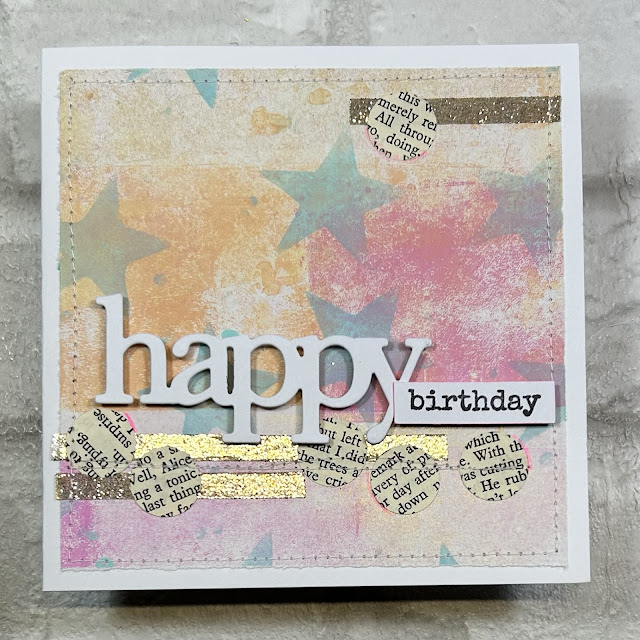
The Stickles Dry Fine Glitter is made up of tiny smooth particles that, when adhered to the surface (here I used strong double sided tape), creates a sparkly gilded effect.


Flowery Happy Birthday

 
The Gold Fresco Finish is the best gold paint I've worked with! It is so glossy and is a great tone of gold, really rich, and you can use it on your stamps too!


Here I used the Gold paint to stamp the flowers from JOFY132 (available from stockists)


... and teamed it with Ranger's Perfect Pearls - there is a gold mica powder available, but instead I used Mint here to compliment the colours of the background papers. I love how the colour changes when it catches the light as shown in the photos below.


It was fun to use gold leaf and and revisit using Perfect Pearls with the Fresco paints - I'd forgotten what a great combination they are!

I hope these ideas have inspired you to delve into your crafting stash, dig out the blingy things and add a bit of sparkle & shine to your next project - even adding a distressed gold leaf edge to a panel (as in the 'joy' card I shared earlier in this post) can make all the difference!  or a touch or two of glitter! (remember: glitter is not just for Christmas! lol)

Have fun!!

Jo


YouTube: Jo Firth-Young
Pinterest: @jofyjo
Facebook: JoFY Jamboree!
Twitter: @jofyjo
Instagram: @jofyjo

Thursday, 21 November 2024

2024 Topic 10 : Gilded {by Liesbeth Fidder-de Vos}


Hi everyone!

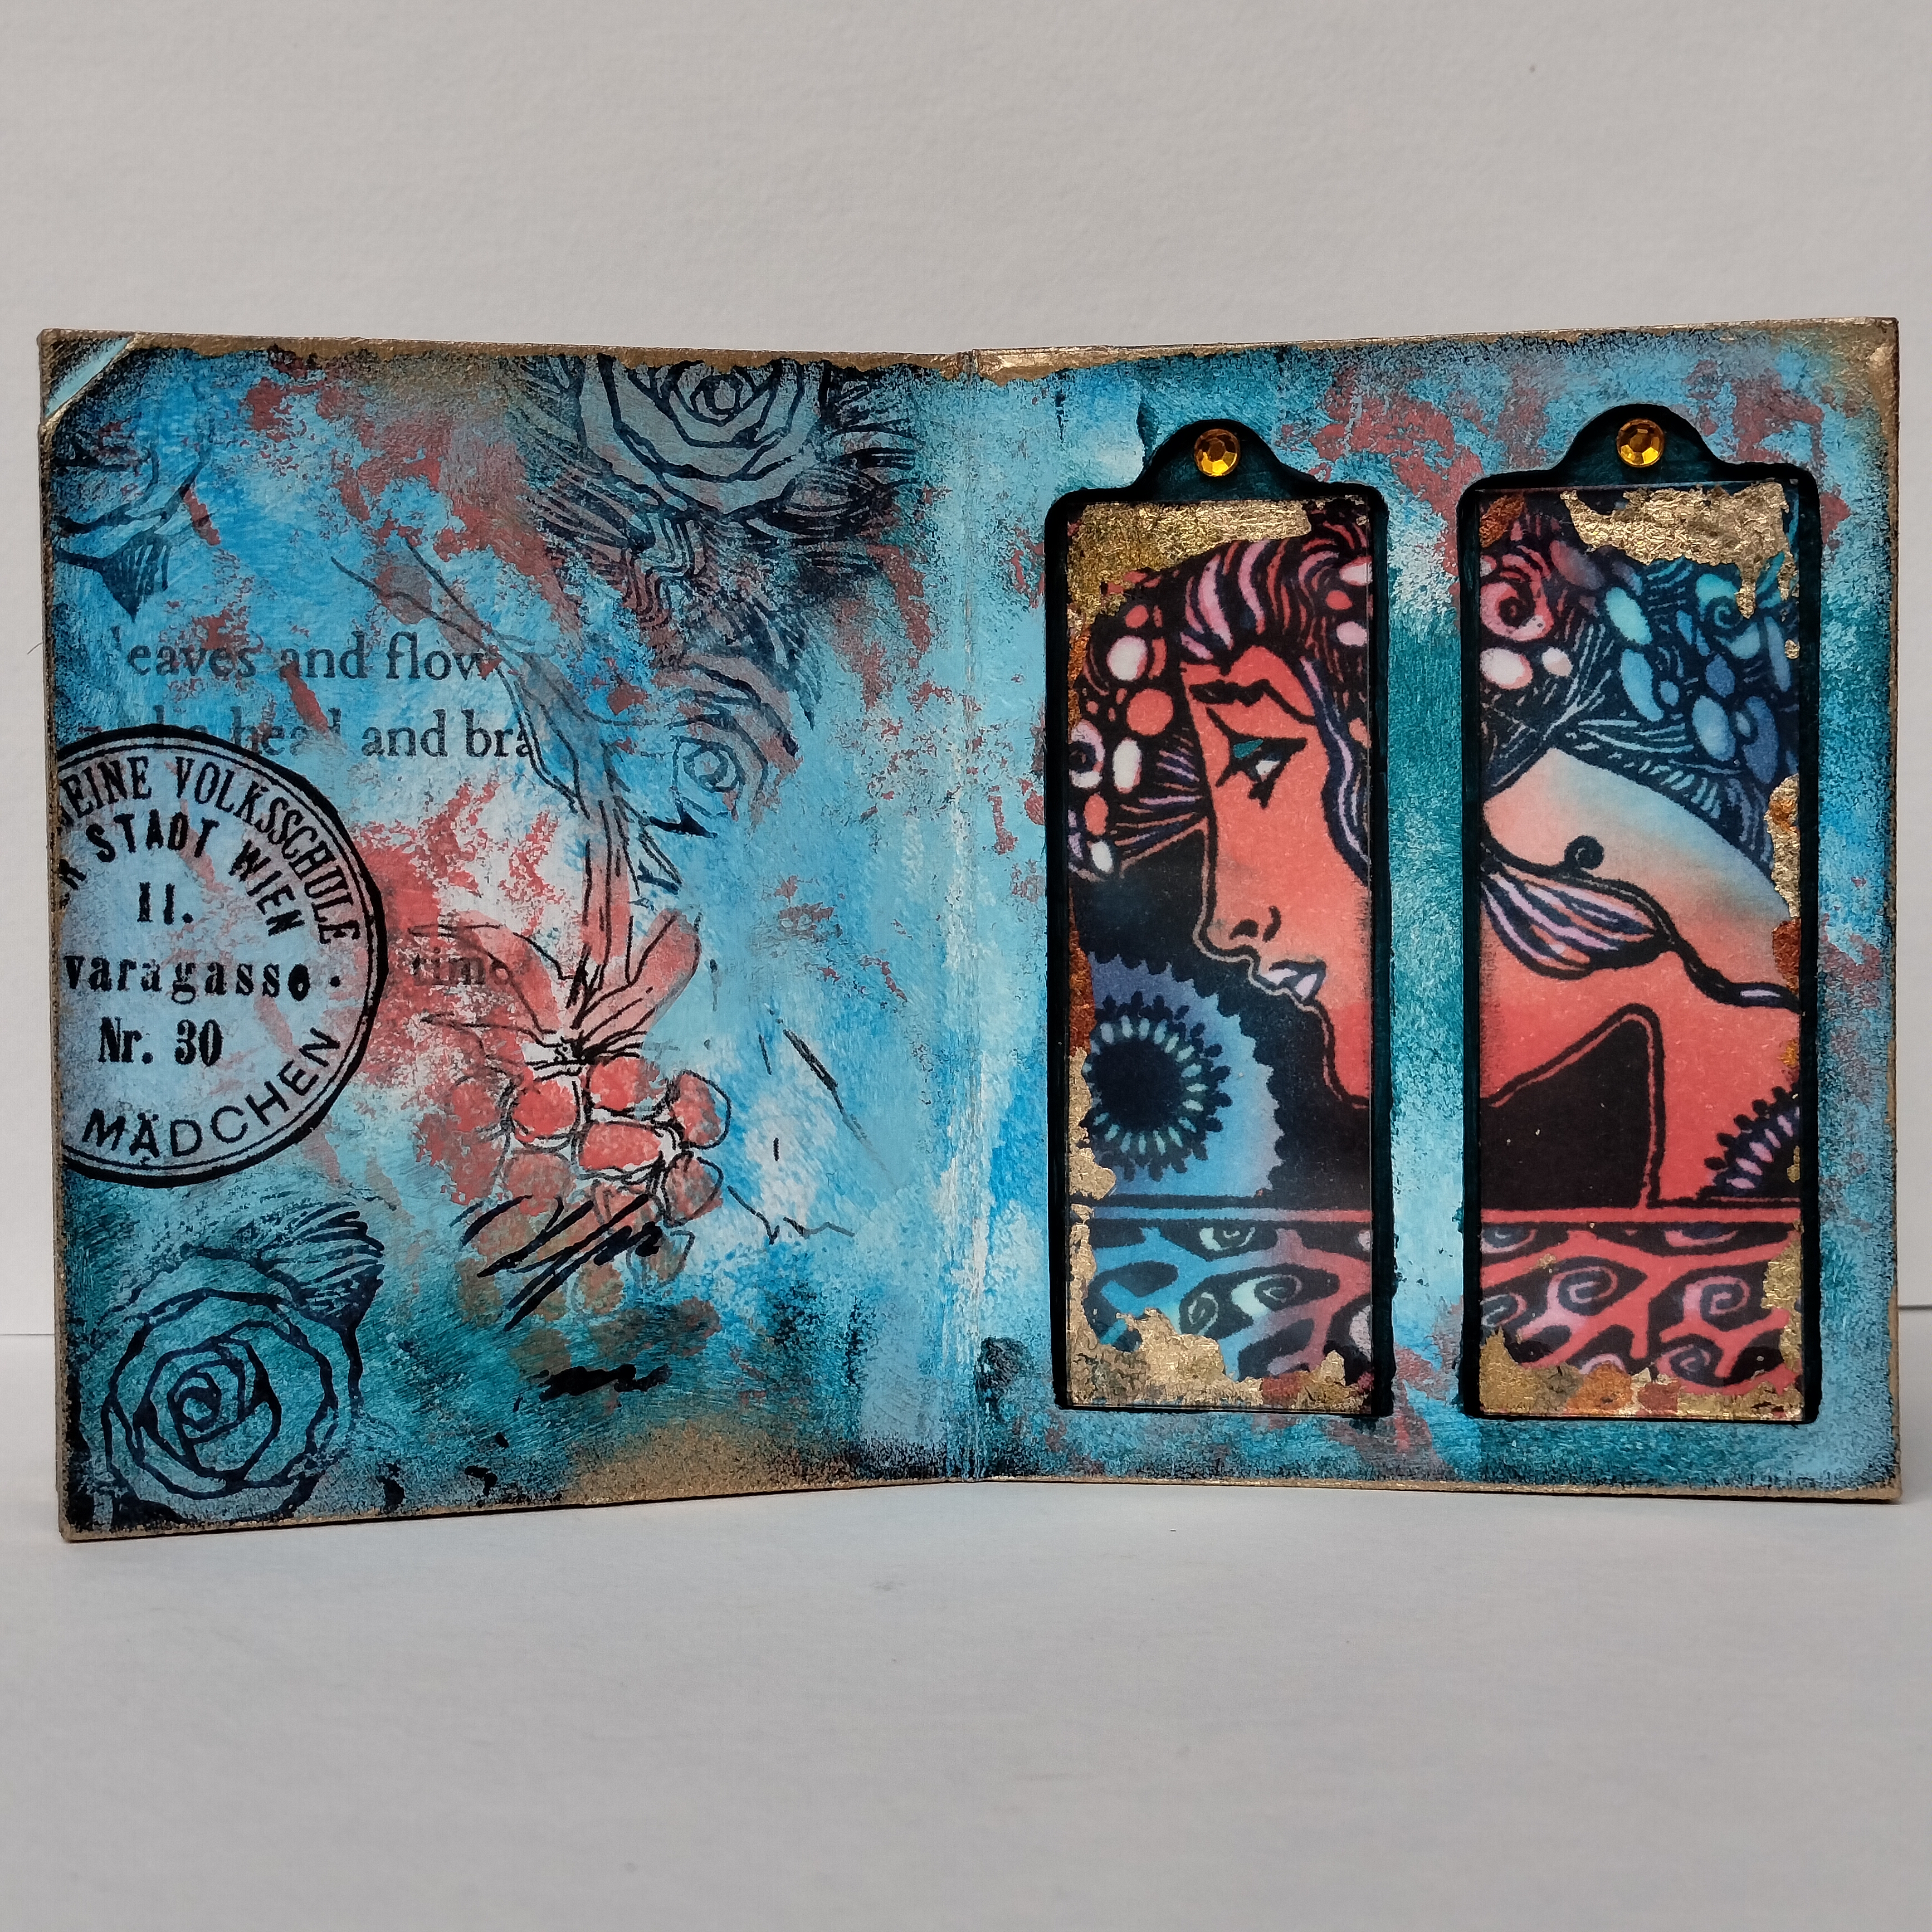
Liesbeth here with you today. I would love to show you my gilded book/starbook with wonderful women faces, gilded and framed behind glass!

My inspiration and starting point this time was the beautiful Lynne Perrella stamp sets by PaperArtsy: LPC069 and LPC070. Love the fact that the faces of the stamps are in profile, perfect to cut and frame.

I used three different ways of gilding: gold leave flakes, golden paint and rhinestones. And of course I didn't forget our current theme ,Nature'!  Let's start! 


Maybe you already know I never have a (ready from start to end) plan for a project...never..., only some ideas and some starting points. For this gilded star-book I new I needed the two lovely Lynne Perrella stamp sets LPC069 and LPC070, a metallic paint, PaperArtsy Fresco Finish matte glaze and gold leave flakes. I was planning on using the beautiful platinum PaperArtsy Fresco paint White Fire but later on I changed that to Gold.


The surface I used are 6 cardboard microscope slide mailers and glass slides. They are used in the medical world to protect and send medical preparations to the labs. I used 2-place mailers, they are also available with 1 or 4 places. In combination with the glass slides they are so great to create with!


First I made the book, I piled up 6 slide mailers and glued backsides onto front sides.


I coated the entire book with a layer of gesso and after that I started with adding some Nature, our theme! There fore I tore out some small pieces of Alison Bombers PaperArtsy printed tissue paper (PT08). I glued it onto the front, back and left ,pages' of the book using PaperArtsy Fresco Finish Matte Glaze. Works perfect!


I chose 4 beautiful colours of PaperArtsy Fresco Finish paints: Summer Sky, Glass Blue, Inky Pool and a bit of Coral, applied it in spots with sponges, covering every part of the book.


I painted the edges of the frames with the dark Inky Pool to accentuete the depth. With a bit of watered down Coral paint I coloured parts of the Printed Tissue paper, like berries, acorn and so on.


At this point I was sure  the pages needed a bit more...but I didn't know what... So I decided  to first create the glass slides.
 

Time to use the gorgeous images of the Lynne Perrella stamp sets (LPC069 and LPC070)! I stamped the different women on white cardstock with dark blue ink (Tsukineko Versafine Clair-Twilight, and cut them out a bit bigger, outside the lines, to be sure it fits.


Using Ranger Distress Inks (Salty Ocean, Chipped Sapphire and Abandoned Coral) and blending tools I coloured the faces, large areas of colour. I think it's about the same colours as the paints I used. With a little bit of watered down bleach and a synthetic brush, I bleached some details of the images here and there to highlight them.

 
One of the glass microscope slides was my template: I cut 12 slide size cards out of the stamped images. I hope this makes sense ... if not...see photo below ;-)
With a bit of tacky glue I glued some shiny gold leave flakes at the edges here and there. I have a little box with multi color flakes...no idea what brand it is. Once the glue is dry, you can make it shiny by gently polishing it with a paper towel. I applied a very small drop of Glossy Accents on every corner of the stamped paper and added the glass, and I glued the whole thing in the niche.... 12 times!


Some more for our current theme Nature: Onto the left pages I stamped some small parts of the stamps like this rose. Again with Tsukineko Versafine Clair - Twilight. I inked them with just a corner of the ink pad. The other stamp is a kind of a swirl...you can see it on other pictures. Above the glass slides, into the thumb grooves I put  golden rhinestones.


I gilded the spine and the edges of the book by sponging some PaperArtsy Fresco Finish-Gold.


The final finishing touch was adding some small parts, like words or this circle below, from the Alison Bomber Printed Tissue (PT08) and...a extra tiny bit of golden paint.


The book is ready! Here I show it as a star-book I think the images of the stamps and the printed tissue are perfect together..although the style is completely different, it works!


One of the pages.


For the front of the book I used some left overs from cutting the stamped images and glued them at the edges. No waste!


The backside of the (almost) closed book. I used a cut out stamped image from one of the PaperArtsy Lynne Perrella stamp sets (LPC069).


An overview of the book among most of the materials I used. 


Another detail picture of one of the pages. Oh how I love this stamp from LPC070!


I had so much fun with this gilding adventure! It is a pity that on the pictures the shininess is not very visible. In real life the book is glossy and shiny and bling bling, believe me!

I hope I inspired you to create some gilded projects yourself! Have lots of fun, see you next time!

Liesbeth XX