
Hi everyone, it's Ellie Knol with you today, and I'm here to share with you a technique I discovered, and thought this theme 'Mainly Stencils" was a perfect theme to share it with you.
Have you ever had dried up paints on a stencil? Yummy dried up paints? Are you like me, wanting to make a print of it, but don't know how, and want to try to get it off? I did the trying, and it turned out SO beautiful. I HAVE to share the HOW with you: it's basically creating an acrylic skin onto paper in the pattern of a stencil.
I've made two A5 size journals from the colorful papers. One with the ordinary and quite well known gelatin print, pulled with white paint, and the other one with the dried up colorful paints from the stencil.
Below you see the result of my discovery of this technique, using another PaperArtsy Stencil by JoFY (PS139) and created a grungy and imperfect background in the process from the dried paints on the stencil.
A close up: It is 3D, it sits on top of the surface and almost is like plastic to the touch.
An acrylic skin is what it is called in paint pouring when leaving paints to dry thinly, but it will not have a pattern as the one created with a stencil, it has the reverse pattern.
For this post I will recreate this technique as best as I can; the stencil I want to use for the technique is still brand new. No leftover paints from a previous session on there!
I decided to use some darker colors to be able to show the process better.
Getting the dried up paints onto the stencil occurs naturally if you do a lot of gel printing ! Just let the stencil gather paint. when you take a print from the gel plate, first apply paints to the plate, position the stencil and pull a print to get the silhouette of the stencil on the plate, and more important, paint onto the stencil!
Let the paints dry: on the plate and on the stencil. I normally use these smaller brayers when applying different colors onto the plate.. in this case one for the reds, and one for the blue and black.
Paint on the stencil, paint on the gelatine plate..
After the paints have dried on the plate, pull a print with PaperArtsy Fresco Finish Chalk Acrylic -
Snowflake as shown in the next four pictures.; the basic way of printing on a gelatin plate. I used this first print to create the cover of the first journal, as seen in the final step.


I left the stencil to dry for a few hours. Fresco Finish Paints dry pretty quick but my aim is to replicate the technique, I wanted the paints to be bone dry.
Most of the times we only discover the gorgeous paints on a stencil after a printing session; or days later.
I guess that, when you decide to clean a stencil or mask with this technique, it will come off more easily when you do it as soon as possible.
A PaperArtsy Stencil by JoFY (PS130) is the stencil I chose this time.
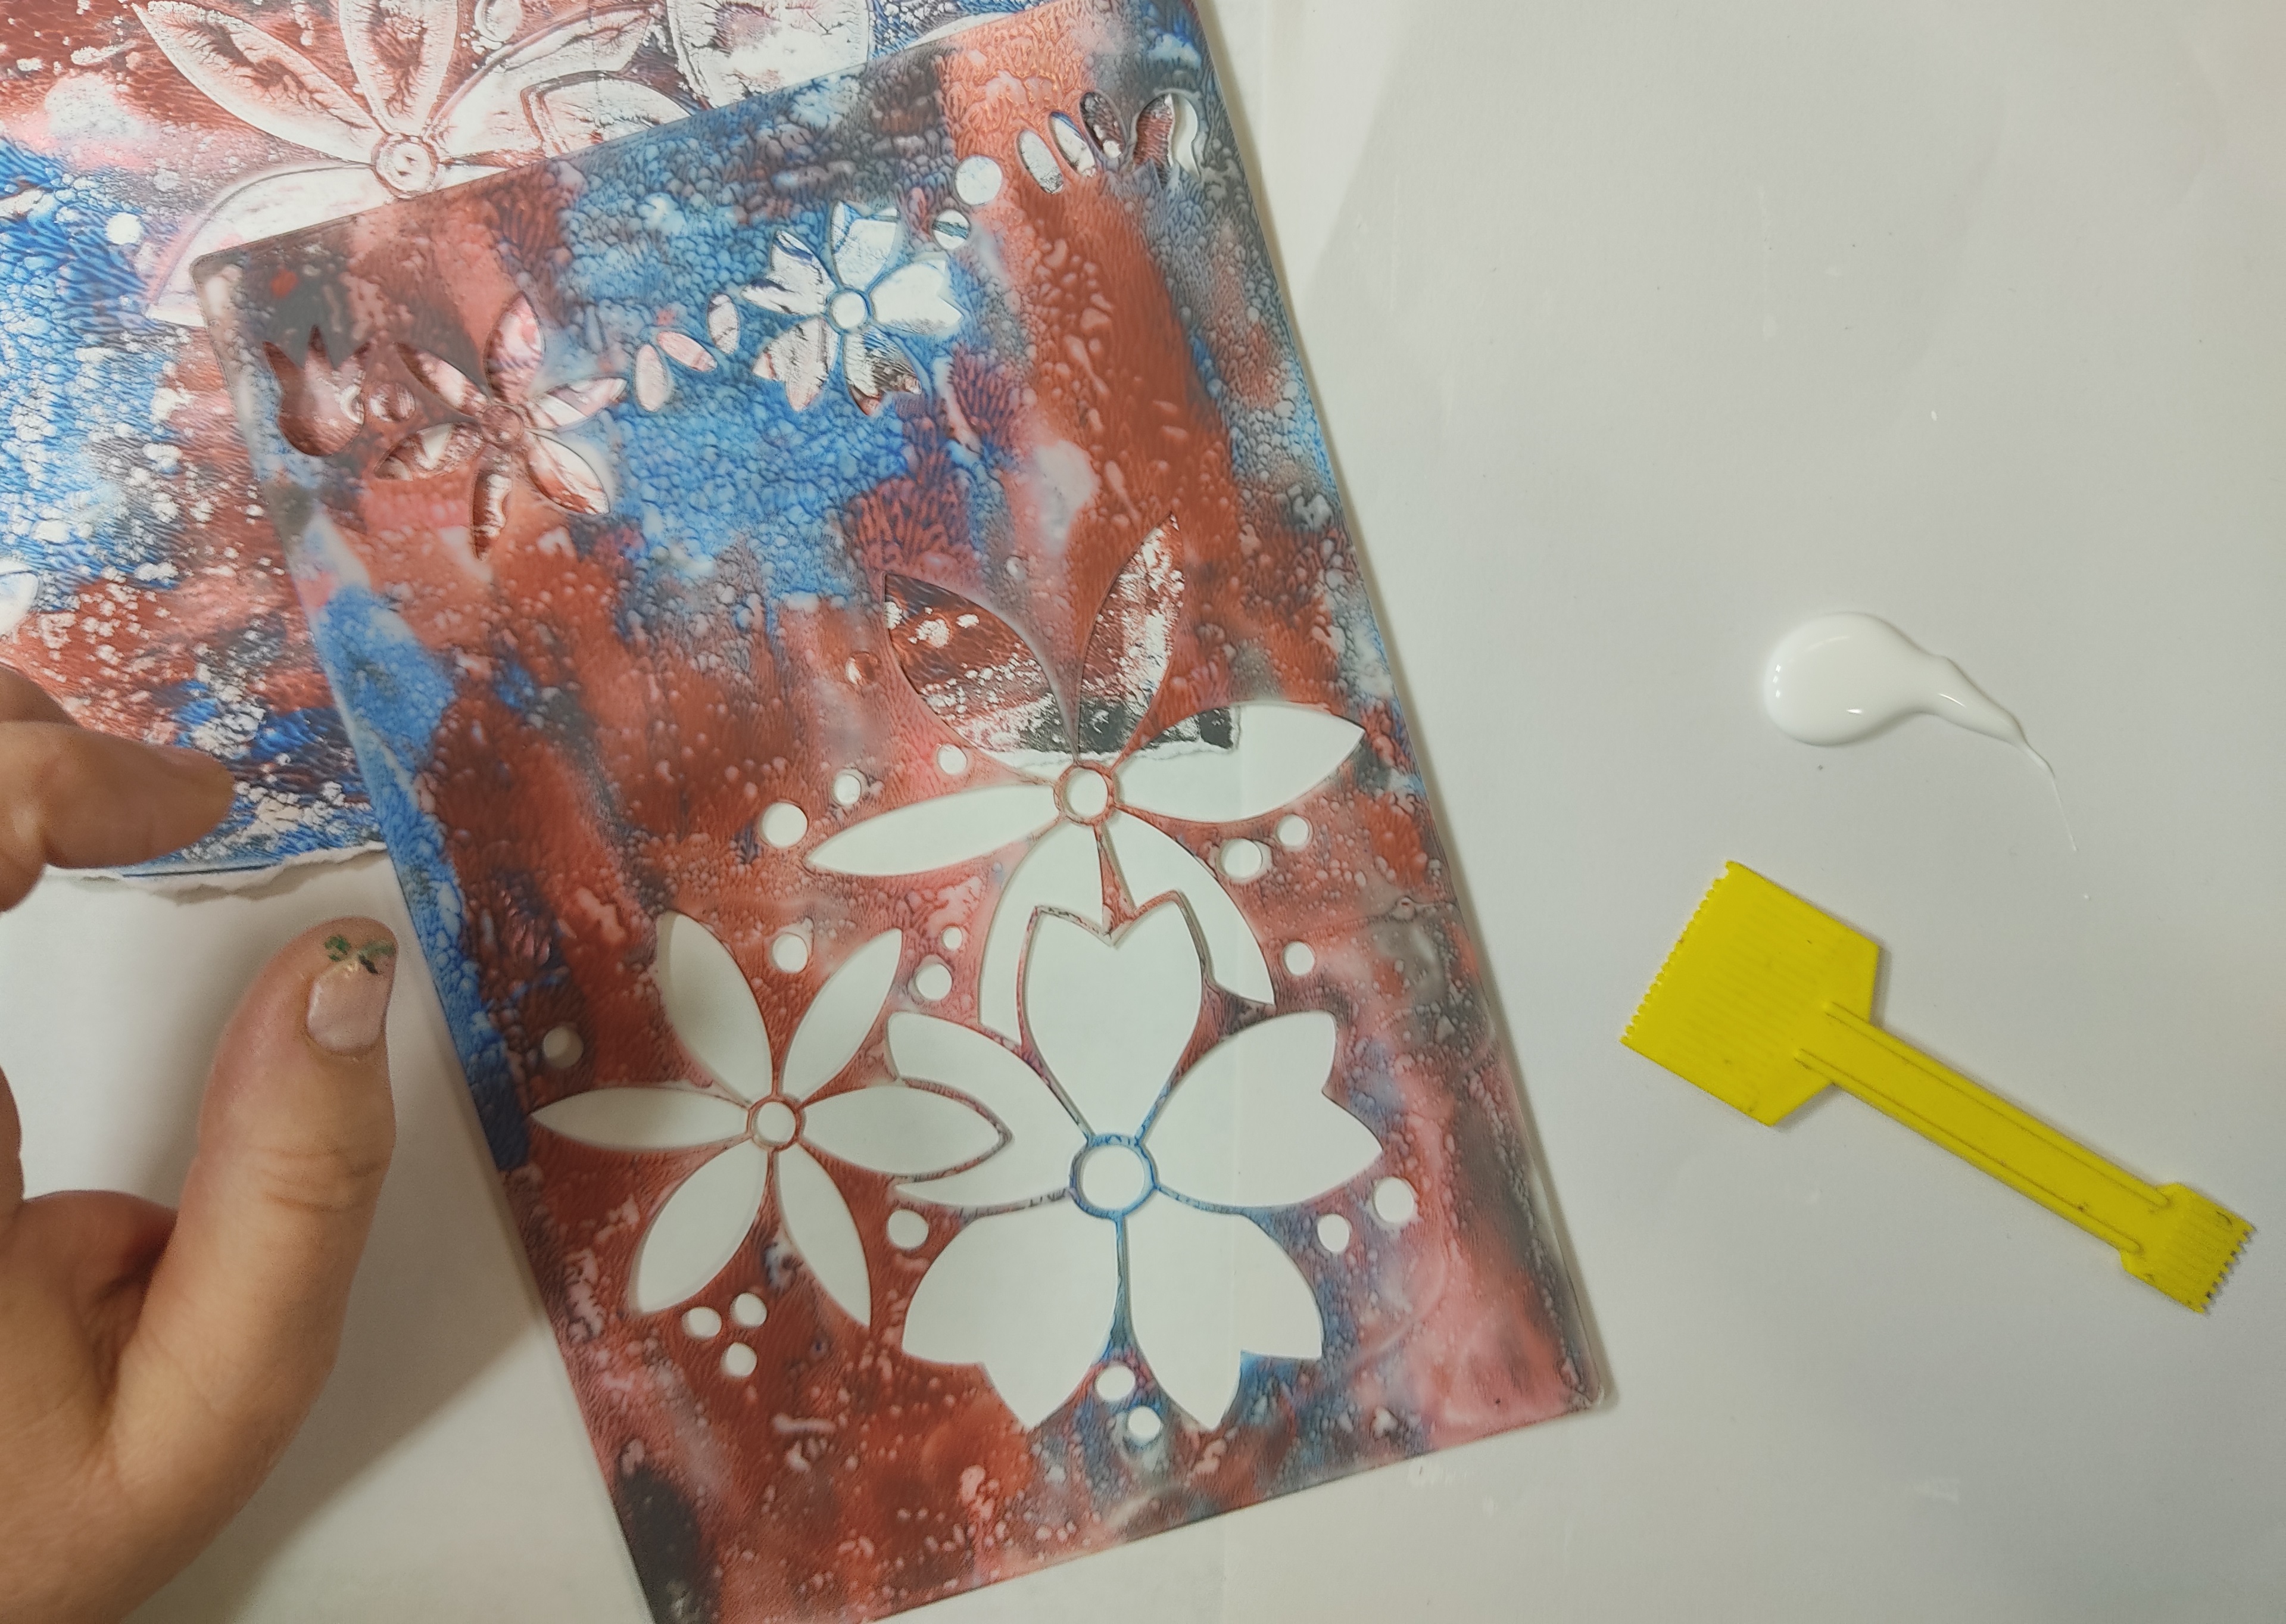
Apply heavy body gel medium or bookbinding glue to a piece of sturdy cardstock. Make sure to cover the surface of the paper quite well.
Immediately press the stencil into the glue very well...

...and cover the paper-side of it with a scrap piece of paper and burnish it very well.
Leave it to dry for a while in a bookpress or underneath heavy books, then leave to dry in open air overnight. Make sure it is bone dry.
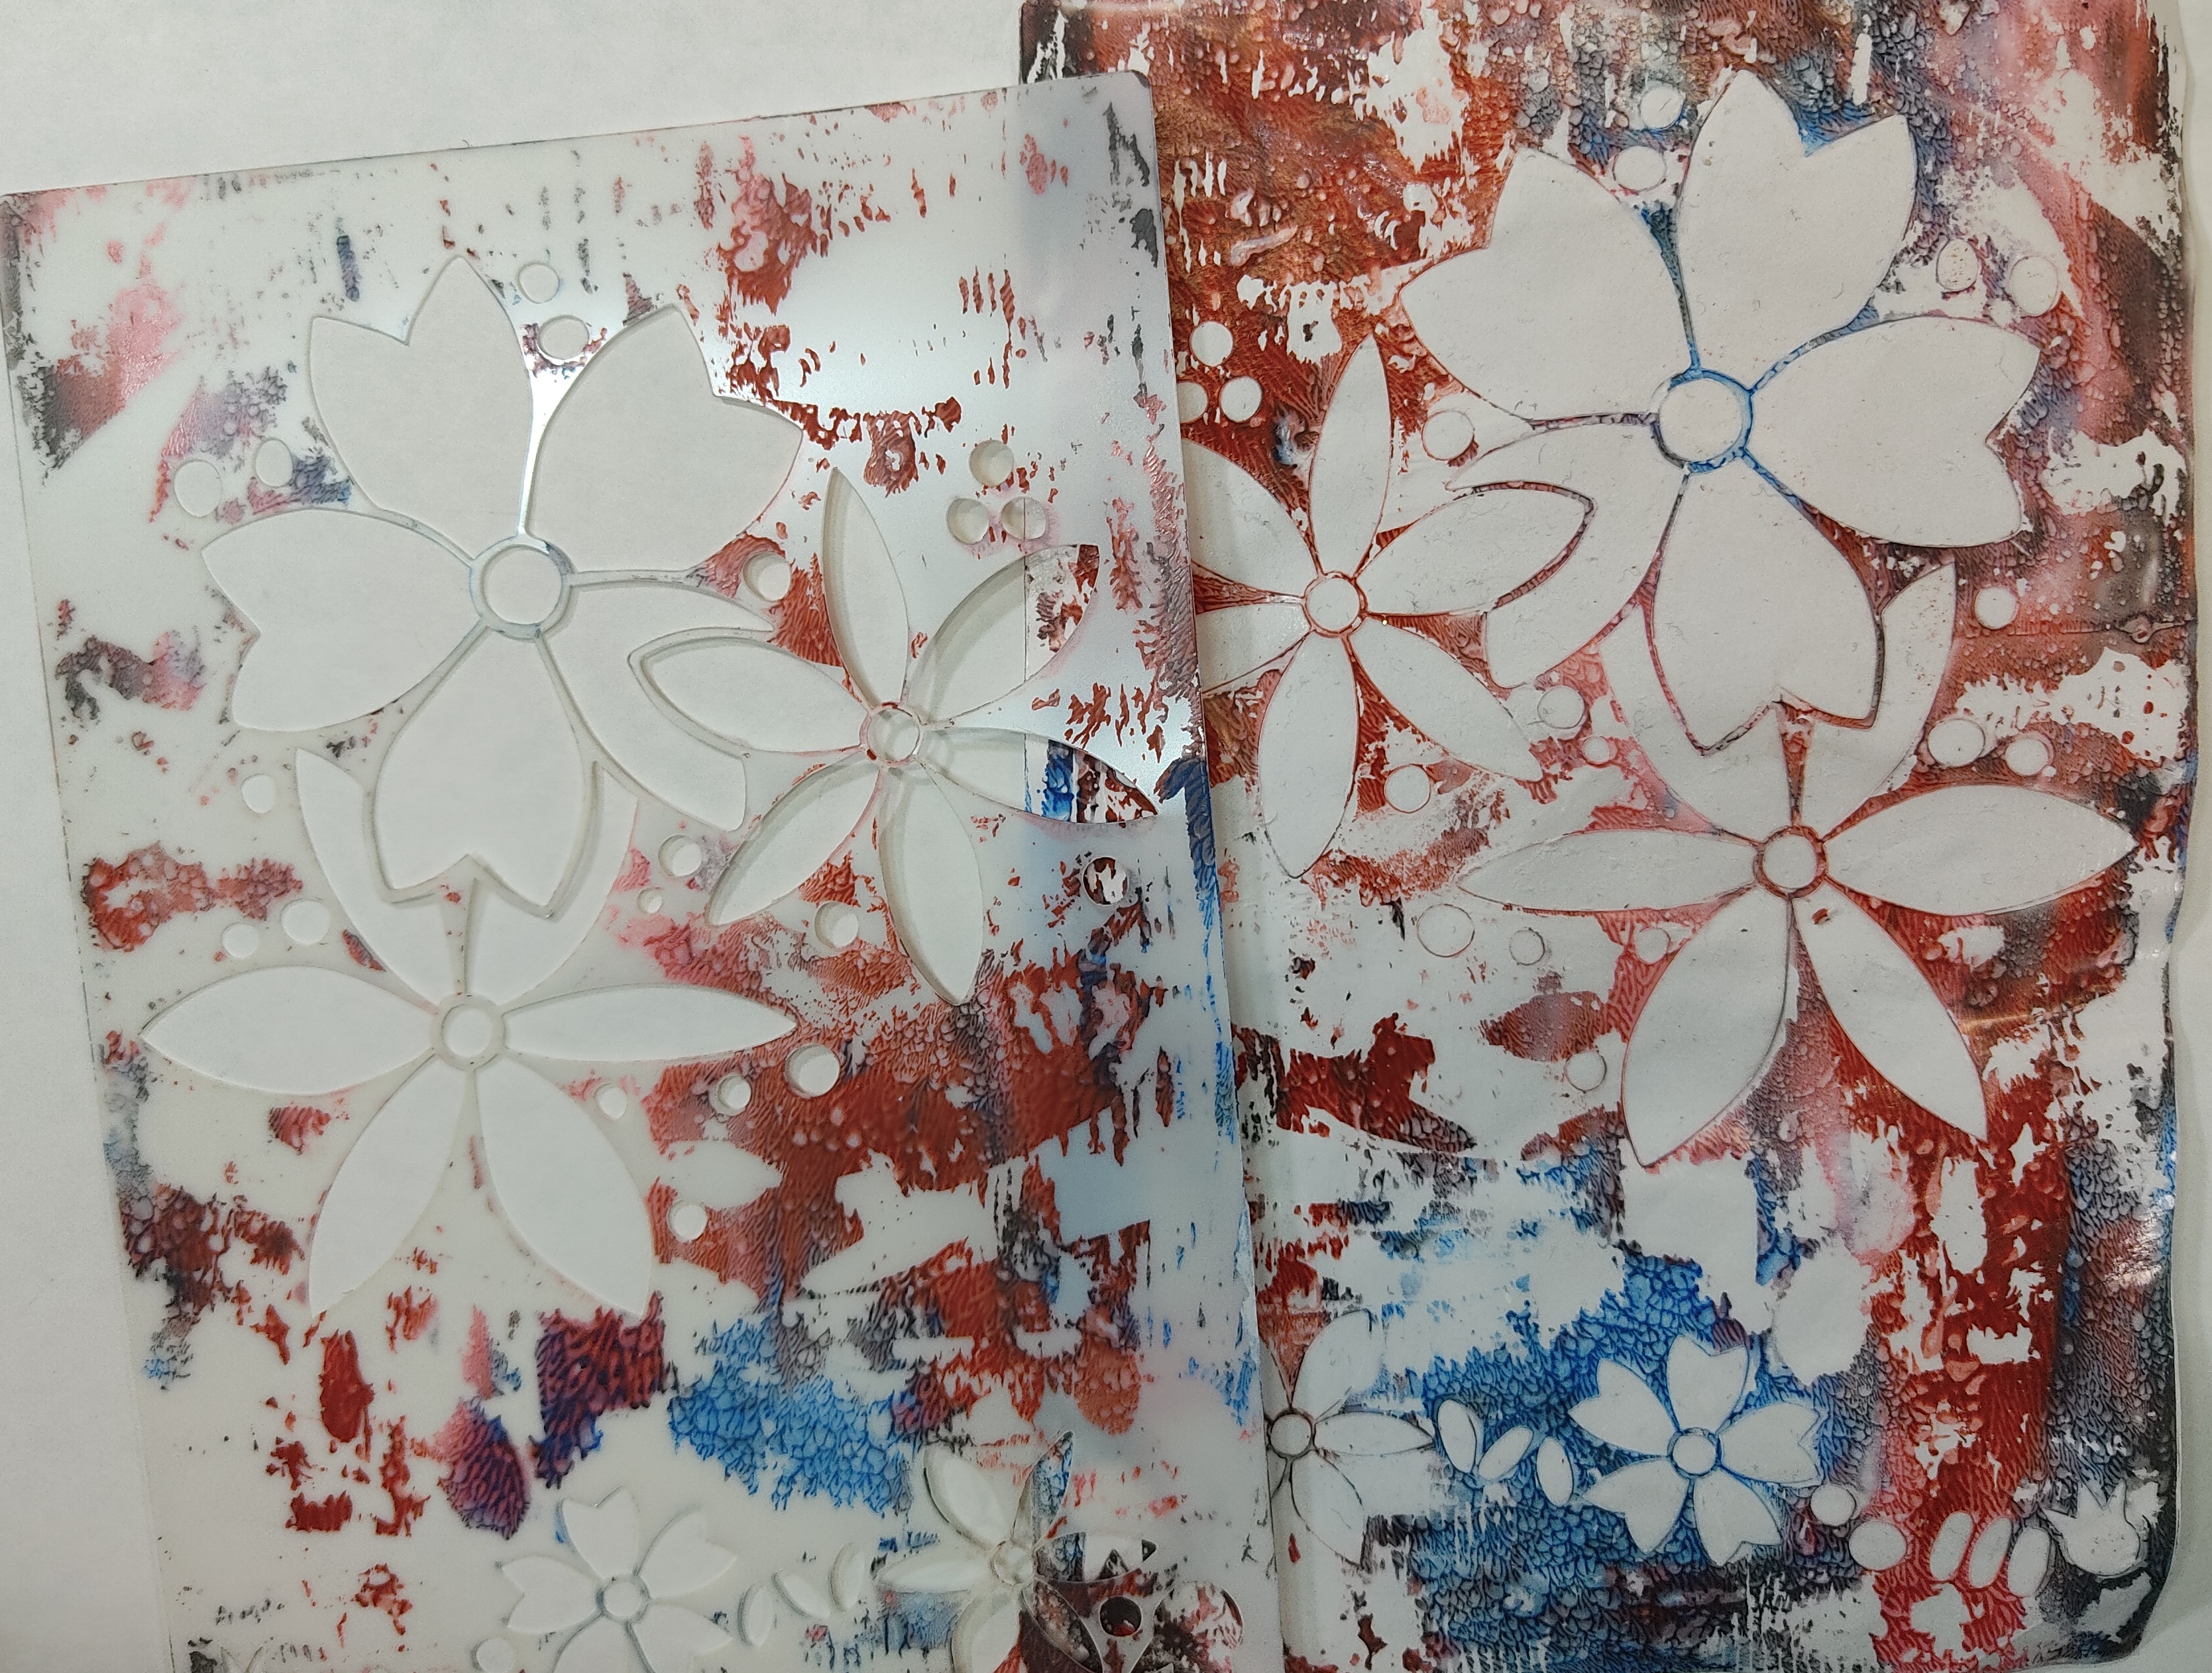
Now the reveal...start in a corner and take the paper off the stencil. Be patient, if the paper tears and in the process does not release the paint, start on another corner and release it from another direction.. work towards the middle. If needed glue any tiny torn part of the paper back with a glue stick.
I think the glue was not bone dry on this one, as some of the paint did not come off the stencil, but I am happy with the grungy look of it.
On the left the stencil, on the right the background. The process did not damage the stencil in any way.

As mentioned before, I created two journals with the papers. Enjoy the pictures.
The dark of the Slate Fresco Finish
gives the colors more depth and variety.
Two journals, two little gifts.
I will certainly rescue paint from stencils to create grungy backgrounds again...no need to scrub the stencils with soap and water.
I hope you find this tutorial inspirational and you will have a look through your stencils to create one of a kind papers.
Leaving paints on stencils deliberately is not something we would normally do, but we all have stencils with gorgeous paints on them, don't we?
Ellie Knol
Facebook: https://www.facebook.com/EllieKnolCrea/
Instagram: https://www.instagram.com/ellie.knol/


6 comments:
Wow fabulous Ellie! what an amazing technique. I have plenty to practice on! thank you x
What an awesome technique Ellie, I will certainly think of this the next time I have paint on my stencil.
Thank you so much for sharing, stay safe and have a wonderful day.
You know what I’m going to be doing tomorrow already…checking out my dirty stencils 🥳 thank you for sharing x
Thanks so much!
Thanks for sharing this technique Ellie! I'm a very clean crafter and always wash my stencils but this is a great reason to leave them mucky! I definitely need to free my messy side! Thanks ~ Stef
This is a great idea, a twist on gel print photo transfers, but with the dirty stencil, how fun! You are a clever gal Ellie and I appreciate you sharing with us. I will definitely be trying out your technique. Hugs, Autumn
Post a Comment