


Hi everyone, it's Renata Peley with you today, and I'm here to share with you an art journal page made using some fun stencil techniques.

I think the majority of us have another hobby besides crafting and that is gathering art supplies. And while that really is a great hobby, sometimes it can get overwhelming and make us forget some exciting stuff that we can do with the goodies that we already have. So, my plan was to remind you of a few interesting techniques that you can do with your stencils.
Kim Dellow has really fun stencils. Some of them are standalone, while others have matching stamp sets, and in this project, I am going to show you how you can use both of these stencil types.


I more often tend to paint and color with watercolors, and for a long time I was lacking the confidence in working with acrylics. One of the first techniques that made me like acrylics was gel-printing, so I decided to start my project with a dash of acrylic confidence.
The feeling of spring is really starting to overtake me, so I thought to make my art journal page reflect my springy mood to you as well. For that reason, I chose the following PaperArtsy Fresco Finish Chalk Acrylics: Blue Oyster, China, Limelight and Granny Smith.


Also, at this stage I already knew that I would use the stencil PS048 to make some flowers for my project, so while my gel-plate was out and messy, I prepared the first layer of paint. I tried to mix at least two different shades of a single color for each page. I wanted a green page for the leaves and pink and purple pages for my flowers.

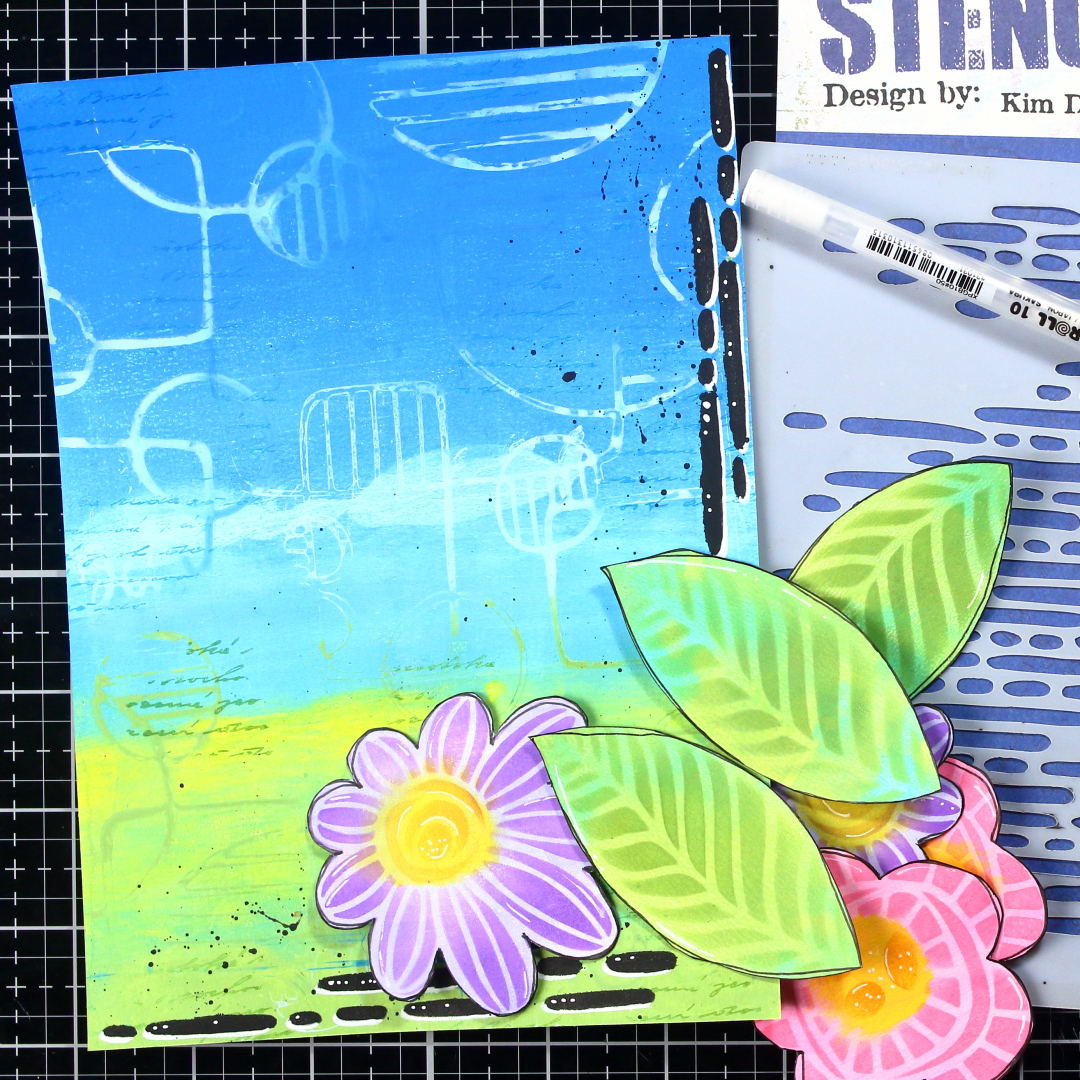
Now comes the time for the first stencil technique I wanted to share with you, and that is stamping with the stencils. First, you have to be aware that you won’t get a crisp image this way but if that is ok with you, you can get some really fun results.
I started off by diluting some of the colors I already used for my background by adding a bit of water. For better results, you should aim for a somewhat uniform watercolor look. As a next step I dipped the PS040 stencil into diluted acrylics and carefully pressed it onto my background. I like to press it with paper towel, to pick up accidental seeping and so I don’t get my fingers too messy.


When this layer was dry, I wanted to add just a bit more interest to my background. I am kind of a fan of some text on my background, so I really couldn’t resist stamping a beautiful script from the BG2 stamp set. I wanted this to have only a subtle appearance, so I chose to stamp with Archival Ink in the colors similar to those used on my background.


At this point, I put my background aside and I started working on my images. As I mentioned, I prepared a first layer of color on my gel-plate, so now I started working on adding some more color, shades and details. For my flowers and leaves I used the PS048 stencil from Kim Dellow.

For each element, I was adding some ink in a similar, (but a bit darker) shade of the acrylics I used for the first layer. And when I was happy with the color, I added a doodle frame for my elements with a black ink pen. On the photos below, you can see, step by step, how I colored the leaves and the flowers.


I repeated this process for all of the elements and you can see my finished flowers and leaves after fussy cutting, on the next photo.

I believe that sometimes some small details can make a difference between a just alright art journal page and a really beautiful one. One of those details is, in my opinion, coloring all your elements in the same manner. Don’t get me wrong, this is not a rule, and sometimes various coloring methods pulled in one project can give a great result, but that might not always be the case. So, in full honesty, this was not my first batch of flowers. The first ones I colored with Distress Oxides. And while I really liked how they turned out, they just didn’t match the rest of my project. For a moment there, I was looking at my project and felt something was off, but I just couldn’t put my finger on it. The realization hit me the moment I took those gel-plate printed backgrounds to color my birds from the EKD02 stamp set by Kim Dellow.


Now I had my background, my birds and my leaves and flowers colored with the same mediums on the same type of paper. And somehow, that pulled it all together and all the elements started to look like they belonged together.
At the moment, I was happy with those, so I decided to play some more and show you my third stencil technique for this project. And for that, I was going to use the PS036 stencil and Snowflake and Little Black Dress acrylic paints.


What I wanted was to give my project an interesting frame. First, through the stencil I layered white color, let that dry and then slide my stencil a bit down and to the side and put black color over it. This technique can be really fun and have some stunning effects. In truth I went rather simple, but I highly encourage you to try it with some other stencils as well, and be brave to try all sorts of crazy color combinations. For more inspiration on this technique, you can also check a wonderful tutorial by Leandra made all the way back in 2012. Anyway, to accentuate my results, I also used a white gel-pen and put some little details on my stenciled lines, just for fun.
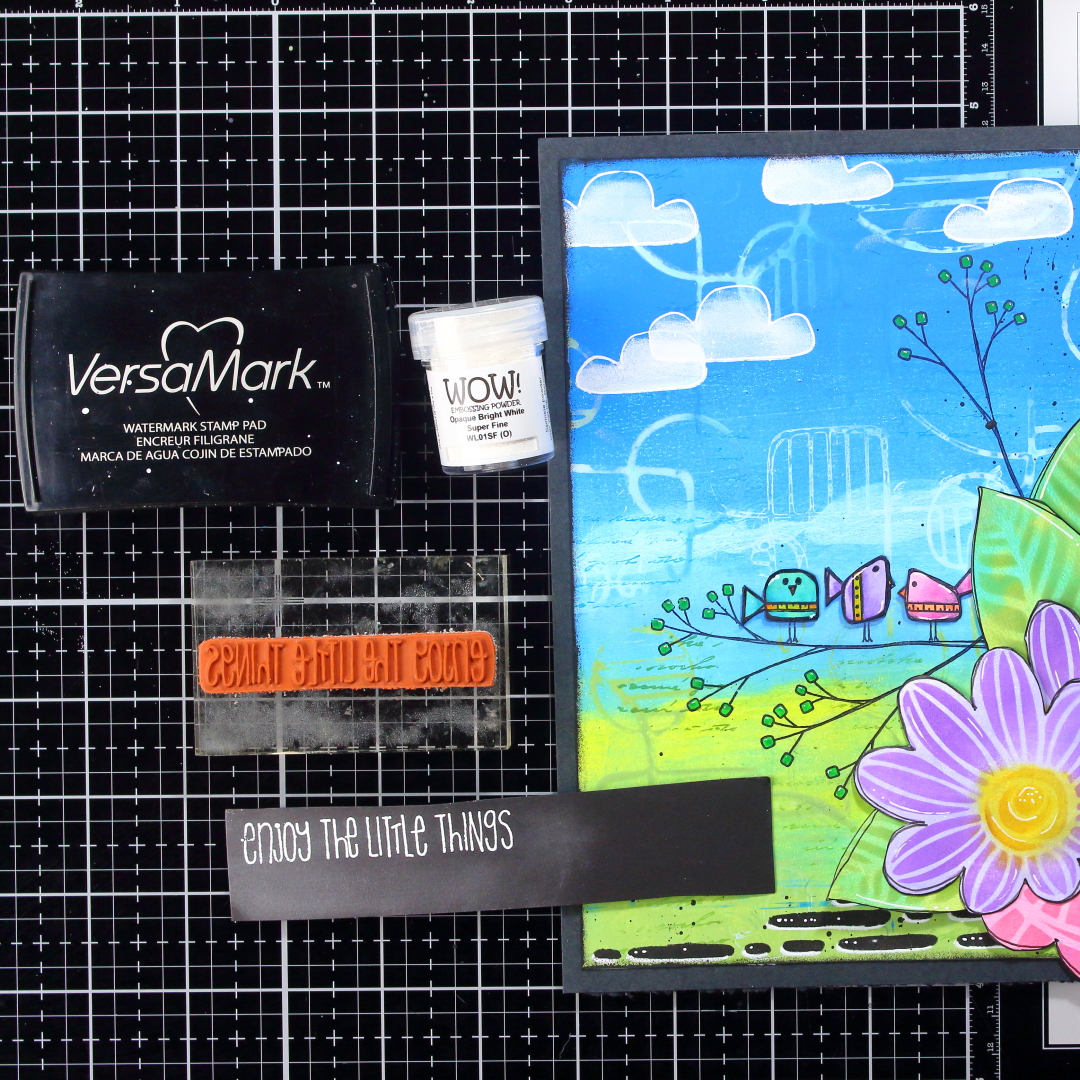
As I had already planned out the location of my flowers, before gluing them to the background, I did some stamping with the Jet Black Archival Ink. I used the EKD02 stamp set by Kim Dellow, and stamped the birds and the branches.

Also, since I had the corresponding stencil (PS035), I decided to make my life easier and use it to give those little birdies a shadow. I like to give shadows to the elements which lay flat on my pages because that gives them the illusion of dimension and makes them stand out more. For that, I used an ink which is a few shades darker than the background on which the birds are laying.


One of my favorite parts of the art journaling process is the assembling, when all the parts come together to form a story. While I glued the birds flat on the paper, for the flowers and the leaves I applied just a drop of glue so they would lift a tiny bit on the edges and get some natural shadow and dimension.

I didn’t know why but I still felt as if my page was missing something. And just with a glance at the stencil PS035, I knew just what it was. I needed some happy clouds. I took my white gel-pen and drew the clouds directly on my project. Then I filled them in with some Cut-n-Dry foam and Snowflake Fresco Finish Acrylic paint. When I was coloring my clouds, I paid attention to put more white paint to the bottom of the clouds, while leaving the upper part more transparent. I think that helped to give some dimension and fluffiness to my clouds.

To be honest, at this point, I felt like my project had too much weight in the corner where the flowers are, so I needed something to give it a bit of a balance. For that purpose, I employed two tactics. First, I gave my project a well-positioned sentiment which I heat-embossed on a piece of black cardstock, and second, I gave it a nice wide black frame.
Now I was finally satisfied with my art journal page and felt that it was complete.


At the start of my “artsy career”, I was doing mainly decoupage. At that point working with stencils was my worst nightmare. Somehow, I never managed to get the results I was going for. And for a while I steered clear from stencils. I don’t know exactly at what point, but after quite some time I decided to give stencils another chance. And boy, was I happy that I did that. Suddenly I realized it is not as hard as it seemed in the beginning and even more, there were just so many more ways to use stencils than I originally thought. In this post I managed to show you only a few of those ways, but you can be sure this is only a small part of all the fun possibilities. Just be brave and play around.
Renata 💓

Facebook: Renata Peley
Instagram: @renata_artjournaling


No comments:
Post a Comment