Hi everyone, it's Jenny (Pushing The Right Buttons) with you today, and I'm here to share with you a few ideas for ways to use the new PA Mini Stencils designed by Dounia.
My original intention was to create a few neutral toned tip'ins for my art journal but that soon snowballed into a number of interactive pages featuring different techniques as I quickly realised some of the endless the possibilities these stencils hold.
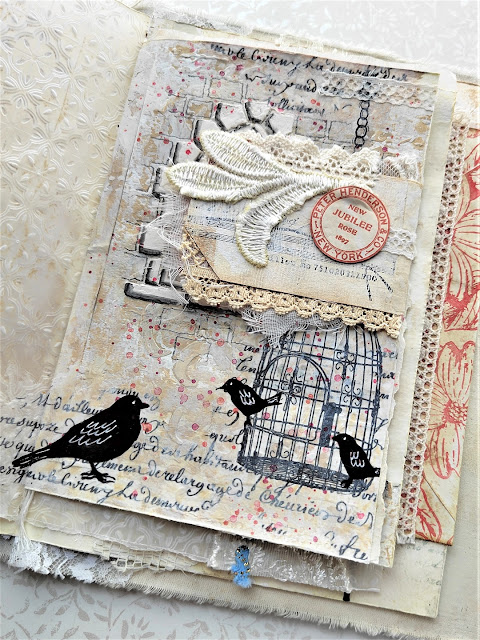
Here is the first of those interactive pages; you might spot that it also includes some of the new PaperArtsy Printed Tissue. I've put together a short tutorial for this one and then go on to share the basics of another four pages so grab a coffee!
These are the stencils used in my projects - PM015, PM016, PM017, PM018 and PM019. They have been teamed with Tracy Scott's stencil PS279 which also features architectural designs. And importantly, for those who feel less confident in their ability to draw bricks freehand, there is a little group of three brick shapes in the middle of Tracy's stencil that work perfectly with the new ones.
Try removing the centre of stencil PM15 before scraping Grunge Paste onto your background. If you are working on an uneven surface it means your window area will have a flatter surface onto which you can add the more intricate details.
Tear off pieces of PaperArtsy Printed Tissue and apply around your window as an alternative to stamping images and text. I drew in a chain from which to hang the birdcage by adding simple circles with a permanent black ink pen. This can all be 'knocked back' with a diluted layer of gesso. I went on to add extra tissue at the top to balance the design.
Paint over your birds and add some extra details with a contrasting permanent ink pen to make them stand out. Moving on to the window you can draw in the details to help guide you with where to add colour.


I created an ombre effect with Fresco Finish Chalk Acrylic Paints in Claret, London Bus and Scottish Salmon before using the central part of the stencil to apply more Grunge Paste. Give your dry paste an enhanced 3D look by blending grey ink around the lower corners of the bricks.
The colour in the window draws the eye on an otherwise neutral-toned page. Unify the design with splatters of the same colours.
To finish decorate the outside of the tag flip with trims and your favourite PaperArtsy stamps. The words inside mine came from Alison Bomber's Music & Silence stamp set EAB03.
You may also see from the photo below how I decided at the last minute to draw in extra brick detail with a regular pencil to stop the window from floating on the finished page.
Here's the next two page spread featuring a flip open page and some lacy detailing.
It all got too messy and complicated for me so I put tissue over the top and painted over the majority of the page with Wisteria Fresco Finish Chalk Acrylic Paint. I find it helps to draw around your stencilled bricks (adding more if needed) before painting over them with Sand and Snowflake Fresco Finish Chalk Acrylic Paint. And don't forget that shading trick from the last page!
With the window back to being the centre of attention I could add floral images from Kay Carley's stamp set EKC40, coloured with Amethyst and Verdigris Fresco Finish Chalk Acrylic Paints.
On the opposite page is a lace page with more layers of fabric and some bespoke trim...
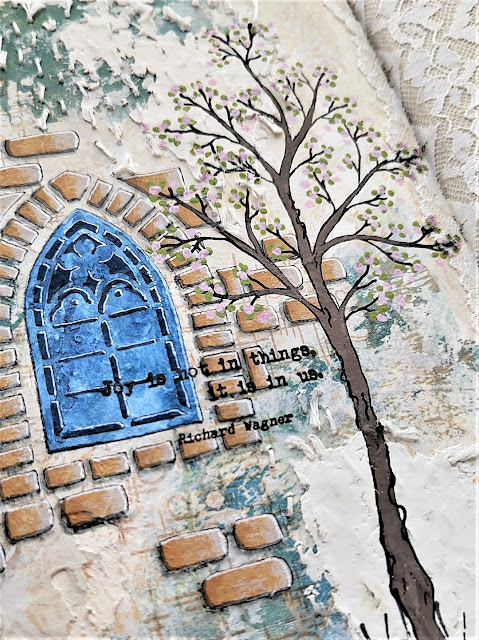
For anyone who loves parchment craft (and anyone who wants to give it a go) these mini stencils are the ideal size. I chose to go simple with a ball tool and white pencil but I know there are masters of this craft out there who could go to town with shading and colours galore.
After cutting around the embossed design from stencil PM15 I took a little care to add dry adhesive behind to secure it in place.
The tree from Kay Carley's stamp set EKC31 can easily be transformed from Winter to Spring with the addition of dots signifying new leaves and blossoms whilst carefully curated words from Alison Bomber's stamp set EAB14 can make you pause and reflect.

As promised here's one last project to get your creativity flowing; this one uses the outer of stencil PM18 and inner of PM17. Smoosh embossing ink through them and heat emboss with a light/white embossing powder before spritzing with water and sprinkling on some Infusions powder. My card had white gesso on it initially (hence the patch of white down the centre) and I moved the dilute colour around to make sure every part was covered.
Going down the clean and simple route this method would also work perfectly on watercolour card with a hint of colour brushed over the window - imagine using one for a christening, wedding or sympathy card.
I stamped and fussy cut flowers and leaves from Kay Carley's stamp set EKC06 where you will also find the small dragonfly image from the lilac page earlier. A few fabric and lace trims are all that's needed for that shabby chic look.
I'm still brimming with ideas for using these wonderful mini stencils, especially as the size means they can help you make quick little projects or be extended/repeated to fill journal pages and more.
Thank you so much for stopping by.
Jenny


.jpg)
13 comments:
Absolutely amazing journal Jenny!!
This journal is a jewel of book with great technique and precise design. I love the way you have used the parchment craft and embroidery, also PaperArtsy tissue paper and Kay's stamps. Just wonderful. xxx
It's wonderful !!!! did you share somewhere how you made the base of this journal ?
kind regards
Thank you Toutencolle! I created another journal in the same way as this one last December. You can see the tutorial here; https://pushingtherightbuttons.blogspot.com/2021/12/comfort-joy-with-eileen-hull-designs.html
Hope that helps x
Etsuko thank you! xx
Fabulous tutorials for your gorgeous pages! All I can say is - WOW!!
wow, Jenny, these pages are just stunning. I love it.
WOW! This is stunning. Love the colour scheme, and your attention to detail is amazing. You've just convinced me that I need these little stencils!
Blown away by this post Jenny, just amazing artwork. I love the idea of using archway stencils in this way so thanks so much for all your wonderful inspiration. I will have a go and if it turns out half as good as yours, I will be pleased! Thanks ~ Stef
Stunning journal pages Jenny! I particularly enjoyed the one with the window outline embroidered to provide detail and texture. So pleased to see all the pages you have done, they are heart lifting.
Susie, Helen, Linda and Stef thank you so much for your lovely comments. Stef please make sure to let me know when you share your art - I'd really love to see xx
Susie, Helen, Linda and Stef thank you so much for your lovely comments. Stef when you share your finished art please let me know - I'd love to see it xx
Amazing work Jenny…….I need to get back to this kind of work,,,you’ve inspired me!
I am always enamored by your creations, but these pages playing in architectural design really have me smitten Jenny. I love every detail on these pages, the stitching, the use of neutral colors and the gorgeous texture created with GP and laces. Another triumph of a post! xx, Autumn
Post a Comment