
~ Leandra
I
was toying with what possible substrates to use... tags (of course), or
an art journalling page? But when I was chopping things back in the
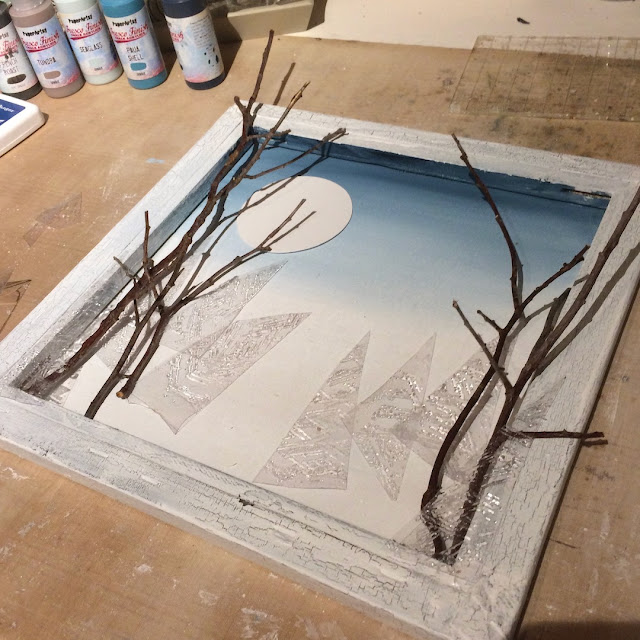
garden I was left with some twiggy branches, and suddenly I knew what I
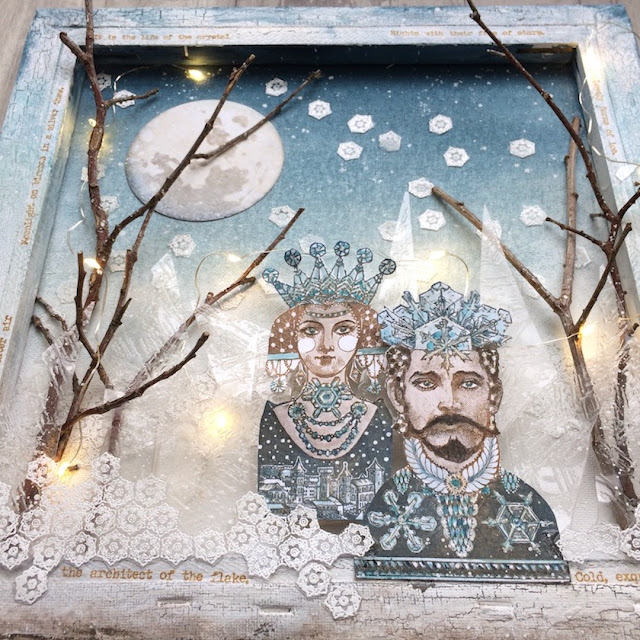
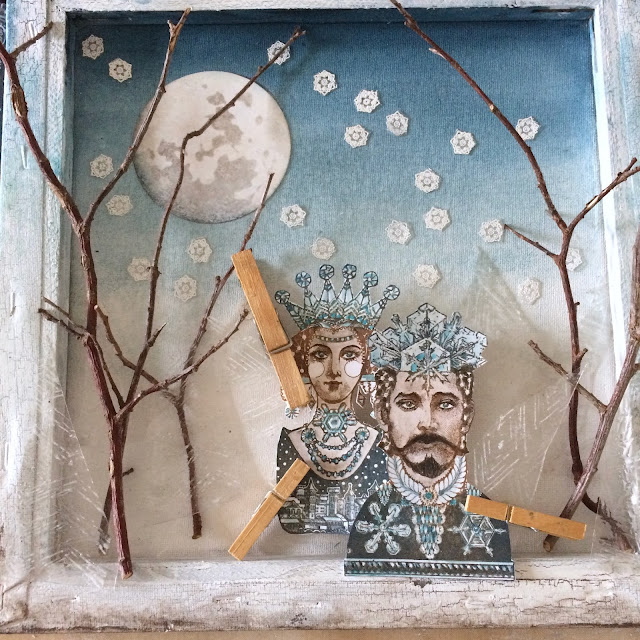
needed to create a kingdom for my icy king and queen - a reverse
canvas. When I put the stamps in place to see the effect, I knew I was
on to something...


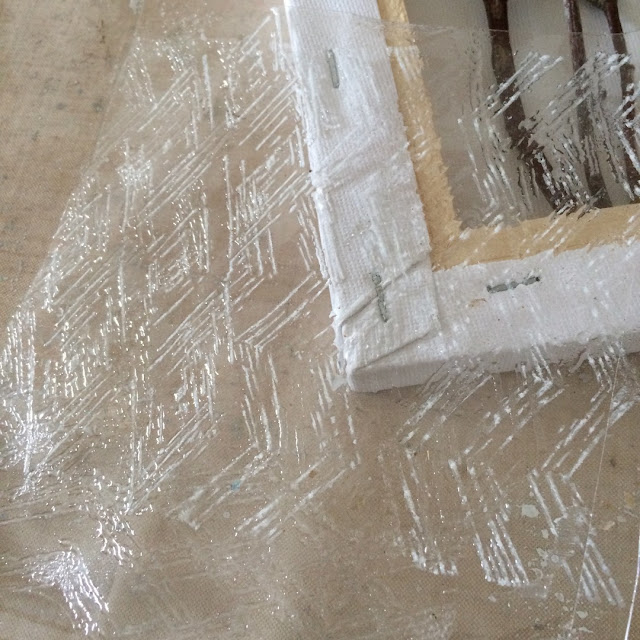
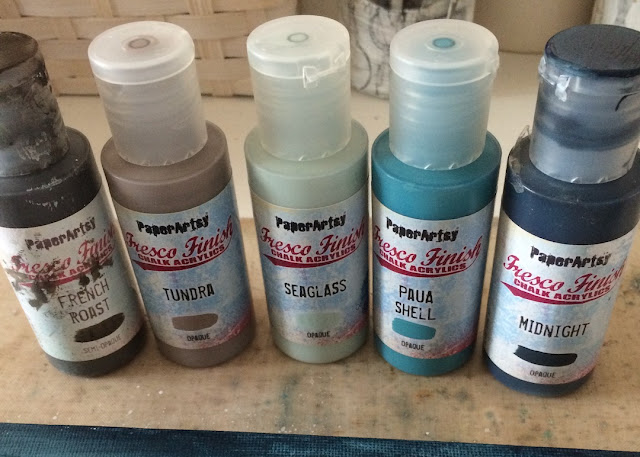
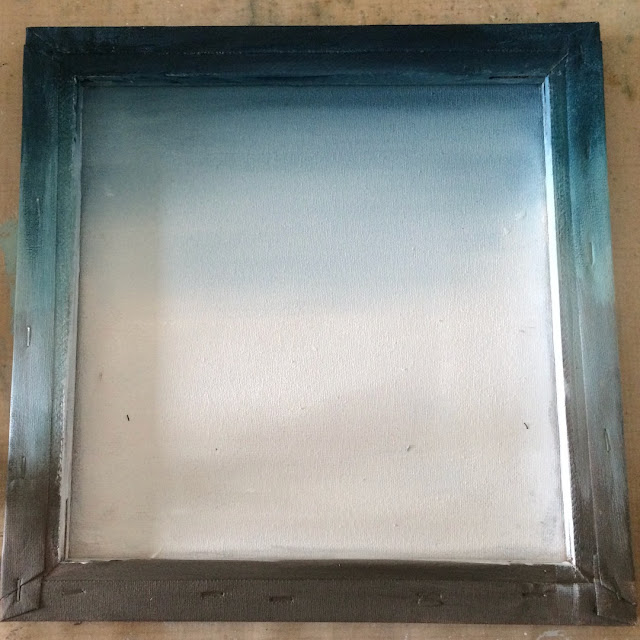
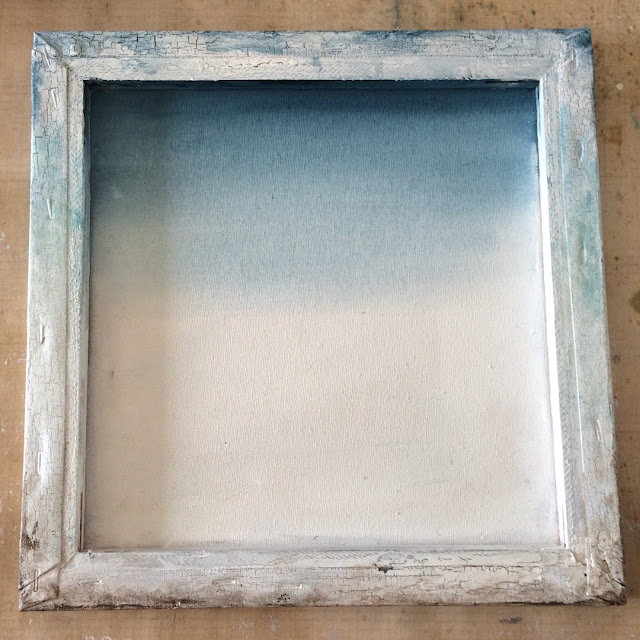
I blended them onto the frame of the canvas, starting from darkest Midnight at the top, down via Paua Shell and Seaglass, on to the earthy Tundra and French Roast at the bottom. I also gesso'd the inner canvas and blended some Midnight into the still wet gesso to start building the skyscape. (The reverse sides of canvases aren't prepped, even if the fronts are, so it's worth a coat of gesso so that they don't soak up all your precious paint.) Don't get too attached to this look...
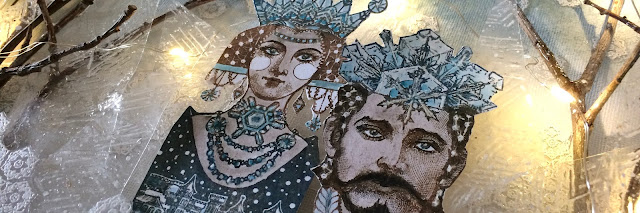
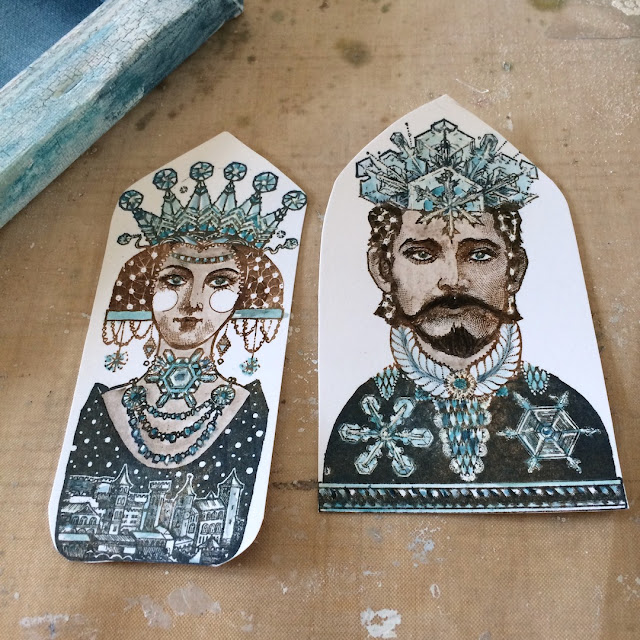
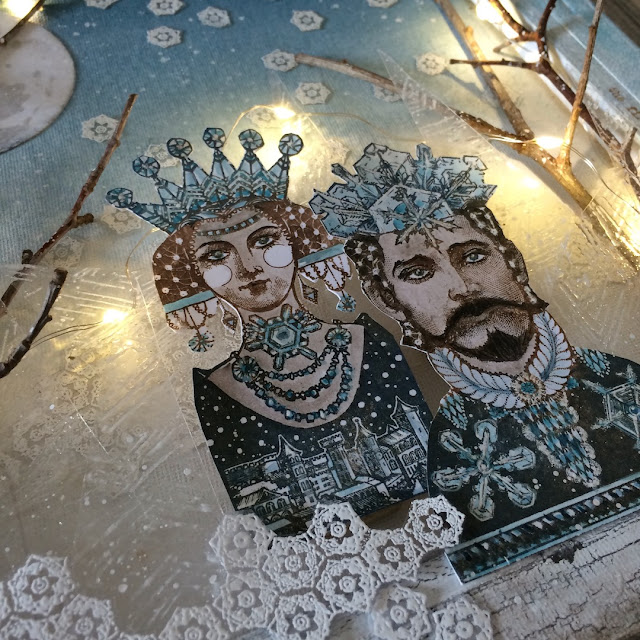
Okay, now we're cooking (in very cold water!)... time to invite the Ice Queen and King to join the journey. I used a stamping platform to stamp them in a combination of Archival Inks, Potting Soil and Night Sky, and then painted them with the same palette as before, but adding the icy Wolf Eye to the mix. I then stamped again to revive some of the clarity (thank you stamping platform). At first I cut them in these palatial arch shapes...
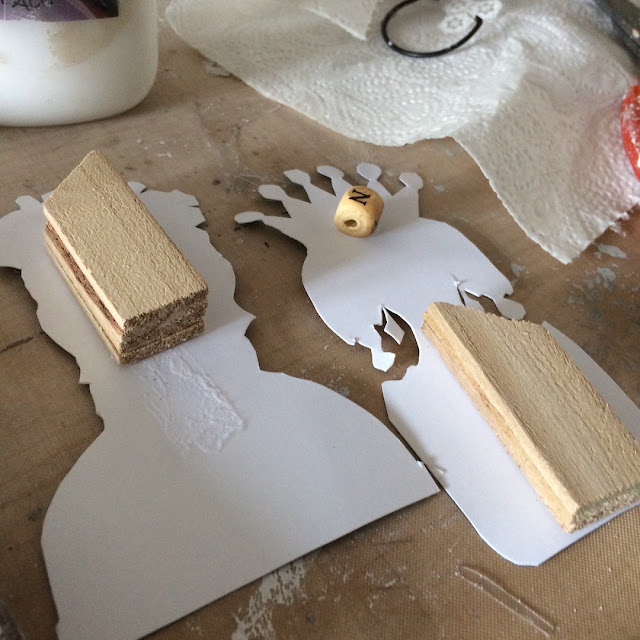
You can see in that photo (as well as a couple of spoilers for what's coming) that they are mounted dimensionally within the frame. I used the wooden stretcher struts that came with the canvas to support the Ice Monarchs, with an extra little letter cube for the queen's head. Let me share with you the behind-the-scenes glamour!
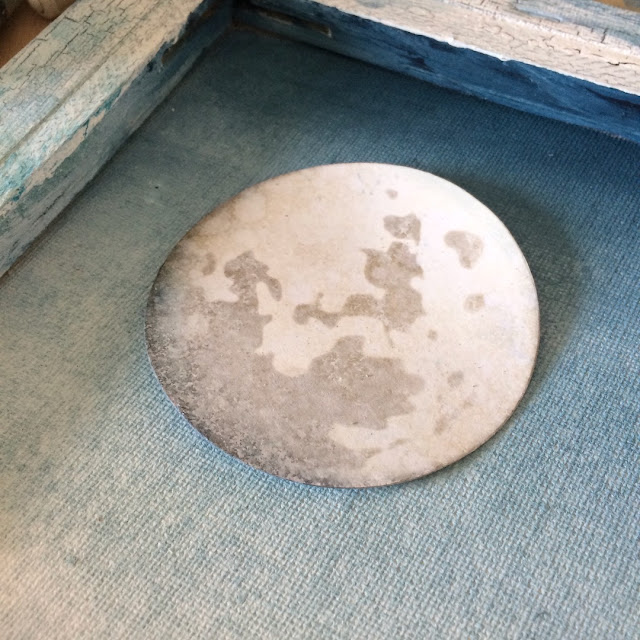
If you follow me on Instagram, you'll have noticed that I'm slightly obsessed with the new Tim Holtz Moon Masks... it was pretty inevitable that one of them would end up being part of my icy landscape, inked and painted onto a die-cut circle just the right size.


Some of them are individually cut to drift down through the moonlit sky...


And this is where things started to get pretty tricky. I wanted my shards of ice to be part of that dimensional look - jaggedly sticking up at different depths within the canvas. But when something is see-through, you can't mount it on wooden blocks like the king and queen. That's not going to look good! I worked out that some of them could be glued to the backs of the Ice Monarchs themselves...


Others are glued to the reverse side of the snowdrift pieces of acetate, sometimes with some twiggy support to help them stay in place, and a couple of foreground pieces are glued on the canvas frame itself. There was quite a lot of clothes peg action needed one way and another!
It was messy and frustrating and a real juggling act at times, but I think completely worth it for the layered effect.


It must be Archival because they need to be smothered in glue to get them to melt into the frame. Careful that the fragile tissue paper doesn't tear...


These phrases are gathered from two different quotes at the bottom of my Eclectica Alison Bomber Winter Edition (EAB05), one by John Burroughs and one by L.M. Montgomery (best known for her Anne of Green Gables books).


... of snowflakes and icy shards...


... and the moonlight.

I haven't made the lights a permanent fixture yet, as I do like the icy look when they're not there at all...

Perhaps in the end I will give in and bore a hole through my canvas to fit them properly and glue them in place, but it's just the work of a few seconds to thread them into position so, for now, they're a removable element. And totally worth it for lighting up the fire of the frost!

I hope you enjoyed visiting this kingdom of snow and ice, and entering the presence of the Monarchs of the Ice.

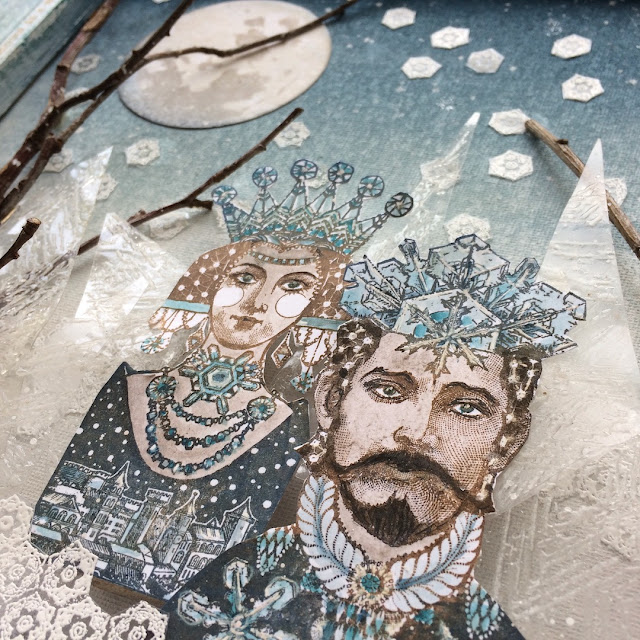
I'm absolutely delighted with my Jack Frost textured shards of ice - it's definitely an effect I'll use again - and I love the snowflakes, both floating in the air and gathering on the ground. I love how all of it works to echo the intricate snowy designs on the Lynne Perrella figures.
Do have a go with stamping and embossing on acetate - it can really give a different impact to an image, and allows you to build transparent or translucent layers for a lovely sense of depth, especially if you've got a reverse canvas to build it all in.
Thank you so much for stopping by today to see the results of my stamping mash up. I really enjoyed working out how the different designers' elements would work together to tell the story. And I hope you'll be inspired to try out some unexpected stamp combinations to see where they take you. Happy crafting all!
Alison xx
Blog: Words and Pictures
Instagram: w0rdsandp1ctures
Pinterest: butterfly crafter


27 comments:
what a beautiful mashup Alison! a perfect use of Lynne's stamps.
Your mash up reverse canvas is truly magical!
Thank you for the step-out photos and the clear instructions.
P.S. I knew there was another reason (besides shakers) that I had been hoarding acetate packaging! I didn't realize that you could heat set on it!
Absolutely gorgeous! Thank you for sharing the process.
Thank you, Helen, Shirley and Kathi.
And yes, Kathi - stamping and embossing on acetate is one of my favourite things to do with the quote stamps too... then you can have them hovering over a tag without hiding the visual elements too much. Hope you have fun playing with your hoarded stash of acetate!
Alison x
Oh, and sorry everyone that the video isn't working... I must have loaded it wrongly or something. Sigh!
Alison x
So very beautiful Alison,, so much beautiful detail.. the 'lace' is gorgeous! xx Ellie
Breathtakingly beautiful Alison, and I will think about your project before I throw away the stretchers from canvas.
Some wonderful ideas, and a great mash up. Obviously the browns complement the blues, but I would never have thought of such a wonderful contrast. And as for your quotes luckily fitting around the frame, well, you reckon to make your own luck!
The images are perfect, the icy shards and Gwen snowflakes all add to this magical Narnian world. I love it! Where are my canvases, let me at em! Xx
Alison, your Kingdom of ice and snow is stunning and the ice Monarchs look perfect in your mash up reverse canvas. The ice shards in the background give real depth to the ice effect and the moon is fabulous. The natural twigs are such a lovely addition. As I have a slight obsession with lights, I do like it lit up, although it does 'warm' the piece up... A fabulous creation!
This is absolutely gorgeous! The ice effect is incredible and the entire scene is so beautiful! With lights and all... Everything blends in so nicely. Love it!!
Stunning. I really appreciate the photos and descriptions. Amazing work.
Thank you all... so happy you’re enjoying exploring the Ice Kingdom!
Alison x
So enthralled and chilled, literally via your masterpiece icy post!
Love the addition of the mini lights to set your piece aglow. A most magnificent mashup, your tissue stamped verse around the sides, brilliant, wow, Alison. You are a master of adding delicious details from top to bottom. Stamping on acetate? Brilliant! You really have a knack of working outside the packaging and frame flipping, too. Thank you always for your beautiful complete stepouts, retry that video! You are the Ice Queen and I say that with love!
Beautiful! So much care and thought put into this project.
Beautiful! So much care and thought put into this project.
Beautiful! So much care and thought put into this project.
Wow! I would never have thought to use the reverse side of a canvas to give a frame to my work! How absolutely wonderful and great outside the box thinking! Fab storytelling too! Very inspirational ~ Stef x
The acetate is brilliant for the ice effect! I love the addition of twigs in the project, a bit of nature inside...
Thank you so much, everybody... such amazing comments and feedback - I'm smiling so much that it hurts a little bit!!
Alison x
Exquisite make honoring these incredibly regal Lynne Perella stamps, as well as those from the other sets... and wonderful stepouts, indignity aside of course! I sense that your move to lovely Bohemia is awakening the magical stories in your heart and mind.... and cannot wait for more!
Love how you used the acetate shards. This is wonderfully magical. Hugz
Wow, fabulous Christmas frame!!! I adore your idea os stamping and embossing on packaging acetate, and your palette of paints and coloring is just fabulous... as well as the whole scene you created Alison, wonderful!!! Lovely details too with the moon, and branches. Thank you for the detailed step-by-step with lots of photos! Coco xx
Fabulous! Xx
Thank you all for such lovely comments.
Alison x
Wow! Thanks for the process, it’s an amazing piece.
Sally xx
Absolutely exquisite, Alison. I love seeing all the decisions you made along the way. The acetate shards are genius! X
Alison, I've saved this post for a time when I could really enjoy it and soak up all of your clever details. Embossing packaging! I would never have thought for fear of it melting! But how brilliant it is. I assumed on IG that you had used an embossing folder, but for this to be stamps blows my mind! This is the most gorgeous project and you've brilliantly executed every single element. I'm in awe of your talents my friend, total awe! xx, Autumn
Thank you also to Sally, Lucy and Autumn - so lovely to read your comments.
Alison x
Post a Comment