Hi everyone, it's Liesbeth with you today, and I'm here to share with you the second life of a pair of old jeans and an old book! Together they become a (usable) handbag!
I love recycling; giving things a second life so much! I saw the idea of making a purse from an old book in Finland a few years ago. There was lots of sewing there, and I figured out how to avoid sewing by using the fabric of old jeans, so anyone can create this. For the painting and stamping techniques I never have a plan...I always just start and see what happens!

So...what I needed was an old book...not a beautiful one because it was to be overpainted and of course some old worn jeans I didn't wear anymore.
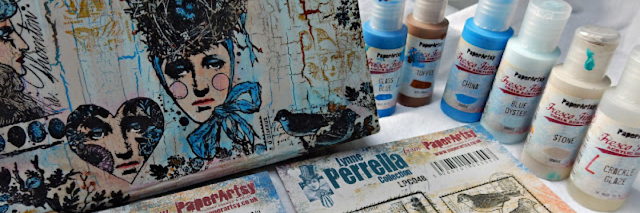
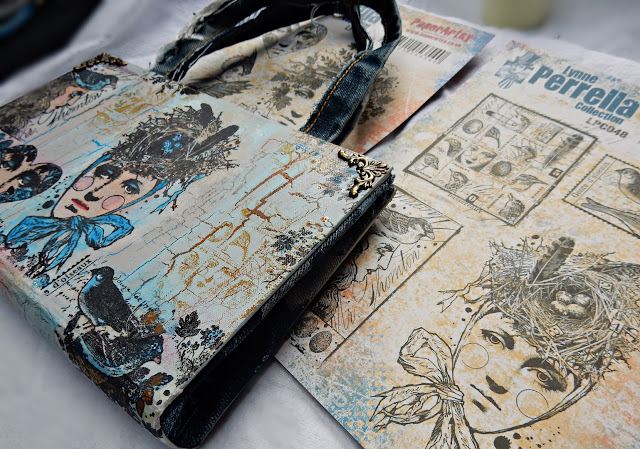
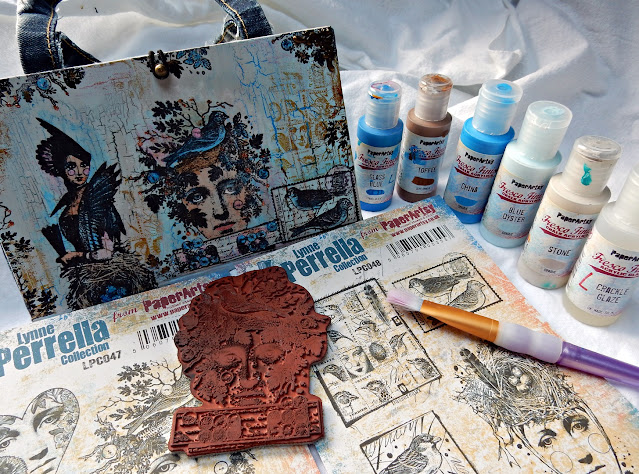
I chose these two wonderful Lynne Perrella stamp sets : LPC047 and LPC048. I also chose the colour combination...that was easy because it's my favourite: blues/turquoises and rust.
Let's start to prepare things first. I cut off the trouser legs from the jeans and cut the legs open to create a flat piece of fabric. I cut off the hems (as shown), I'll use them as handles for the bag.
I cut out the pages of the book (use them for your other projects!) Just the cover of the book remains.
To make the fabric inside of the purse, I set up the book sideways onto the denim opened 12.5cm as you can see here below. Using a pencil I traced the triangle shape inside the open cover. I cut it out adding 1,5 cm to all edges of the triangle. I cut this piece two times, for both sides of the purse.
I also cut out the body/lining piece, exactly the same size as the book cover. So no seams needed.
The reason for cutting the fabric now, and not after I painted the book cover is because it's much easier to work with the unfinished piece here. I put aside the fabric pieces for later.

Now the fun part starts! First I covered the book cover with a layer of gesso to be sure the paint doesn't soak in too much. I dried the gesso and painted big parts variably with blue and brown paints. I used PaperArtsy Fresco Finish Chalk Acrylic China and Toffee. I love them, and I love the combination! I didn't work very elegantly here, but that's not necessary because almost everything will be covered.
Now it's the turn of the lighter colours: Fresco Finish Acrylic Paint, Blue Oyster and Stone. I squeezed out lots of both paints onto a craft sheet and made sure both colours were on the brush when I started painting. I covered the entire bookcover with these two paints, I worked quickly and tried not to touch the same spot twice. I used a thick layer of paint...I will get the BIG crackles I need! The crackling starts immediately and it's so nice to see the process; it's always magical!
I let the paints dry very well. Meanwhile I took a Kleenex tissue and took the 3 different layers of it apart. Using Tsukineko StazOn ink - Jet Black, I stamped lots of stamps from the two Lynne Perrella stamp sets onto the tissue paper. I didn't know which ones I needed, so I stamped a lot using LPC047 and LPC048 and some even twice. Instead of StazOn of course, you can use another waterproof ink.
I tore out most of the images, and some I cut out, like the hearts.
With the tissue cut outs, I tried different compositions on both sides of the book cover. When I was satisfied, I glued all parts onto the surface, and also added some small torn out pieces of images (branches and small birds). Be careful, the tissue paper becomes very weak as soon as it's wet.
When everything was dry I thought 'hmmm, not enough is happening there... more is more!' ;-) So I stamped the wonderful grid stamp (from Stamp Set LPC048) here and there with Tsukineko StazOn ink in Saddle brown. Still...not enough... so I also stamped some leaves and branches on the edges using StazOn Jet Black. The leaves and branches...are from the headdress of the big woman's face! I just used the edges of that stamp.(from Stamp Set LPC047).
Time for the finishing touch of the images, where everything comes together. I coloured the skin (faces, hands) with some Salmon Adirondack ink and a waterbrush. Pink Distress ink also worked perfectly to give a bit of warmth!
Time to add some more colour! I love to colour images with PaperArtsy Fresco Finish Acrylic Paint in Glass Blue, because of its transparency and colour; wonderful! I coloured some details like birds, eggs and buttons using it. After that I watered down some of the Glass Blue paint with quite a lot of water till it was like watercolor paint, and painted some shadows here and there around the images so they would pop out even more. I repeated this process with the brown paint I used before(Fresco Finish Acrylic Paint - Toffee).
Time for make-up! With blue colour pencil I coloured the eyelids and irises of the women, the cheeks with pink and the lips with red. The white of the eyes I highlighted using a white gel pen. All these details bring the face alive.
I really LOVE glitter, and use too much sometimes... (not this time 😉) Very subtly I added some blue and copper glitter glue (Stickles) on the leaves, branches, eggs and buttons of the images.
Well...I think the book cover is finished...yes, it is! This is what it looks like now, now it's time to turn it in a nice handbag!
Some details: you can see the shadows I made with the (very) watered down paint next to the faces.

Bringing everything together! But first, while I was poking around in my studio, I found these beautiful metal corner-pieces...perfect for this book-bag! Using tacky glue, I glued them on the upper corners.
I thought the pieces of jeans I cut out before were a little boring...so I decided to stamp onto the fabric. Once I'd seen some pictures of beautiful bleached stamped images on fabric so I thought let's try! So I took a scrap piece and started stamping using pure bleach. Again, I stamped with the haircut, leaves and branches, from the woman's head on Lynne Perrella Stamp Set LPC047 Unfortunately it wasn't a success, the prints were smudged and not detailed at all. Experiment FAILED! 😀
So I tried to decorate the fabric with paint, and that worked well! Same colours again :
Fresco Finish Acrylic Paint in Blue Oyster and Stone. I added both colours together on the stamp, and stamped randomly, turning the stamp every time in another position. I liked it!
So I stamped it the same way onto the cut out panels.
To create the handles of the bag, I glued down the hems on the inside of the book cover, at the same distance to the centre. Allow to dry well. I used clamps whilst it was drying.
For a closure, I attached a hitch fastener (Tim Holtz) between the handles. On the other side, I glued a rubber (hair) band using tacky tape and tacky glue.
Using tacky glue, I glued the triangle end panels at the inside of the bag (yes, now it's a bag!) You have to be very careful here, use rather a lot of glue on the edges, put the fabric in place, press each time with your fingers, press and smooth the seams till it's fixed.
Using a lot of tacky glue, at the edges and in the middle and onto the spine, I finished the bag by adding the remaining piece of fabric (lining) into the bag. I pressed for a long time with my fingers again until everything was fixed.
And a unique handbag is ready to be used!