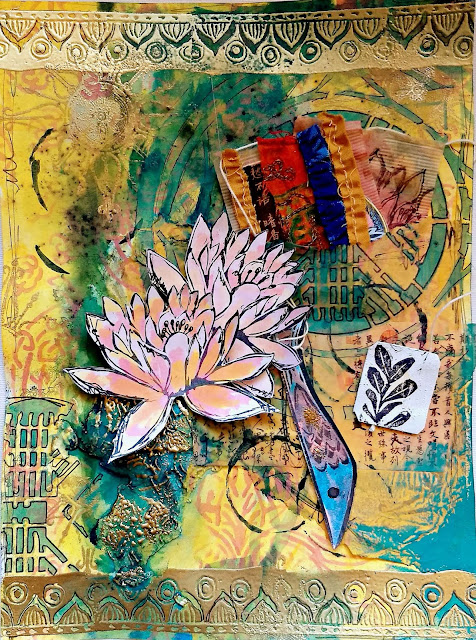
2019 Topic 16: Stamp Carving
What does sari fabric, washi tape, fabric scraps and a stamp have
to do with a teabag?! Kate has tried lots of techniques and produced an
awesome art journal page that incorporates a charming carved stamp!
Hi everyone, it's Kate with you today, and I'd like to share with you an art journal page using my hand carved stamps.
This
year, I have made it a goal to improve my stamp carving technique. I
have never taken a class but I read several books and watched a lot of
videos to learn where to start. With each stamp I have carved, I've
learned what not to do, especially when it comes to more intricate
images. Today, I am working with a lotus that I specifically carved for
this post as well as a few other stamps that I carved within the past
few months.
I
am not going to lie, I struggled with this project. I haven't had a lot
of time to be creative recently and it was a struggle to get the juices
flowing. But I worked through the frustration and eventually ended up
with something I liked.
During the carving process, I stamped the image several times to see where I needed to shave off more rubber with my carving tool. I did this until I was pleased with the image.
Gold embossing is one of my favorite accents so of course I used it with these stamped medallions.
I really wanted a pocket on this page so I tore some tissue paper and then added washi tape and doodling on top.
I painted some teabags with the intention of embellishing them for the pocket.
l added some Infusions to the background. At this point, I was very disappointed with the way the page looked so I decided to layer some stencils.
I starting the layering process using several Fresco Finish Chalk Paints.
More stenciling and a border was added in gold.
Here are all the hand carved stamps I used.
A teabag embellished with sari fabric, washi tape, fabric scraps and a stamp.
Another teabag for the pocket.
I
always love seeing one of my sketches come to life in a stamp that I
carved with my own hands. If you have never given it a try you should!
There are so many free resources to help you get started. And remember,
you might not like your first stamp but don't give up. It can only get
better.
Until next time,
Kate
Blog: https://kateyetter.com/
Facebook: https://www.facebook.com/katesscrapyard/


6 comments:
Brilliant stamp carving, Kate!
Lucy x
Great stamps Kate. Love your project
Wow Kate ! where to start .... your flower stamp is amazing, I would never have thought you had carved that. In fact I was wondering why I had not seen it in a PA set! Then all those fabulous layers ....and tea bag ..... all stunning! Thank you for so much inspiration! x
Fabulous carvings, I like each one. Stunning mixed media art with Gwen's stamps. xx
A fantastic arty page Kate, and I love your stamp designs!
Alison x
Your hand carved stamps are fabulous , Kate . You obviously are a natural especially with all those fine detail cuts . they must have taken hours . Your journal page is a terrific showcasing of them . Tfs x
Post a Comment