2019 Topic 9: Arty Wood Blocks
Amanda's
awesome upcycle takes a game from boring to 'bravo'! She has some great
ideas for a block swap (that she should definitely organise!) and I
love the idea of creating extra elements to make it into useable art.
Hi everyone, it's Amanda (ink-a-pink) here and I'd like to share with you my project for the current topic: Arty Wood Blocks.
Whilst
thinking about a few ideas for this topic considering what I might
create, I found myself quite randomly saying out loud one day 'Jenga'!!!
I guess from that point on the seed was sown and my creative direction
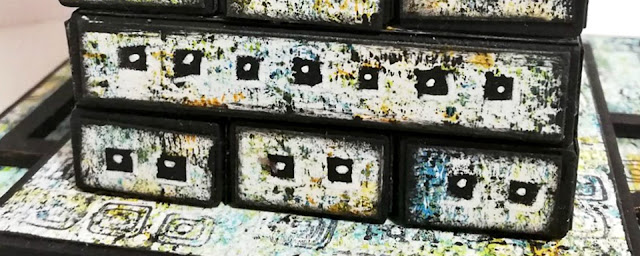
was decided! I would attempt to give a game of Jenga, all 54 wood blocks a grungy arty
makeover and in addition I would create an arty wood platform on which
the game could stand so it could be left out all set up ready to play
and/or be displayed as a piece of mixed media art!
So 'Project Jenga' as it became known began .....
So 'Project Jenga' as it became known began .....
I dug out my old Jenga game, removed it from its packaging...
and primed each of the 54 blocks with gesso before giving them a couple of coats of Little Black Dress Fresco Finish Chalk Paint.
I
set them to one side whilst I created some brayered masterboards which I
would use to cover the Jenga blocks. I chose a colour palette of Mermaid, Seaglass, China, Space Cadet, Butter, Slimed, Tangerine Twist and Snowflake Fresco Finish Chalk Paints.
I worked initially on 3 A4 sheets of PaperArtsy Super Smoothy card but soon realised I needed a good few more -7 in total! Fortunately as I'd used a simple brayer technique repeating the process took no time at all.
Next came all the repetitive creativity - firstly measuring and cutting the required amount of pieces needed to cover all the surfaces of the 54 Jenga blocks; you do the math!
Then
lots of repeat stamping on the wider pieces that would cover the top
and base of the blocks using the triple square stamp and all of the
quote stamps from Eclectica EEG17 stamp set.
This
was followed by some repeat stencilling on the thinner pieces that
would cover the sides and ends of the blocks using the line of small
squares on PaperArtsy Stencil PS016 with Little Black Dress Fresco Finish Chalk paint.
I
also did some 'painting in' of some of the stamped shapes and add
highlights and accents with a white pen to help 'lift' the stamp and
stencil imagery
I know repetitive creativity isn't for everyone but don't let it put you off as its the type of project that you could do in stages, a little at a time. In fact that would be my suggestion, maybe work in batches suitable and manageable for you.
ensuring they would push in and out of the tower with ease. I think in the coming days I will treat the blocks to a coat of soft touch varnish to seal and protect, give them a longer 'shelf life' so to speak.
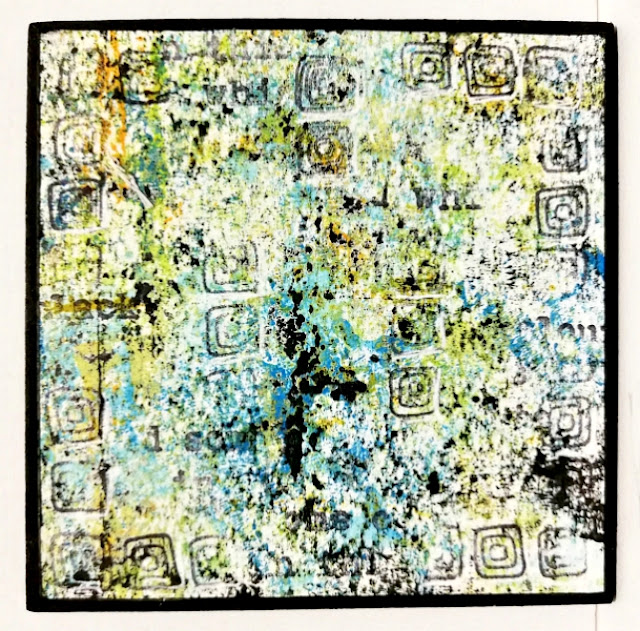
The Jenga platform consists of two wood blocks, one 4x4 inch and one 6x6 inch. Both were primed and painted before being covered -the 4x4 block with a left over piece of the brayered masterboard that I stamped using the triple square stamp from Eclectica EEG17
and the 6x6 block with pieces cut from another masterboard I created working with the same colour palette as before.
I added some stamping detail using once again stamps from Eclectica EEG17.
I wanted to keep some continuity running through from the tower to the platform hence my use of the same stamps and colour palette as I felt this would lend itself better to the overall design and lessen the risk of potential 'clashing'!
I personally find palette knife application allows for a much 'looser, freer' release of the paint;
enabling you to gradually build up lots of layers and depth of colours.
Continuing the masterboard around the sides of the 6x6 platform mirrored the covered sides of the Jenga blocks nicely and again kept the design continuity flowing.
The black painted sides of the 4x4 block that I left exposed allowed me to adhere some broken PaperArtsy Wood Chips by Seth Apter (also painted black) seamlessly to each of the four sides.
I used another wood chip piece to create a removable decorative 'Tower Topper' that would also serve as a 'moving aid' when transferring the Jenga Tower and platform from one place to another. You simply hold the platform with one hand, the topper with the other and move without the Tower tumbling all around!
The final touches were some black inverted eyelets adhered to each of the corners of the 6x6 platform and 'Project Jenga' was complete.
Although it was indeed a big project, and I can't pretend it all ran smoothly. On more than one occasion I almost gave up as there were plenty of bumps along the creative road but I'm glad I stuck with it and saw it through to its completion as I had hours of creative fun along the way . Would I do it again? You know I guess I would; I love a challenge and there are so many creative possibilities with a project like this. The creativity can be as simple or as complex as you choose and how cool would it be to make it into a project you create with friends or a group of fellow creatives. Give/send them all some Jenga blocks and let them work their own personal creative magic!
Keep on Creating
Amanda
Blog: ink-a-pink
Instagram: kynapi10
Pinterest: PinkArt


14 comments:
what a fantastic idea, beautifully executed and turns Jenga into a really gorgeous game!
This jenga now definitely looks awesome!!!
Wow, this is absolutely brilliant, Amanda! I love the idea and I love the colour palette and how you have thought everythjng through. I love the odea of a game you can have sat in the corner of the room as a decor piece until you want to play it. The 'mover' piece is inspired!
Lucy x
Fabulous.... Love it!
A genius idea Amanda, beautifully executed, as all your projects are. I love everything about this wonderful project. xx
Amazing and beautiful work!!! And a lot of patience too!!! Love it
Isa
Oooh! What a clever idea! Love it! Lx
Wow wow wow It's a amazing project Amanda!! Wonderful idea and very fun. Love it!! xx
waue awsome, what a huge work you put into this project it looks fantastic. great idea
Definitely a labour of love, but so worth the hiccups along the way - it's a fabulous tower of art!
Alison x
Wow! Such a fabulous and clever project Amanda! I love your arty Jenga!
Alison xx
Phenomenal Amanda!!! You have such patience to complete such a huge project and it's all done with such care and attention to detail. LOVE how it's all turned out!
A labour of love but it is fantastic ! xx
Thank you so much Everyone for visiting and for your lovely kind words . They are both very much appreciated x
Post a Comment