
To start with I decorated some fabric . I used panels of
calico about 12 inches by 14 inches It
would perhaps seem easier to just stamp one large piece of fabric but I found
that making 3 similar panels simpler. Iron the fabric to have a smooth surface
.I stamped using Black Archival Ink and kept the stamp in place a little longer
than normal to let the ink soak in . I started with both the panel and word
stamps from HP1216.


Finally add Scissors
from HP1213 and various buttons .
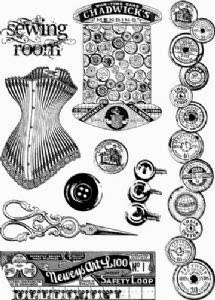

Heat set the ink and
set aside for later.
Next I stamped some
more fabric .I made two different pieces to go together . Firstly a long narrow
piece ( about 4 inches wide ) which was stamped at regular intervals with the
zip stamp from HP1215. I then used the large flower from JOFY 13 and the spike
of buds from JOFY 14 in between the stripes.

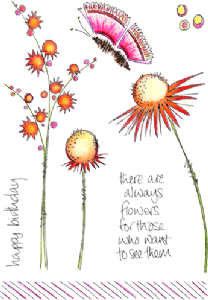


The ink should be heat
fixed and then it can be painted as follows;-
Use Nougat to paint
the large flower petals and centre but don’t paint the spiky bit in between .

Use Autumn Fire to paint the spiky part and blend it out onto the petals .Paint
all the spiky flower parts with Haystack and then blend some Autumn Fire along
one side of the buds .

Blend some Blood Orange onto the tips of the large
flower petals and onto the buds.

Finally
use Eggplant in between the spikes on the large flowers and onto the rounded
bases of the spiky buds.


I really wanted to use
a paper mache chair but I couldn’t find one so I found a sleigh (!) and changed
it into a chair.

Cut off one side of the sleigh and turn it round to form the
back . Cut off the front and the front
curve on the other side .
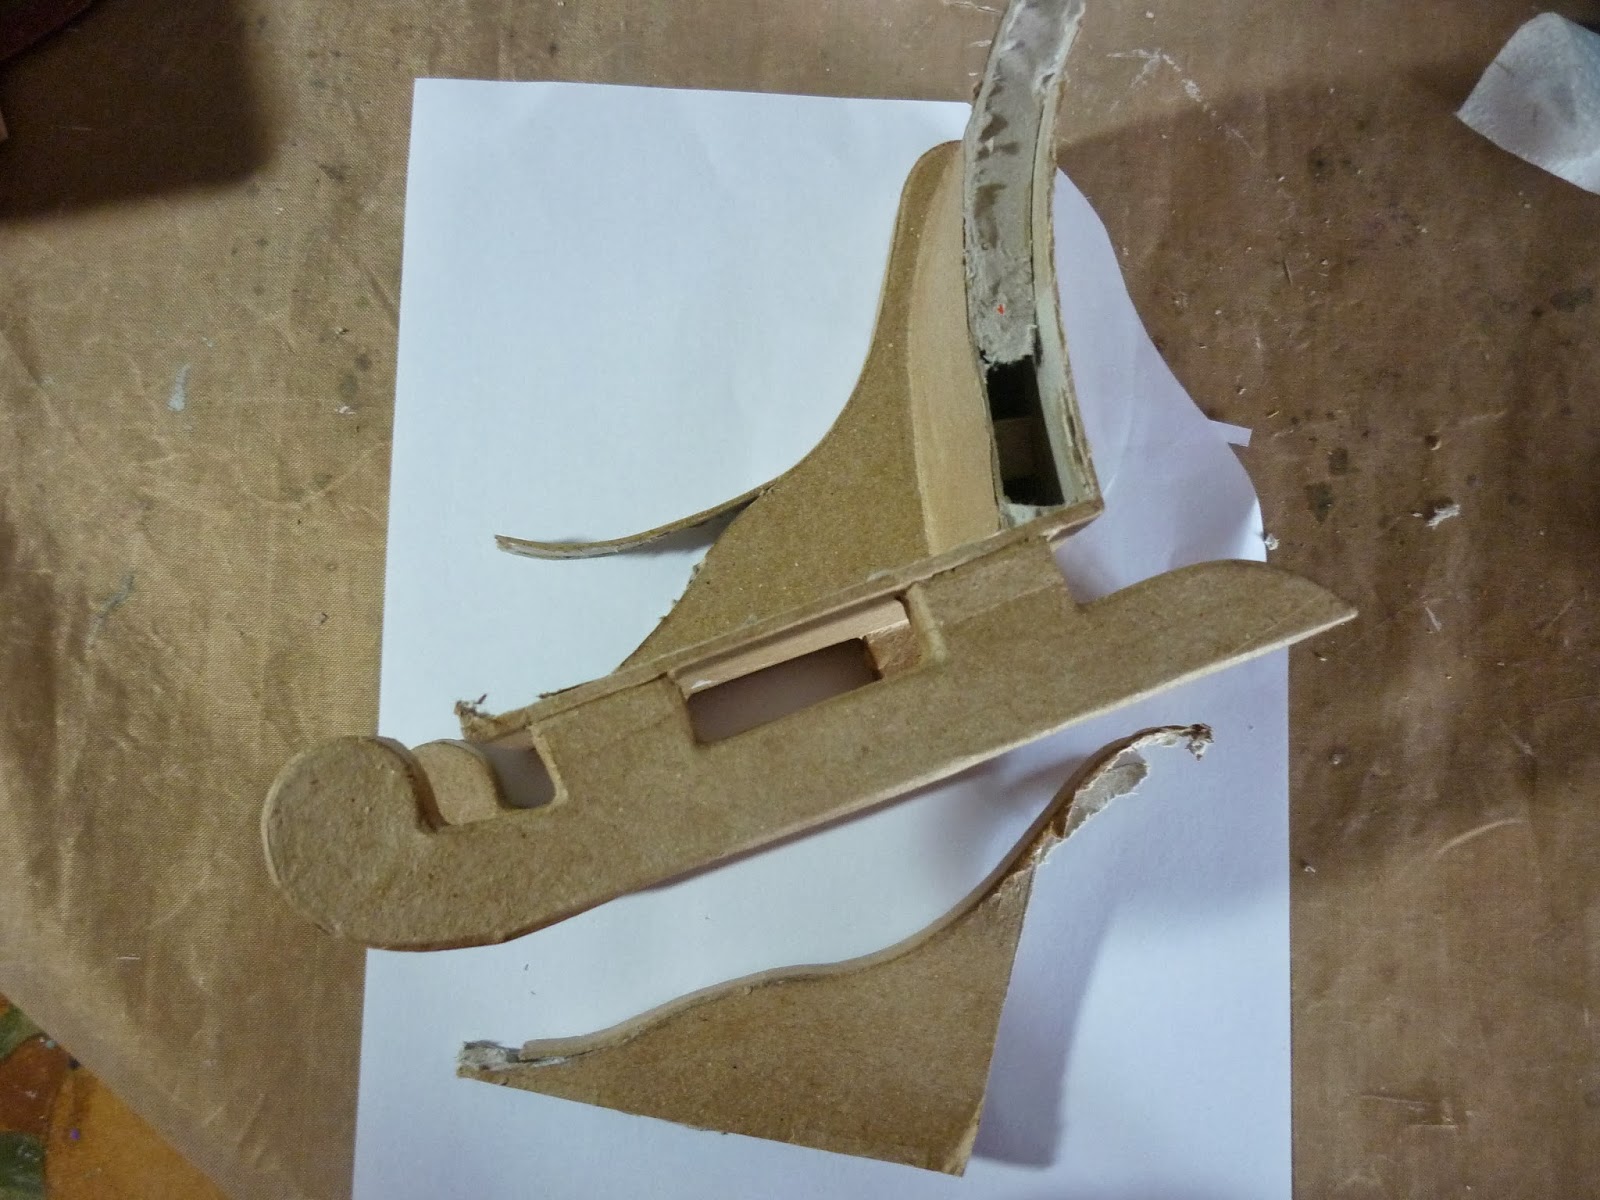
Cut off the skis on the bottom of the sleigh. Make a
seat with Greyboard and cover the base of the chair with greyboard. ( I needed
to add another piece of board between the two on the right side to fill the
gap. I used the end of one of the skis to create the curl on the right hand
side . The base of the sear was made
pieces of Greyboard stuck into a rectangle and stuck on the base of the chair
to act as a support . When finished it was all painted a cream colour (Nougat).

I then used my stamped
fabric to cover the chair . Cut the fabric slightly larger than the area to be
covered and adhere it with bookbinding glue ( which doesn’t soak into the
fabric ) Trim the fabric to leave a quarter inch extra and clip the fabric on
curves.

Adhere the extra down . I covered the chair in this order so that I
achieved a neat finish - Inside arm ,
Outside arm , Inside back and Outside
back ( turn the fabric neatly under where the back meets the outside arm.
Measure the seat and cut a piece of fabric slightly bigger . Turn under the
extra and adhere to the seat. Finally turn under one edge of the long stripey
fabric and sew or stick a hem . Pleat it over the stripes and adhere to the
edge of the seat all round to form a frill. I covered the edges of the seat and
back of the chair with lace to neaten.


I had a small piece if
the stripey fabric left so I used it to cover a paper mache basket that I had
painted with a toning creamy colour ( Nougat mixed with Haystack and a little
(Irish Cream ) .I added lace to the handle. Use the same cream paint to cover a large spool .

I stamped some more
fabric with the two different script stamps from the Haberdashery range and the
using Autumn Fire paint I stamped the spikey JOFY flowers .The fabric was stuck
over a domed shaped piece of polystyrene ( half a ball ) and clipped and stuck
down on the flat edge , This was stuck to the top of the spool and lace was
added to neaten the edge . Stick buttons
to hat pins and stick into holder .


That’s all for now
folks – all will be revealed tomorrow .
Leandra Says: Absolutely adore how you have stamped up this fabric Liz. The colours you have added blend together beautifully. Can't wait to see the next stages and finished project tomorrow evening.
Gillian Says: Fab combination of stamped layers and beautifully blended colours, love the more feminine touches such as the lace and your attention to detail is first class.


17 comments:
Wow, what a lot of details here - love the stamping onto the fabric and the chair is inspired.. can't wait to see tomorrow! Welcome, Liz.
Gorgeous project - feminine, vintage - just gorgeous!!
So gorgeous, the chair looks amazing.
Welcome, and fantastic projects.
Fab! Love the chair! xx
This all looks fabulous! The chair looks so cosy and comfy; but super elegant and feminine too - wish I could shrink down and fit into it! I am eager to see what comes next tomorrow! Julie Ann x
Fantastic stamping, painting and construction work! Looking forward to seeing the finished product...
I love your colouring. Looking forward to seeing the rest of your week
All looking very lovely - the painting on the fabric JOFYs is fabulous!
Alison x
Amazing so far - looking forward to finished project
Loving this and can't wait for next post! Welcome Liz:-)
Welcome to the party Liz
Great makes
Sam xxx
Hi Liz, wonderful start to your week at PaperArtsy! Very intrigued to see the whole tomorrow! Love the stamping on fabric and your colouring of the images.
Hugs
Lesley Xx
Wow! That's amazing! I love the look of stamping and painting on fabric.
That chair is beautiful and quite a feat of engineering!
Yeah! Wow! I didn't know rubber stamps and fabric could turn into such fantastic creativity. There are some really talented people here.
Teresa in California
http://amagicalwhimsy.blogspot.com/
Absolutely gorgeous projects, love the stamped fabrics!
Emma x
Wow wow absolutely stunning, can't believe I couldn't join in last week, life got in the way lol. I so am going to try the pins they are so gorgeous :-) Kezzy xxx
Post a Comment