

So we are rapidly moving along the PaperArtsy Timeline of Stamp releases this week, with the help of our amazing blog followers who volunteered to play #3UP. Last night's Cat's Meow was a bit of a curve ball, but I decided to add it in, as many people don't realise the Cat's Meow collection exists. I realise it is not generally to the more normal {is there such a thing - LOL } PaperArtsy devotee's taste, but there are many stampers out there who may be glad to know it is there. So, for the record ALL our collections can be seen from this page in our online shop.
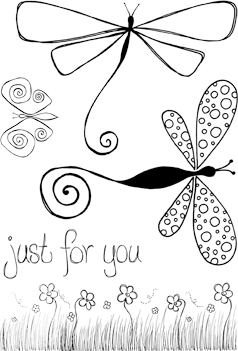
Now, admit it, many of us started our stamping lives with stamps of the style that Squiggly ink represents; crisp, clean, simple. They are easily used for cards, gift tags and are great to stamp onto scrapbook papers, emboss, colour in with inks, paints or markers. When you see stamps like this, you generally can conjure up a quick make without too much trouble, so we tend to think of this style as 'entry level crafting'. You see it on the tele, in supermarkets and big box stores, and it's certainly easily identified with by newbies to stamping and crafting. It is the 'mainstream genre' that 90% of crafters out there readily relate to.
.jpg)
.jpg)
Newbies to stamping are the lifeblood of the crafting industry, they are our future customers too. We fully recognise and welcome that there is plenty of room for all sorts of styles in this industry; consumers like and need a wide variety of to choose from, this is a really good thing! This is also one of the main reasons why we ask you to support your local retailer and buy our products from your local craft shop. If you don't support them, there will be less choice in your local High Street leaving only the multi-national giants and therefore fewer small independent retailers and therefore LESS choice! This is a huge issue across the world, if you want choice, you must #shoplocal . We deal with independent retailers all over the world, and they need your valuable support in all global territories.
.jpg) |
| by Leandra Franich |
I designed the Squiggly Ink stamp Collection several years ago to coincide with the ArtsyCrafts events Lin Brown and I started teaching. We were looking for stamps to use in conjunction with metal, and fine line drawings certainly stamp up easily on metal compared to the dark detailed images of the Ink and the Dog Collection, and hence Squigglies were born. Even I managed to make a scrapbook layout with them, I think this was the first of 4 layouts I have ever made!
.jpg) |
| By Leandra Franich |
It was a steep learning curve for me to design stamps. I don't really consider myself 'a natural' at drawing, but it's amazing what you can achieve with a bit of research, planning and sketching, sketching, sketching. Certainly I got better at it as time went on, and once we figured out a method that created consistency for manufacturing purposes, we were on a roll.
 |
| By Leandra Franich |
 |
| by Leandra Franich |

Not only did I want stamps that we could easily use on metal, but also some to make into more interesting projects, and so many of the themes were also explored at various AC events, or used in all kinds of ways to teach techniques with dye sprays, paints, metal, inks...and even texture pastes ...we were doing all this with these stamps and various company's products way back in 2008! Who knew how popular all those techniques would become within the Craft Industry to this day!
.jpg) |
| By Leandra Franich |
I think some of the stamps, for example Flora and Fauna, would fit really nicely with the JOFY stamps. I also did a Suzi-blu class in the middle of this phase, and her influence and teaching gave me the confidence to try some character based stamps, I particularly like this Xmas fairy.
 |
| By Joanne Wardle |
 |
| By Jo Capper-Sandon |
 |
| By Jo Capper-Sandon |
So, the walk down memeory lane must come to a close so we can inspect the amazing pieces created by our #3UPPERS for tonight's post ! They have had had a month to faff about to create a project to share with the rest of you tonight. The stamps we allocated randomly, so no thought was given to the preferred stamping style of each 3UP-ster. Some people are happy as Larry, and others are freaking out. However, it is a challenge, and when you bravely put your hand up, you were happily pounced on and accepted immediately!
So who is up tonight?
Who: Susan M Brown
Twitter: @sbartist
Stamps Susan used:
 |
| Squiggly Ink: Flora and Fauna 3 |
Susan Says: During the daylight hours... I am a graphic artist working in the fast-paced printing industry. I'm a native of Chicago, Illinois though I have lived in Florida most of my life. I currently reside in Fort Lauderdale, Florida with my husband of 20 years. For as long as I can remember, I have loved making things and this is still true today. I'm a painter at heart, though I love to dabble in all things - I'm a bit of a “technique junkie”. My style is varied and unique - ranging from cardmaking, tags, stamping and mixed-media - to mini-albums and off-the-page whimsies. I especially love green-crafting and repurposing items destined for the bin; transforming them into something beautiful, useful and new again.

The Challenge:


I'm so excited to be playing in this round of Paper Artsy's 3up
Challenge and I invite you to my 'Inspiration
Garden House". In my assortment of creative goodies for the challenge
there was a scalloped wooden book page, wooden buttons, some teeny tags, Squiggly Ink Flora
and Fauna Stamps and some color swatches. I immediately decided on
creating a birdhouse using the scalloped page as a roof.
I painted the base
with the Paper
Artsy Fresco Finish Chalk Acrylics in Claret {a lovely cranberry red}; then layered
the Paper Artsy
Fresco Finish Crackle Glaze with Sherbet over the top {I love these paints and
this Crackle Glaze - thanks Leandra for the amazing crackle demo video}.

I gave a light
rubbing of Walnut Stain Distress Ink and a wet brush to antique the bright pink
down to go along with the rest of my color palette. The distressed flowers are
the roof die-cut distressed flowers cut from stamped muslin, dabbed with
watered down fresco paints from the roof. The vintage handle detail is a piece
I created - I made a mold using Amazing Mold Putty and cast in Amazing Clear Cast
Resin, Brown
Alumilite Dye and Alumilite Gold Metallic Powders.

The base of
the house is a recycled holiday card box covered in a recycled woodgrain brown
packing paper. It was perfect for covering the silver snowflake box. The center
of the box background is a scrap of BoBunny patterned paper that matched my
color palette perfectly; overstamped with leaf foliage using Timber Brown
Staz-On ink.

I stamped flowers onto recycled sewing patterns, hand-cut and
layered to make my giant whimsy sunflowers. Mini wooden spools painted same as
the roof serve as flower pots; and fiber covered chenille stems make these
blooms spring to life. I finished off this garden by creating a pennant banner
using the teeny tags. They had a wine colored thread so I tied a bunch of them
together and filled them in with some inspiring words using Walnut Stain Distress
Marker.
I want to say thank-you to Leandra from Paper Artsy for hosting this
challenge and for inviting this girl from across the pond to play along and
inspire. :) Sb
Who: Steven Macari
Twitter: @smacari
Stamps Steven used:
Leandra
sent two sets of stamps from the Squiggly Ink range, “Crowns and
Castles” collection: 6 & 8. When my mystery box arrived I had an
additional set 2, plus set 1 from “Ding & Dong” and set 4
from “Bricks and Mortar”.
 |
| Squiggly Ink: Bricks and Mortar 4 |
 |
| Squiggly Ink: Crowns and Castles 2 |
 |
| Squiggly Ink: Crowns and Castles 6 |
 |
| Squiggly Ink: Crowns and Castles 8 |
 |
| Squiggly Ink: Ding and Dong 1 |
Steven Says: I don’t really have a “style” as such, I’m fairly eclectic in my arty tastes, but when I got my #3up package my first thoughts were: “Ribbons! PINK!” After a lot of procrastination (specialist subject!) I decided I to do a sort of mini book.

The Challenge: As I had tags I thought of folding some of them to make pages. I finally decided to make an accordion book using cartridge paper and used the corrugated cardboard tags as front and back covers, the manila tags as “tags” and for stamping on along with the Heavyweight Smoothy card (love this product!). The colour swatch I had was Toad Hall/Sage and Claret/Rose. I extended this to all 4 colours in both “colour families” and added Haystack and Pumpkin soup.


The covers were first painted then I coloured Grunge Paste and stencilled it on the outside. The inside covers, white card tags, were treated in the same way. For the accordion pages I misted the Fresco paints both for the background and for stencilling.

I made masses of “Washi “ tape from micropore and used it for the edges of the page, the “belly band” and random decorating.
The “fleur de lys” (top pic) is stamped directly onto the corrugated card painted with Fresco colours, the chalice was first stamped on to the Heavyweight card then painted and finally cut.

Another fun and creative moment!
Who: Jo Vickery
Twitter: @Jomatt79
Stamps Jo used:


Jo Says: I have been crafting for about 10 years and started off making cards. I was introduced to PaperArtsy when I attended the first of many ArtsyCrafts weekends which, Leandra ran with Lin Brown of LB Crafts. I have been addicted to their products ever since. When Leandra announced the 3up project, I wanted to be part of it, to help celebrate PaperArtsy’s 10th birthday.

The Challenge:
I started by putting Grunge Paste through a stencil onto the MDF substrate and then painting with Sherbet Fresco paint. I then stamped the crosshatch patten using Very Berry paint over the top in a random patten. I then sanded the grunge paste and dry brushed Hey Pesto to age the project.

I then stamped the heart image onto the white card along with a butterfly and dragonfly from the other plate. I painted the images using the fresco paints, I also coloured the ribbon and fabric heart to blend in with the project.
I really enjoyed being part of this project and wish PaperArtsy good luck for the next 10 years.
Jo
x
Who: Sarah Dunkley
Twitter: @SezzieD78
Stamps Sarah used:
 |
| Squiggly Ink: Crowns and Castles 3 |
 |
| Squiggly Ink: Crowns and Castles 1 |
 |
| Squiggly Ink: Crowns and Castles9 |
Sarah says: I
love the grungy & vintage look but I have experimented with lots of
different styles over the years. I do find that it depends on my mood
as to what comes out! I love to use broken jewellery/recycling in my art
& I love altering items...When I saw the bundle of joy I was sent, it shouted “storybook” at me! So this is a bit of a long project!

The Challenge: I used GP through a brick stencil. I painted each page with either Very Berry or Toad Hall. I highlighted the bricks with Olive Bronze TG. I also sponged paint through the brick stencil.

I drew the princess & her gown is made from scrap paper. I used the Turret Stamp for her hat. Her head/hands are coloured in with Promarkers. The Heart/Diamond/Spade/Club stamp was used to make the doorplate behind the magic doorway. I embossed some Metal on Card with it using a ball tool. I painted it with Little Black Dress & rubbed over it with some Olive Bronze TG. It also has a Mini Brad in each corner.

The banners are made from the same stamp onto cotton fabric which I painted with Very Berry, Toad Hall, Rose, Tinned Peas & Squid Ink. I also used the Bunting Stamp for the pelmet which I also coloured in with Promarkers. I also sewed beads onto the bottom of the large one.

I drew the dragons body & painted it with Sage. I used the Hinge Stamp for the dragons head & added gems to the crown. I used the Heart Stamp for her tail. Her wings are made from Angelina Fibres. Her nose is a Mini Brad that I painted. The mini frames are from my stash. I wrote the letters for ‘please’ onto paper inserted them & the sealed it inside a layer of Glossy Accents.
The magic doorway is a mini tin that used to have mints in it. I covered it in GP & stamped into it with some corrugated cardboard, painted it with Rose & highlighted the texture with Olive Bronze TG. The lock was made with the Hardware #1 Die & Metal on Card.

I painted it the same way as the doorplate. Inside, is the “Book of Wisdom” It is made from a tiny box. I painted the edge with Snowflake & drew lines with a fineliner. I made the pages inside from card washed over with a teabag. I also made the text boxes in the book this way.
I added book rings & various ribbons, cords & beads to finish it off.
I added book rings & various ribbons, cords & beads to finish it off.

That’s about as brief as I can make it ! :)
Sarah Dunkley
Who: Anna Ely
Twitter: @annaelycm
Stamps Anna used:
 | |
| Squiggly Ink: Nut and Meg 7 | |
Anna Says: My
name is Anna Ely and I live in central Florida, about an hour away from
Disney World and Orlando. I’ve been an artist most all of my life and
have tried just about every technique you can imagine. Over the years I
have been published in Somerset Studio magazine, Legacy, as well as
Rubber Stamper and other publications. I have been demoing and teaching
at rubberstamp conventions in the United States for the last 18 years
or so, although these days I only demo at conventions here in Florida. I
am active in several art groups on Facebook and on my blog. I really enjoy the wonderful sharing and encouragement that goes on among artists all over the world.

The Challenge: I
couldn’t resist doing a couple of little projects with the cute Nut and
Meg set number 7 that I received for the challenge. The first piece
was made using the small Hanging Chunky Board. I used acrylic paints,
Distress Crackle Paint and Copic markers. What fun to think about
Christmas and cooler weather. The temperatures in Florida are so hot
this time of year!

This led me to playing in the snow…well as close to
snow as I’ll get here in Florida. I pulled out my art journal and
patterned papers and created a little scene from the North Pole. I used
acrylic paints, a chipboard street light and Copic markers along with
Snow-Tex to create the fun blizzard.

I can’t wait to see what everyone else has done!
Who: Karen Brown
Twitter: @kazkraft
Stamps Kaz used:


Kaz says: I’m Kaz, I’m from Scotland and I’m not sure I have a “style” of crafting, I just like whatever I’m doing right now. I’ve been crafting since 2006 with a couple of breaks for life stuff!!
My item was a wooden frame with a canvas insert, so I made it into the top of a box. It’s approximately 13cm squared which is exactly the same size as an MDF tissue box I had ready and waiting to be decorated. I decided it would be an “Inspiration Box” like those journal prompt boxes and things you see.....so while you are crafting if you have a block you can take the box, look at all the techniques and products used on it, and the cards inside, and get an idea of what to do next on your project.

The Challenge: The box was painted using cut n dry foam in fresco colours raspberry, claret and nougat. Lots of water to mix it all in, and that was the base for all of the techniques.

The canvas “lid” has been beeswaxed; the image on there was stamped onto one ply of a cosmetic tissue and then waxed on. The colours under the wax were painted on first. When the wax was almost dry I dropped some dry glitter onto it, it gives a subtle sheen and adds texture too. Then I added a knob, and that’s the lid.
The sides have so many different products on them....one side has frames with parts of stamped images, stamped with Versafine onto smoothy card and coloured with fresco paint, water soluble crayons and pencils. I then added glossy accents, crackle accents and sepia accents. (see pic top)

The next side I did some masking, using the love heart stamp- the main image is stamped with Versafine onyx black then coloured with festive berries distress ink and covered with crackle accents. I painted over the rest of the images with the base colours to tone it down and added german scrap, rub ons and treasure gold.
Next side- grunge paste through a stencil and stamped on, left to dry, sanded and treasure gold added (thanks to last week’s tute on the pa blog!! Lol) then some stamping around it with Versafine onyx black and archival coffee, couple of rub ons and the word amore at the top is stamped onto tissue and painted on with matt medium.
Last, and my favourite side, the treasure gold side!! Grunge paste through a stencil, left to dry then the treasure gold painted on, left to dry and buffed. I then stamped the phrase in Versafine black onyx and added a grungeboard heart painted in London bus and covered with crackle accents.

The inside of the box contains a “recipe cards” thing I bought in the supermarket, my intention is to fill it completely with all of the products and things I have in cupboards and forget to use! The underside of the lid, the knob I used had a long screw so I used that too, added loads of ribbon and hanging bits, including a glittered grungeboard tag, beads, and a bamboo tile with an image transfer of Edgar Allan Poe on it, I always forget how cool image transfers are! The underneath of the canvas was painted and stamped on too.
That’s the shortened version, for more details and photos you can visit my blog!!
Thanks for looking, and thanks Leandra for organising this, I’ve really enjoyed the challenge!!


35 comments:
Wow, jaw dropping projects tonight - I love the Squiggly collection, and have loads of them (I even still use some of them from time to time!) Ladies, (and Steven!) you have done amazingly tonight!
Wow absolutely fantastic projects tonight #3upsters!!! well done xx
Gorgeous. I love squiggly ink stamps.
Amazing work guys and gals xo
Wow! These projects are fabulous! I didn't know this collection at all and you've all really impressed me with its whimsy, its versatility and your creativity! Julie Ann xx
Wow, spectacular & beautiful projects from all of tonight's #3UPers!! And Leandra, your projects from the PA archive are fantastic, love that scrapbook page.
Great projects and such lovely stamps too. Well done everyone.
I think these may be the best yet - love squiggly ink
Not too familiar with this collection so this is a great opportunity to see the stamps in action. Wonderful projects all around!
Beautiful projecrs again! I have some Squigglies in my collection, and they are always fun to use.
wow fantastic projects yet again, makes me want all the Squiggly Ink stamps now lol
I also have loads of the Squigglies and I still love them. I think they work well with more current stamps - stampotique and Dylusions! Great in my art journal. Love that Suzi Blu style fairy.
Great projects again by all the PA twits on the Squiggly Ink projects!!
Sam xxx
Fabulous projects everyone. The Squiggly ink stamps certainly reminded me of ArtsyCrafts events. :-)
One of my fave stamps is from the Squiggly collection and is featured in one of Leandra's makes.
Great projects everybody, these stamps make great whimsical projects, another evening of hardwork and a lot of thought. Well done#3UPs !!!
Really love all the projects, especially the cheeky elf!
Emma x
Wow wow you have all done amazingly all your projects are truly awesome. It's great to be back in the land of the living, never been without communication that long before lol. Only problem is I need to catch up with everything lol, so much to see I can't wait. I really love the stamps you have all used, I realise I have loads of them, and really need to revive them for a play. I have fallen in love with the castle stamps, might need to purchase them in the future :-) Kezzy xxx
Everyone did an amazing job! Thank you for sharing your creativity with us!
I've been looking at the paints & wondered if they are sold in small sets or do you have to get them individually?
Which ones do you recommend for someone getting started with your paint line?
What great projects. I love the Squiggly Ink stamps
another day of fabulous entries. Great job everyone.. this is an amazing week!!
Ooh, more fabby awesomeness - well DONE, twits! And I am so loving the 'history' in each post :)
Fantastic projects again tonight. X
Fantastic projects everyone. Thanks for sharing.
Once again fantastic projects stuffed full of clever ideas and inspiration! Must resurrect my Squigglies and get back to work with them.
Well done everyone!!
I received some of these stamps with my Monday madness box so will be trying out some projects now, love tonight's challenges great projects x
I am inspired totally and absolutely! The projects shown and the artists wonderful posts are brilliant.
Fantastic projects from everyone! Brings back lots of happy Artsycraft memories :o) xx
The projects are all fabulous and so diverse!
I love the whimsical style of these stamps and will have to take a closer look at them!
Wonderful work!
Lucy x
Blimey -- nothing short of fabulous. What fun it all is, and how much your hard work is appreciated. We are being VERY spoilt by this whole exercise!!!!
Love to all -- Sally xoxoxox
Really enjoyed tonights inspiration, cracking projects all round using the Squiggly Ink collection.x
Yet another amazing day of challenges I am SO enjoying this week, well done everyone
Happy craftin
Rebecca
Oh Wow! These are all stunning makes. Well done everyone for showcasing these fab stamps so well. There is so much inspiration in the birthday celebration #3up ster blog posts for us all to keep coming back to over and over again.
Hugs
Lesley Xx
wow, loads of loveliness in this post, especially love the king and queen tags and the nut and meg work, but everything is gorgeous, loved using these stamps. x
Such delightful projects - fresh, funky and so much fun!
Alison x
Post a Comment