
"When Gillian and Leandra asked if I would like to be a guest designer for the autumn semester, to say you could knock me down with an autumn leaf would have been an understatement! I love using PaperArtsy products, the finish of the paint; the versatility of the stamps and oh don’t get me started on Grunge Paste! If I was asked to describe my style I’d struggle but what I do know is I love tones of colour, texture, layers and using fabric; sometimes altogether, sometimes individually".
So here is my first offering, I hope you like it ......
I really like the Paper Mache Hanging Boards from PaperArtsy, they are a
good solid base to work with, but I’d just like them a bit bigger! So I made
them bigger by removing the string and sticking one large hanging chunky board and
two small hanging chunky boards together on the edges using Glue and Seal (any
good strong glue will do). I then
reinforced the sticking with tissue tape over the joins and then all over the
boards front and back and the sides.

Over this I put quite a few layers of Gesso as I didn’t want
the tape showing through, I just needed it to strengthen the boards. I then
mixed Chocolate Pudding, Little Black Dress and a little bit of Old Gold Fresco Paints to make a darker brown. Using Cut N Dry foam I put the paint mixture on
in downward strokes over the board. You don’t want it perfect as you want
different tones so vary the pressure you put on the foam as you keep adding
layers. It gave a really good worn wood look.

With a really manky stiff dried up brush (I have loads
because I’m really bad at cleaning my brushes!) add some light strokes ofSnowflake over the base. Again I wanted to create that weathered old piece of
wood that’s been lying around ageing in the elements!

Whilst this dried I started on the plaques. Using some
Smoothy Heavy Weight White Stamping Card from PaperArtsy I painted it with VeryBerry and Sherbert using Cut N Dry to apply. Starting with the Very Berry I put the paint on in a circular motion as
if I was polishing (doesn’t happen very often on the dining room table but you
get the idea). I then added Sherbert and
kept adding layers until I was happy with the depth of colour and the shading. I then sprayed the card with water and with
some watered down French Roast adding a wash over the top. First I went down
with the brush with vertical strokes and then whilst it was still wet lightly
did horizontal strokes across to try eradicate brush strokes but leave pools of
colour. Dried this and did the same with
a watered down layer of Claret.
Using the Ink & The Dog Background Plate 6 I stamped in Claret, it didn’t
matter that I missed some of the stamp with paint as I didn’t want an all over
coverage. I then cut out the plaque using some really old PaperArtsy dies.


I sanded both of them to create spots where the sandpaper
removes the top layer of paper. Using Black Archival Ink I stamped the flourish
from HP1005.Once this was dry I went round the edges in Black Soot Distress
Ink. Going back to the hanging boards, I mixed Chocolate Pudding
and French Roast and stamped randomly over the boards with the text stamp from
HP1217.
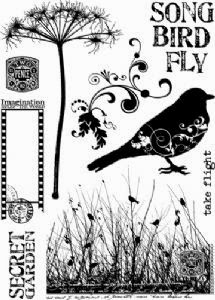
 I also added the splodge stamp from HP1105 in Black Archival Ink around the
edge of the boards. I also added some Sapphire Treasure Gold to the edges of the
plaque and lightly over the hanging boards just to tie in all the colours and
let your brain home in and focus on certain elements of the design, I think it
also adds some more texture and distress. I always like to edge my art so it draws the eye in and
anchors it, otherwise I find my eyes don’t know where to focus and everything
seems to slide off the page like a Dali picture! So to edge the boards and add some texture, I mixed some
pinches of Stampendous Frantage in Chunky Black Embossing Enamel, Aged copper
Embossing Enamel and Aged Scarlet Embossing Enamel and using an embossing pad
along the edge melted the mixture in various places. Being so chunky it doesn’t
melt evenly and you can get nice pockmarks of metal.
I also added the splodge stamp from HP1105 in Black Archival Ink around the
edge of the boards. I also added some Sapphire Treasure Gold to the edges of the
plaque and lightly over the hanging boards just to tie in all the colours and
let your brain home in and focus on certain elements of the design, I think it
also adds some more texture and distress. I always like to edge my art so it draws the eye in and
anchors it, otherwise I find my eyes don’t know where to focus and everything
seems to slide off the page like a Dali picture! So to edge the boards and add some texture, I mixed some
pinches of Stampendous Frantage in Chunky Black Embossing Enamel, Aged copper
Embossing Enamel and Aged Scarlet Embossing Enamel and using an embossing pad
along the edge melted the mixture in various places. Being so chunky it doesn’t
melt evenly and you can get nice pockmarks of metal.
HP1005

Using Cut N Dry foam
I painted an #5 sized tag on with Mocha Mousse, I left some bits unpainted as I
wanted a really rough layer. Over this I
added Irish Cream more in the places where there wasn’t Mocha Mousse. Gave it a good sand with a sanding block to
bring back some of the base layer and just sort of even it all out. I stamped the button stamp from HP1211 in
Chocolate Pudding, once dry I sanded again to knock back the colour and added
washes of Vintage Lace and finally Claret. I distressed the edges and adding
Walnut Stain Distress Ink.


For the hearts I painted some Grunge Paper with SherbetFresco Paint. I cut out three hearts using this PaperArtsy Die and then smeared
on a thin layer of Grunge Paste, not all over as I wanted it really rough like
flaking plaster.

Once this was dry I watered down some Vintage Lace and
splodged it over each heart letting it pool in places. Left it to dry naturally. I watered down someMocha Mousse and washed it quite heavily over the hearts and immediately dabbed
off with a dry baby wipe (I tend to keep my used baby wipes to use in this
way). Keep going with adding and dabbing
until you get something you are happy with in terms of shabby distressed. Once
the hearts were dry I stamped the heart stamp from HP1217 in Coffee Archival Ink
and then sprinkled on Pepper embossing powder. As I dried the powder the grunge paper curled, it was a happy accident
but I liked how the hearts curved to give some dimension. I edged the hearts with some watered downClaret that I used to wash over the tag.

The layers were beginning to look good, but it still needed
something else from a texture point of view.
So I stamped the tape measure stamp in Black Versafine all over a sheet
of Krunchy Wax Kraft Paper, heated it to seal it and then crunched it up. First
into a ball and then into a sausage.

Carefully unfolded it and cut out the strips and added them
in places on the hanging boards under the plaques using Matte Medium. I didn’t want them to be too flat so Matte
Medium works really well as long as you leave it alone to dry! Two of the
strips I pleated and using Matte Medium attached to the tag.

I used a hot glue gun to stick everything down as I wanted
to add some height with the layers. Finally
I nailed in the corners of each board some black tacks and attached the knotted
string using nails through the sides of the boards.

Well I hope you like my first design piece and it’s given
you some ideas you can borrow and interpret yourself, can’t wait to see if you
are inspired!

Join me again tomorrow night when I will be back with my second project of the week.
Leandra Says: I love your eye for composition and use of textures Jo. This debut GD project depicts your unique style perfectly. Great way to use the Paper Substrates. Fabby.
Gillian Says: J'Adore the amazing textures you have achieved on this project along with those gorgeous colour tones. The layered strips of KWP are brill. I know we are in for a fantastic week ahead, can't wait to see more of your unique style.


25 comments:
Gorgeous. I love the colours. And the texture is fabulous! I need to try this soon!!!
I love the shape you achieved by sticking the boards together this way and the lovely grunge, aged look was so effective! I'm really looking forward to seeing your next project! Welcome! Julie Ann xx
Oh emm gee, that is GORGEOUS. I love the painted boards, they look just like weathered wood & the hearts are fabulous. Love it!
Well you kept that quiet!! This is a gorgeous first project, and I just know the rest will be equally
amazing.
FAB-U-LOUS! I would be chuffed to have that hanging up. Love it. So pleased that you have manky brushes too, I am dreadful at cleaning mine.
Really lovely Jo
The weathered wood effect is fantastic! Lovely grunged up hanging.
Fabulous, love the effects you've made and all the texture created. x
Wow Jo this is brilliant!! All those lovely layers and the texture..perfect..all that detail..and I love the embossing finishes it off! great first project can't wait to see the rest!!
Yikes! What a gorgeous piece. I love the depth and layers of color, patterns, and texture.
Thanks for the great instructions and tutorial!
This is gorgeous. Love the paint effects and textures and the whole look. Beautiful
Fantastic grungy look - love the Frantage texture and the joined up boards - very cool!
Alison x
I love every thing about this, I want one for my wall, congrats on the GD you make amazing things x
Beautiful creative piece of art, love the grungy look.
Your background is sensational. I definitely would have thought it was actual wood!!
Fabulous first project Jo and I can't believe how well you kept this little secret yesterday when you popped in to see us all, lol!
Love all the texture and layers we have come to associate with your style and the way you offset the hanging boards to make a whole is great.
Hugs
Lesley Xx
Wow so fantastic textures and the weathered wood effect is fantastic!
Thanks for sharing with us !!
Lovely piece. You are so talented.
Great first project Jo, I love the texture.....just yummy.
Lin
love the shape you've created with the offset hanging boards.
Great shape to work with and excellent instructions on how to achieve the look. Fab project :-)
Love this hunni! Great project! xx
Stunning! All three of your projects are great. I really love your style :)
Wow wow wow absolutely gorgeous. Your work is truly awesome :-) Kezzy xxx
Post a Comment