Showing posts with label Patterns. Show all posts

Sunday, 23 January 2022

2022 Topic 02: Pattern Play - Topic Introduction


Hi everyone, Keren here with you today to talk about pattern. It fills so much of our lives without us even acknowledging it and it's also something we strive for as artists; creating pleasing arrangements of shapes, graphically, symmetrically or even in an abstract manner.

We've been playing around with patterns since we could play! Making marks in the sand, painting with our fingers and even with old abacuses. We might have moved onto making Lego models and trying to get even patterns of colour (or was that just me), creating patterns as we iced cakes or scribbled doodles on notebooks. Some of us might have gone on to making large scale graffiti patterns whilst others cut out paper and arranged it into pleasing images.

We do pattern differently, just as we create art that's not the same. For some, they love the predictable comfort of an exact pattern (think of sewists trying to pattern match). Others love to create portions of pattern in places on their art. Perhaps others love using odd numbered amounts of marks on their pieces, that they'll repeat in a more random fashion.
Whether you're an ordered patterner or prefer to create pattern in a more organic way, we've got a topic that's bound to appeal to you on some level.

Pattern is never far from the PaperArtsy blog, so we begin with one of our designers who is well known for her love of pattern and creating stamps and stencils that help us love it too.
Tracy Scott is often found doodling and making patterned wonders, so it seemed only fitting to show you a few of her pieces.


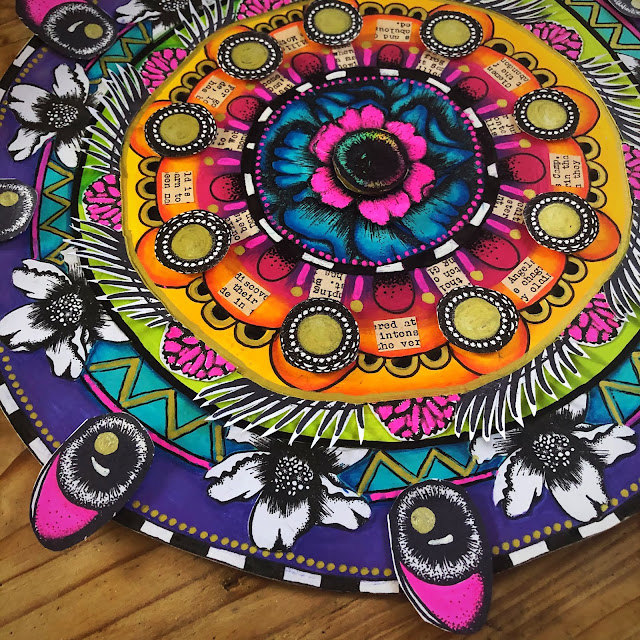
Here's an inspiring video from Tracy all about pattern play put together especially for this topic. But if you know Tracy, you will be aware how pattern is such an important part of how she creates, so there are some awesome insights here for you!


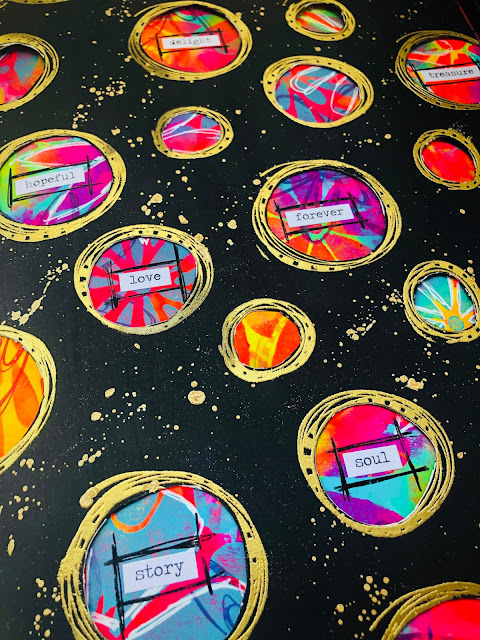
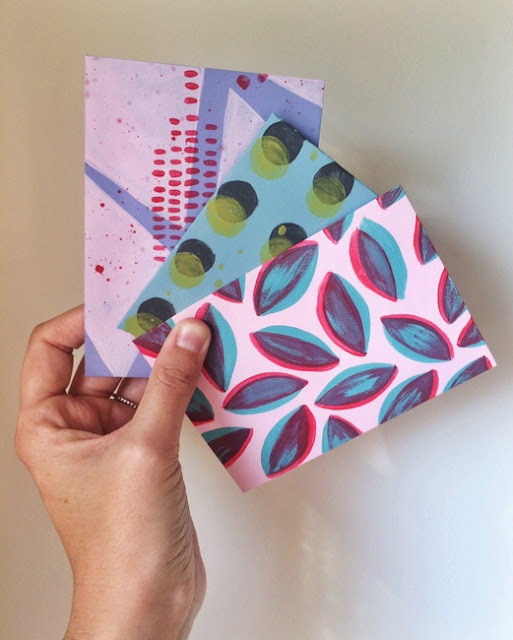
Roxanne Coble decided to add pattern to her envelopes, with really fun and vibrant results that would cheer up the most unhappy of postmen. 


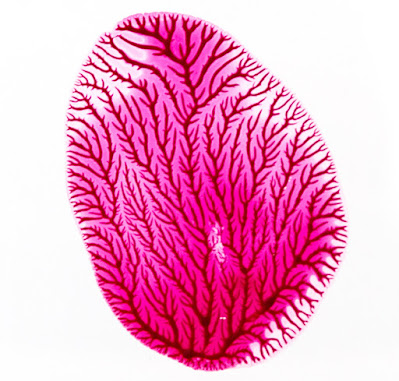
There are patterns everywhere. Have you heard about fractal patterns? If you grab some gloss paint (they reckon you could use acrylic- so here's a challenge to try this with your Fresco Finish Chalk Acrylics), press a tiny drop of paint between two solid transparent surfaces and lift the surfaces away from each other without sliding you'll end up with a self-similar viscous fingered pattern. If you want to learn about fractals in nature, check out the blog listed under the image.


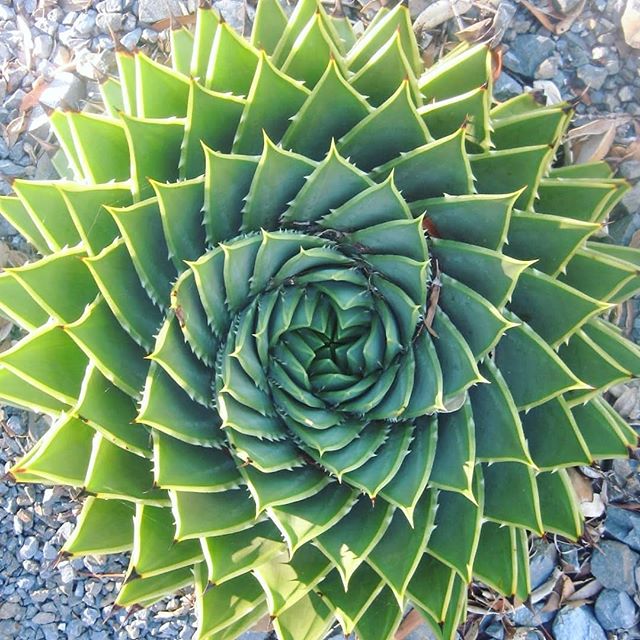
There are some fascinating patterns that mathematicians have noticed in nature. One of these is called the Fibonacci Sequence. Without attempting to explain it to you here (and if you want to understand it, this is a great article), it is to do with how a spiral is created. Looking nature will bring so many beautiful pattern. Here's a Spiral Aloe Plant.


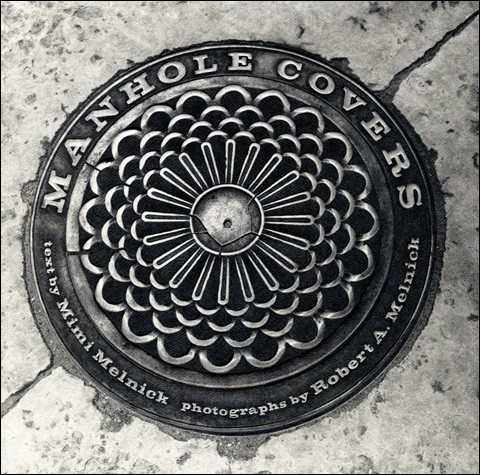
Pattern is all around us- we simply don't have to look too far. I'd love to create some stamps based on vintage manhole covers (you must look out for some on your next walk), as they have some amazing details. Mimi & Robert Melnick had a similar idea and brought out a book about the subject. Just look at this beauty.


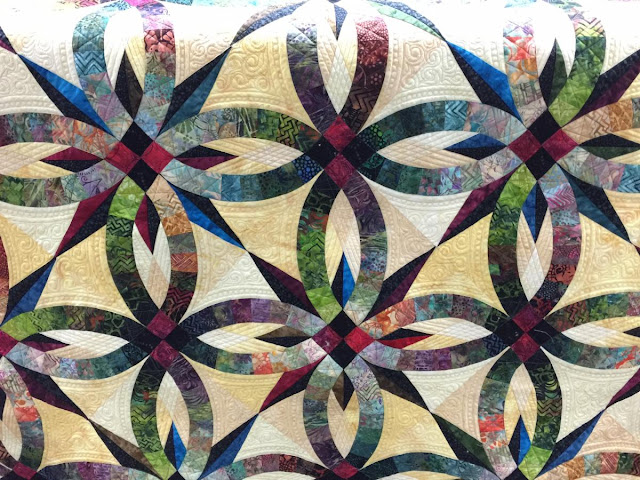
Where else can we get inspiration for playing with pattern? How about fabric? Surface pattern designers carefully calculate repeated patterns so the customer gets the most of the design in the different cuts of fabric. Then take fabric, cut it up and sew it back together again and you have patchwork. The pattern below is both in the fabric placement and if you look carefully, also in the quilting which adds to the pattern's dimension.


We've looked at carefully repeating patterns. What about abstract patterns?
This piece of art by Vassily Kandinsky has repeated elements that aren't the same, but is a really good example of an initial look at abstract pattern. You can see that the colours are similar and whilst the shapes aren't exactly the same, there is an obvious grid containing circular shapes. 


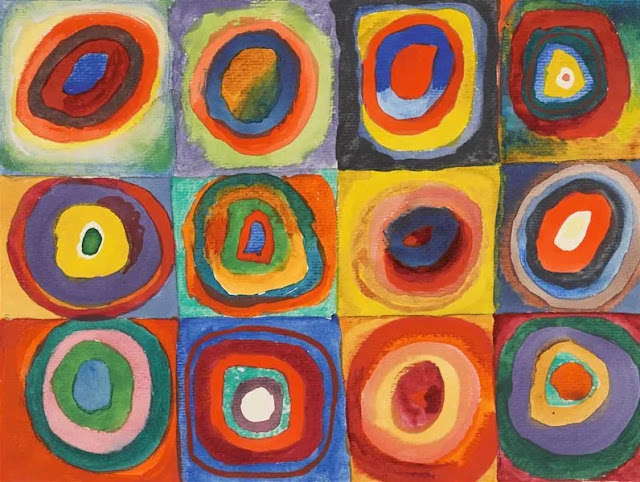
You might feel that the piece above isn't as abstract as you could go. A pattern defined at its simplest is a repetition in elements, and not necessarily identical.
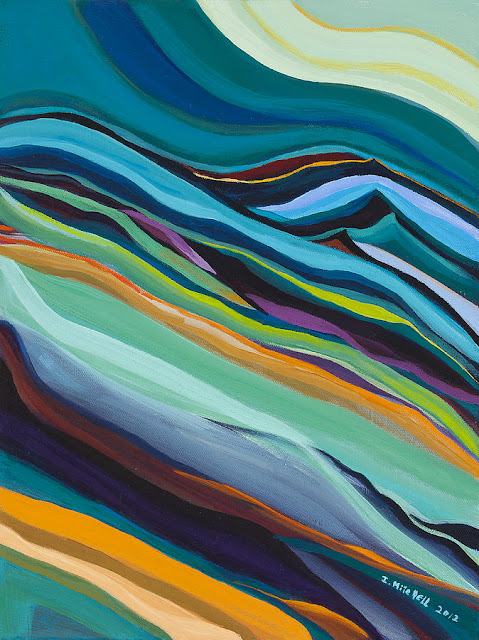
This is a little less literal; this beautiful art piece by Ida Mitchell shows that the pattern is in the softly undulating lines.


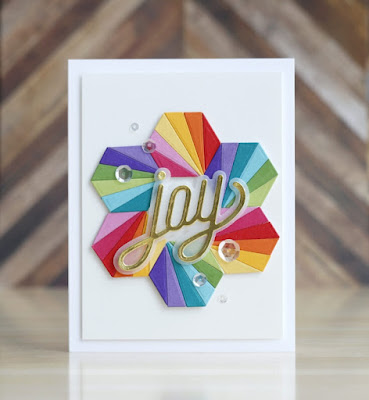
You can create pattern with the simplest of shapes. Trim shapes down into smaller segments or parts and add colour in like this clever example.


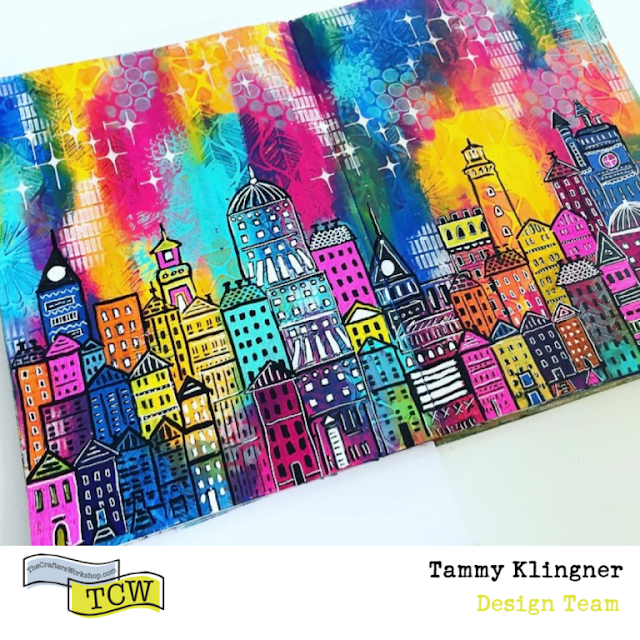
Tammy Klingner produced this wonderfully vibrant patterned journal page. The repetition of buildings, colours, stars and the stencilling all add to the pattern.


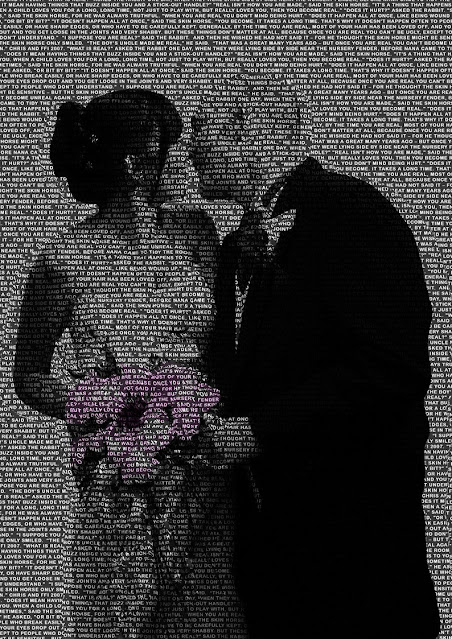
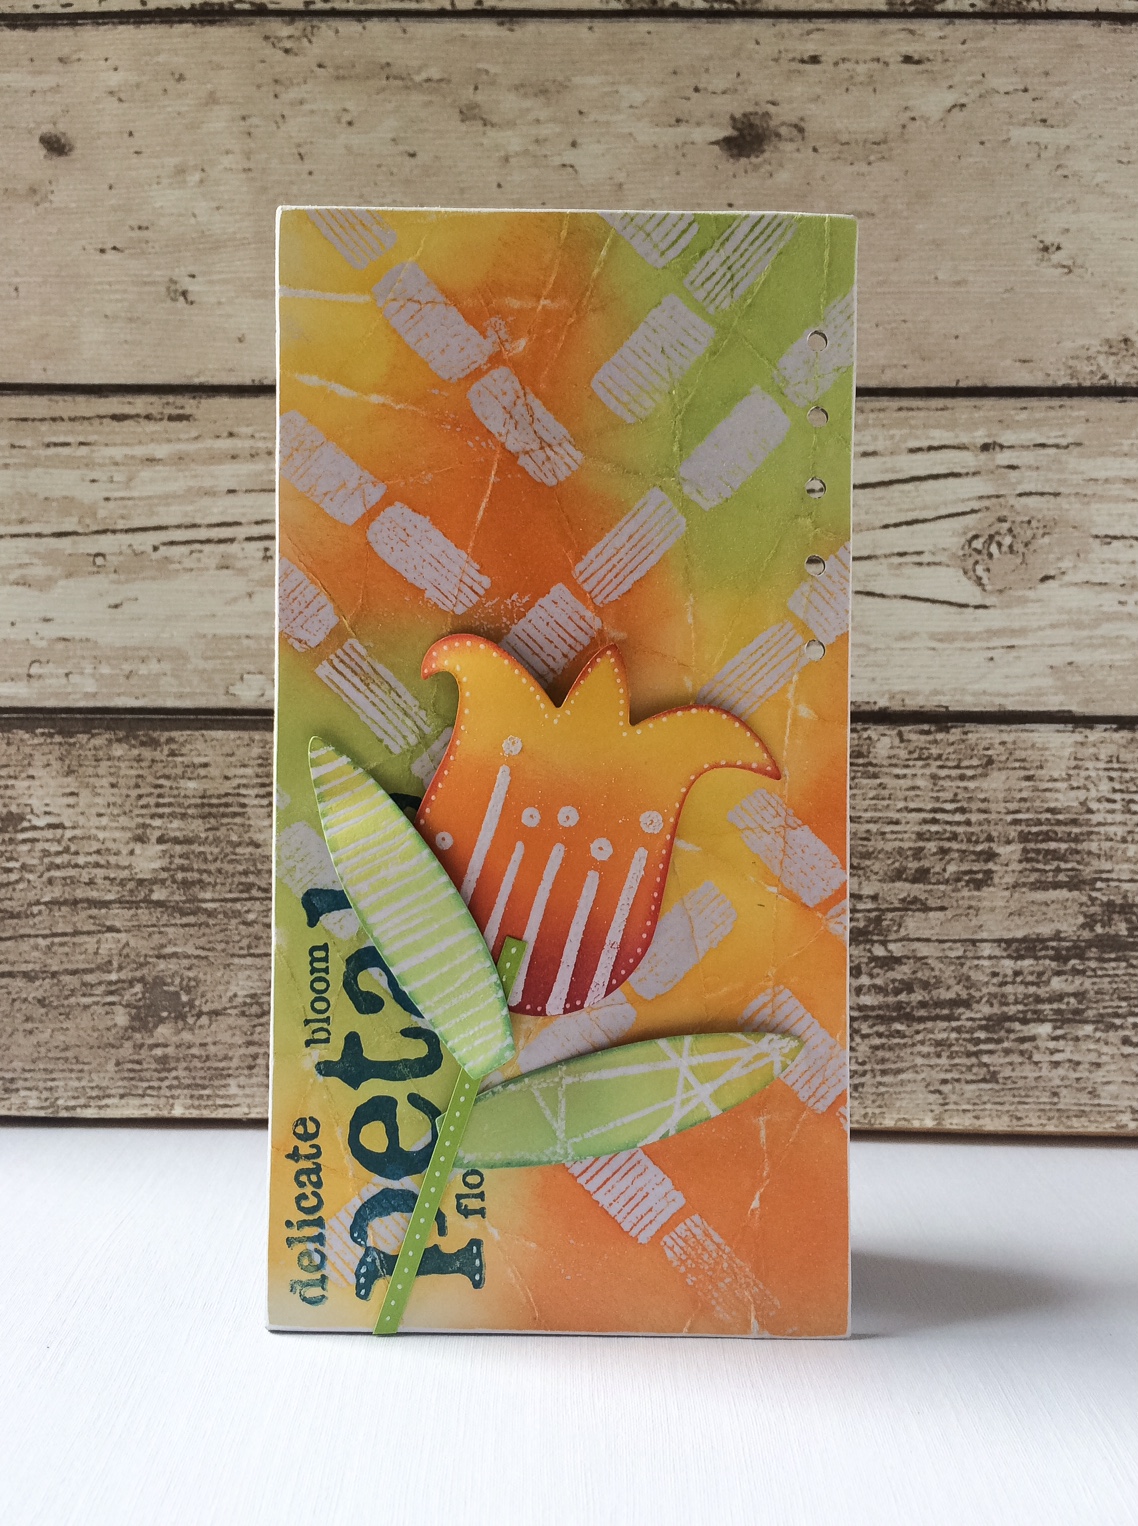
It doesn't need to be just about images..how about words? We can pattern play with all sorts of letters and phrases.


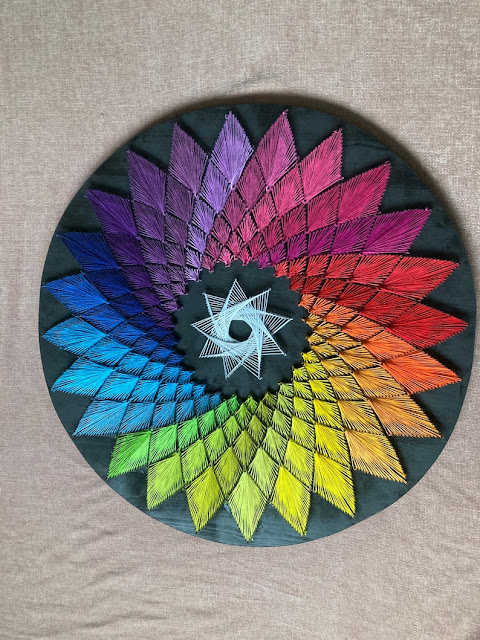
There are also patterns to be made using different materials. String Art has resurfaced from the 70s and is making a comeback!


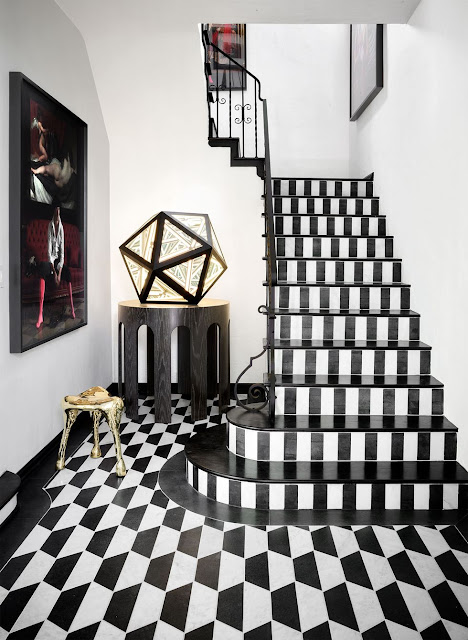
If you fancy getting started. Why not grab a shape and try some simple tessellation? The simplest of shapes, placed together can give dramatic results.


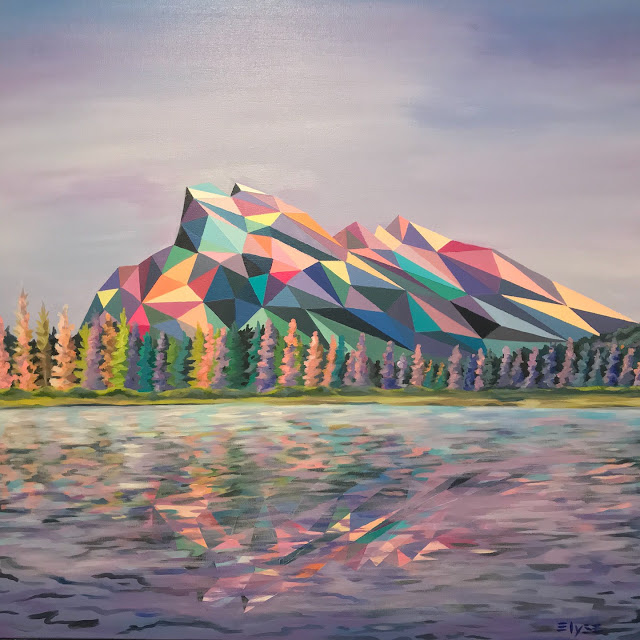
Why not create a new pattern instead of the one that usually exists? Elyse Dodge creates amazing landscapes using geometric patterning.


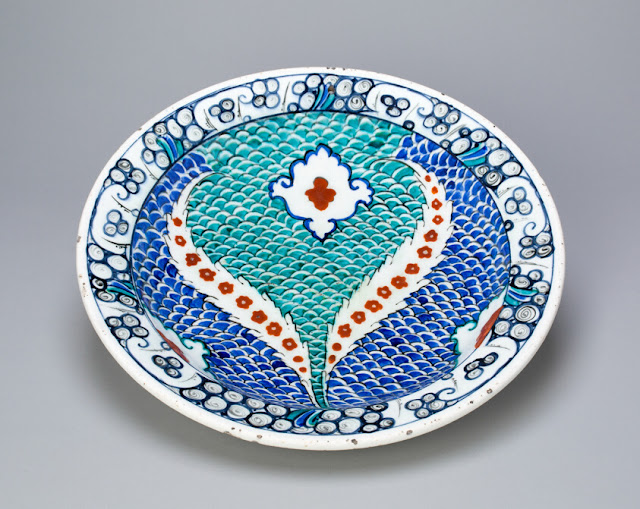
Pattern has been around for so many centuries. I thought this Turkish 16th example was beautiful.


We'll finish with another PaperArtsy project- Gwen Lafleur has some wonderful pattern-creating stamps (along with most of the other stamp designers) and she created these fun oversized hole reinforcers and the pattern with them laid out on the carrier sheet is fabulous.

Hope these projects inspire to you create some patterns in your art. Grab your pen and get doodling or create patterns with the smaller stamps in your stash. Choose a few stencils and combine them to make new images. Bring joy to your day creating something beautiful.


Does this topic push your creative buttons? We would LOVE you to share what you get up to with us! A great place is tagging us on Instagram @paperartsy or why not join us and post in the PaperArtsy People Group on Facebook. We love to see what you make!

Thursday, 29 December 2016

PaperArtsy Blog Summary of Topics 13-15 {Curated by Debs Wainwright)

Blog Summary: Colour Mixing, Paper Piecing, Patchwork

This picture from Nederhoff in the introduction of topic 15 patterns, captures all three techniques nicely!

Today's curator is Deborah Wainwright (Debs) and she is looking back on Topics 13-15.

We are fortunate to have such wonderful bloggers who share stunning ideas. They constantly surprise us all with their creativity, Debs is going to share with you a few of her picks form this Autumnal  period.

Leandra

Hello all, Debs here from ArtZone and I'm so happy to be sharing some of my highlights from three of the PaperArtsy 2016 themes with you tonight.

This year for me, has been a great one for learning! I have been fortunate in being able  to try out many new products which always excites and inspire me, as well experimenting with different techniques.  Teaching a journal class monthly has really helped me think about what I'm going to create, and how I'm going to use the products, whereas, non teaching creations start with no intention and move towards finish pieces by listening to my intuition, the results are not always pretty but they are what they are...

Recently I have been playing with my art digitally; taking pieces I have drawn or painted into apps on my iPad and producing different composite art pieces. Layering up different pieces this way also helps me with composition and colour in my non digital art, as the skills are so transferable.

I was so pleased to be able look back at all the wonderful creations under the three topics below, not just because of the fabulous works of art I'm going to share with you, but because these topics mean so much to me in my own creative journey. It was hard to choose which projects I favoured as they were all fabulous, so I picked those that spoke to me when I reviewed them for this post.


Topic 13: Paper Piecing/ Patchwork

First let's introduce topic 13 which was a new concept for me, I had played with Paper but never realised what fabulous art could be made (I have learnt so much from all the artists who create on here). Here is one of mine I completed, inspired by this challenge. All the details can be found here.


My first favourite in this topic is this gorgeous canvas board Owlandish by the lovely  Lesley Ebdon which captures the topic wonderfully with all the different elements. A real fun looking piece, which makes me smile with all the coloured houses which the little owls live in. Such a pretty place too with flowers and sun that always shines.


And then this lovely Delft Tiles By the very talented Liesbeth Fiddler I loved the colours Lisbeth used they are so just right! It was just fabulous to see how Liesbeth thought outside the box with this one, creating the tiles was ingenious and then topping it with the Teacup woman  as Liesbeth calls her, just tied it altogether. You could almost imagine being in a Dutch kitchen drinking tea.


And lastly in this topic we have the lovely Lin Brown with a charming Journal Cover I chose this because I just love how Lin interpreted the topic by using fabric as a piecing technique. Look how wonderfully the fabric has been stamped with the different colours using a mix of complementary colours as well as those that contrast.


Topic 14 : Colour Mixing

This topic is very close to my heart, as I love mixing colours and of late I've been using a very limited palette and mixing the colours I need.

For example, in this piece I used only the Four colours from Seth Apter's range and mixed up the colours I wanted to use. I think when I counted them there was 21 colours.


Now onto my 3 favourite projects, the first by the lovely Ingrid Vichova  whose Complementary Canvas I fell in love with, as soon as I saw it. What an amazing way to showcase this topic. I loved how all the colours blended so well together, over all the luscious texture, and then the few places of rust just popping off the canvas, finished it wonderfully!


It was difficult to choose my favourite pieces as all the topics had such amazing pieces to choose from but this one by Alison Hall, really caught my eye. I just loved the contrast of mixing the infusions for the background and the topped with the black and white,  gives another fabulous way to show what can be achieved. 


And last in this topic I'm sharing one of own  I chose this one because it shows several ways to mix colours. I deliberately chose colours which do not mix well together wet, as they will make brown. (mixing together the three primary colours in any combination will make brown). However putting them side by side when dry gives a nice contrast.


Topic 15 : Patterns

The last topic Patterns, is another fascinating one as there are so many ways to make and use them in your creations. I have added the pic below to show how you can mix your creations with digital technology to create something different. The sample shows a journal page I completed using JOFY stamps which I then took into an app called  Capture by Adobe, this can be printed out, and used anyway you want to create a unique piece. Or you could use your favourite stamps and then create a pattern, print it and then colour it. To see the original and what I did with the pattern Paper please follow this link


Now onto my favourites, I loved this Botanicals Tag by Katy Leitch which showed how using part of stamps to create your pattern is really effective. Like Katy says in the original post it doesn't matter what stamp you use as you will not see it in its entirety. For example, Katy used a clock stamp.


My next choice is by the fabulously talented Julie Ann Lee whose 
Trinket Goblets really caught my eye. I love how Julie Ann used inspiration from nature, and as she says, patterns are all around us in nature if you look for them. Her beautiful faces peeping out from the leaves certainly have a story to tell!


And lastly, but of course not in any order, is this gorgeous Giftbox, Tag and Card from Chris Cresswell, who has showed with some colour and simple stamping, you can created the boldest patterns. I love this little coordinated set which was created with a Gelli plate, stamps and lots of doodles from Chris. This clearly demonstrates how you can use the fabulous stamps from any of Paper Artsy's Designers and make them your own by using doodles. 


Okay, I hope you like my choices. As previously said, it was difficult to choose and a big responsibility, so thank to Leandra for giving me this opportunity. It was actually a pleasure to go back and really read the posts; all too often I skip over them, because I'm too busy with other stuff, that I miss how well written they are. It also reminds me I love to read, which I do not do nearly enough.

I hope my choices of projects has inspired you to get out in the craft room and play, it certainly has me! I leave you with Happy, Creative New Year, hugs Debs xx

Friday, 19 August 2016

2016 #15 Bloom {by Jennie Atkinson}

 2016 Topic 15: Patterns

Hi everyone Jennie here with you tonight to share my patterns project using Ink and the Dog Minis. I really love these vintage stamps and never tire of them. 

They are probably not the most obvious stamps to go to for a patterned background, but I hope that I can show you how versatile they can be when used in conjunction with the Gelli Plate. Yes, after years of being scared of getting one I can't get enough of it now!


Step One: I started with my master board and brayered Sour Grapes, Sugar Plum and Nougat Fresco Paints onto the the 8 x 10 Gelli plate. I used two of the Minis to create my pattern MN96 and MN46:

 MN46:
 MN96

Step Two:  I then used another two Minis MN09 and MN74 and Watering Can Archival Ink to stamp over the painted surface. I don't use a stamp block but just pick up some ink on the stamp and roll it onto the paper. You need to be a little careful with the lovely young lady as if you don't press on her head she comes out rather bald! (see top right hand corner!)
MN09 
 MN74

I needed a text stamp to finish it off so used two from the Vintage Ink and Dog A6 Set Petals 4

Petals 4
Step Three:  And then it was fun time trying to see what I could cut from the master boards. I was aiming to cut something large enough for a 5" x 3.5" card and got five good pieces, although I noticed afterwards that I had a very "bald head" in one of them!


Step Four: And here is the finished card. I stamped the lovely MN09 again in Black Archival and did a bit of fussy cutting and layered her on top of some torn old book paper and a piece of lace. 


Step 5:  I had lots of little bits left over so I thought I would keep one card to send and package the other three up as a little present using the scraps to make a little band to hold the cards together.


I really love the versatility of these little mini stamps which can so easily be mixed and matched together so easily. And being so reasonably priced I find they drop into my basket very easily!


Thank you for joining me tonight and I hope this little project of (quite quickly made) cards will spur you on to use your vintage stamps in your backgrounds as well letting them take centre stage.

Jennie
Live The Dream

Fabulous masterboard Jennie, using the same image to echo the focal image creates brilliant balance and unity.What a special little parcel you have created, perfect inspiration for a last minute gift.~Darcy

We would love to see how you interpret this House topic by linking what you make to our 2016 Challenge #15: Patterns, on this page HERE.
All of our bloggers love to see your twist on their ideas,  particularly if you were inspired directly by their post. 
All links go in the draw to win a £50 voucher to spend on products of your choice from the PaperArtsy online store. The Paper Piecing link will close 17:00 (London Time) Sunday, Aug 21st 2016. The winner will be announced 2  hours later at 19:00.

Wednesday, 17 August 2016

2016 #15 Faux Batik {by Keren Baker}


2016 Topic 15: Patterns

Hi everyone Keren Baker here. Tonight I'd like to share with you this evening with a post about Faux Batik.


When I saw the Eclectica Ellen Vargo 05 set it reminded me a little of the dye resist technique for fabric called Batik.


I remember going to a craft club in a local secondary school when I was in Junior school and my Mum creating a Batik piece with layers of wax and dye. I have no idea what I created but the process of her project was fascinating. I've recreated something vaguely akin to it using a version similar to this one.

Step One: First up, create a pattern with the patterned images! This post is about pattern after all! Ellen's set is full of wonderful bold images. For the best results, you want solid images, so I chose the most solid from the set and heat embossed with clear embossing powder. I went for a vague herringbone styled pattern.


Step Two: Now create lines in your cardstock (use a thinner weight card) by folding in lots of different directions. You don't need to continue a line across the whole width, change direction and go for random rather than ordered.


Step Three: Add colour. I've used a dye ink, and want to try this with Frescos too.


Step Four: Once you've completed adding colour (darker colours are definitely better, but I wanted a fresh, lighter scheme), iron the piece between some scrap paper so the embossing powder sinks into the paper and is removed from the card. You will probably need to do this a couple of times. Once you've done that, try sanding a few of the folded lines to give some contrast.


Step Five: You now have a reasonably flat piece, but it does need a decent anchor, so I adhered it to a piece of Heavy Grey/White board. I wanted to add more pattern and by using the same colours but different pattern, it didn't end up too cluttered. I used the older Eclectica {Lin Brown} Tulip die set with leaves (which some of you may have). I love how the pattern gives the impression of stamen too!


I finished the piece with a sentiment from Ink And The Dog Petals Plate 6


...in a dark blue and punched 5 small holes near the top right to help balance the design!

Hopefully you can see that the areas where the embossing was, now have strands of colour going through them. It's a cool technique and one that is more striking when using darker colours. I'd love to experiment with Frescos and see the differences that acrylic paint makes. Do have a go with this technique, I'd love to see some unusual variations. The more folds you have through the embossed images, the better, and make sure the colour is worked in well as when you remove the embossed areas, you'll only be left with the original substrate colour.

Thanks for joining me tonight!
 Keren xx 
(Twitter, IG, Pinterest @craftstampink )

Keren what a fun idea! There are so many bold stamps that could crack this technique! We could have fun making loads of Batik backgrounds with this! Thanks so much for the inspiration! ~Leandra

We would love to see how you interpret this Patterns topic by linking what you make to our 2016 Challenge #15: Patterns, on this page HERE.

All links go in the draw to win a £50 voucher to spend on products of your choice from the PaperArtsy online store. The Patterns link will close 17:00 (London Time) Sunday, Aug 21st 2016. The winner will be announced 2 hours later at 19:00.