Showing posts with label PS250. Show all posts

Tuesday, 7 June 2022

2022 Topic 08: Split Complementary Colours {by Etsuko Noguchi} with Jo Firth-Young's stamps


Green – Grey Tones
Main Colour: Soft Green
Complements: Salmon Orange, Pink Purple
Type: Twist - unusual grey-blue softens the entire wheel
Created from Frescos: Lemon Meringue, Prawn, Glacier Ice


Hi everyone, it's Etsuko (My favorite things) with you today, and I'm here to share with you a Mixed media 'Junk Journal' project that for our current 'Split Complimentary' colour wheel topic.

Rather than mix up the colours suggested in the colour-wheel above, I decided to choose existing colours from the PaperArtsy Fresco range that were similar but a bit deeper in tone. To Prawn I added Sour Grapes and Niagara Falls to represent the split complementary concept.


When I saw Jo's new stamps, I had the idea to make the Junk Journal using fabric. And I wanted to make a junk journal incorporating fabric and see how this colour wheel might change if the same colour and different materials were used. 


The first thing I did was to decide on the paint colour wheel theme, and I chose these three paint colours for me. My main colour was PaperArtsy Fresco Finish Chalk Acrylic - Niagara Falls (FF205), and with it's split complimentary colours being Sour Grapes (FF115) and Prawn (FF98). One of the split complimentary colours nominated is a little more yellow than Prawn, but the gauze fabric is coarse and i expected the colour would be lighter when painted, so the Prawn was used as is, another close options could have been Peach Nectar.

I painted the fabric to see how the colours would look. I used gauze fabric so that the paint would look soft in colour and fabric would not become stiff after painting. You can also add textile medium to your paint for washable permanence and softness on fabric, useful if painting clothing, not so important for journal or fabric art. 


First of all I using JoFY set 113 and 114 (JoFY 113JoFY114) and JoFY mini 54 (JM54) with PaperArtsy Fresco Finish Chalk Acrylics as shown below and Snowflake (FF15). 


On a heat mat, the paints were spread thinly with a palette knife and stamped onto each piece of cloth, and some cloth was dipped in paint diluted with water, dyed, and allowed to dry. As you can see in the photos, some of the colours do not resemble the colour wheel, but in reality they are almost the same, but the colours in the photos change depending on the location and time of the subject, which is really difficult. 


I want used JoFY114 large flower as a focal point on the front cover, I then stamped JoFY114 in Niagara Falls (FF205) on the gauze fabric and also I stamped Sara Naumann set 61(ESN 61) script in Ranger Archival CornFlower Blue from above.


The painted fabric was used for the petals, stitched and cut around the petals using an embroidery frame to create the focal point and other printed fabrics were patched to create the background. I added the sentiment of JoFY113. On the spine I made tassel from leftover and used them as decoration.


Now prepare the window for the first page, the small JoFY114 flowers printed on the acetate with StazOn Pigment Snowflake, made a hole in the lace page, glued the acetate from the back.


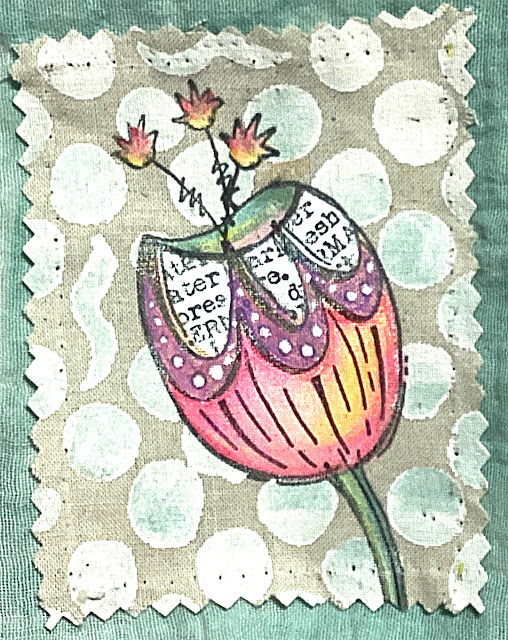
Next I made JoFY113 tulip peeking through the window. Snowflake (FF15) and Niagara Falls (FF205) painted through PaperArtsy Stencil by JoFY (PS250) on the raw fabric, 


I painted the tulip used Niagara falls (FF205), Sour Grapes (FF115), Prawn (FF98) these three colours and a touch of Mustard Pickle (FF148) as a highlight.  


I made the frame by placing a piece of fabric dyed in Niagara Falls underneath the painted tulip, and stitched a small flowers from JoFY114 on the background the page.


The small page inside was made of paper clay with JoFY114 stamped on it too look like a seashell specimen, finger painted in three colours and finished with gold wax.


I embroidered JoFY113 tulip on this narrow rectangle page although I did not use three colours. 


I though pocket page was nice, then I made a pocket to put a tag in.


I printed Snowflake and Niagara Falls on the leftover paper through PaperArtsy Stencil by JoFY (PS136 and PS250) to create the background and printed JoFY113 tulip on a book page and coloured it.


I made the pocket using various of laces. JoFy114 flower painted and stitched.


Finally I made a patchwork page using the main colour and the two split complementary colours print fabrics. Each fabric was Sashiko stitch with the same type of colour embroidery thread, and the seams are embroidered to give a little depth to the printed I then decide on the pattern to be placed in the rectangle. The flowers made in the previous photo was cut with a thin cotton for quilting on the back and sewn to make it little fuller. JoFY 113 sentiment was embossed in black powder on the white painted fabric, cut and sewn then finished page.
  

I used JoFY114 and ESN61 stamps for the front and back covers and simply made in the main colour Niagara Falls.


This slightly smoky colour wheel was a combination of colours that I rarely use, but it was a lot of fun with this project and I wanted to continue exploring this further it. Please share with us for your creations using these color wheel on PaperArtsy Instagram or in the Facebook Group 'PaperArtsy People'.

Thank you so much for visiting here.
Etsuko xxx


Facebook: Etsuko Noguchi
Instagram: Pxienest
Pinterest: Etsuko N

Tuesday, 24 August 2021

2021 Topic 10: My Favourite Colour with JOFY {by Jo Firth-Young}

  2021 Topic 10: My Favourite Colour


We do love a JOFY mini book, and even better when it's a pink-black-gold combo! Jo goes through her back catalogue to show just how perfectly all her stamps can work well together in the background and of course she also manages to find the perfect focal points to adorn each page beautifully.
~ Leandra

Hi everyone, it's Jo Firth-Young (www.jofy.co.uk) here with you today, and I'm here to share with you a small concertina book I made using my 'favourite' colour - I say my 'favourite' colour but it really is so hard to pick just one colour isn't it?!!
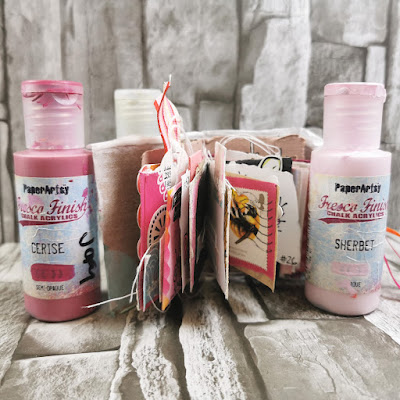
I chose PINKS, - including HOT pink - the gorgeous Cerise. Hot pink seems slightly rebellious - it says 'look at me!'  It makes a statement doesn't it. I've teamed it with Sherbet, Gold and black to quieten it down a little... but not too much. lol

The mini book I created (final size 8x8cm) came together quite easily - I didn't start with any expectations of what it was going to be... but I took inspiration from 
an even smaller book I have on my desk (I do love tiny 'junk'/art journals!). 


It features lots of the small designs that are on my stamp plates and I've been wanting to make a slighter larger project using phrases.
 
So I gathered up Smoothy card and paints and just started playing - I used lots of bits of 'this and that' - I had FUN making it, no pressure.  I used many of my favourite techniques - and all that HOT PINK colour!! 
The finished book just makes me smile- it has a really positive feel to it - I chose to feature lots of the little phrases & words that are dotted among my JOFY collection - I wanted to give them their '5 minutes of fame'. lol


I started by creating a master-board on a 13x6in panel of Heavy Smoothy. I painted it with diluted Sherbet Fresco Finish paint, used stencil PS250 to add small spots in Cerise and larger spots in Kitsch Flamingo Distress Oxide.  


Then, I added letters (JOFY101) in Gold Fresco Finish to break up the pink and add a touch of shine to contrast the matte pink paints. I intentionally left 'open' spaces.


Once all the painted layers had dried I added more details: I stamped blocks of small dots (EM57), and drew around the large dots with Stabilo All pencils in white and black diluting the lines with water.


I folded the panel into 4 x 3in strips, cutting off the remaining 1in strip.
 

I realised that 4 rectangle panels didn't give me enough space to work on - not enough pages, and I thought rectangles might be slightly restrictive so I cut the rectangles into 8 7x7cm squares - much more versatile and more pages! win win!

Now to decide what colour card to mount the squares onto for the concertina structure.  I often try out several backgrounds colours before making a decision - its definitely worth looking at different options - some might surprise you!  I tested white, black and my firm favourite: kraft. The different background colours definitely create a different look - the white is fresh, the black is very dramatic and the kraft gives a softer look. I decided on black for my book- a change from the white or kraft that I might normally reach for.


I measured and cut a strip of black card to mount the squares onto allowing for a border to frame each piece.


.... and when all the background details were finished I sewed each panel in place.
 

Here are pairs of page with the details of stamps used... details on the panels are die cuts, stamping, stenciling - created from pieces cut/created for this piece and from project 'left-overs' - repurposing bits and pieces. I really like adding all these little details to these small pages.

'Life is good.... ' is from JOFY46.  The numbers on the right hand page are from JOFY88 - this was a 'scrap' piece saved from a previous project (its always worth hanging on to interesting bits and pieces). These numbers were part of the planner sets I designed but it great to see them being used for something else.


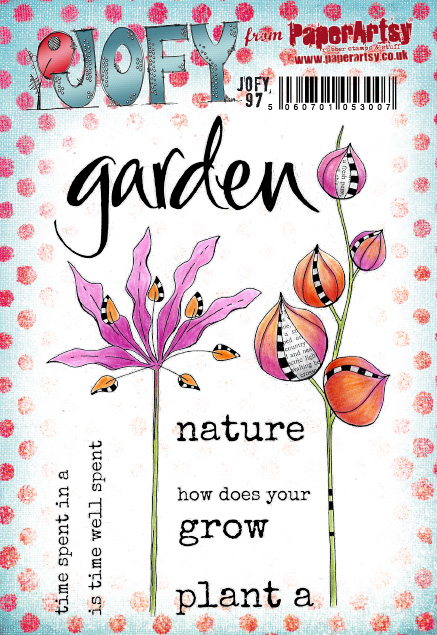
The left hand page features bud stems from JOFY26 and 'Grow' from JOFY97 is part of a phrase but works just as well on its own.
I heat embossed most of the images stamped in black - the gloss of the embossing is a nice contrast to the matte Fresco paints.
The flower on the right hand page is JOFY61, and this page features one of the background stamps I added for more detail on some pages - the white embossing really makes it pop.


'Be a rebel' (great phrase) comes from JOFY50 - the ombre painted word uses Cerise and Sherbet. The flowers on the right hand page are from JOFY26 (shown above) - I stamped the flowers directly onto the background and added an additional one for added interest.


Here are the final two pages featuring JOFY72 (I like how the word 'you!' is accentuated by embossing it in gold), and JOFY102. 


Black and pink is such a great colour combination isn't it! and with those pops of gold and white!! Fabulous! 


I hope this encourages you, inspires you, to take another look through your stamps sets - look for the smaller stamps that are tucked in around the bigger images - bring them out, play with them and make them the feature of your pages - there are lots of little treasures in those sets - I'd love to see what you create!  

Take care

Jo


Website: www.jofy.co.uk
Pinterest: @jofyjo
Facebook: JoFY Jamboree! group
Twitter: @jofyjo
Instagram: @jofyjo

Teaching dates - ONLINE workshops
28.08.21  Loobi Crafts, www.loobicrafts.co.uk ...Wonderfully Wintery

Every Friday until December:  Festive Friday, 18.00 (UK time), in my Jamboree group: Free demo/Card making class