Showing posts with label Liz Borer. Show all posts

Saturday, 5 May 2018

2018 #8 Boxes Just a pretty box! with EKC {by Liz Borer}

2018 Topic 8: Boxes


Liz is wonderful at creating these 3D pieces. She always has a wonderful colour palette, and texture is usually there in a soft and subtle way. yet again she's done it with this gorgeous box! ~ Leandra 

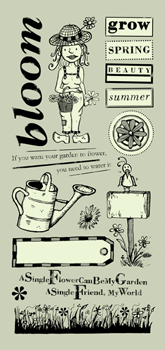
Hi there to everyone, I'm back again with today's blog post . I've decorated a box with Kay Charley's lovely Floral stamps and as usual when I'm working it's turned out pretty ! 


I painted the whole box with Chalk paint , two coats sanding between  coats to get a smooth surface . This is a good colour because it's a soft white .
 

I stencilled through a swirly stencil using Wateringcan Archival ink . This gave me a nice soft grey that was permanent .


I then stamped randomly with the same colour some words from  ESC04 . 


Finally I stamped the flowers from EKC01 and EKC14 . 


The top of the box has a recess in it which I covered with a separately stamped piece of card . Around the edges I spread Grunge Paste through a stencil . You can see that I added a little stamping between these areas as before .


The insert was painted with Chalk paint to match the rest of the box .. I then stencilled as before . The stamping used only the Floral stamps . 


All the flowers were painted using the Infusions powders as Paints . Put a little powder onto the palette and add water to get the desired depth of colour . I've used quite a lot of colours washing them over each other in different areas . On the top insert I also sprinkled a little of Violet Storm and spritzed with water .


This shows the side of the box .  I used a little of the following colours of infusions: Blackcurrent , Olive Tree , Raspberry , The Sage , Emerald Isle , In the Navy Are you Cerise and lots of Violetta.


Finally I rubbed White Fire Treasure Gold over the raised areas on the top of the box and around the edges . I added a few butterflies that were coloured using colours from the palette and a few flowers from my stash .

This box could have been painted in any range of colour  because the background is neutral.These stamps are lovely and I hope you have enjoyed my idea as much as I enjoyed making it . 


Bye for now !
Liz


We always hope that you  learn something interesting from our blog

Our creative team love to read your comments so much, so please take time to let them know you've been inspired!  

You must complete step 1 AND 2 to be entered into the draw. 

To join our challenge:
1. Leave a comment on the Topic Introduction Post and go in the draw to win a PaperArtsy Apron. 
2. Make something arty relevant to the topic, and link your creation from any social URL (eg. Instagram, Pinterest, Blog Post etc) sharing your original make to this challenge page.

The current topic link Topic 8: Boxes will close 17:00 (London Time) Sunday, May 13th 2018, and the winner will be announced 2 hours later at 19:00.

Saturday, 10 March 2018

2018 #4 Whimsy: Clever Cats with Cat's Meow Collection {by Liz Borer}

2018 Topic 4: Whimsy


Hello everyone. We are continuing with the theme of whimsy, and tonight it's a throwback to our Cat's Meow stamps from 2005, which are still in our catalogue today. These DL size stamp sets are jam packed with lots of fun elements. Liz does them justice beautifully ~ Leandra


Hello there , Liz back with a fun project using Cat's Meow Stamps.

I had to use the Cat and Cheese sets because I have three cats so these made me smile ! I've made three small items because my base was large enough to make some small pieces after I had made the main one and why waste the card ? 

Cat's Meow Collection: Cat (CMCT)

I've used mount board as the base of the project which I painted with a base coat of Nougat Chalk paint.

To create the background I swirled and rubbed paint onto the base coat with wet wipes. I wanted to create a random mottled effect. I started with Bora Bora and Tango, then Autumn Fire and Jade.
Finally I added more of the first two colours. I've used these four colours to paint everything else to make the colours tie together.


I mixed some Nougat into Autumn Fire and BoraBora to lighten them and painted some of the colour onto a scrap of bubble wrap. I then 'stamped' the bubbles  randomly over the background. Although it's very faint I used an oval stencil and a mix of Jade and Autumn Fire ( this creates a dark muted green, good for distressing the edges) to create a frame.


I then stamped cat paw prints around the frame.
I stamped the cat into the frame so his whiskers showed before adding a painted cut out cat  


I stamped most  of the images onto white card, painted them and then cut them out, because it would be difficult to paint over the background.
These film strips are created from the individual stamped image cut out and stuck to a strip of card. I stamped the images onto the 'film' and painted them before sticking them together. I've used the two orange paints for the cat (because I have a ginger cat !) and Antarctic and Lake Wanaka for the mice.


The muted green paint mix made a good colour to wash onto the film strip to darken it.
The strips were attached with dimensional glue. MEOW is stamped and embossed with gold powder and stuck in place.


To create  sign I stamped the top of the note stamp while masking off the bottom and then stamped the base of the stamp while masking the top. After painting I triple embossed the sign and added a painted stick.


I wanted the mouse to face the other way , so I stamped it on tissue paper and attached it to card with Matte Glaze before painting it with Antarctic and Lake Wanaka as before. He is then facing the correct direction to hold the sign !


 Here's the cats portrait, he's so happy !


'If only cat's could talk' 


This is made from the same background but using different images. The paw prints were stamped onto the background with light grey ink. The red heart was painted onto the sign with London Bus paint.

I had great fun with these little projects and I hope you enjoyed them too. 
 See you soon, Liz.

Blog: Decorative Delights
In case you need a reminder of the stamps in the Cat's Meow Collection, designed by Marieke Blokland for PaperArtsy back in 2005 here are the images of the full series. You can buy them all unmounted or EZ mounted here from PaperArtsy.


We always hope that you  learn something interesting from our blog

Our creative team love to read your comments so much, so please take time to let them know you've been inspired!  

You must complete step 1 AND 2 to be entered into the draw. 

To join our challenge:
1. Leave a comment on the Topic Introduction Post and go in the draw to win a PaperArtsy Apron. 
2. Make something arty relevant to the topic, and link your creation from any social URL (eg. Instagram, Pinterest, Blog Post etc) sharing your original make to this challenge page.

The current topic link Topic 4: Whimsy will close 17:00 (London Time) Sunday, March 18th 2018, and the winner will be announced 2 hours later at 19:00.


All links go in the draw to win a PaperArtsy creative apron. Please make sure we can contact you as a prize winner - it helps if you share your contact info from the platform you opt to use.

Good Luck! If you have any questions, don't hesitate to ask!

Wednesday, 13 December 2017

2017 #19 Fave Things: Flower-Face Canvas with ESC {by Liz Borer}

2017 Topic 19: My Favourite Things


It always fascinated me how Liz builds up her backgrounds and colours. She has a great eye for composition too, and here is another masterpiece to enjoy!

Hi everyone, it's Liz here, nice to be with you again.

It's probably fairly clear by now that my favourite things are flowers. Whether I'm painting or stamping or creating mixed media projects , flowers seem to pop up in most of my work!  So this project is unashamedly floral and pretty!

I've made this wall hanging out of two pieces of MDF which I then fixed together. On the base MDF, I used Grunge Paste through three different stencils around the edges. I positioned these so that the texture would show up behind the front piece. I used washes of Jade (in Tracy Scott's Limited Edition Paint Set) and Blueberry around the edges.


Next I painted the whole thing with Sage paint and added more washes of Blueberry and Jade at the edges for depth.

 Eclectica³ Scrapcosy Set 04 (ESC04)

I stamped the words from ESC04 using Blueberry paint and added some flowers from ESC03 in Jet Black Archival ink. Finally I rubbed some White Fire Treasure Gold over the raised areas and edges. The centre of this piece looks rather messy but it doesn't show when the front is added.

Eclectica³ Scrapcosy Set 03 (ESC03)


This is the base of the front piece which I base-coated with Nougat. I then applied lots of colours by dabbing them on randomly with a wet wipe. I started with Jade and Spanish Mulberry and then used Blush, Mermaid and Honey Dew. I finished with Sage so that the base and front colours toned together. I then washed Jade around the edges for a darker edge.


Again I used Grunge Paste through a stencil. However this time I added a little Mermaid paint to the Paste to tint it. I rubbed more White Fire Treasure Gold over the raised areas.


Lots of stamping here using the black ink. This is the lower half of the panel.

Eclectica³ Scrapcosy Set 01 (ESC01)
 
I've used flowers from ESC01 and ESC03 (on the top part of the panel too)  and also flowers and butterflies from ESC04 on the lower section. Yes, it looks really messy at this point.


The face is stamped onto card painted with Nougat.


I added two more stamped images as shown to fill in spaces that I realised would look odd after the next step. I added a little colour to her cheeks and eyes.  


I found these MDF flourishes in my stash and decided to make a frame for the face out of them. So I painted them Jade and then added more coloured Grunge Paste, Jade this time through a stencil. Once dry, I rubbed more White Fire Treasure Gold over the raised areas. I attached the flourishes around the face and then had to remove the excess paper to leave just the face in the frame.


This is the finished front panel showing the frame and all the lace and flowers that I've added. Any metal pieces had more Treasure Gold on them to keep the same gold throughout the project. I've attached the front to the back of the hanging by adding a piece of foam board between them. It makes a solid smooth connection but is very light.

As I said this is very floral and feminine, showing a different way of using these lovely stamps.
 

By for now, 
Liz
 

I love how you've framed her face with those MDF pieces, and all the additional embellishments look stunning. Just shows how one small stamp can be expanded so cleverly by giving yourself the space to expand into a bigger zone like this. ~Leandra


As this is the final topic of the year, there is not a challenge as we know you are all super busy, so sit back, enjoy and be inspired.

Season's Greetings and best wishes to you all from all of us here at PaperArtsy 

Wednesday, 15 November 2017

2017 #17 White: French Boudoir with Squiggly Ink {by Liz Borer}

2017 Topic 17: Shades of White


Liz has created one of her trademark projects for this post. Lots of wonderful details. If you want something to get your teeth into, this is a great idea and works so well in this colourway.

Hi there everyone I'm so glad to be back with another blog post for PaperArtsy. 

I've been very quiet recently due to many things happening in my life which include my daughter's wedding and moving house! Needless to say my craft stash is in great disarray due to the move so I had to use the stamps I could find. As for the embellishments, well again I had to use what I could find in the chaos.

Instead of my normal style of describing how I did this I am writing it as an inspirational piece as well as some description of what I did.This is mainly because I made the box I used into a kind of printers tray with apertures. I did this because I wanted wide, flat divisions between the apertures so I could decorate them. I used greyboard for this and white foam board behind the divisions to create the 'walls'. The added advantage to this was that I didn't have to paint them as they were already white!


I decided that I would need some colour in this project to make the white stand out. Therefore I painted the frame with London Night. Once dry I applied Crackle Glaze randomly and once dry I painted the whole frame with Chalk. This allowed a little variation in colour but kept the frame basically white.


Next I found a floral stencil and spread Grunge Paste through it onto the frame. Again it's white so I didn't have to paint over it. I rubbed a little Treasure Gold in White Fire over the raised areas. Frame finished!


The greyboard panel was painted with Lake Wanaka and then with Chalk. I then sanded the white off in places to get a subtle grey colour before using more Grunge Paste through a different stencil. I added more Treasure Gold as before. 


I stamped some script (from Stamp Set HP1303) using Watering Can Archival ink which I used for all the stamping as it blended with the colour scheme. I also created a very subtle effect stamping flowers from EEB03 and iridescent embossing powder.


The backgrounds for each aperture were cut from a piece of card that I had painted first with Chalk. After that was dry I applied Lake Wanaka, London Night and Mermaid paint randomly over the white base coat using a wet wipe and just swirling the colours over the card. To add some gold I mixed the Treasure Gold with alcohol ink blending solution to make a paint and rubbed this here and there over the card. Finally I swirled more Chalk paint with a wet wipe over the colours to lighten them.


So that's really all I wanted to say about the box and frame.

To complete the backgrounds of each aperture, I stamped and embossed with Ivory embossing powder various designs onto the card prepared above.


Top left and middle left  used EEB05. Middle behind lady I used HP1305. Top right I used HP1009 and Lower right behind bucket I used EEB03.
I left the others plain because they were covered by embellishments.

Before I started this project I had decided to decorate the frame as I have described but I hadn't really thought about how I would finish it. When I looked at the colours and the finish it reminded me of a French ladies boudoir which is why I have set out the embellishments as they are .

I made the bookcase out of greyboard and painted it with Chalk paint. The books are also greyboard painted white. The beauty of these paints is that they adhere to glass so I painted the bottles white.


The stamping on the books and bottles is from  the stamp from HP1216 which is mainly words.  A tiny fragment of this stamp looks great on these little pieces.


Most of the embellishments are painted with a base colour before adding white on top. In this picture the bucket was painted with Lake Wanaka and Crackle Glaze before the white. 

The poppy seed heads were painted with London Night before dry brushing with white. I added a little glitter embossing powder to them.
 

Frame: I stamped the face from EEB03 onto a scrap of the background paper and embossed with gold.

The gold 'jar' was a Christmas glass Bauble painted with White Fire Treasure Gold and while painting it I also painted the bottle gold. When that was dry I added Crackle Glaze with white paint over it. I liked the effect of the gold showing through the cracks.


Again I made the table from greyboard and a wooden knob, painted white. I stamped the little bottles as before using HP1216.

Obviously I have added other embellishments but I just wanted to comment on how I coloured Some of them.l hope you have enjoyed my ideas and perhaps they have inspired you. 

Bye for now.
Liz

Wow, what a stunner Liz! I love how the tiniest elements all come together perfectly. This is simply beautiful!! ~Leandra


We always hope that you  learn something interesting from our blog

Our creative team love to read your comments so much, so please take time to let them know you've been inspired!  

Why not join our 2-weekly challenge by blogging your create response to the current topic and link it here?

The current topic link Topic 17: White will close 17:00 (London Time) Sunday, 26th November 2017, and the winner will be announced 2 hours later at 19:00.

All links go in the draw to win a £50 voucher to spend on products of your choice from the PaperArtsy online store.