Showing posts with label EM68. Show all posts

Thursday, 7 July 2022

2022 Topic 10 : Up my Street {by Renata Peley} with Seth Apter stamps


Hi everyone, it's Peley Renata with you today, and I'm here to share a project with you which is a bit different than those you might have seen from me before. This time my skills were challenged a bit more, and my mixed media-oriented mind was put to the test. Also, you will see how some ideas fail terribly even for me and how I deal with that. And how sometimes even when you have a set idea in your mind, you have to change the whole approach to achieve what you originally intended. Anyway, if you are in the mood to see a very crazy creative session, do keep reading. J


Whenever I took a look at Seth Apter stamps, I always thought how amazing they were for making really interesting backgrounds. But hey, why only backgrounds?! This time I will use these stamps as key elements, points of interest, exciting textures and building blocks of my quirky architectural design.


There is a challenge and excitement in drawing with ink, making the whole thing permanent and learning to embrace your mistakes and make them to be those loveable elements of your drawing. But this time, for the start of my project I decided to take the safe route and start with a pencil and an eraser.


So, at the beginning, my idea was to stamp some images on a parchment paper, glue them on my building sketch, then color them. I thought this way I will have some more room for mistakes and that I can plan out the placement of my elements better.


I guess you are thinking now: ok and what was the problem? Well let me tell you, since there were several problems with that plan. J First of all, I stamped my images with Archival ink, since I thought it is a dye ink, it should be permanent, and it should dry fast. But no, it just wasn’t drying on it. The mistake wasn’t the ink, it was the paper. I should have either left it to dry more, be more careful or use a different paper. So, what happened is that I started accidentally transferring and smudging ink all over with my fingers and the sides of my palms. And it all got worse when I started adhering the images with matte medium. Then of course, the stamped images got more pale and smudgy, since now I wasn’t removing ink just with my fingers but with my brush as well. This way the whole project looked a bit too messy for my taste. Now I realize that you might not see on the image below how messy this page became, but trust me it was there.


If you can believe it, the whole project got even worse when I started coloring my buildings. That was the moment when I realized I have to put the whole thing aside and start all over the next day, with a fresh mind and a new approach.

The following day I changed my strategy altogether. I redraw my sketch and used this opportunity to alter some tiny details as well. On a separate piece of paper (regular mixed media paper this time) I measured, drew and cut out my building sections. I stamped and heat embossed each of these sections with a different Seth Apter stamp. I chose to heat emboss my elements because this time I planned to have some more texture. And for that same reason, I decided to raise the level of the building floor separators. I refer to those long thin stripes between floors. For each separator I used 3 thin stripes of paper and glued them together. That way it truly stood out against the other elements.


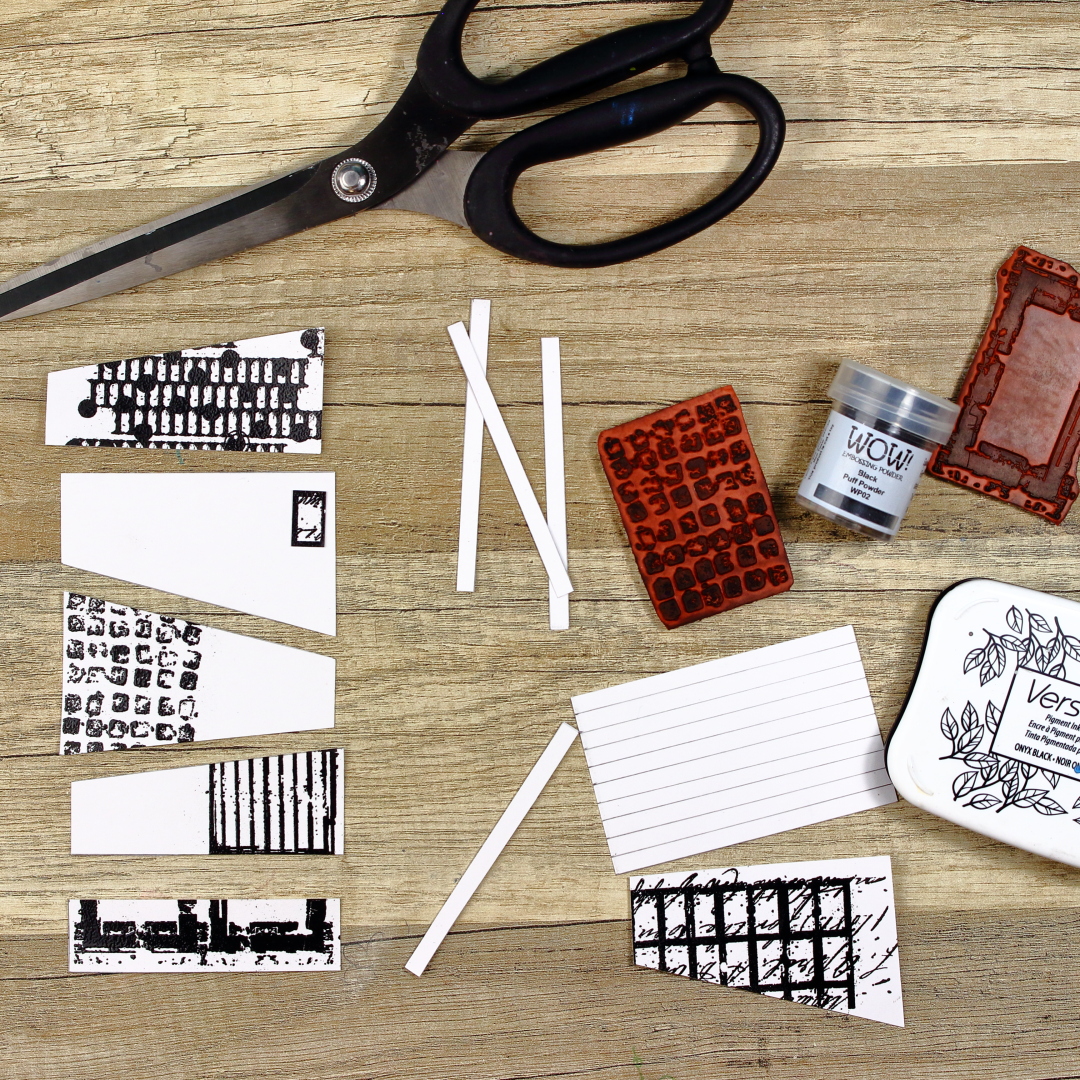
As you can see, I used that rectangles stamp from the ESA26 set as windows, EM41 and EM68 as textures, EM53 as the big gate or passage, EM71 as antennae etc. How you see and choose to use these stamps all depends on your imagination.


At this point, I wanted to position the elements that would stick out of my buildings, such as antennae, fences and cables. I used Archival Ink in black color. I also used two small pieces of paper to mask the areas that I didn’t want to stamp on by accident. As you might notice, at that moment I wasn’t thinking properly and I stamped some images on the places that I would cover later, but I guess that just happens. At least I had them planned out. J


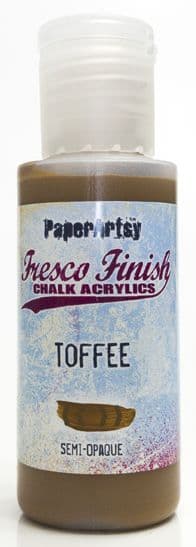
The next step was to color my elements. For the buildings, I chose to use PaperArtsy Fresco Finish Acrylic paints: Toffee and Chocolate PuddingYellow Submarine and Tango paints for my tree. Why is my tree yellow and orange? Well, I just like how it looks and how it stands out against other elements. I wanted the windows and background to be subtle so I used just a light wash of blue watercolor for that. Oh and of course I didn’t forget to add some splatters.


A tiny, but important detail is that I like to frame my cutout pieces. That serves two purposes: first, if you cut out your elements a bit unevenly, it can cover that to a certain degree and second, it gives it a bit of that desired feeling of shadow and dimension. For this, I used an archival ink brush pen in black color.


My elements were mostly done, but I just couldn’t resist adding some more depth. To achieve that effect, I used india ink brush pens. Now, since I used acrylics for coloring, that made my surface non-porous and I could apply this technique, since it’s so fast and simple. But you can always go with watercolors or even colored pencils for this purpose.
So, how I tend to do this is just use a few shades darker brush pen than the base color and smudge it with my fingers. You have to do this somewhat fast, because india ink dries rather quickly.


Now the time came to assemble my project. For this, I used simple paper glue that dries transparently, just in case it overflows. I had enough mishaps on this project as it was and didn’t want to risk some more.


With my building done, I went on to draw some doodles. I think doodling is kind of a very personal thing. What tools you like to use, what style, etc. I like this architectural kind of vibe, so I added some geometrical shapes, lines, numbers and scribbles, but you can always go for some whimsical or quirky designs, or even floral. Just do whatever makes you happy. I also didn’t skip using a white gel-pen for emphasizing some details and adding highlights.


We all have that bad day, days, or even a week when you really want to do something good with your time or you want to be creative but it is just not working out. At that point, it is the easiest just to let it go and watch some tv series or eat a bowl (or a tiny cup J) of ice cream. But one thing that I can promise you is if you manage to push through just a bit, you will manage to make something that you will like and the feeling of a “bad day” will just go away. This project started unlucky for me, but at the end I am pleased with how it turned out and I got that feeling of success. Even though I can still imagine some tweaks that I would do. J

Renata 💜


Facebook: Renata Peley
Instagram: @renata_artjournaling 

Wednesday, 25 May 2022

NEW PaperArtsy Products: Seth Apter {May 2022}


A note from Leandra:
We are loving all the mini size stamps this year, they are such a dinky, easy to use size, offer affordability at a lower price point than a full set, and lots of fun for sure! Seth has brought a nice mix of shape, font and texture in this series of 8 stamps. And did you see the paint??! Delicious colours that are going to offer both oomph and neutral options! nd of course, we worked hard to offer you colours totally different to anything else in his (or the core) range to date! 
 
Don't forget Seth will be over in PaperArtsy People shortly after this post publishes. It's super  nice to hear direct from the designer about their new release, we hope you can catch Seth either LIVE or via replay.
 
Remember, all these stamps and paints are available EXCLUSIVELY from our approved stockists for the next 3-4 months, you will find a link from the tab at the PA Blog home page, or from our IG bio, and a list at the foot of this post. 
 
Hi everyone, Seth Apter back with you with my newest releases. And this time I come bearing both stamps and paint!

I often say I love new release days and the thrill of sending out my products into the world and into your creative hands never diminishes. It is always, always, always so exciting to see what you all come up with.

For this release, 8 Eclectica Minis and 4 new Paints. Almost hard for me to believe but I now have 32 mini stamps, 32 paint colors, and 30 stamp sets with PaperArtsy.

My new stamps were inspired by a phrase I like to use when I demo and teach: make it your own. I feel that we as creative individuals have enough imagination to be able to take any commercial product and use them in a way that makes them completely your own. Each of the mini stamps were designed with this in mind and were created to give you many options in the way you use them.

As for the paints...my inspiration was more practical and was the question what colors are missing in my range that would also pair well with many of the other colors in the palette? Hoping you like the new additions and will continue to read this post to see the product images, artwork created using the stamps and paints, and ideas behind each stamp.
  

Price: Mini Stamp  RRP €4.68 +VAT    Size: credit card size (approx)
All stamps are individually trimmed onto cling foam with a laminated storage/index sheet.
  
Seth Apter  Eclectica³ Mini 65 (EM65)
 
Art for me is about personal expression and every time I create a piece of art I feel like I am telling my own story. So what better way to do that then to announce it in a stamp!
 

The design of this stamp includes its own background - text with a script font in a distressed style. The words have been spaced far enough apart so that they can be used individually or paired off as well.


Seth Apter Eclectica³ Mini 66 (EM66)
 
I love using text in my artwork, both for the meaning as well as the beauty of the letters themselves. Words for me can sometimes be a supporting design element but often they are front and center as the focal point.
 

Each of these words can be stamped on its own, matched with another word or two, or as a set. The phrase was created to reflect my thoughts and feelings about what is important to me after these past few years of challenge and upheaval.


Seth Apter Eclectica³ Mini 67 (EM67)
   
I love a stamp design that can be used in multiple ways. EM67 was created with that idea in mind, knowing that the distressed rectangle could be used as is, as a border, in segments, or in all three ways in the same piece.
 

In designing this stamp, I chose to leave open space within the lines of the rectangle. This gives the option to enable you to let the background show through, color within the lines, or - when placed horizontally, use it as a journaling block for writing. Again, options enable you to make a stamp fully your own.


Seth Apter Eclectica³ Mini 68 (EM68)
  
I love a line. The perfect element for so many things. And you know what I love even more than a line? Many lines. Introducing the many lines of EM68.
 

In this artwork, I used the entire stamp as a focal point for the piece. The lines were used like the lines from a notebook and the script text was added afterwards. But the options with this stamp are limitless based on how it is used. It can used as a mark maker for the background, to create a border around the edges, or to make a crosshatch design when overlapped horizontally and vertically.


Seth Apter Eclectica³  Mini 69 (EM69)
   

One of my favorite types of stamp designs can be loosely described as mark makers, with small details that can be added into the background for dimension, interest and visual texture.
 

EM69 will allow you to add marks to your background or, when stamped in colors contrasting to the base layers, even a focal point to draw the eye to your artwork. You can decide whether you want to to have these marks stand out or blend in.


Seth Apter Eclectica³  Mini 70 (EM70)
   

I love to swatch colors for many reasons - the process, the look of the outcome, and as a reference tool. Some time back, as part of my PaperArtsy ESA20 stamp set, I designed a large stamp with wonky, scratchy rectangles as an alternative to the more traditional swatching tools. I decided it was time to create a smaller version and that lead to EM70. 
 

While these are useful for swatching colors, these can also be used as frames, borders, design details in the background, and even journaling blocks. The ALL THE COLORS stamp was released in my PaperArtsy ESA24 set. 


Seth Apter Eclectica³ Mini 71 (EM71)
   
Slightly industrial, a little bit tribal, and just a touch vintage, EM71 was created so that it can be used as is, in segments, or in a repeating pattern to create long lines or squares/frames. 
 

Using portions of this stamp in all different directions and off the edge, enables you to make marks differently than other people using the same stamp. And do not forget that this can also simply be the start of a completely new design if you extend the lines of the stamp in unique ways.


Seth Apter Eclectica³ Mini 72 (EM72)
   
Inspired by the zig and the zag of a spring, EM72 is a design that can be used as a strong visual focal point, a background element or a border frame. 
 

Placed end to end, you can create a zig-zag line of any length and placed side by side, you can create what looks to be a grate. 


Project: Sewing With Stamps


We often get caught up using products over and over again in the traditional ways. For example, we stamp with an inkpad. Or when we are feeling a bit wild, we break outage embossing powder. But there are so many ways to use a stamp. How about, for example, as a guide for some hand stitching?


In the image above you can see that my new stamp EM72 was stamped horizontally using black ink twice. In the lower impression, I used the design of the stamp as a template for a hand stitched design. This adds layers and design interest and enables you to make your own creative choices in terms of the actually stitching pattern, color of the ink and the thread, etc. 


In the completed artwork above, I used the lines from stamp EM68 as my stitching guide. I used black ink and red thread. I also used some of the random splats and marks in the stamp design to guide me in adding some extra stitching details. As I say...make it your own!


Price: RRP €4.58 +VAT    Size: 50 ml (7 fl.oz)


We have 4 new paints from Seth to share with you today. 2 opaque, and 2 translucent

Powder Pink is an off white with a hint of pink. We all know how useful off whites are to knock back, blend and so on, but it is also nice to have them in warm and cool shades, and this pink base is certainly unique among all the fresco range. Semi opaque means it is buildable to opaque with 2 coats, but the lesser opacity can be handy in that it knocks back without complete obliteration. 

Toffee Apple everyone wants a red, and wow are they the hardest paint for us to develop and have differentiated from other reds. Translucent, this one is GORGEOUS - a rich red with a pink undertone and very different to any other reds we have in our line.

Purple Majesty is in a similar zone to Tracy Scott's Purple Wine (Semi-Opaque) and Electric Violet (Full Opaque), and the differentiation, you will be interested to know, is that Purple Majesty is a translucent - super fun as that extra transparency allows you to add interest with buildable layers or for colouring without obliteration.

Finally Stardust is an intense opaque grey with a greeny-blue base that is going to mix amazing well with Purple Majesty, but also colours in the greens or blues such as Blue Lagoon

You can see how colour mixing from one end of the spectrum to the other allows you to create a wide range of shades and colours.


All four colors work well individually, blended together, or mixed with other shades. Here are two examples using a blend of all four shades. You can see that the quantity you use of each color will completely change the outcome.


Blending even just two of the colors together can lead to beautifully complex surfaces as well. For example, Purple Majesty and Stardust...


And Toffee Apple and Powder Pink ...


Fresco Finish Chalk Acrylic Paints are a matte finish paint, with opacity varying from translucent, semi-opaque or opaque (see the hand-painted chevron on each bottle).

These paints are low VOC, UV resistant, clean up in water and suitable for indoor and outdoor use, as well as perfect for all manner of surfaces: fabric, wood, card, paper, chipboard, leather and more.

They do not require an undercoat, these are chalk based, therefore every option is like a coloured gesso; the opacity determines the level of coverage. Thin with any PaperArtsy glaze to increase the translucency to your preference.

Here is a reminder of the full range of Seth's paint, 32 colours from MAY 2022.


As always, thanks so very much for your support and taking the time to look through this post. Feel free to tag me if you do get some of these products and share your creations online. And speaking of...you can find me online at:

Socials...


Teaching Schedule:
You can find my online classes here.

 PaperArtsy Stockist List

Our stockists are your go-to  source for all PaperArtsy products, and we suggest that you also use the PaperArtsy People Facebook group to source a retailer in your country. Many are members of our FB group and will happily share links to their online stores.

Australia
Bev's Cross Crafts, Spreyton, Tasmania https://www.bevscrosscrafts.com.au/
Crafters Cupboard, Berwick, Victoria www.crafterscupboard.com.au
Memories on the Murray, Murray Bridge, SA  https://www.memoriesonthemurray.net/
Natalie May Scrapbooking, Dover Gardens, SA https://nataliemay.com.au/
Scrapbook Superstore & More, South Penrith, NSW https://www.scrapbooksuperstore.com.au/
The Scrapbooker's Confetti Box, Swansea, NSW https://thescrapbookersconfettibox.com/
The Scrapbook Store, North Perth,WA http://thescrapbookstore.com.au/ 
Time To Createwww.timetocreate.com.au

Belgium
Cart N Scrap Art, Antwerp, www.cartnscrapart.be
Créatelier Caracolle, Liège, www.createliercaracolle.be

Canada
Clipper Street Scrapbook Company, Langley, BC. www.clipperstreet.com
Paper Art Creations Inc, Leduc, Alberta, www.paperartcreations.com/
Scrapbook Centrale, Dollard Des Ormeaux, Quebec www.scrapbookcentrale.ca
Scrap Addicts, Edmonton, Alberta www.scrapaddicts.ca/
Scrap and Bean, Edmonton, Alberta scrapandbean.com/ 
Scrapbooking Fairies, Drayton Valley, Alberta www.scrapbookingfairies.com/
The Paper & ink Boutique, Calgary, Alberta www.paperandinkboutique.com/
The Scrap Yard, Calgary, Alberta, www.thescrapyardcalgary.com/ 

Denmark
Hobbyboden Scrapworld Samso www.hobbyboden.dk

France
Eirl Bancon Cartoscrap, Midi Pyrenees, www.cartoscrap.com
Fée Du Scrap, Saint Sébastien-Sur-Loire, www.feeduscrap.fr/
Horizon Créatif, Ste Jalle www.horizon-creatif.fr
Instant Créatif, La Possession, La Réunion, www.icreatif.re
Katzelkraft, Ingwiller www.katzelkraft.fr/en/
Kerudoc Creation, St Yvi www.kerudoccreation.com
Le Grenier des filles, Pierre Benite
Page de scrap, Saint Pavace, www.pagedescrap.fr/
Scrap Déco Home, Goutrens, www.scrapdecohome.fr/
Toutencolle, Dun sur Avon www.toutencolle.fr

Finland
Heidin Korttipaja, Istunmaki, www.korttipaja.fi/fi
Piia Paper, Kittiläwww.piiapaper.com/fi

Germany
Stempelbar, Berlin, www.stempelbar.de
Stempeloase Munich, Munich www.stempeloase.de
Stempelfee Shop, Hilden www.stempelfee-shop.de
Stempellaedle, Stuttgart, www.stempellaedle.de/shop

Greece
Scraps N Pieces, Kallithea www.scrapsnpieces.gr

Italy
Immagine SAS di Rapaccini, Rome, www.immaginelab.com
Il Negozio Della Mamma Di Cle, Torino, www.ilnegoziodellamammadicle.com
Marte Savona, Savona, www.martesavona.it
Pezze E Colori, Lissone, www.pezzeecolori.it/ 
Piccole Passioni, Siena, www.piccolepassioni.it

Japan
La Wadao, Odawara, Kanagawa, www.lawadao.com
Tiny Dots, Funabashi-shi, Chiba www.tinydots.shop-pro.jp

Netherlands
De Hobbystudio, Genemuiden, www.dehobbystudio.nl/
Doe@ding,Spijkenisse doeading.nl/
Hobbycompleet de Duif, Leeuwarden www.hobbycompleet.nl
Stampingcorner, Capelle Aan Den Ijssel www.stampingcorner.nl

Norway
Hobbygarasjen, Kopervik, www.Hobbygarasjen.no

Spain
Cien por Cien Manualidades, Barcelona,  www.100x100manualidades.es
Ideas 10 Manualidades Y Scrapbook, Bilbao ideas10manualidades.com/
Marakiscrap, Tarragona, www.marakiscrap.com
Scrap & Papers Experiences, Barcelona, www.scrappapersexperiences.com
The Paradise Corner, Barcelona, www.theparadisecorner.com

Sweden
Butik Elva, Staffanstorp, www.butikelva.se

Taiwan
Mandy's Cards, Taipei www.facebook.com/mandy.card.77

United Kingdom
Amelia's Creative Crafts, Studley, Warwickshire  www.ameliascreativecrafts.co.uk
Art from the Heart, Harrogate, Yorkshire www.afth.co.uk
Blade Rubber Stamps, London www.bladerubberstamps.co.uk
Crafts at The Malthouse, Herstmonceux,  East Sussex, www.themalthouse.co.uk/
Fave Rave, Stourbridge, West Midlands www.shabbychicstencils.co.uk
Loobi Crafts, Leighton Buzzard, Bedfordshire, www.loobicrafts.co.uk
Papermaze, Ipswich, Suffolk www.papermaze.co.uk/ 
Stampers Grove, Springbank, Lilliesleaf, Melrose,Scotland www.stampersgrove.co.uk
The Artistic Stamper Craft Store, Faversham, Kent www.theartisticstamper.com
The Forget me not Kraft KabinRochford, Essex, www.TheForgetMeNotKraftKabin.co.uk

USA
Artistic Artifacts, Alexandria, VA www.artisticartifacts.com/
Artistic Studio Creations, Fayetteville, Georgia www.facebook.com/ASCbyCrystal
Craftiness, Chatsworth, CA, www.craftinessonline.com/
Ephemera Paducah, Paducah, Kentucky www.ephemerapaducah.com
Everything Scrapbook & Stamps, Lake Worth, Florida https://everythingmixedmedia.com/
Frantic Stamper, Oregon www.franticstamper.com
Free Heart LLC, Denver, Colarado, www.freeheartllc.com/
Golden Hills PaperCrafts, Fairfax Station, Virginia, www.goldenshillpapercrafts.com/
Joggles, West Warwick, Rhode Island, www.joggles.com
PaperCraft Clubhouse, Westbrook, Connecticut, papercraftclubhouse.com/
Qingquing's Stamp Shop, Portland, Oregon
Runaway, Art & Craft Studio, NE Salem, Oregon www.runawayart.com/
Simon Says Stamp, Columbus, Ohio www. simonsaysstamp.com
Topflight Stamps, Irmo, South Carolina topflightstamps.com/

Our brand is only available from established stockists who are VAT/ GST/ sales tax registered and for whom product education is a core principle. We would rather supply a few hand selected stockists, than the greater masses. If you would like to apply to be a stockist, you can find our more about our supply criteria here.

PaperArtsy Links
Facebook Group PaperArtsy People
Facebook Page PaperArtsy