Showing posts with label EM65. Show all posts

Thursday, 16 March 2023

2023 Topic 03: Focus on Seth Apter {by Renata Peley} with Seth Apter Products


Hi everyone, it’s Peley Renata with you today and in this blog, you can see me struggle, you can see me squirm as I do a project way out of my comfort zone. As perhaps some of you know, I am mostly comfortable with doing art journal pages, with little to no dimension. And now I challenged myself to make a very dimensional and somewhat abstract 3D project in combination with some fun stamps designed by Seth Apter.


Of course, it wasn’t pain and suffering. You know, a bit of a personal challenge builds character. And if I’m going to be completely honest, I did enjoy this project and now that I let go of my fear of this type of 3D bulky and layered projects, I’m probably going to make them again from time to time.

Anyway, as the quarterly topic is “Tracks”, I decided to make my project in a manner of a riddle, and you have to follow certain tracks and clues to find my secret message. This idea got me quite immersed and had lots of fun figuring out how it would work.


I guess a lot of you who are PaperArtsy fans are also familiar with the work of Seth Apter. He designed quite a selection of stamps and colors for them. And even more, he has a unique and recognizable style, and my task was to make a project in that particular style. Of course, that doesn’t mean to simply copy his work, but rather to be inspired by it and add some personal touches. And in truth, being inspired by his work wasn’t that hard.

To get a better picture of Seth Apter’s work, I went for a bit of research on his web page. If you visit his page and click on the “Artwork”, you can get a clear image of his art approach. Now what’s left to do is to try to incorporate his style with my own, together with the PaperArtsy quarterly topic.

The second step after the research was to go and see what kind of papers and items I could gather up from my stash, and start formulating a strategy to approach my somewhat developing project idea.


Now, don’t get intimidated by my selection of items. You most certainly don’t need all these. Anyway, at the end I won’t use even half of them. These were just gathered up to get my imagination flowing.

Over the years I have become a passionate collector of little metal charms. And I always think: “Oh this one looks versatile/pretty” or “I’m sure I’m going to need this one sooner or later”, but the truth is, I almost never use them, so I made a promise to myself to use a few of them in this project.


Have you ever heard of the infinite calendar? It’s basically what its name says, a calendar which you move manually every day in order to keep track of the date and you can use it every year over and over again. If you are curious, you can just look it up on Pinterest and there you can find several versions of this calendar. I was inspired by the round version, to make my first “clue” piece. The starting point for this element was the stamp set from Seth Apter (ESA31).


If you take a look at this stamp set, it has this gorgeous round design with several circles with letters. So, what I did is to take a heavy weight paper (300gsm) and applied a mix of PaperArtsy Fresco Finish Acrylic Paints: Buff (FF96) and Squid Ink (FF56). When the paint was dry, I stamped the previously mentioned stamp three times and heat embossed it with black embossing powder.


After cutting out three circles of my stamped images (each one smaller than the previous one), comes the tricky part. Now, I’ll let you on a little secret, I genuinely dislike designing precise and working 3D elements, so I asked my husband for a little help. What I needed is to craft an element which will hold my circles together and have an opening through which we can see one letter from each of the three circles. On the image below you can see what we came up with and what my husband drew for me. 😊


The next step was to cut out the drawn shape and connect the elements.

By the way, you know how foam tapes are sticky on the bottom, but on the top, they have that smooth paper, which you are supposed to peel off? Well, in order to prevent my circles from sticking to each other and to spin more smoothly, between each of them I put a piece of a foam tape, without removing the protective layer from it. Meaning, it sticks to the lower circle, but it leaves the upper part non-adhesive and smooth. That provided the buffer area for a smooth rotation of the circles.


With that, all the elements were ready, so I just pierced a hole in the middle of the circles and connected them all with a metal braid. Here you can see the finished result.


This rotating circle is supposed to be one of my focal elements. But now I wanted to make another important piece. A secret box with a message. My box was actually an empty matchbox, but of course first I had to paint it. For this I decided to use once again PaperArtsy Fresco Finish Acrylic Paint Squid Ink, but also Black Dress (FF19).

At this point my box looked rather plain so I decided to embellish it a bit with one of the mini stamps designed by Seth Apter (EM55). I just stamped the image with the archival ink, without caring about getting a perfect impression. Then once again I just had to add another small detail and this was a tiny bit of the PaperArtsy Fresco Finish Acrylic Paint White Fire (FF121). And when I say “a tiny bit” I really mean a tiny bit as I just put a very small amount of paint on a toothpick and rubbed it over the surface of the box. It is a very subtle detail and it can be seen just under certain light, but I think it really looks nice and it gives it a more metallic look. Oh, and I also used White Fire on the black piece of my rotating circle.
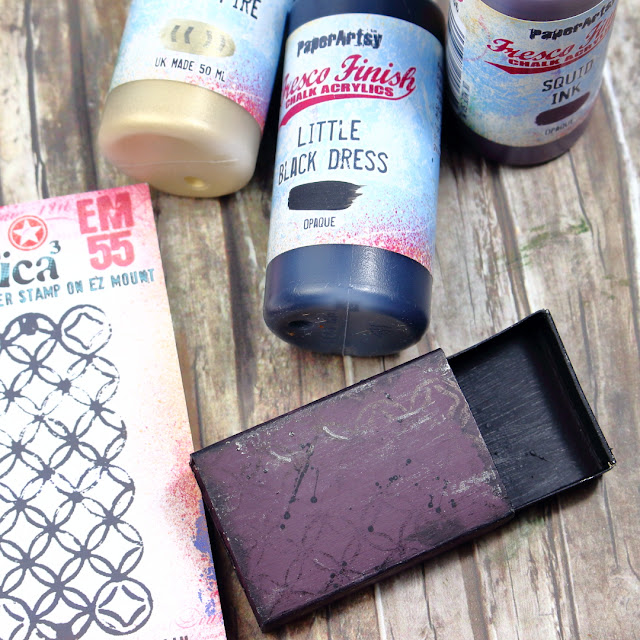


In order to make the box open more easily I attached to it a tiny metal clip on one side. Now for the content of the box I had a tea-dyed notebook paper and I stamped another one of the Seth Apter mini stamps (EM65) on it. This was to serve as my “secret” message. And just for the fun of it, I also put a small metal key next to it.


With these two elements crafted, it was time to start thinking of a composition and another round of checking for items that I could incorporate in my project.


I must admit, at this point I was very confused with how to proceed. I started to doubt the size of my originally planned substrate. I also felt that all those goodies that you saw me assemble at start aren’t appropriate, or just not enough. It was time for me to take a break and wait for a new day to start with a fresh brain. And guess what? The next day I sit at my crafting table and did some fumbling and tumbling…and again came up with nothing. It was time for some more research. I went scouring Pinterest, my fellow crafters Instagram accounts and of course Seth Apter’s web page and finally some ideas started to form.

I realized that I wasn’t troubled just by the size of my substrate, but also by the oval shape of it so it was time to consider some other options.

Years ago, my husband was into some furniture-making, so we still had some wood planks of various sizes stashed around. There I found some smaller boards that finally helped me to start going again.

I took a few narrow boards, but I wanted to alter their color a bit. As I decided to stick to my original color scheme, so again I took PaperArtsy Fresco Finish Acrylic Paints Squid Ink and Little Black Dress. But I didn’t want to just cover whole boards, instead I put the paint only on the edges of the panels, so it would look something almost like burnt wood.


Now the question was how to connect the wood planks. The idea was to use a furniture stapler gun as it would contribute to the whole grunge vibe, but apparently, I am one of those people who can’t find stuff in their own home, so I had to find another solution.

First, I thought just to glue the boards to each other, and it was not a bad solution, but I wanted something a bit more special. What I did was to yet again ask my hubby for some help. He drilled 16 small holes in my planks so that I could connect them using a bit sturdier thread. For each connecting point we made four holes so that I could connect the wood in an “X” shape, as you can see on the image below.


When connecting the planks, you can decide how you want to align them. I chose to make them just a little bit off, but I did pay attention to use one plank that was a bit shorter than the others, so that in that place I could put my matchbox with the message. I glued one side of the matchbox to the lower side of my shortest wood board.


At this point I decided to build up one more element before I start concentrating on my layout. On the stamp set PaperArtsy Seth Apter ESA31, you can see those two stamps with vertically spelled words and since they very much appealed to me, I decided to use one of them. When I was searching for my possible substrate, I also found these mini 5-10cm narrow wood panels which were just the ideal size for stamping my words. I prepped the panel with PaperArtsy Fresco Finish Acrylic Paints Buff (FF96) and Squid Ink (FF56). When the paint was dry, I stamped and heat embossed the word ‘document’ with black embossing powder. And here is how it turned out.

Now with my substrate and a few important elements finally complete, it was time to start thinking about the composition. And guess what? This turned out to be the most challenging part of my project yet. I had two considerations. First, I really liked the look of my wooden boards and wanted to be sure they are not completely covered with the elements that I planned to layer on top. Second, I didn’t want just to pile my elements randomly, I wanted to give it all some meaning and sense.


I know that making a layout shouldn’t belong to the twists and turns section of the blog, but if we are being honest, for me making this layout was all about twists and turns of actions. I think I made about ten possible layouts over several days until I finally found one that I was happy with.

The idea was to have a few different types of papers layered on top of each other, with a random but still sensible look about it. I also wanted to implement a few of those metal charms that I mentioned at the start, my rotating circle, some heat embossed gears that I made from Seth Apter’s stamp set ESA12 and such.


I wanted to go slowly and gradually with this. First, I adhered my little word panel in the top left corner and two small cork material squares on the right side which I had from who knows where. It’s also worth mentioning that, while building the layout I mostly used a double-sided tape and put it only in the middle of the paper elements so that later on I would be able to tuck in some other bits and pieces if I wanted to.


At this point, I just wanted to layer some papers. I stamped a few of them with Seth Apter’s stamps, two were book pages and on the picture below you can see how it looked so far.


Now I finally wanted to start using my collected metal charms. Originally, I first thought just to adhere one of them with glue but in the end I decided to spice it up a bit and screw in my charm instead.


At this step I came to two realizations. First, that I have completely covered my little secret box, which in fact wasn’t my original intention. After all I thought I managed to decorate the matchbox rather nicely but as it seems that it will stay a secret between you and me. 😊 And the second thing was that I had to start using something resembling some clues to finding my secret box. I decided to use some darts and arrows discreetly pointing in the direction of the box. Here you have multiple options. You can draw those arrows, cut them out by hand or like me, use some metal dies. In the end, I used two different die sets designed by Tim Holtz to embellish my project. Those dies included some numbers, arrows, paper folder and that lovely frame that I used for the word “wonder”.

Oh, and look how pretty are those gears from the Paper Artsy Seth Apter stamp set ESA12 that I heat embossed in copper color.


At this point, my project was going nicely. Layers were formed and some details were added, so now I wanted to attach my rotatable circle. Do you remember those two cork material squares that I previously used? Well, I had one more of those and I used it to lift up my circle so it would be more comfortable to rotate it.


After attaching the circle, the last element that I wanted to add was a little paper folder. Inside it I have tucked in a few papers and I have also embellished the folder with a stamp and some mini paper clips. And that was about it. I had some idea of adding a few more elements like a wire piece, textile or some more charms, but I decided to resist that urge so my project wouldn’t become overcrowded.


Well…I have quite a few thoughts about this project. Even now after completing this whole blog post, my brain doesn’t stopping thinking about all the other things that I could have implemented. Also, I enjoyed my two interactive elements of this piece, but I would have liked it if I could have figured out one or two more, but maybe that is just too ambitious.  

All in all, so far in my ‘crafty’ history, this project was the biggest challenge so far and I am so happy that I faced it and managed to find a way to make a project that I like. It gave me a feeling of success and it gave me some courage to experiment more and try new things. I would also like to advise you as well to go out of your comfort zone because that is when we learn the most. Anyway, what’s the worst thing that can happen? Make a project you don’t like? So what? We all have in our closets a few projects that we are not so proud of. 😊

Renata 💜


Wednesday, 25 May 2022

NEW PaperArtsy Products: Seth Apter {May 2022}


A note from Leandra:
We are loving all the mini size stamps this year, they are such a dinky, easy to use size, offer affordability at a lower price point than a full set, and lots of fun for sure! Seth has brought a nice mix of shape, font and texture in this series of 8 stamps. And did you see the paint??! Delicious colours that are going to offer both oomph and neutral options! nd of course, we worked hard to offer you colours totally different to anything else in his (or the core) range to date! 
 
Don't forget Seth will be over in PaperArtsy People shortly after this post publishes. It's super  nice to hear direct from the designer about their new release, we hope you can catch Seth either LIVE or via replay.
 
Remember, all these stamps and paints are available EXCLUSIVELY from our approved stockists for the next 3-4 months, you will find a link from the tab at the PA Blog home page, or from our IG bio, and a list at the foot of this post. 
 
Hi everyone, Seth Apter back with you with my newest releases. And this time I come bearing both stamps and paint!

I often say I love new release days and the thrill of sending out my products into the world and into your creative hands never diminishes. It is always, always, always so exciting to see what you all come up with.

For this release, 8 Eclectica Minis and 4 new Paints. Almost hard for me to believe but I now have 32 mini stamps, 32 paint colors, and 30 stamp sets with PaperArtsy.

My new stamps were inspired by a phrase I like to use when I demo and teach: make it your own. I feel that we as creative individuals have enough imagination to be able to take any commercial product and use them in a way that makes them completely your own. Each of the mini stamps were designed with this in mind and were created to give you many options in the way you use them.

As for the paints...my inspiration was more practical and was the question what colors are missing in my range that would also pair well with many of the other colors in the palette? Hoping you like the new additions and will continue to read this post to see the product images, artwork created using the stamps and paints, and ideas behind each stamp.
  

Price: Mini Stamp  RRP €4.68 +VAT    Size: credit card size (approx)
All stamps are individually trimmed onto cling foam with a laminated storage/index sheet.
  
Seth Apter  Eclectica³ Mini 65 (EM65)
 
Art for me is about personal expression and every time I create a piece of art I feel like I am telling my own story. So what better way to do that then to announce it in a stamp!
 

The design of this stamp includes its own background - text with a script font in a distressed style. The words have been spaced far enough apart so that they can be used individually or paired off as well.


Seth Apter Eclectica³ Mini 66 (EM66)
 
I love using text in my artwork, both for the meaning as well as the beauty of the letters themselves. Words for me can sometimes be a supporting design element but often they are front and center as the focal point.
 

Each of these words can be stamped on its own, matched with another word or two, or as a set. The phrase was created to reflect my thoughts and feelings about what is important to me after these past few years of challenge and upheaval.


Seth Apter Eclectica³ Mini 67 (EM67)
   
I love a stamp design that can be used in multiple ways. EM67 was created with that idea in mind, knowing that the distressed rectangle could be used as is, as a border, in segments, or in all three ways in the same piece.
 

In designing this stamp, I chose to leave open space within the lines of the rectangle. This gives the option to enable you to let the background show through, color within the lines, or - when placed horizontally, use it as a journaling block for writing. Again, options enable you to make a stamp fully your own.


Seth Apter Eclectica³ Mini 68 (EM68)
  
I love a line. The perfect element for so many things. And you know what I love even more than a line? Many lines. Introducing the many lines of EM68.
 

In this artwork, I used the entire stamp as a focal point for the piece. The lines were used like the lines from a notebook and the script text was added afterwards. But the options with this stamp are limitless based on how it is used. It can used as a mark maker for the background, to create a border around the edges, or to make a crosshatch design when overlapped horizontally and vertically.


Seth Apter Eclectica³  Mini 69 (EM69)
   

One of my favorite types of stamp designs can be loosely described as mark makers, with small details that can be added into the background for dimension, interest and visual texture.
 

EM69 will allow you to add marks to your background or, when stamped in colors contrasting to the base layers, even a focal point to draw the eye to your artwork. You can decide whether you want to to have these marks stand out or blend in.


Seth Apter Eclectica³  Mini 70 (EM70)
   

I love to swatch colors for many reasons - the process, the look of the outcome, and as a reference tool. Some time back, as part of my PaperArtsy ESA20 stamp set, I designed a large stamp with wonky, scratchy rectangles as an alternative to the more traditional swatching tools. I decided it was time to create a smaller version and that lead to EM70. 
 

While these are useful for swatching colors, these can also be used as frames, borders, design details in the background, and even journaling blocks. The ALL THE COLORS stamp was released in my PaperArtsy ESA24 set. 


Seth Apter Eclectica³ Mini 71 (EM71)
   
Slightly industrial, a little bit tribal, and just a touch vintage, EM71 was created so that it can be used as is, in segments, or in a repeating pattern to create long lines or squares/frames. 
 

Using portions of this stamp in all different directions and off the edge, enables you to make marks differently than other people using the same stamp. And do not forget that this can also simply be the start of a completely new design if you extend the lines of the stamp in unique ways.


Seth Apter Eclectica³ Mini 72 (EM72)
   
Inspired by the zig and the zag of a spring, EM72 is a design that can be used as a strong visual focal point, a background element or a border frame. 
 

Placed end to end, you can create a zig-zag line of any length and placed side by side, you can create what looks to be a grate. 


Project: Sewing With Stamps


We often get caught up using products over and over again in the traditional ways. For example, we stamp with an inkpad. Or when we are feeling a bit wild, we break outage embossing powder. But there are so many ways to use a stamp. How about, for example, as a guide for some hand stitching?


In the image above you can see that my new stamp EM72 was stamped horizontally using black ink twice. In the lower impression, I used the design of the stamp as a template for a hand stitched design. This adds layers and design interest and enables you to make your own creative choices in terms of the actually stitching pattern, color of the ink and the thread, etc. 


In the completed artwork above, I used the lines from stamp EM68 as my stitching guide. I used black ink and red thread. I also used some of the random splats and marks in the stamp design to guide me in adding some extra stitching details. As I say...make it your own!


Price: RRP €4.58 +VAT    Size: 50 ml (7 fl.oz)


We have 4 new paints from Seth to share with you today. 2 opaque, and 2 translucent

Powder Pink is an off white with a hint of pink. We all know how useful off whites are to knock back, blend and so on, but it is also nice to have them in warm and cool shades, and this pink base is certainly unique among all the fresco range. Semi opaque means it is buildable to opaque with 2 coats, but the lesser opacity can be handy in that it knocks back without complete obliteration. 

Toffee Apple everyone wants a red, and wow are they the hardest paint for us to develop and have differentiated from other reds. Translucent, this one is GORGEOUS - a rich red with a pink undertone and very different to any other reds we have in our line.

Purple Majesty is in a similar zone to Tracy Scott's Purple Wine (Semi-Opaque) and Electric Violet (Full Opaque), and the differentiation, you will be interested to know, is that Purple Majesty is a translucent - super fun as that extra transparency allows you to add interest with buildable layers or for colouring without obliteration.

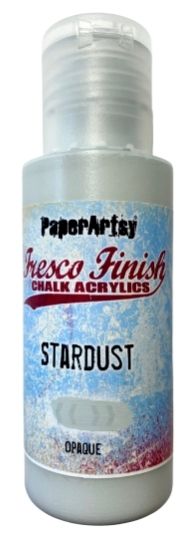
Finally Stardust is an intense opaque grey with a greeny-blue base that is going to mix amazing well with Purple Majesty, but also colours in the greens or blues such as Blue Lagoon

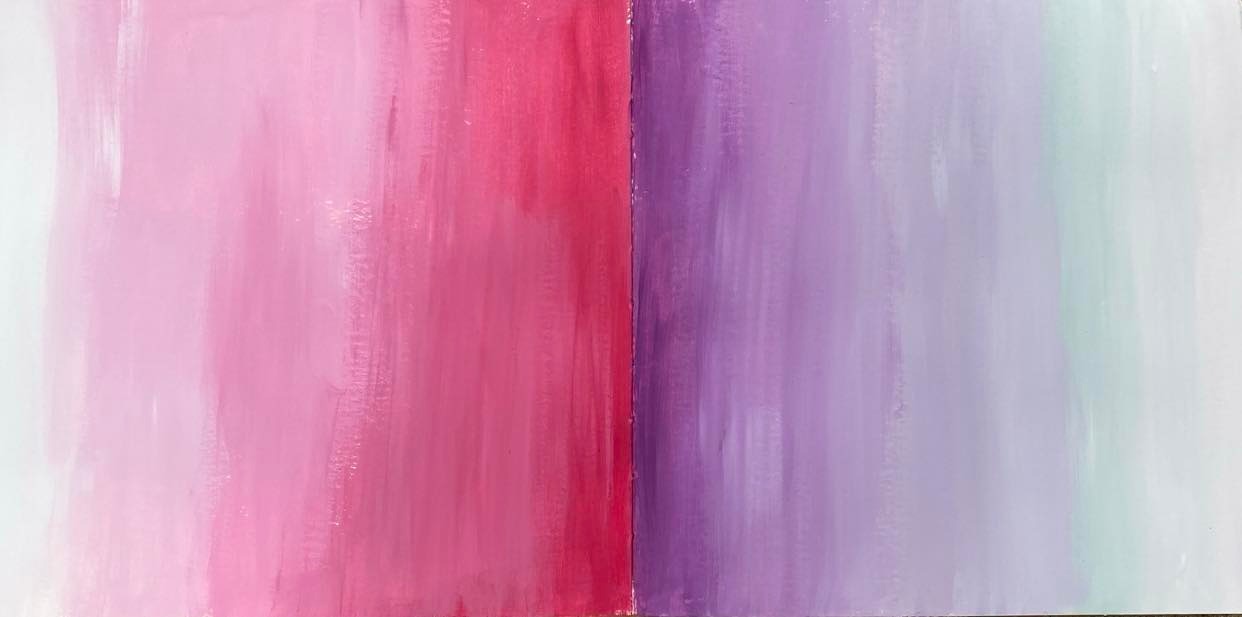
You can see how colour mixing from one end of the spectrum to the other allows you to create a wide range of shades and colours.


All four colors work well individually, blended together, or mixed with other shades. Here are two examples using a blend of all four shades. You can see that the quantity you use of each color will completely change the outcome.


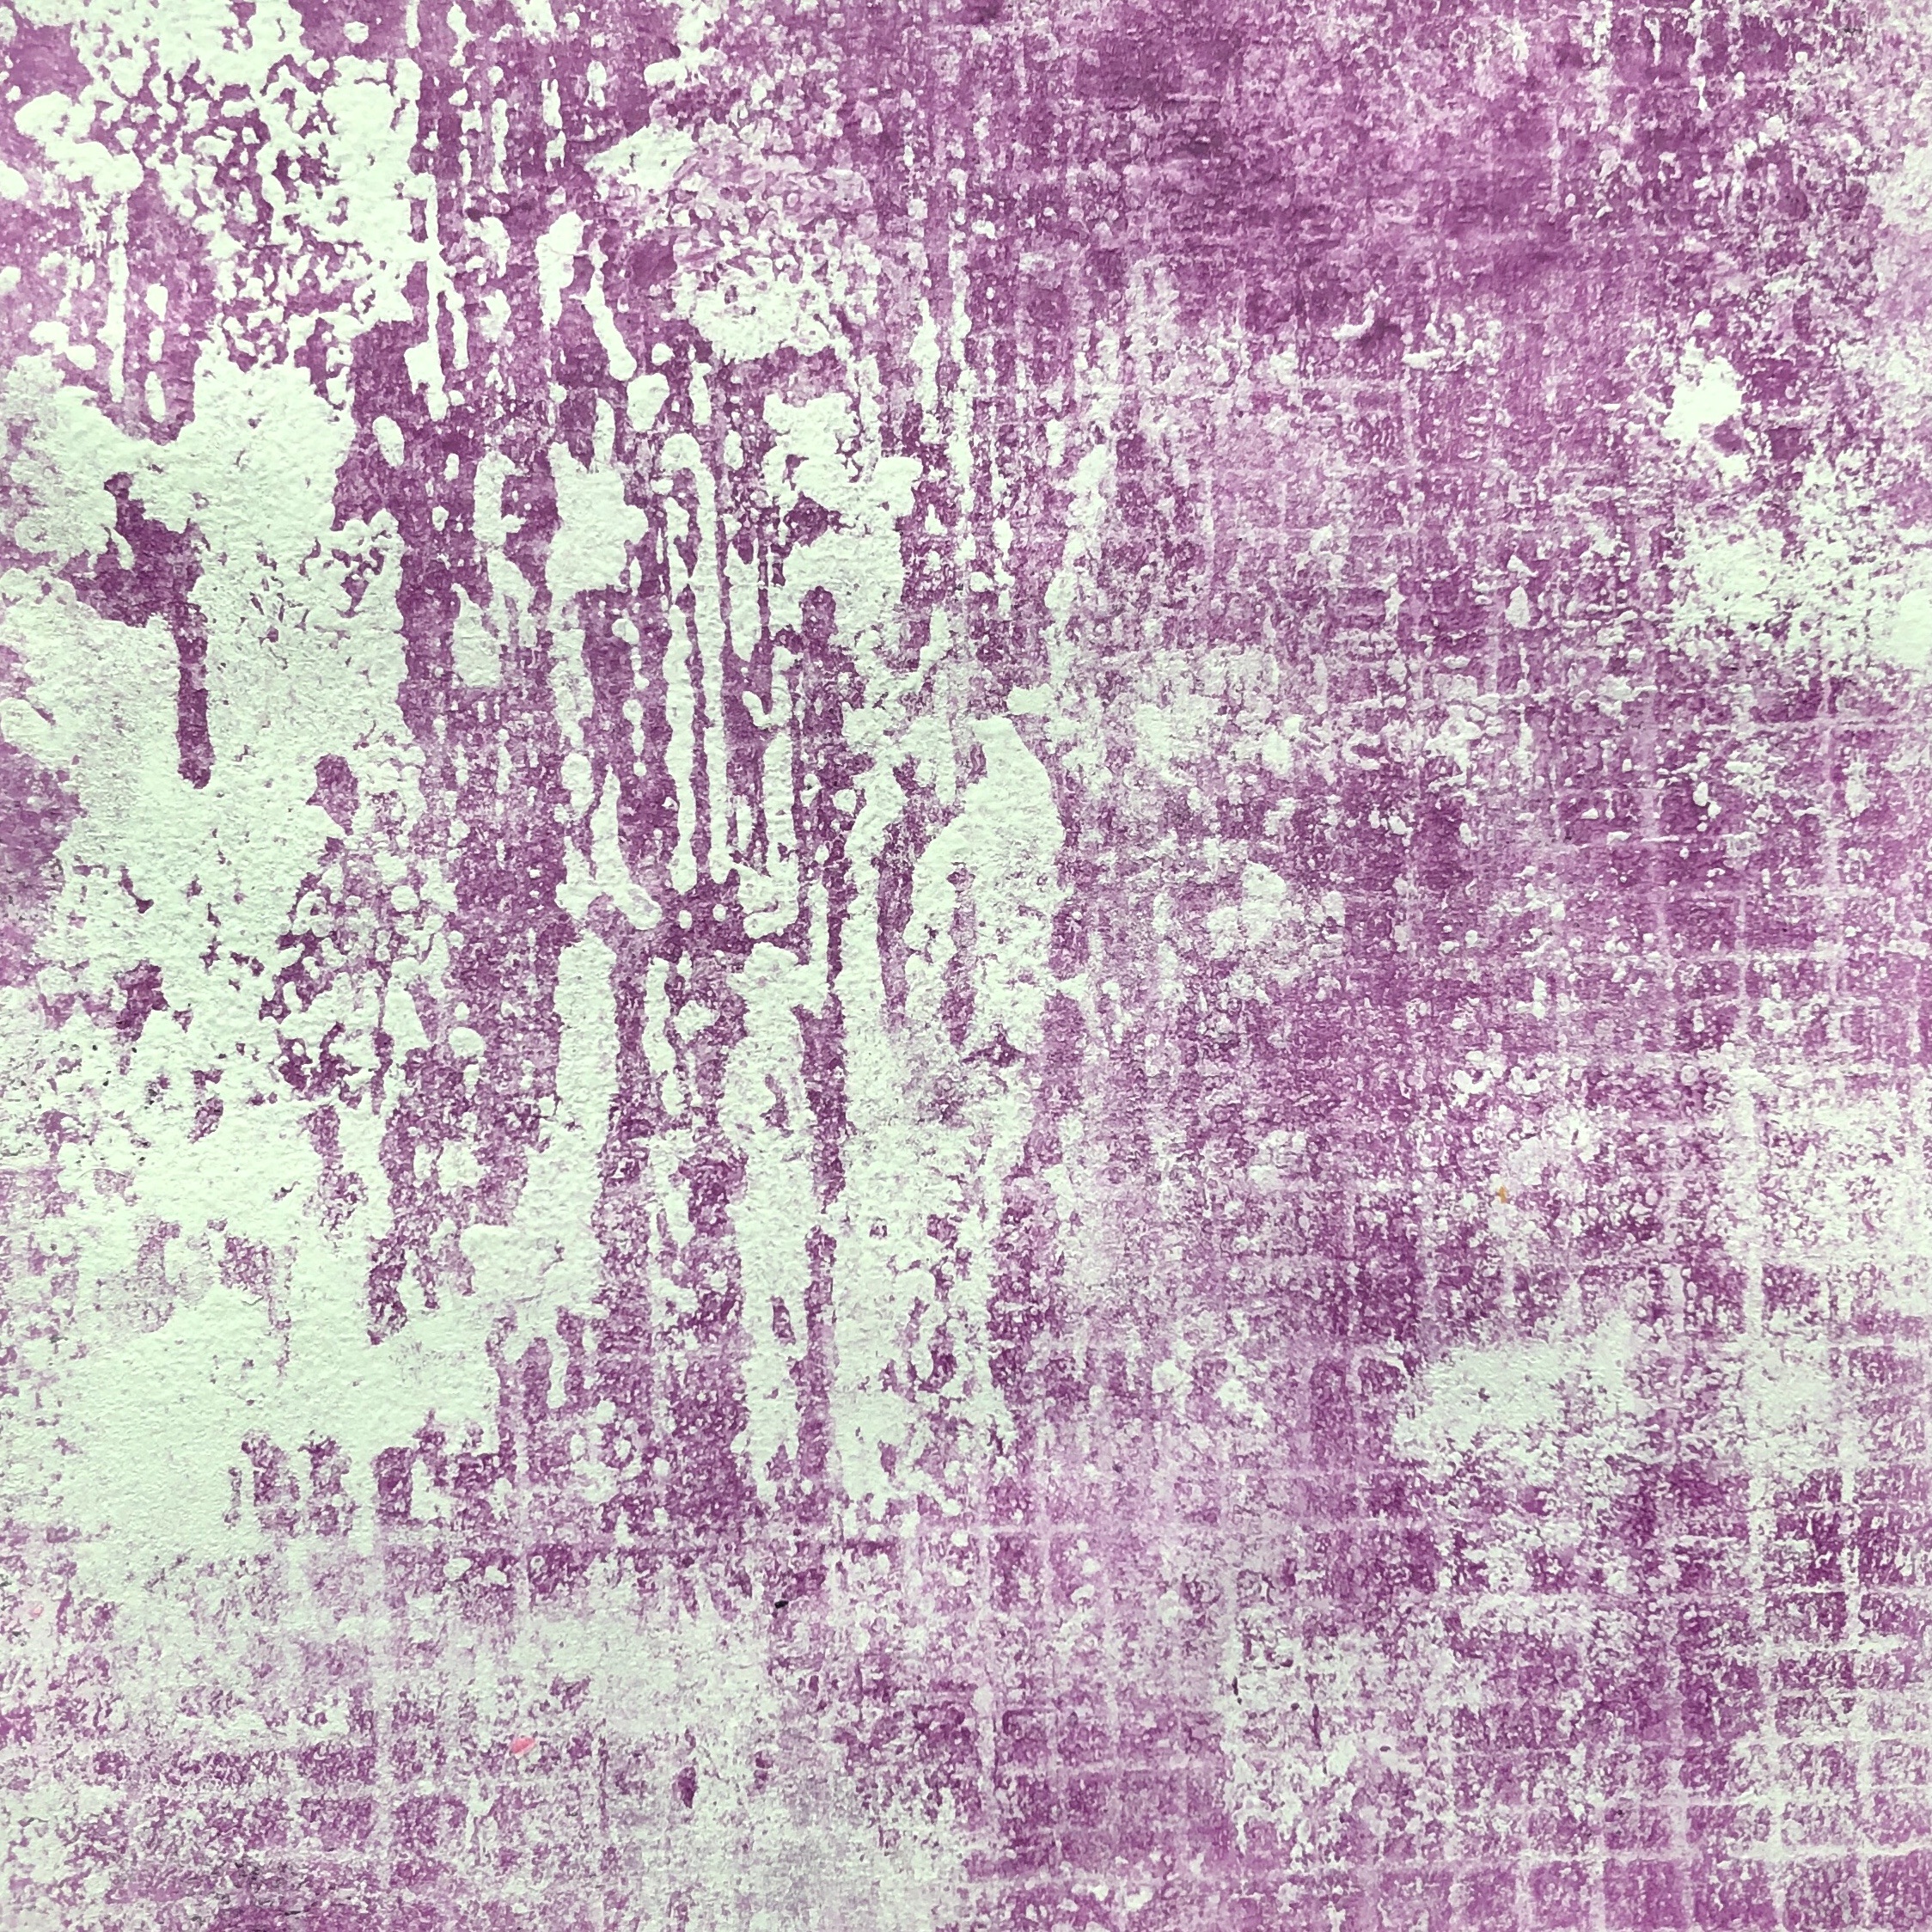
Blending even just two of the colors together can lead to beautifully complex surfaces as well. For example, Purple Majesty and Stardust...


And Toffee Apple and Powder Pink ...


Fresco Finish Chalk Acrylic Paints are a matte finish paint, with opacity varying from translucent, semi-opaque or opaque (see the hand-painted chevron on each bottle).

These paints are low VOC, UV resistant, clean up in water and suitable for indoor and outdoor use, as well as perfect for all manner of surfaces: fabric, wood, card, paper, chipboard, leather and more.

They do not require an undercoat, these are chalk based, therefore every option is like a coloured gesso; the opacity determines the level of coverage. Thin with any PaperArtsy glaze to increase the translucency to your preference.

Here is a reminder of the full range of Seth's paint, 32 colours from MAY 2022.


As always, thanks so very much for your support and taking the time to look through this post. Feel free to tag me if you do get some of these products and share your creations online. And speaking of...you can find me online at:

Socials...


Teaching Schedule:
You can find my online classes here.

 PaperArtsy Stockist List

Our stockists are your go-to  source for all PaperArtsy products, and we suggest that you also use the PaperArtsy People Facebook group to source a retailer in your country. Many are members of our FB group and will happily share links to their online stores.

Australia
Bev's Cross Crafts, Spreyton, Tasmania https://www.bevscrosscrafts.com.au/
Crafters Cupboard, Berwick, Victoria www.crafterscupboard.com.au
Memories on the Murray, Murray Bridge, SA  https://www.memoriesonthemurray.net/
Natalie May Scrapbooking, Dover Gardens, SA https://nataliemay.com.au/
Scrapbook Superstore & More, South Penrith, NSW https://www.scrapbooksuperstore.com.au/
The Scrapbooker's Confetti Box, Swansea, NSW https://thescrapbookersconfettibox.com/
The Scrapbook Store, North Perth,WA http://thescrapbookstore.com.au/ 
Time To Create, www.timetocreate.com.au

Belgium
Cart N Scrap Art, Antwerp, www.cartnscrapart.be
Créatelier Caracolle, Liège, www.createliercaracolle.be

Canada
Clipper Street Scrapbook Company, Langley, BC. www.clipperstreet.com
Paper Art Creations Inc, Leduc, Alberta, www.paperartcreations.com/
Scrapbook Centrale, Dollard Des Ormeaux, Quebec www.scrapbookcentrale.ca
Scrap Addicts, Edmonton, Alberta www.scrapaddicts.ca/
Scrap and Bean, Edmonton, Alberta scrapandbean.com/ 
Scrapbooking Fairies, Drayton Valley, Alberta www.scrapbookingfairies.com/
The Paper & ink Boutique, Calgary, Alberta www.paperandinkboutique.com/
The Scrap Yard, Calgary, Alberta, www.thescrapyardcalgary.com/ 

Denmark
Hobbyboden Scrapworld Samso www.hobbyboden.dk

France
Eirl Bancon Cartoscrap, Midi Pyrenees, www.cartoscrap.com
Fée Du Scrap, Saint Sébastien-Sur-Loire, www.feeduscrap.fr/
Horizon Créatif, Ste Jalle www.horizon-creatif.fr
Instant Créatif, La Possession, La Réunion, www.icreatif.re
Katzelkraft, Ingwiller www.katzelkraft.fr/en/
Kerudoc Creation, St Yvi www.kerudoccreation.com
Le Grenier des filles, Pierre Benite
Page de scrap, Saint Pavace, www.pagedescrap.fr/
Scrap Déco Home, Goutrens, www.scrapdecohome.fr/
Toutencolle, Dun sur Avon www.toutencolle.fr

Finland
Heidin Korttipaja, Istunmaki, www.korttipaja.fi/fi
Piia Paper, Kittilä, www.piiapaper.com/fi

Germany
Stempelbar, Berlin, www.stempelbar.de
Stempeloase Munich, Munich www.stempeloase.de
Stempelfee Shop, Hilden www.stempelfee-shop.de
Stempellaedle, Stuttgart, www.stempellaedle.de/shop

Greece
Scraps N Pieces, Kallithea www.scrapsnpieces.gr

Italy
Immagine SAS di Rapaccini, Rome, www.immaginelab.com
Il Negozio Della Mamma Di Cle, Torino, www.ilnegoziodellamammadicle.com
Marte Savona, Savona, www.martesavona.it
Pezze E Colori, Lissone, www.pezzeecolori.it/ 
Piccole Passioni, Siena, www.piccolepassioni.it

Japan
La Wadao, Odawara, Kanagawa, www.lawadao.com
Tiny Dots, Funabashi-shi, Chiba www.tinydots.shop-pro.jp

Netherlands
De Hobbystudio, Genemuiden, www.dehobbystudio.nl/
Doe@ding,Spijkenisse doeading.nl/
Hobbycompleet de Duif, Leeuwarden www.hobbycompleet.nl
Stampingcorner, Capelle Aan Den Ijssel www.stampingcorner.nl

Norway
Hobbygarasjen, Kopervik, www.Hobbygarasjen.no

Spain
Cien por Cien Manualidades, Barcelona,  www.100x100manualidades.es
Ideas 10 Manualidades Y Scrapbook, Bilbao ideas10manualidades.com/
Marakiscrap, Tarragona, www.marakiscrap.com
Scrap & Papers Experiences, Barcelona, www.scrappapersexperiences.com
The Paradise Corner, Barcelona, www.theparadisecorner.com

Sweden
Butik Elva, Staffanstorp, www.butikelva.se

Taiwan
Mandy's Cards, Taipei www.facebook.com/mandy.card.77

United Kingdom
Amelia's Creative Crafts, Studley, Warwickshire  www.ameliascreativecrafts.co.uk
Art from the Heart, Harrogate, Yorkshire www.afth.co.uk
Blade Rubber Stamps, London www.bladerubberstamps.co.uk
Crafts at The Malthouse, Herstmonceux,  East Sussex, www.themalthouse.co.uk/
Fave Rave, Stourbridge, West Midlands www.shabbychicstencils.co.uk
Loobi Crafts, Leighton Buzzard, Bedfordshire, www.loobicrafts.co.uk
Papermaze, Ipswich, Suffolk www.papermaze.co.uk/ 
Stampers Grove, Springbank, Lilliesleaf, Melrose,Scotland www.stampersgrove.co.uk
The Artistic Stamper Craft Store, Faversham, Kent www.theartisticstamper.com
The Forget me not Kraft Kabin, Rochford, Essex, www.TheForgetMeNotKraftKabin.co.uk

USA
Artistic Artifacts, Alexandria, VA www.artisticartifacts.com/
Artistic Studio Creations, Fayetteville, Georgia www.facebook.com/ASCbyCrystal
Craftiness, Chatsworth, CA, www.craftinessonline.com/
Ephemera Paducah, Paducah, Kentucky www.ephemerapaducah.com
Everything Scrapbook & Stamps, Lake Worth, Florida https://everythingmixedmedia.com/
Frantic Stamper, Oregon www.franticstamper.com
Free Heart LLC, Denver, Colarado, www.freeheartllc.com/
Golden Hills PaperCrafts, Fairfax Station, Virginia, www.goldenshillpapercrafts.com/
Joggles, West Warwick, Rhode Island, www.joggles.com
PaperCraft Clubhouse, Westbrook, Connecticut, papercraftclubhouse.com/
Qingquing's Stamp Shop, Portland, Oregon
Runaway, Art & Craft Studio, NE Salem, Oregon www.runawayart.com/
Simon Says Stamp, Columbus, Ohio www. simonsaysstamp.com
Topflight Stamps, Irmo, South Carolina topflightstamps.com/

Our brand is only available from established stockists who are VAT/ GST/ sales tax registered and for whom product education is a core principle. We would rather supply a few hand selected stockists, than the greater masses. If you would like to apply to be a stockist, you can find our more about our supply criteria here.

PaperArtsy Links
Facebook Group PaperArtsy People
Facebook Page PaperArtsy