Showing posts with label EAB04. Show all posts

Tuesday, 9 November 2021

2021 Topic 14: Mash Up LPC EGL EEV EAB {by Helen Chilton}
   2021 Topic 14: Mash Up LPC EGL EEV EAB


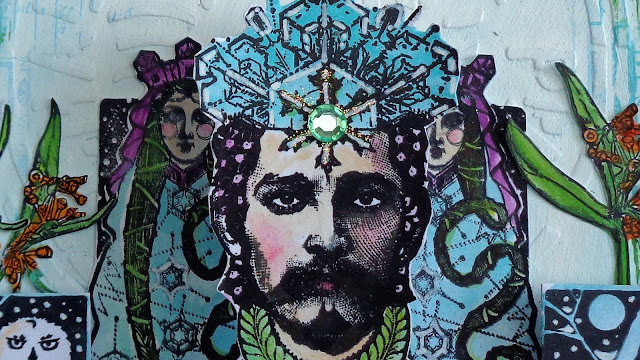
Helen has created something wonderfully regal. It's as if she's created a kingly throne especially for the main character. You'll see hints of the mash-up designers all over, so look really closely. What is clear is that she's combined them all perfectly even mashing up the sentiments themselves to create a new and unique saying.
~ Keren.

Hi everyone, it's Helen with you today with a wintery mash up project using three of the above designers. I was going to use all four, but when it came down to it I couldn't find my Ellen Vargo set!
When I started I was looking to make some pop out elements and, as you'll see later, use more of the Lynne Perrella figures, but as I went along, this project evolved instead. It does have dimension made with a strip of Gwen Lafleur's stamps so the central character stands out - it also enables the tag to be free standing. I added the pop of orange berries as a contrast to the purple and blue.
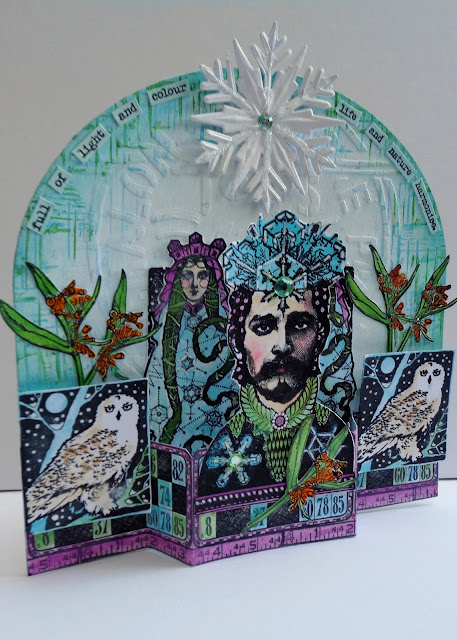
I've used a stamp platform for these images and various Fresco colours.
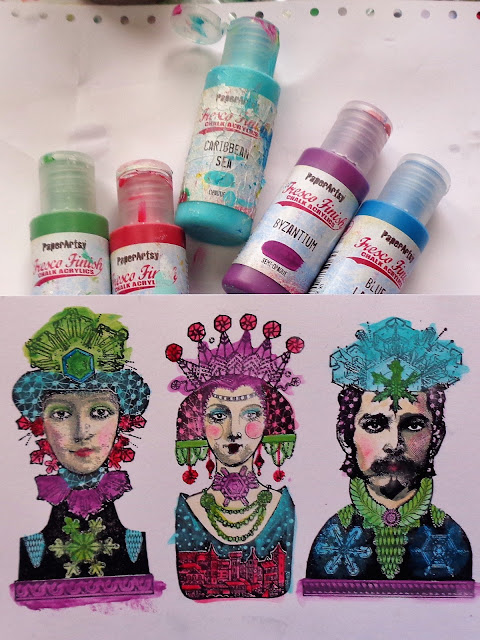

You can see I've painted over the lines quite loosely not worrying about losing definition, as when the paint was dry I just stamped over the top again in black. These are the new Lynne Perrella stamps sets I chose to use.


LPC051 and LPC052 can be found here at these stockists. I used a variety of paints:


The images are quite an intense black so I added some white highlights.


You can also see how the black outlines have been sharpened up by over-stamping.


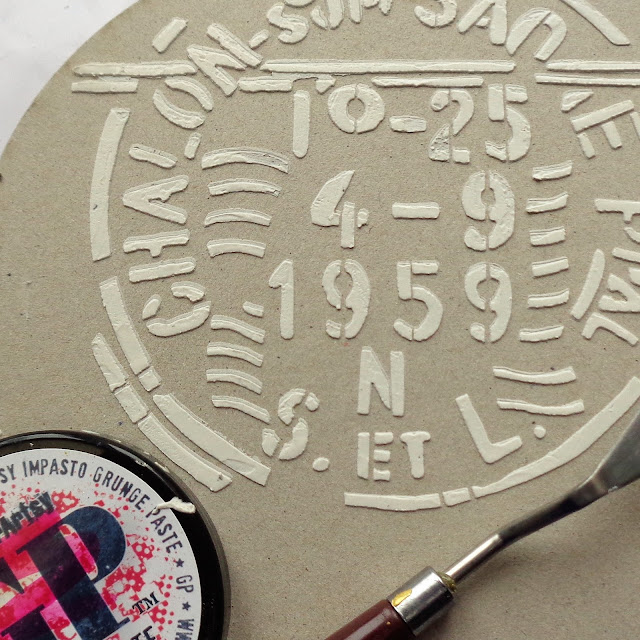
This large tag (from That's Crafty!) was just the right size and shape and worked really well with Sara's circular stencil


Look how clear that design is in Grunge Paste.

To make the pop out strip I just repeat stamped the bingo card and tape measure - both really easy to line up freehand.


Paint it with the same colours as before.


I've then just lined the edges up to the sides of the tag and folded it. The image fits the width of the central fold exactly.


You can see the depth of the fold here. I made it so the two long images fit behind and the owls (minus a few tail feathers!) fit at the sides.


The tag was a bit of a stark white so I rubbed in some blue paint and added stamping in paint round the edge.


The blue/green colours match the colours used before. I like this sort of design stamp - it's not too dense but the colour is still clearly visible.


I then went for some foliage, a bit fiddly to cut out but worth it. The orange is a good contrasting colour.


The Alison Bomber set I had didn't have a quote that fitted perfectly so I just took some words from two separate stamps and put them together.


As you can see, I didn't use all the Lynne Perrella images that I stamped. Originally I was planning to make a Christmas frieze for the mantelpiece with bits sticking up here and there but decided it might be too much of one designer for a mash up post. Also I didn't like the red and purple colours together when I'd painted them. Creating this tag allowed me to introduce more of Gwen's stamps as well. 
I was also thinking of a folded pop up card sort of thing (I've got pop ups on the brain!) but the main image was so clear and full of impact I didn't want to fold it or cover any of it up, hence I placed the other images at the back and to the sides.
As often happens, what I started off making evolved into something else, but I think that just shows how versatile all these stamps are.

Monday, 19 August 2019

2019 #13 Mushrooms: Melancholy Moments with ESC {by Jennie Atkinson}

2019 Topic 13: Mushrooms


Jennie's projects always have a serene, calm to them. I guess her colour palette is very soothing! But when you read through this post and the steps of each layer, it makes you realise the creative details are more in depth than would first appear! ~Leandra

Hi everyone, it's Jennie (Live the Dream) with you today sharing a small panel for our new theme. 

Mushrooms always remind me of sleepy, hazy, autumnal days so I have used Scrapcosy's wonderful mushroom stamp as a centrepiece for this small textured hanging. After my very colourful retro project I am now back in my normal comfort zone of the browns! but they are very good for creating a more ethereal dreamy feel.


I really love this autumn set from Raquel and along with the accompanying stencil are my go to autumn set. The mushrooms have always been fabulous for layering and are easy to cut out, but for this hanging I wanted to stamp on text paper. I have also used another stencil from Raquel along with  a small mini numbers stamp to create the interest behind the main features of the hanging.


I find the easiest way of creating a blended background on grey board is to use the brayer. I coated the board with gesso first and used just two colours of Fresco Finish Acrylics - Chalk and Toffee - working the brayer across the board to get this faux fresco finish.


Once dry more interest was added by using the texture paste through the Harlequinn stencil and adding some stamping with Potting Soil Archival Ink (second generation stamping - ie stamping off first before stamping onto the project). You can see that I first always stamp a little spot which will later be hidden to check the colour ..... which was a good idea as the stamp was upside down!


A technique I learnt from Lynne Moncrieff (Adorn) when using text paper is to give it a light wash with Fresco paint which has been watered down a little. I used Chalk.  This provides a good background for the stamp both in terms of visual quality and to stop the ink bleeding into the paper. Despite being stamped on old text book-paper I have not lost the beautiful detail of the mushroom.


For the collage elements I have used little pieces of textiles and cardboard which have been highlighted with a little stamping from Alison's Autumn Edition Sayings.


I love being able to find a small word from one of the phrases which I then stamp onto old book paper (the edges around the page) and then tear around the phrase very carefully.


Finally I used more texture paste through the stencil to provide an unobtrusive title. I wasn't too sure whether it would sit well over the text paper which hadn't been glued to the edges but it worked very well and a note for the future that the paste is another way of holding elements onto a project!


A small autumnal hanging which could hang anywhere given it's subtle colours. However I think the design and techniques would also work well with orange/red/yellow paints, inks and textiles for a more colourful hanging.

As always thank you so much for joining me and I hope you love using these stamps as much as I do.

Jennie x