Showing posts with label Ash. Show all posts

Wednesday, 19 February 2025

Mini Book with Kate Crane Products {by Victoria Wilding}


Hi everyone

Victoria here with you today.

This year on the blog, we are being given free rein to do a deep dive into one of the PaperArtsy product ranges, and for this post I have been exploring Kate Crane products. 

Kate has such a good mix of designs in her range, there’s everything from background mark making, to quirky focal points that are just adorable. So I decided to explore some of her mini stamps, and test out combining them into a mini-book. 

I’ve had a Sizzix mini album die for a couple of years, that I still hadn’t got round to using, so I thought I’d take the opportunity to use this for the book construction, although you could easily create the pages using a hole punch and paper trimmer. 


This was such a fun project to put together and used a mix of different techniques and products. The kind of fiddly project that you can get lost in for a few hours, or do in parts and keep coming back to, either way would work. So continue reading for a break down of my process, it includes techniques with watercolours, Mattints and Infusions.


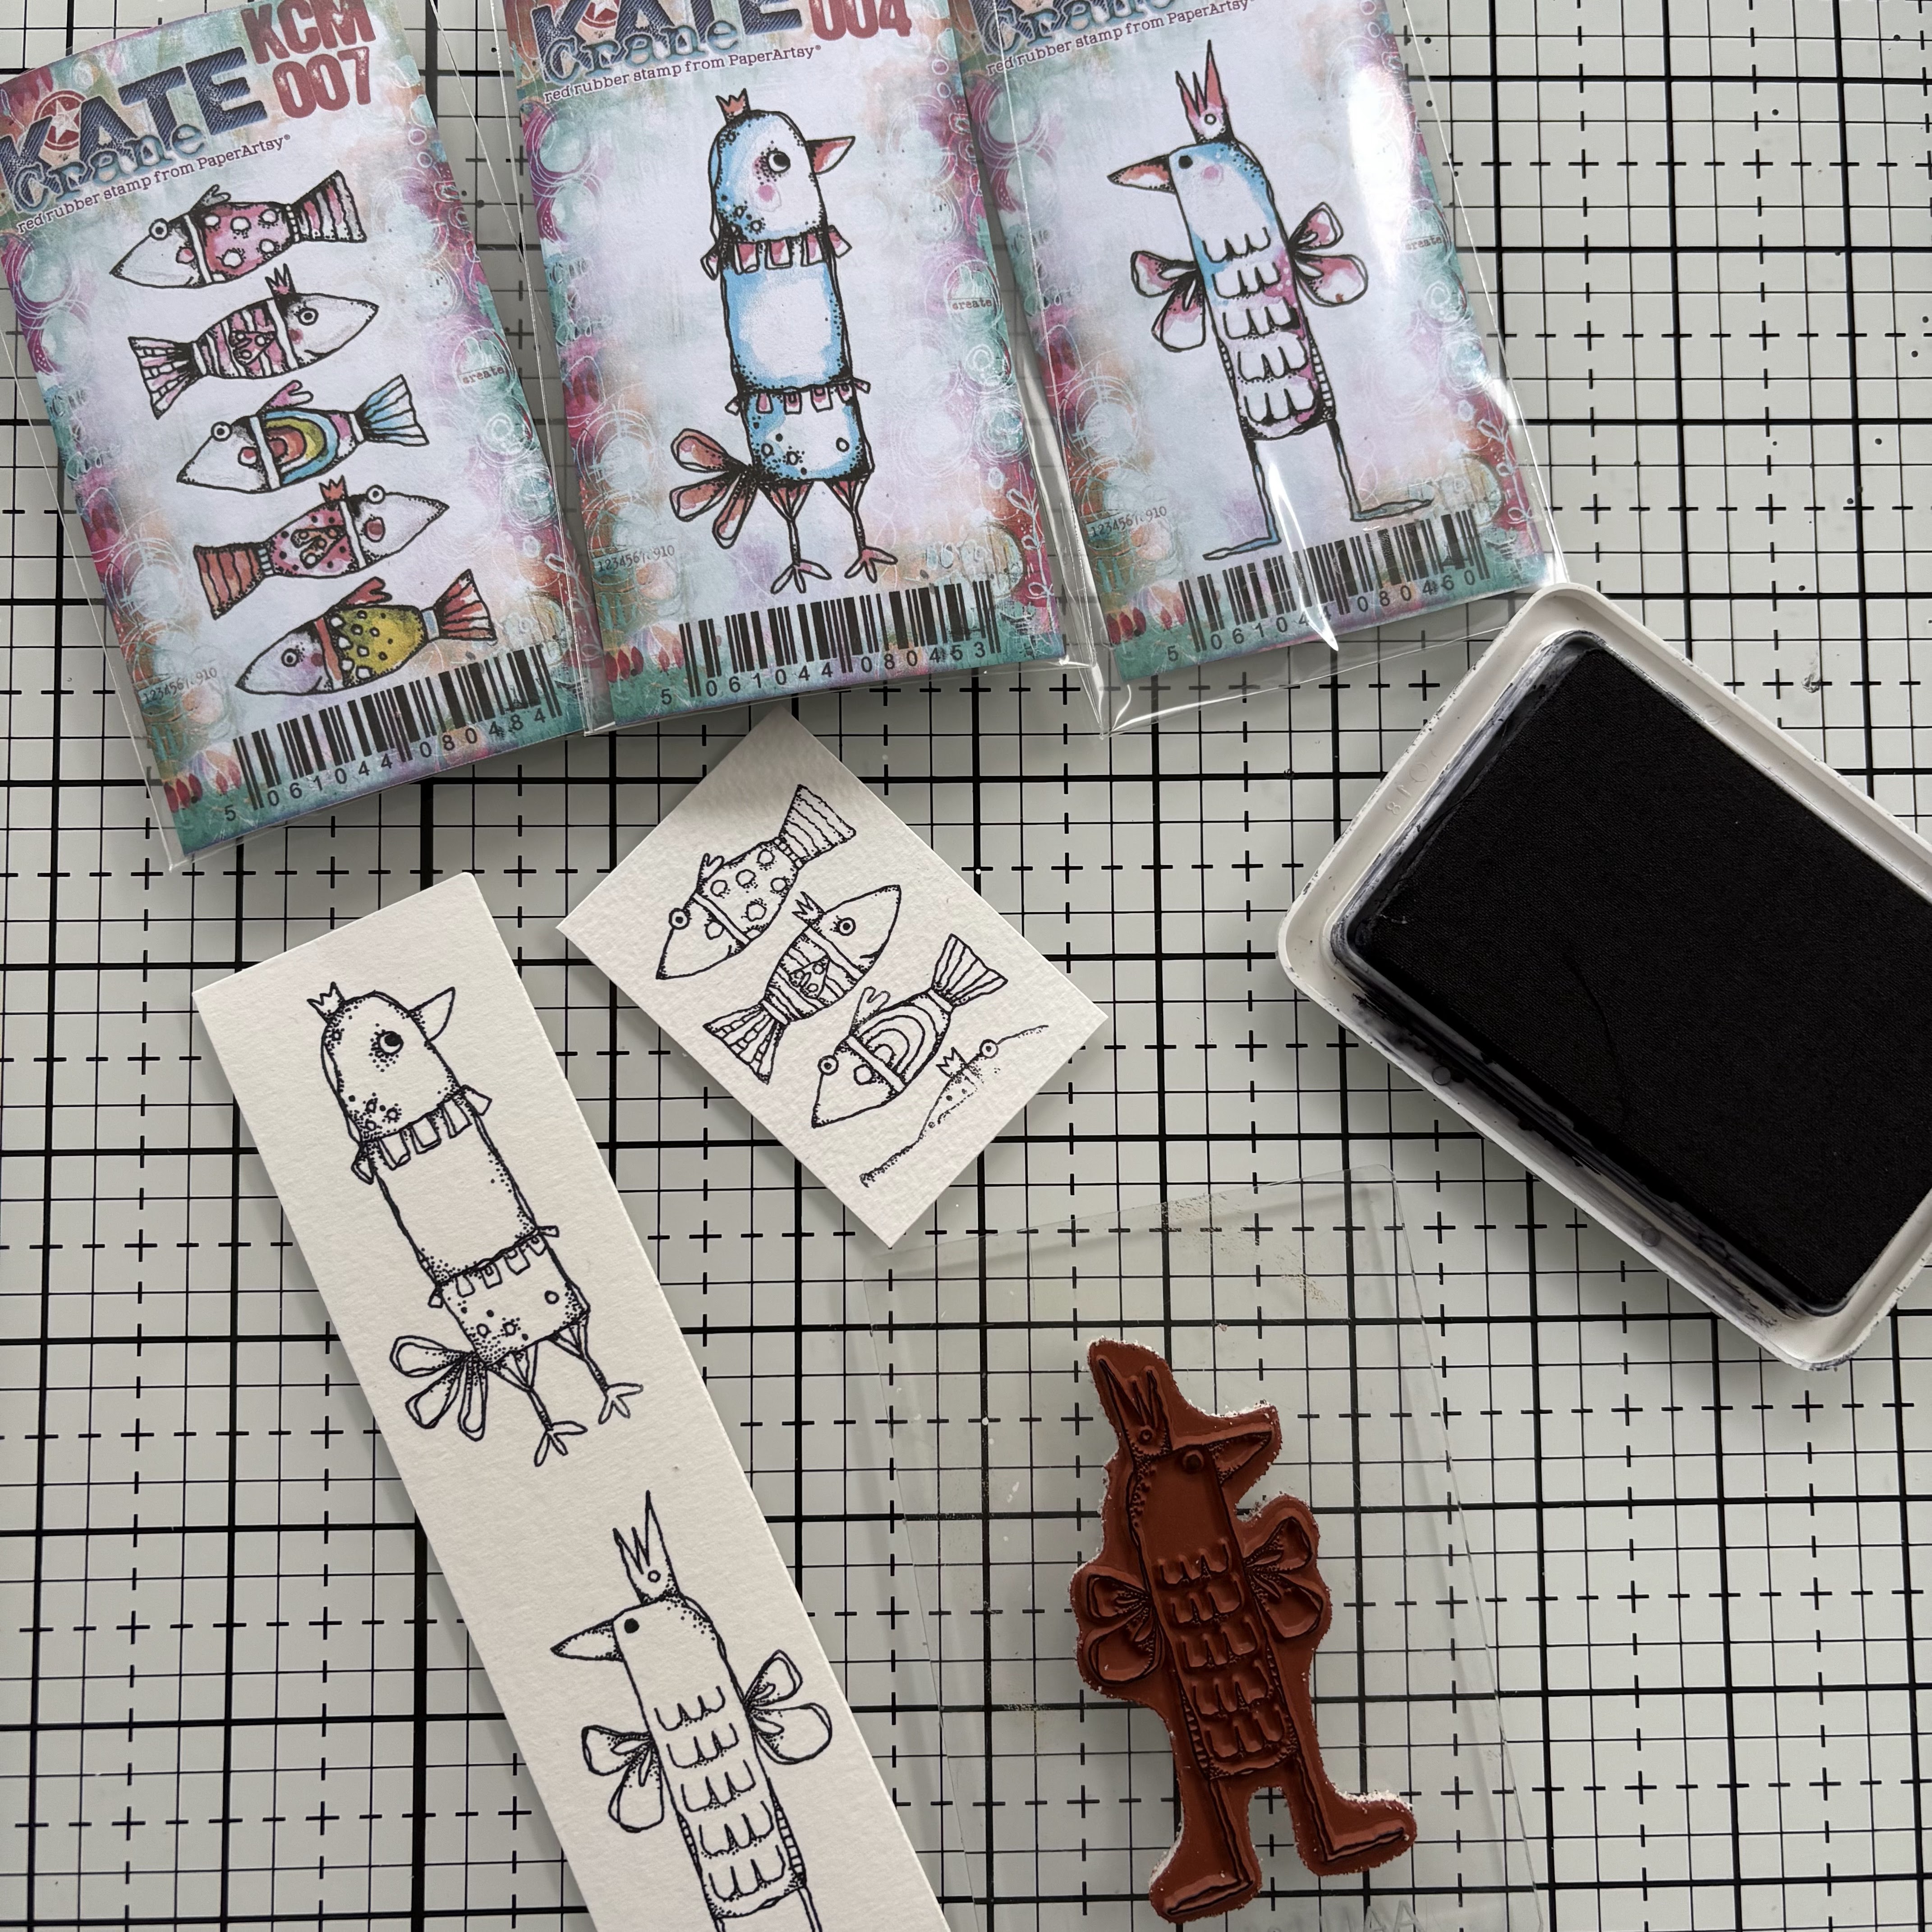
I selected a bunch of Kate Crane mini stamps and a couple of her stencils to use in the projects. I love her quirky animals so of course I had to choose some of these, and settled on KCM004, KCM005, and KCM007. I also wanted some stamps to create background interest, so I chose, KCM001, KCM002, KCM003, KCM013 and KCM014. The last stamp I chose was all about the sentiments and this was KCM006. Then I added a couple of stencils into the mix, selecting PS426 and PS441.

Next up it was all about the colour. I knew I wanted to use my watercolours to colour the quirky birds and fish, so out came my Deep Deep Light palette. For background colour to the pages I chose Mattints in Ash for the cover and Infusions in Sleight Blue (CS13), In the Navy (CS15) and, Royal Blood (CS10).

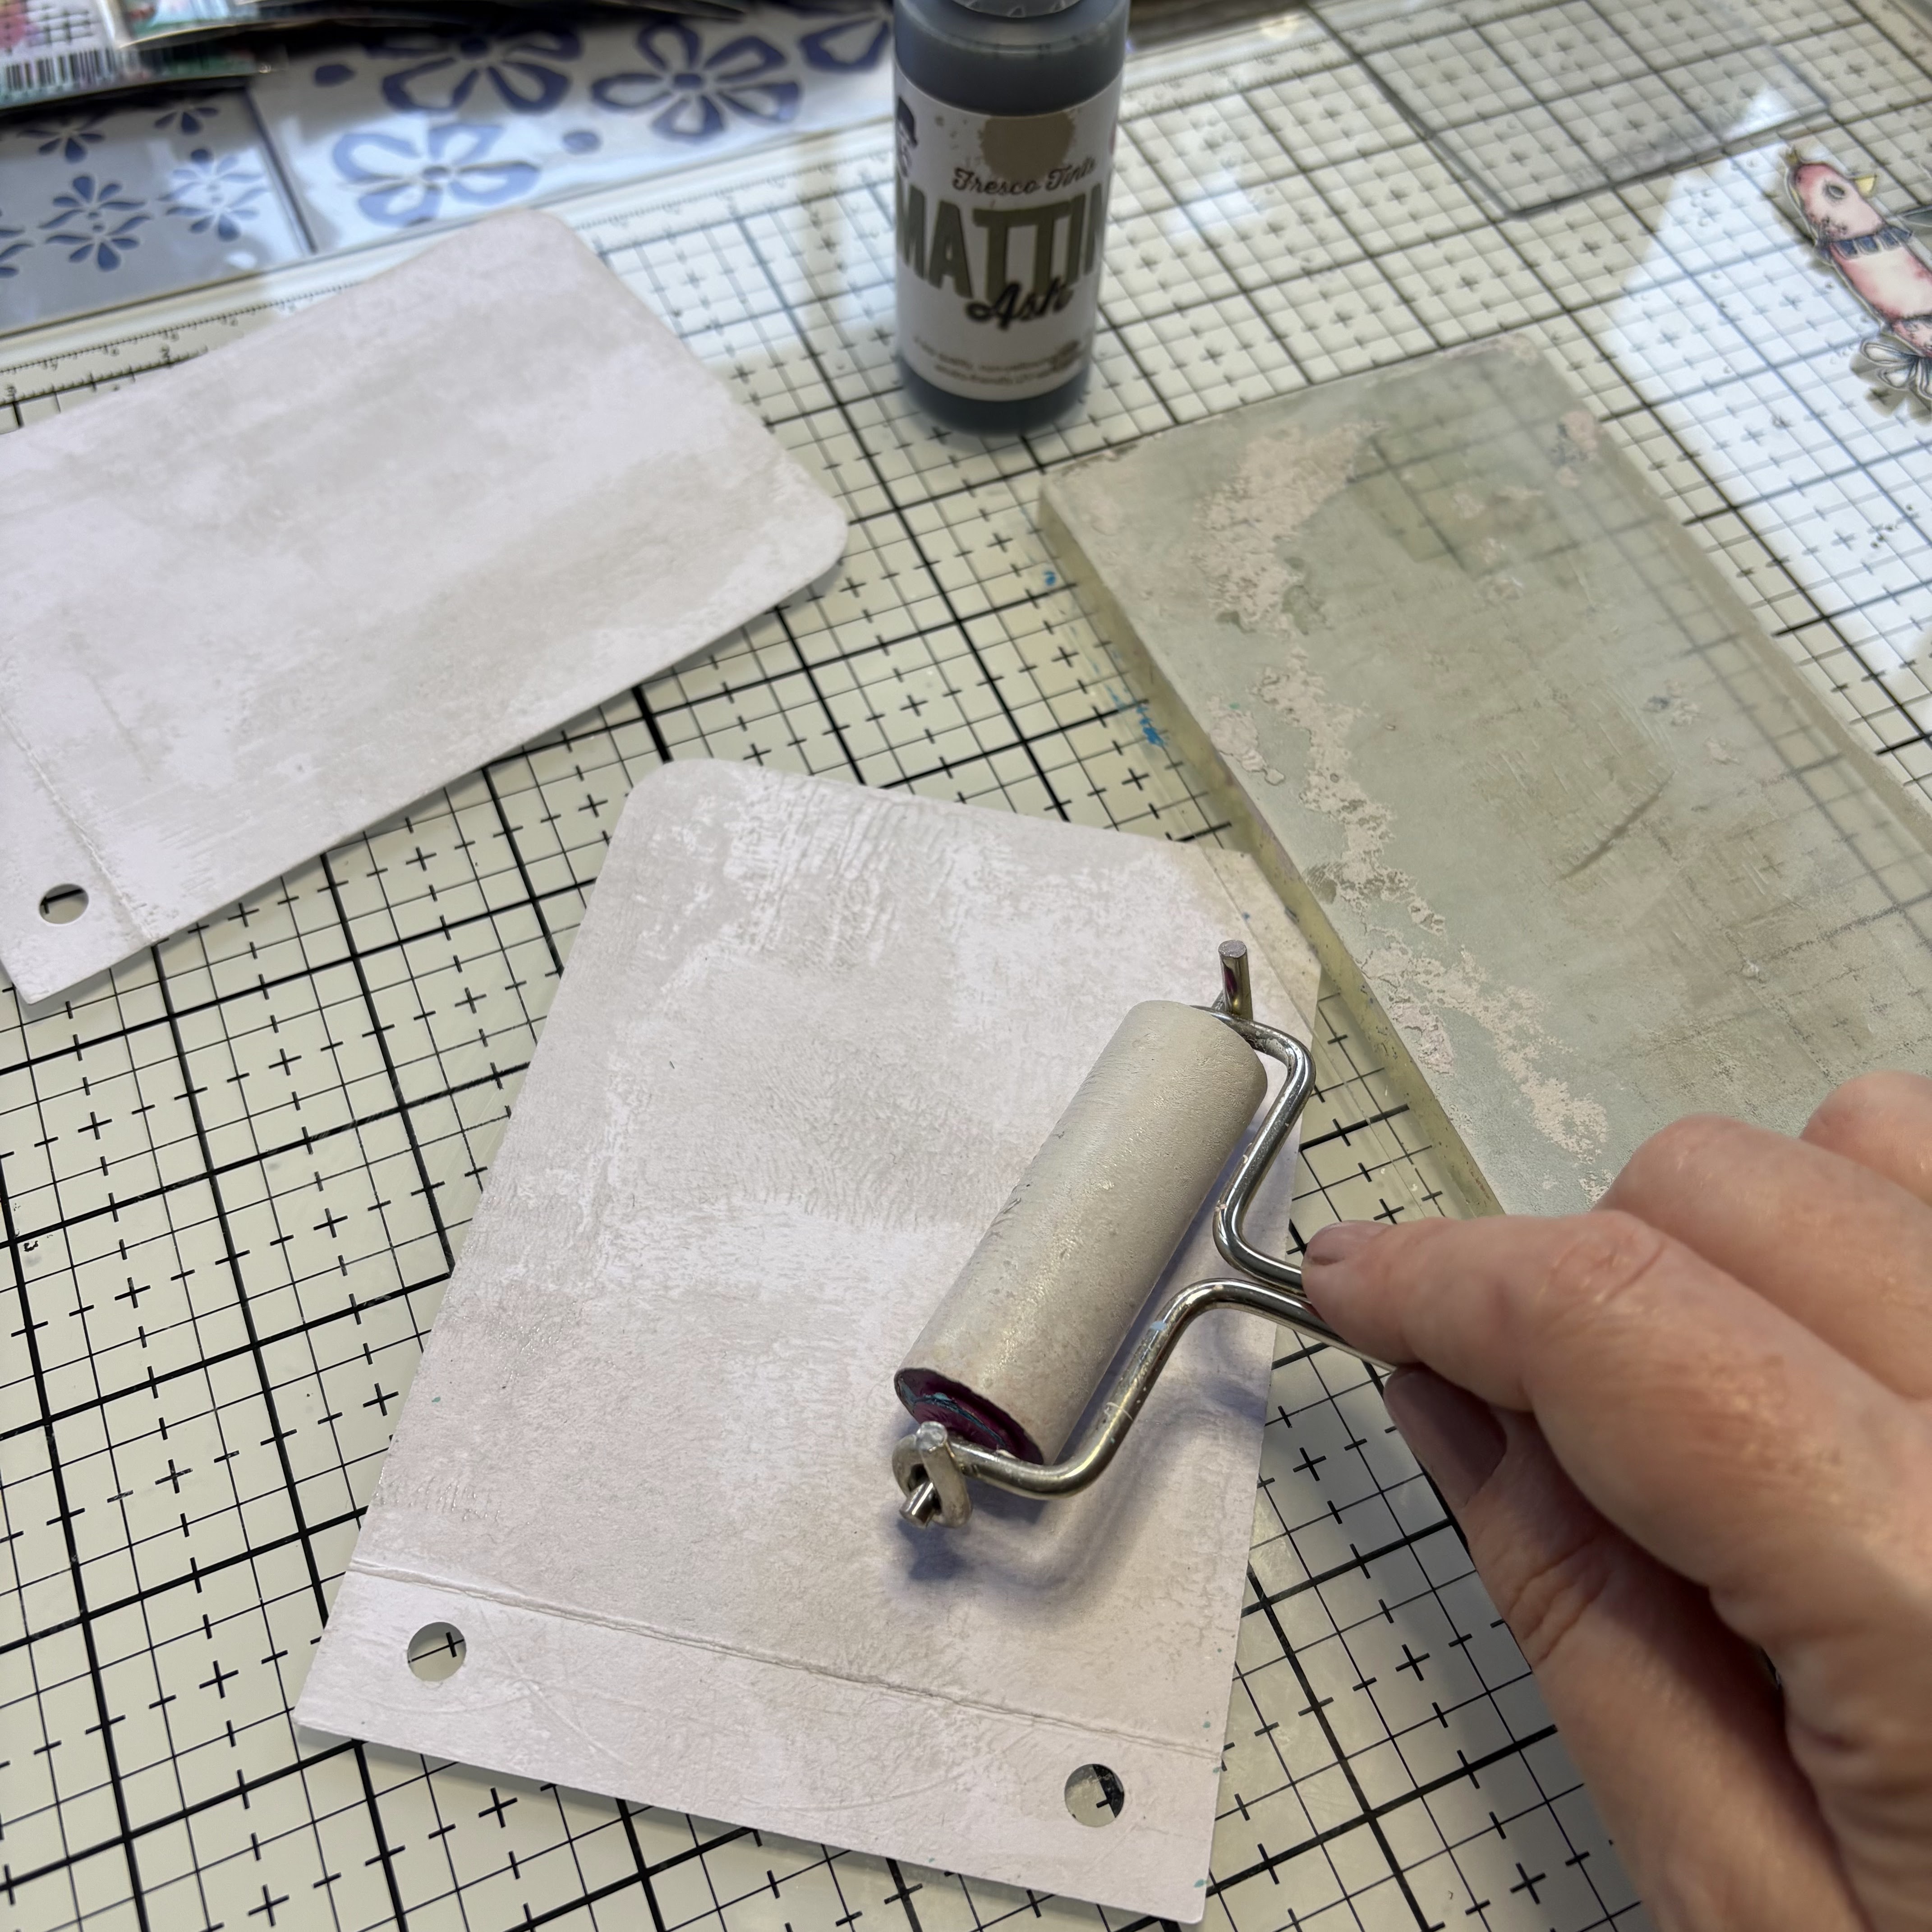

I started off by creating the front and back covers. To provide some subtle background colour I applied Mattints in Ash using a brayer and the gel plate. 


Then I applied blue ink through stencil PS426 to the back cover.


And glued the front and back covers together using the scalloped joining strip.


I wanted the front cover to be quite plain, enticing the viewer to open the album to see the pages inside. I used a die cut piece of card and stamp embossed a sentiment from KCM006 in black and used stamp KCM003 to create some extra texture to the title piece and the edges of the page. I attached the title piece the the front cover using foam pads and moved on to creating the internal pages.


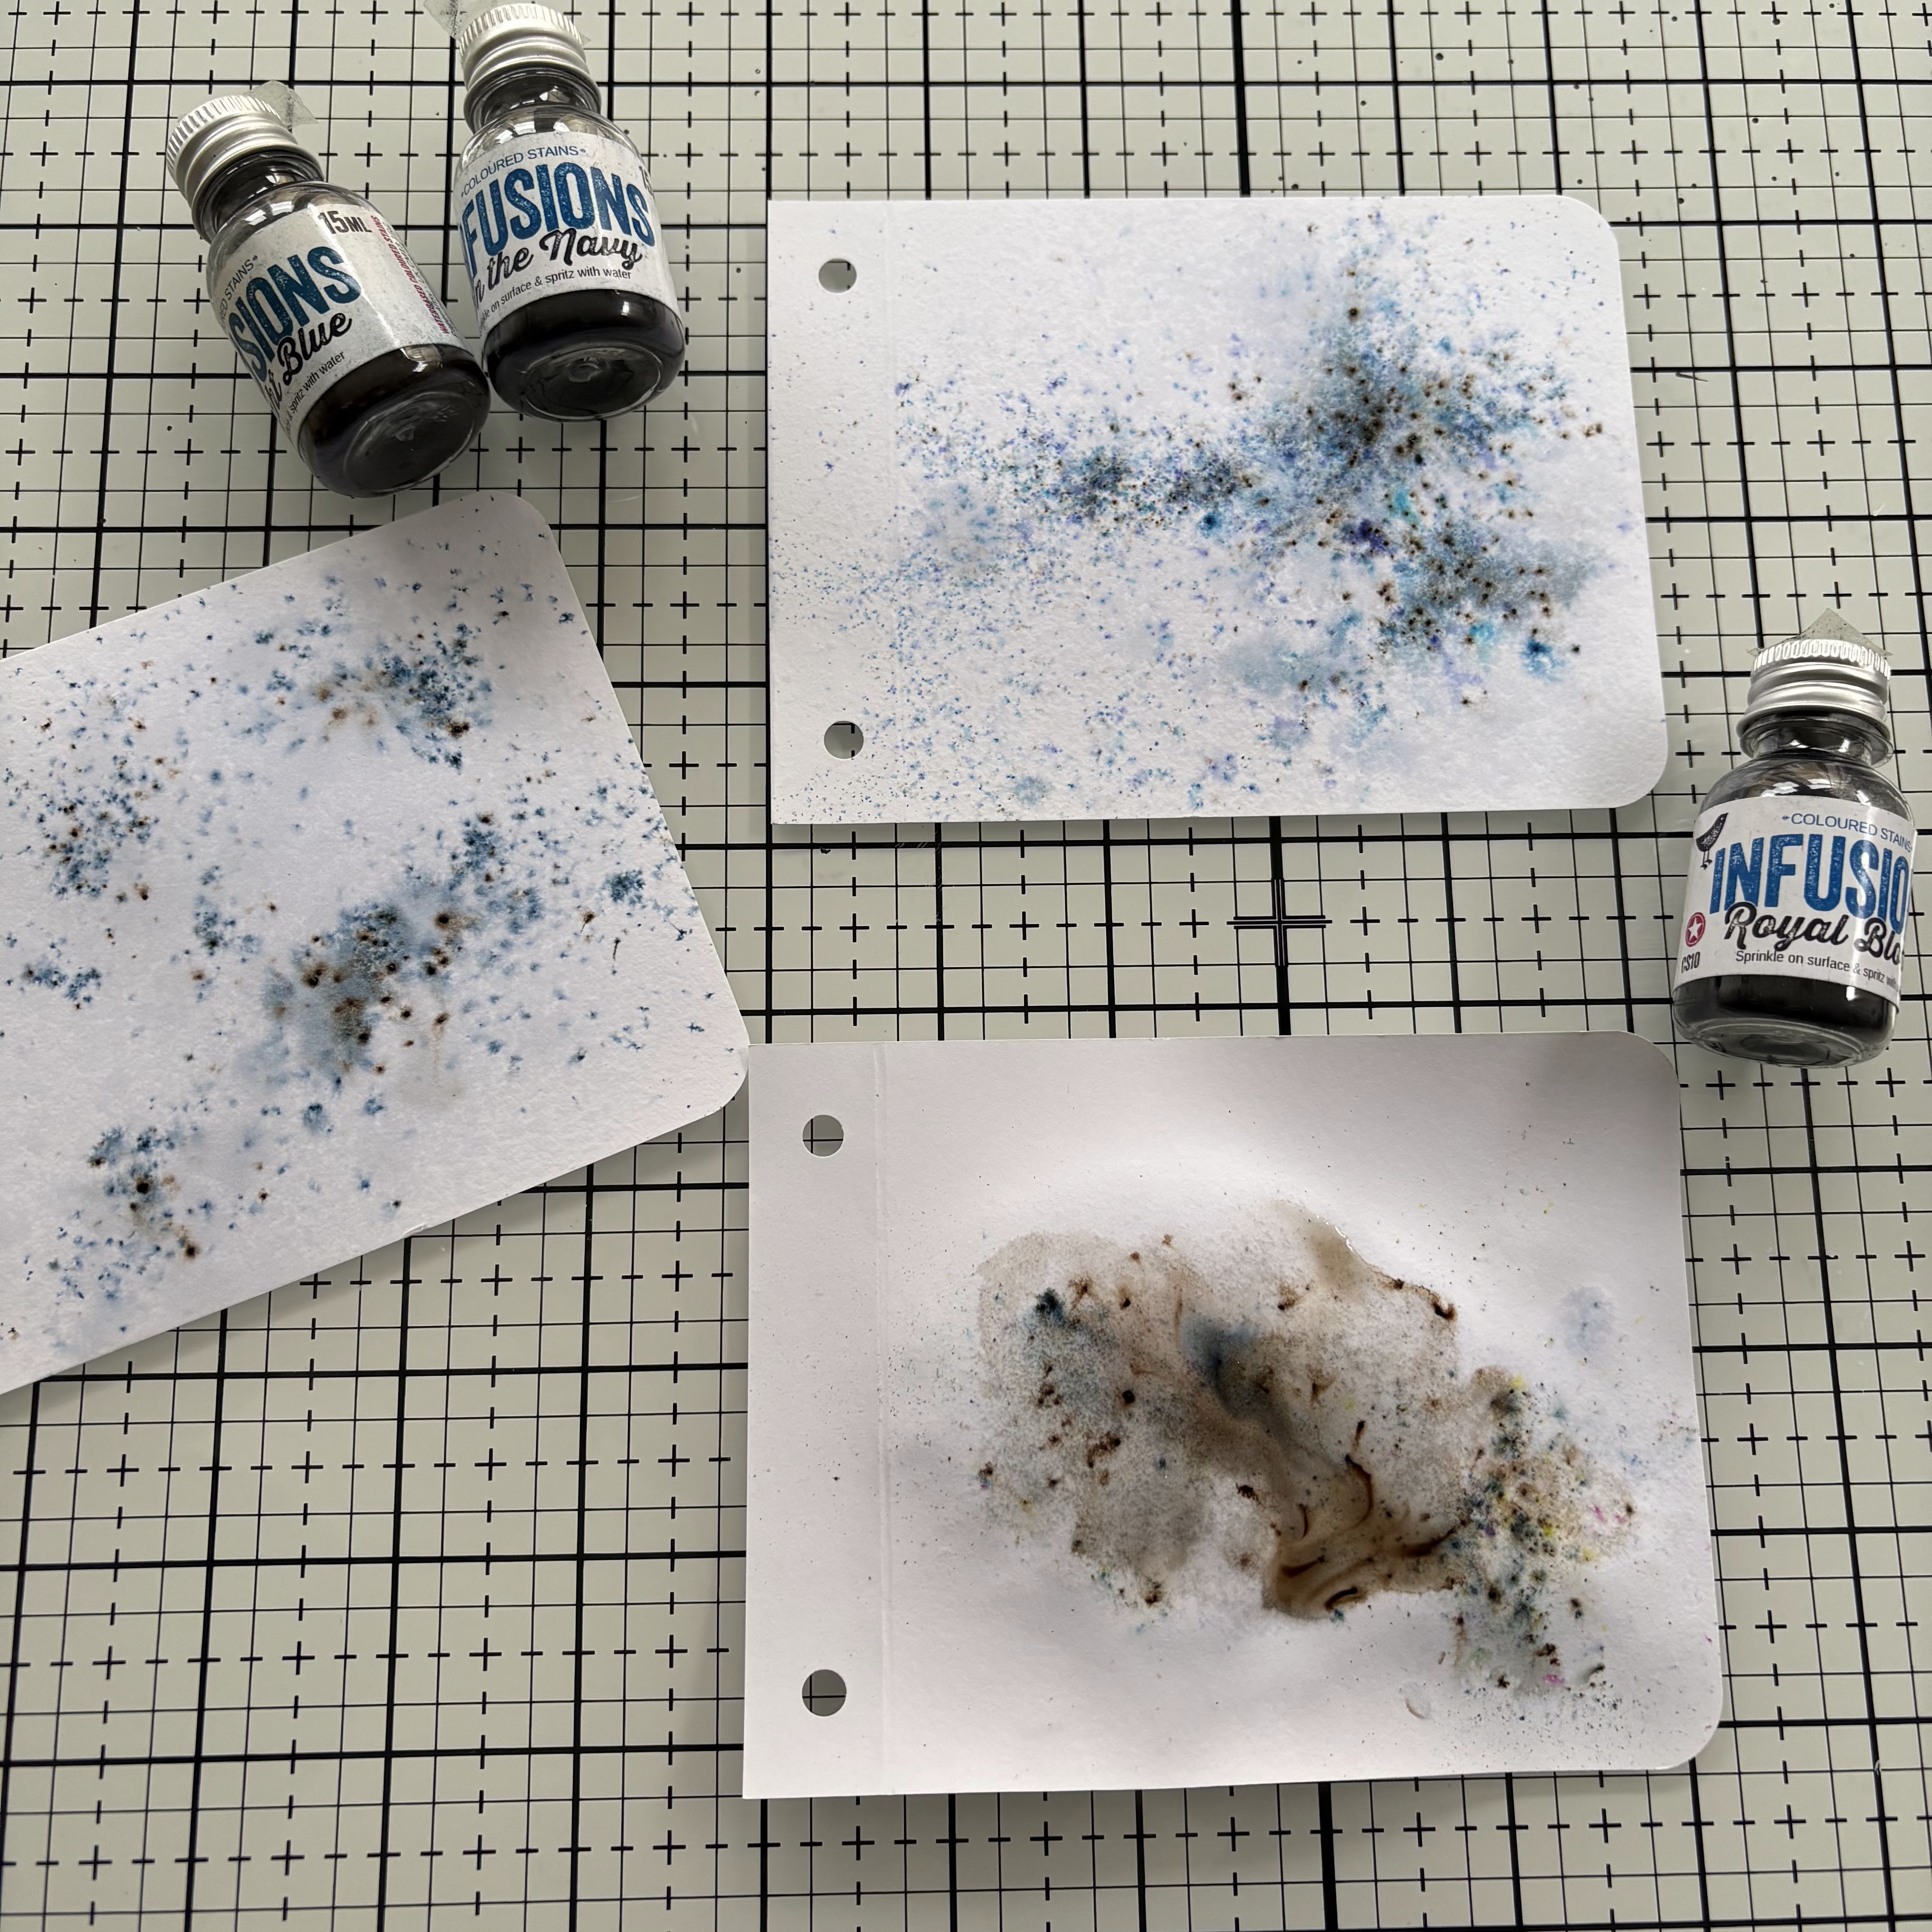
To create some background colour on the internal pages in sprinkles each page with a different colour of blue infusions (Sleight Blue (CS13), In the Navy (CS15) and, Royal Blood (CS10))  and spritzed with water. 


Then I added some extra background texture to ground the focal points using, KCM001KCM002 and, KCM014


Next I moved on to creating the focal points for the pages using the quirky birds and fish stamps, KCM004KCM005, and KCM007. I stamped them out on watercolour paper in black ink. 


And used watercolours to create a soft coloured finish. 


Then I stamped out and mounted the three remaining sentiments from KCM006


I stuck the quirky birds and fish onto the pages using foam pads to create some extra dimension and glued the sentiments in place. 

I thought a couple of the pages needed some extra details so used stamp KCM013 to create some sea planting to the fish scene and stencil PS441 on one of the bird cards. With the pages complete I assembled everything together and secured with some blue sari ribbon. 


The finished book project is lovely to flip through. The cover suggests more arty pages inside and entices you to flip to the next page. 


The combination of the ‘take flight’ sentiment and the butterfly bird is so fun, you can just imagine him furiously flapping his tiny wings to try and fly.


The three fishes page is filled with texture. The hint of leaves at the bottom of the page works really well to imitate sea plants and the splatter of the infusions makes the perfect seawater.

.
On the last page the infusions are watered down much more, which works so nicely against the colouring of the bird.  I love how each page has slightly different elements, but they work so well together as a complete project. 

I hope you feel inspired to try creating your own mini book. Until next time, wishing you a happy creative week. 

Victoria x

Saturday, 25 January 2025

Suncatcher with Mattints {by Dounia Large}


Hi everyone Dounia here with you today.

This year on the blog, we are being given free reign to do a deep dive into one of the PaperArtsy product ranges, and for this post I have been exploring Mattints! I one of their main properties is their transparency so I decided to explore and exploit that in some semi transparent art, a fall inspired suncatcher mobile.


I really love how it transforms depending on the light! For the base of this project, I'm sharing with you one of my favourite technique with Mattints, making 'tissue skins'. It is is really simple and 'brainless' with gorgeous results. I hope you enjoy it too.


For transparency, the 'skins' are built out of tissue paper. The more transparent the better! I know all the PaperArtsy printed tissues will work, so I grabbed the Blank and Background Tissues (PT07 et PT10) I had on my craft table.

For a project about Mattints, I used... Mattints! also for their transparency. I somewhat limited my palette, to help create a united look. Any theme would work so I chose my favourite, fall colours! I love warm hues so went for yellow/orange/red with some greens and browns to completely cover the foliage range. I also added the 'wild cards' The Pink (MT08) et Dragonfly (MT07) to spice things up and create variety.


I first prepared the building blocks necessary, by colouring blank tissue with my chosen Mattints.


I painted roughly A4 pieces in all my fall colours, and half that in the 'wild cards'. The intensity of the colour depends a lot on the quantity of Mattint applied. Here I did two coats on one side and another coat over only half the other side. That way I had two shades of each colour, for more variety and depth.


Here is my very high-tech drying system. With the current weather, my projects are enjoying the wood stove with me! As the Mattints also work as a glue, you have to be careful not to let the sheets stick to one another!


I like to add opaque parts to all transparent projects, to create contrast & texture and highlight the transparency. For this one, I did some very basic mark making on more blank tissue with a opaque Fresco Finish Acrylic Paint. I chose Cloud 9 (FF149), a warm white, because white shows off colours the best and I thought warm version worked the best with my chosen colours.

As you can see, not much thinking is necessary for these steps, just fun playing with paint! Now it is time to start putting the layers together.
 

The principle to creating the 'skins' is to glue layers of tissue on top of each other with a transparent and wet medium, like Matte Glaze (FF52) or Mattints. For the tissue 'disappear', it is crucial to fully saturate it with glaze when gluing it. I like to apply the glaze on the back of the tissue and on the top of receiving substrate before connecting them, then apply another layer on top of the glued down tissue while it is still wet. Here you can easily see the difference between the already glued pieces and the still dry ones.


As my base, I used half of one the big sheets of painted tissue, this one is the Ladybug (MT12) one. I created a layer on top using pieces of the Backgrounds tissue as well as the tissue with white mark making. To create more variation and depth of colour, I decided to glue the pieces with Mattints instead of a colourless glaze. I chose Ladybug (MT12), Squeezed (PT06) and Nutty (MT02) to coordinate with the background. The limits of the tissue pieces are more noticeable that way but I did not mind for this project.


I repeated the process with Nutty (MT02), Glow (MT01) and Fern (MT03) backgrounds. This is the results after this first layer. The white opaque patterns will be softened by the following step.


On top of the 'pattern' layer, I added another one, this time with pieces of the coloured tissues, using coordinated Mattints to glue them. The picture seem to imply I planed their placement but in reality, I did not think too much and just glued stuff on top of each other. If the pieces overlay in some places, it just creates even more colour variation.


As the Mattints are also sealants, they make the tissue less absorbent. So I have found that you often need to 'work' the glue a bit more into the painted pieces, but they too end up disappearing.


Once all of that was a bit more dry, I repeated those two layers on the other side of the bases. This creates even more variations and also makes a stronger 'skin'. I really love how they turned out, with the bits of pattern poking out and all the different colours. However, I think their true beauty shine when seen in transparency.


There you can really see all the layers and the new colours they build. I like the darker touches created by the opaque white paint. I could just make those 'skins' for themselves and display them on my windows, but here I also wanted to show you a use for them.


All those colours had to become leaves! I roughly traced the shapes with Fresco Finish Chocolate Pudding (FF42) and cut in the middle of the lines. This both helped guide the cutting and created a border around the leaves. I think it gives them dimension and reminds me of fallen leaves starting to brown at the edges.


Here is my pile of leaves and my (also very high-tech) structure for the mobile: a cut open soda can. It then only needed a couple hours of threading the leaves onto fishing wire and adding them to the can...

I absolutely love the result. It is a bit messy and misshapen, like real leaves, and I am mesmerized by how different it looks in different lights.


The aim was to have light shine through the leaves, creating shadows and patterns, and here in the rising sun, it does not disappoint!


But I think it is also beautiful in the sun light, without transparency. The depth of colour really shows here and, I think, capture the feeling of an early autumn day.


With no direct sunlight, the colours are softer and more reminiscent of fallen leaves. I love how the golden beads pop then, adding even more whimsy.


Inside, lighted by a lamp, this thing moves with the slightest air currant and cast crazy wispy shadows. So moody!
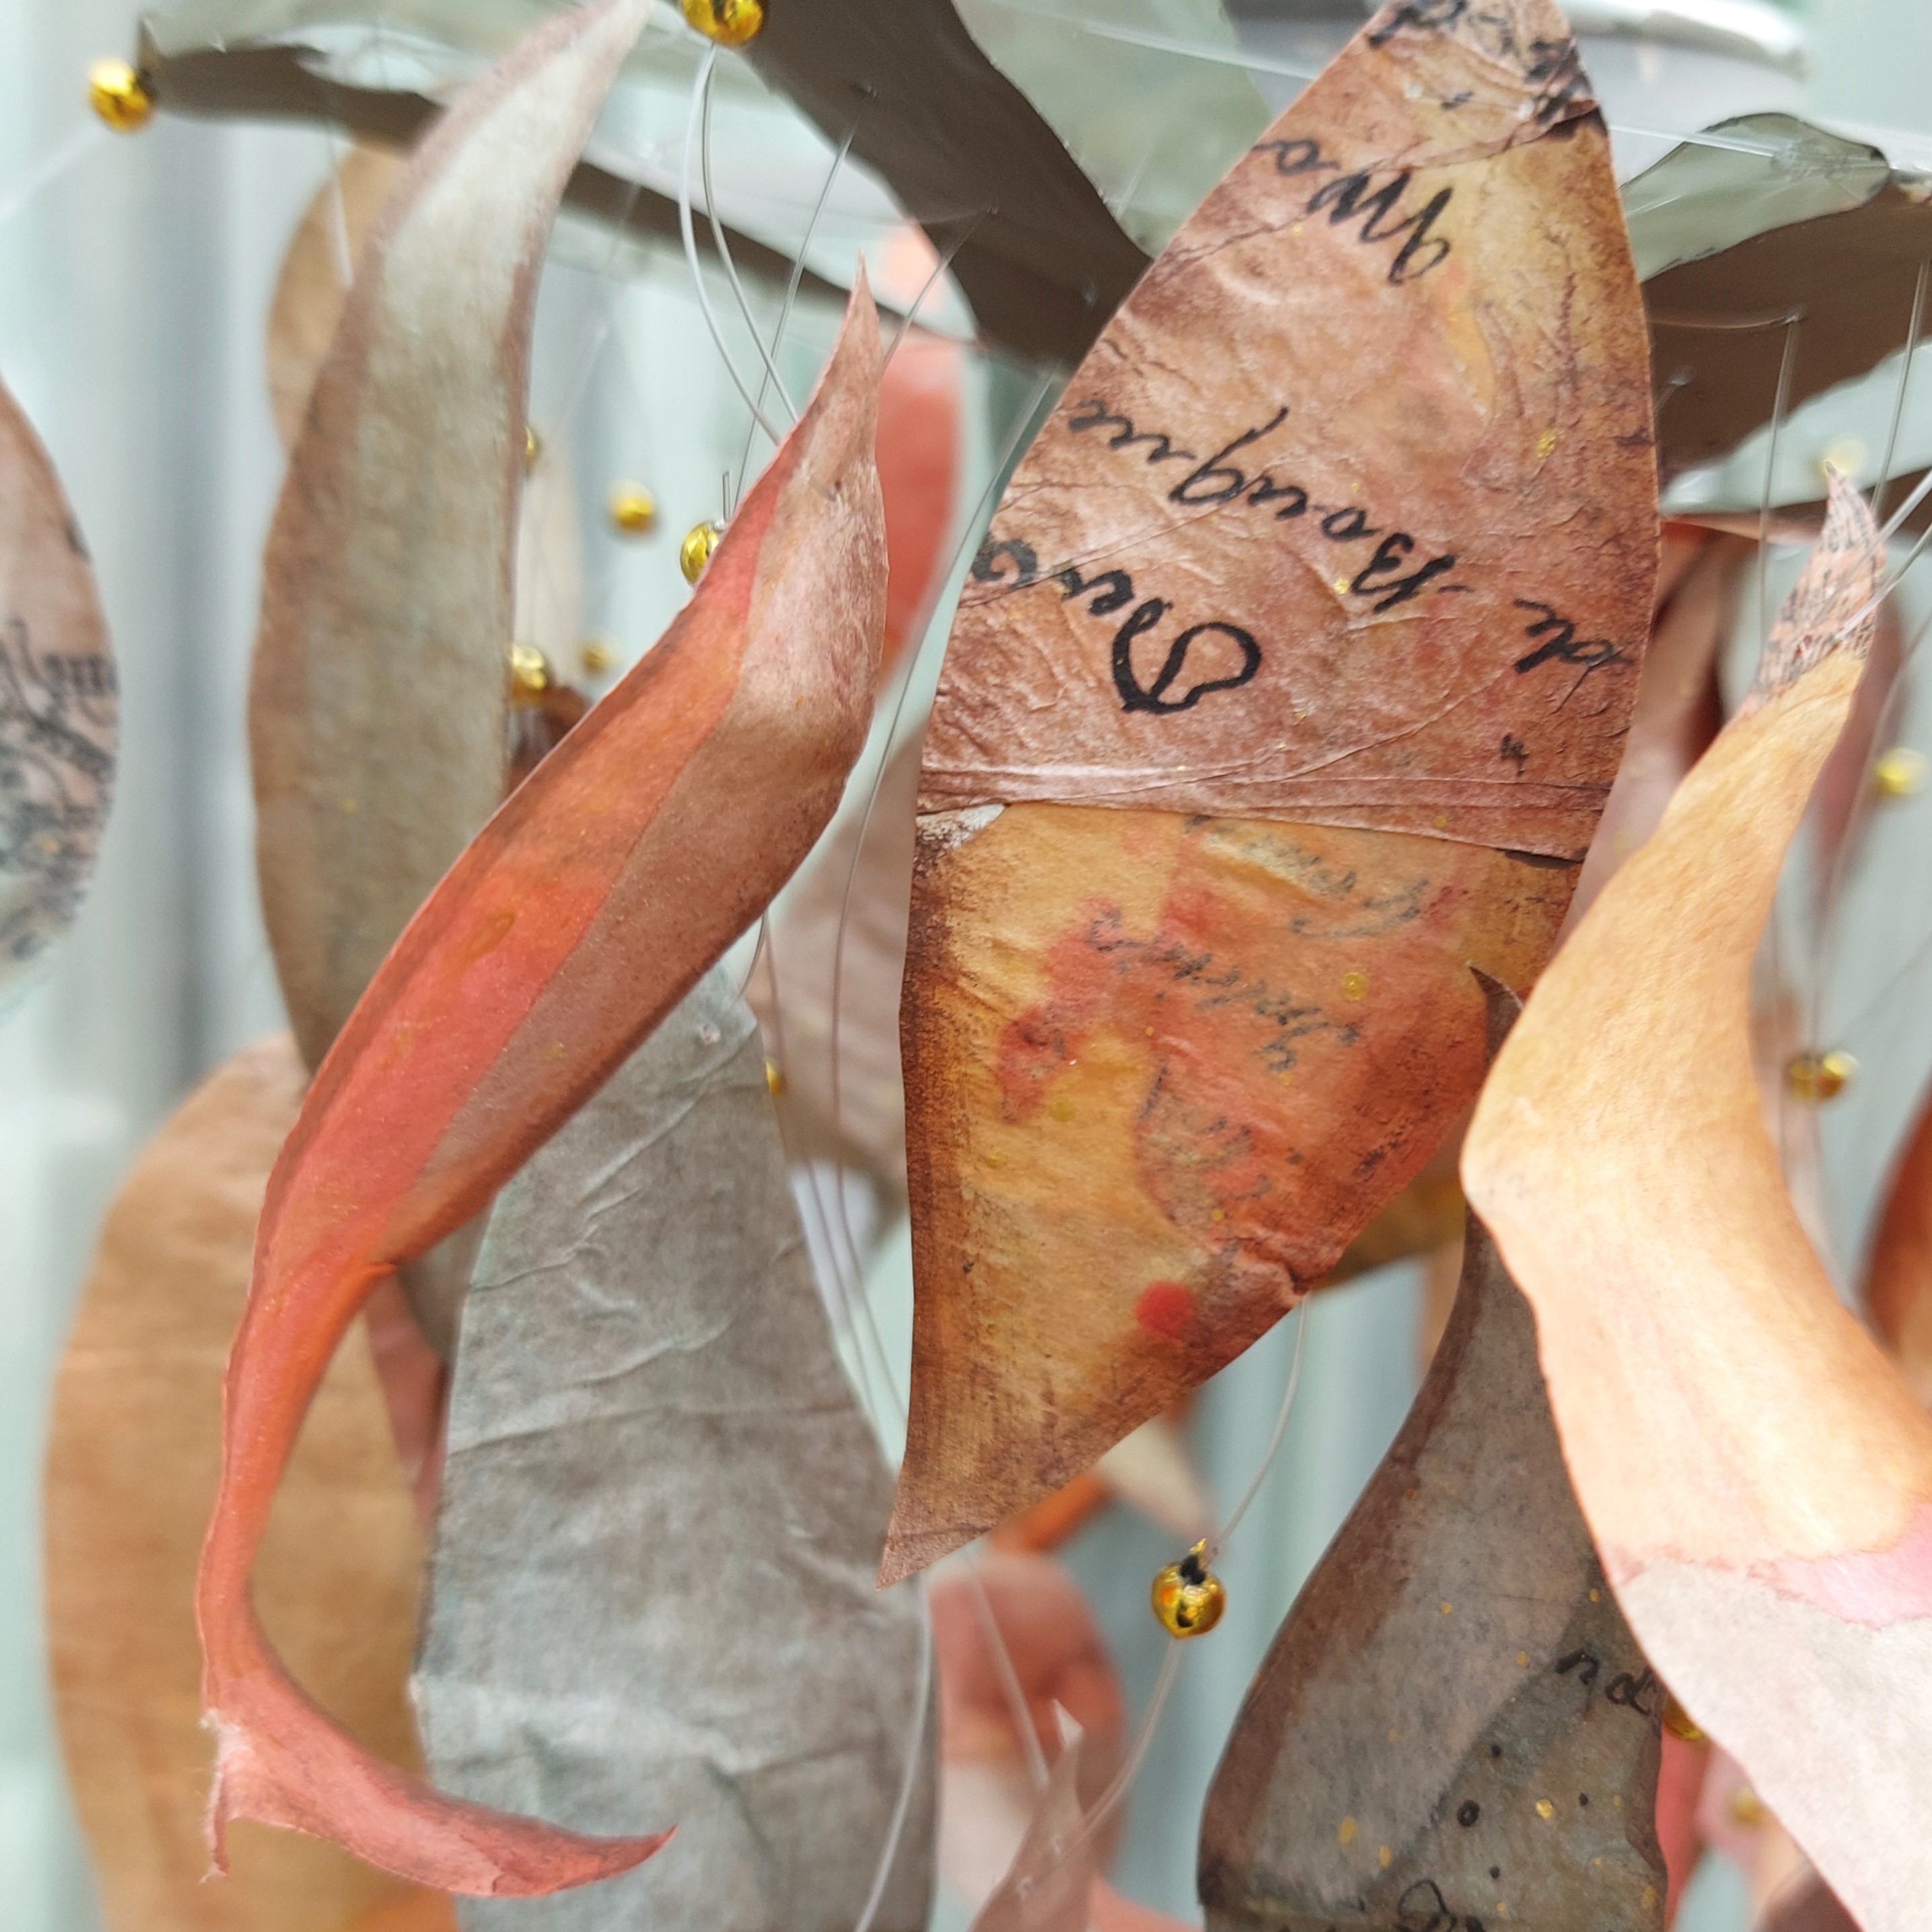
I leave you with a couple of detail shots of the leaves.


I love the snippets of pattern and texture that randomly show.


I prefer warm colours, but let's not forget the beautiful greens that bring depth and contrast.

I hope you enjoyed this journey in Mattintland and that it inspires you to try making tissue 'skins'. The process itself is easy and fun and the possibilities to use them are endless!

Keep creative
Dounia x

Monday, 23 September 2024

NEW PaperArtsy Products {4 new Mattints & 2 Tissue Papers}


A note from Leandra:
It's a new product week kicking off today, and we are so happy to bring you 2 new Printed Tissue papers, and 4 new Mattints! Leandra will be along to share with you LIVE these new products and ideas over in our Facebook Group, 'PaperArtsy People' shortly after this post publishes, and ... don't forget
 
These stamps are available EXCLUSIVELY from our approved stockists. Please check the list at the foot of this post to find a retailer online or geographically near you, it makes sense to order within your country where possible. Our retailers also endeavour to join the designer's live to share their direct shopping links - this makes it super easy for you to find a store with product in stock immediately.

Not one but 2 tissue papers, the long awaited ledger/ background paper is here, perfect to add some interest in your journal backgrounds and to break that 'blank page' when you are wondering how to start. I will be adding this behind collage layers, and it does not have to be glued down, it makes a wonderful sewn layer too.

We also have 'blank' tissue for you. This is perfect if you want to stamp your own imagery. If you reinforce the tissue with some paint, Mattints or Matte glazes, it will become stronger and possible to gel print on it, or use it for image transfers or rust powder techniques, sewing or even with melted wax ... lots of possibilities for this beauty!


Printed Tissue Paper by PaperArtsy (PT07, PT10)
Price: RRP €4.20 +VAT
Size: 30" x 20" (67 x 47 cm) 4 per pack

Printed with permanent ink, will not bleed when you add wet media. To increase tissue  strength, coat with Matte Glaze on a non stick surface, let dry, then apply a second layer of Matte Glaze to adhere tissue to your preferred surface (card, wood, paper, fabric etc). The more liquid the glue, the more easily the tissue will disappear.


There are many useful elements across this Printed Tissue, from newsprint, to numbers, a vintage map of the area in South-West France where PaperArtsy is based, and of course plenty of scripty bits and bobs!

I find if you apply the Mattint (or a clear Matte glaze) to both sides of the tissue to well saturate the paper, it settles onto your background without a white-ish halo. Can you see how the numbers to the left in this sample below look part of the background?


Yes it is might seem weird, but we know that blank tissue is superb in so many ways! To be able to print your own tissue using your stamps, stencils, and colouring options is gold! This is going to be fun to paint on, print on, tint and sew.

In the sample below by Katy Norgate, you can see she has prepared her background with the new Christmassy colours of Mattints (Greenstone and Ladybug), then used some JoFY Christmas Printed Tissue images, ready for gluing onto the background. 

Of course with blank tissue you can stamp ANY image from your stash onto tissue with a  permanent ink, then colour it and glue it onto a prepared card or journal page.


Here is the finished result, the tissue disappears into the prepared background.


And another with some JoFY Baubles using 3 of the newest Mattints.


PaperArtsy Mattints
Price: RRP €5.26 +VAT    
Size:50ml (1.7 fl oz)
Transparent Matte Tint, Adhesive & Sealant

4 new colours of Mattints for you

Greenstone is a lovely blue-green shade of jade
Ash is a delicate grey-brown super nice for aging papers or tissue
River Deep is a rich blue that builds with every layer into a nice navy
Ladybug is a powerful red

Don't forget all these colours can be mixed with other existing Mattints to create a wider colour range.

Mattints are a matte glaze that can be used to tint paper, tissue, colour in your stamps. As a glaze, it is also an adhesive, so great for ink-jet printed transfers or to stick lightweight papers such as tissue onto your receiving surface.

These new products Will be available from PaperArtsy stockists from Monday 23rd September 2024.


Greenstone is quite a cool shade of green, and really reminds me of New Zealand jade, which is why we called it Greenstone! The colour deepens with each application, like all Mattints can do, and if you apply a coat of the tint to the reverse and the front of printed tissue before sticking it into your journal, the shade will develop even more depth.


We think we have created a gorgeous Christmas green with Greenstone. A cool, bottle green, in the sample below it is layered over ash-tinted Ledger paper (PT07)


Here's a closer look


In this sample, just snippets of the ledger paper are applied onto squares, again, coating both sides allows for a deeper colour.


Ash is a greyish brown, again on the cool side of brown, but we love that! This will be perfect for adding shading to a face or a flower, or tinting those printed tissue backgrounds to make them look aged and vintage.


This sample has Ash blended over card where water had dampened the background with the ring patterns. It acts a bit like a resist when the Mattint is laid over top.


Blank tissue is used for the halo, the wings, and also moulded into a heart


River Deep is just a super nice blue. We love how it builds up, it is going to be handy for skies or to make some new purples and turquoises when you start playing with mixing up your colours!


Another watery blended background, perfect to go swimming in!


Everyone like a bit of red, and Ladybug is here for that! You can see the orange undertones, so just imagine how this could be edited with some Squeezed, Glow or The Pink ... as a primary it will pack some punch in your colour mixing game! So don't miss out on this one!


Tissue poppies are always going to love some red petals, but look closely and you will see that the flower centres are made from tissue moulded onto a stamp! 


Yes you can gel print onto Blank Tissue Paper (PT10) as Dounia has below, those lower layers are with a mix of Ladybug, Squeezed and the dots were gel printed onto the tissue.


Now for a few samples using a mix of the new Mattint colours, these are all made by Dounia.


Here you can see the blank tissue is layered up to create a backdrop, river deep at the base with dragonfly higher up. If you are wondering how Shark compares to river deep, it is pale and significantly more grey than River Deep. It is nice to build texture with the tissue paper too.


In this sample, Dounia layered up multiple pieces of tissue, a mix of plain, printed and gel printed, she has called it a 'skin' as the layers are transparent showing peeks of what is below.


The camera has really picked up on the Cloud 9 Gel printed stencil moon shapes, in real life they look a lot less obvious.


This one you can see many of the previous Mattint colours, it is fun how the colours blend into each other on the blank tissue at the foot of the post. Plus you can create new versions of pinky-purples or blue-purples too.


The hidden treasure is a moulded heart made with Squeezed and Ladybug, and the orange section is all blank tissue coloured with Squeezed too.


The various sections all have ledger-printed or blank tissue incorporated and coloured in various Mattints. The lower section is folded and stapled, the colour gets more depth as it is layered over itself.


Lots of crumpled tissues  make up this background that looks a bit like an abstracted flower wall.


You will soon be seeing our blogging team using all these products more as they filter through into their product choices in the near future. 

I hope you find the new Printed (and blank) tissues useful, and the Mattints a welcome addition to the existing colour palette. 

You will only be able to buy these new products from an approved PaperArtsy stockist, the current list is below.

Head on over to PaperArtsy People FB group to see Leandra share these new products, or catch the replay, it will be saved into the Group and pinned to the top.

Leandra


Australia
Bev's Cross Crafts, Spreyton, Tasmania bevscrosscrafts
Crafters Cupboard, Berwick, Victoria crafters cupboard
Hillbilly Scrappin, Nikenbah, QLD hillbilly scrapping
Memories on the Murray, Murray Bridge, SA memories on the murray
Natalie May Scrapbooking, Dover Gardens, SA natalie may
Scrapbook Superstore & More, South Penrith, NSW scrapbook superstore
The Scrapbook Store, North Perth,WA the scrapbook store

Belgium
Créatelier Caracolle, Liège, createlier caracolle

Canada
Clipper Street Scrapbook Company, Langley BC, Clipper Street Scrapbook Co
Scrapbook Centrale, Dollard Des Ormeaux, Quebec scrapbook centrale
Scrap Addicts, Edmonton, Alberta scrap addicts
Scrap and Bean, Edmonton, Alberta scrap and bean
The Paper & Ink Boutique, Calgary, Alberta paper and ink boutique

Denmark
Hobbyboden Scrapworld Samso hobbyboden

France
Emispheres Eurl Ruy Montceau,38300
Fée Du Scrap, Saint Sébastien-Sur-Loire, fee du scrap
Horizon Créatif, Ste Jalle horizon creatif
Instant Créatif, La Possession, La Réunion, i creatif
Katzelkraft, Ingwiller katzelkraft
Kerudoc Creation, St Yvi kerudoc creation
Page de scrap, Saint Pavace, page de scrap
Passion Scrap, Vieux-Conde, Passion Scrap
Scrap by Jo, Saint-Orens-de-Gameville, 31650 Scrap by Jo
Scrap Déco Home, Goutrens, www.scrap deco home
Toutencolle, Dun sur Auron toutencolle

Germany
Stempeloase Munich, Munich stempeloase
Stempelfee Shop, Hilden stempelfee shop

Netherlands
De Hobbystudio, Genemuiden, de hobby studio
Doe@ding,Spijkenisse doe @ ding
Hobbycompleet de Duif, Leeuwarden hobby compleet
Stampingcorner, Capelle Aan Den Ijssel stamping corner

Puerto Rico
Paper Boutique, Fajardi Paper Boutique

South Africa
Kcraft imports Ltd, Centurion 0014 kcraft

Spain
Cien por Cien Manualidades, Barcelona, 100 x 100 manualidades
Ideas 10 Manualidades Y Scrapbook, Bilbao ideas 10 manualidades/

United Kingdom
Amelia's Creative Crafts, Studley, Warwickshire amelias creative crafts
Art from the Heart, Harrogate, Yorkshire art from the heart
Crafts at The Malthouse, Herstmonceux, East Sussex, crafts at the malthouse
Countryview Crafts, Potton, Bedfordshire countryview crafts
Loobi Crafts, Leighton Buzzard, Bedfordshire, loobi crafts
Procraftynation Ltd, King's Lynn, Norfolk Procraftynation
Sir Stampalot, Peterborough, Cambridgeshire sir stampalot
Stampers Grove, Springbank, Lilliesleaf, Melrose,Scotland stampers grove
The Artistic Stamper Craft Store, Faversham, Kent the artistic stamper
The Forget me not Kraft Kabin, Rochford, Essex, The Forget Me Not Kraft Kabin

USA
Artistic Artifacts, Alexandria, VA artistic artifacts
Craftiness, Chatsworth, CA, craftiness
Everything Scrapbook & Stamps, Lake Worth, Florida Everything Scrapbook & Stamps
Frantic Stamper, Oregon frantic stamper
Free Heart LLC, Denver, Colarado, free heart llc
Joggles, Coventry, Rhode Island, joggles
PaperCraft Clubhouse, Westbrook, Connecticut, papercraft clubhouse
Runaway, Art & Craft Studio, NE Salem, Oregon runaway
Scrap-A-Latte, West Babylon NY scrap a latte
Scrapbook-N-Memories, Harrisonville Missouri Scrapbook N Memories
Simon Says Stamp, Columbus, Ohio simon says stamp
Topflight Stamps, Irmo, South Carolina topflight stamps

If you are interested in becoming a PaperArtsy stockist contact Dounia@paperartsy.com for more information

PaperArtsy Links
Facebook Group PaperArtsy People
Facebook Page PaperArtsy