Showing posts with label 2017 Topic 14. Show all posts

Thursday, 28 December 2017

PA 2017 : Blog year in review: Topics 13-16


Hello again from PaperArtsy HQ,

I hope your Christmas break is going well, although many of you will have had a day or 2 back to work, for many people its a relaxing time over the Christmas New year week. Here is another post looking back and celebrating the inspirational ideas presented on the PaperArtsy blog in 2017.

Tonight I'm sharing my picks from Topics 13-16

Leandra 

Topic 13: Metallics

Metallics have been such a strong trend in interior decor for a few years now, and naturally this is also reflected in our crafting. Gold leaf, metallic paints, embossing powders, mica powders and sprays, there are multiple ways that all these elements can successfully add the blingy 'magpie' effect into your work!

Autumn Clark created such gorgeous Xmas cards with Lynne Perrella stamps and a pop of shine. My first pick is this amazing beauty by. A very ...(link to original blog post)

Jennie's trademark soft shades contrast with gold perfectly in this textured assembly of vintage-looking elements.


I thought the delicate metallic embossed colour on Alison's post worked perfectly with the shades of brown. Both she and Raquel prefer to stamp in brown, than black, and i must push myself to stamp wit other coloured inks this year! There you go, one New Year's resolution sorted!


Topic 14: Glitter

Well, yes, we chose Glitter as a topic!!. So don't fall over in shock! But all these sparkly blingy things fell into the same zone for this round, so glitter it is...take a deep breath!

Chris Cresswell made a wonderful array of cards and these popsicle sticks fitted the tall zinski stamps perfectly, look at the cute glittery tops! Go and check out her post, so many card ideas here!


When Jo Firth-Young happened to drop into HQ, and saw me planning out the topics, she booked herself a glitter spot there and then! She LOVES glitter, and Christmas is always her perfect excuse! Here she has decorated an advent calendar perfectly!


The really funny thing about this topic was that (apart from Jo) almost ALL the bloggers were OUT of their comfort zone with glitter, so many went for the non-traditional glitter option, or used very little of it. This was one of those very subtle takes on the topic from Sue Carrington. Fabulous!


And Corrie added subtle holographic glitter to her Halloween backgrounds!


But I was blown away by Raquel's Star decorations. She turned her 'flat' star stamp into a whole bunch of glittered tree decorations!


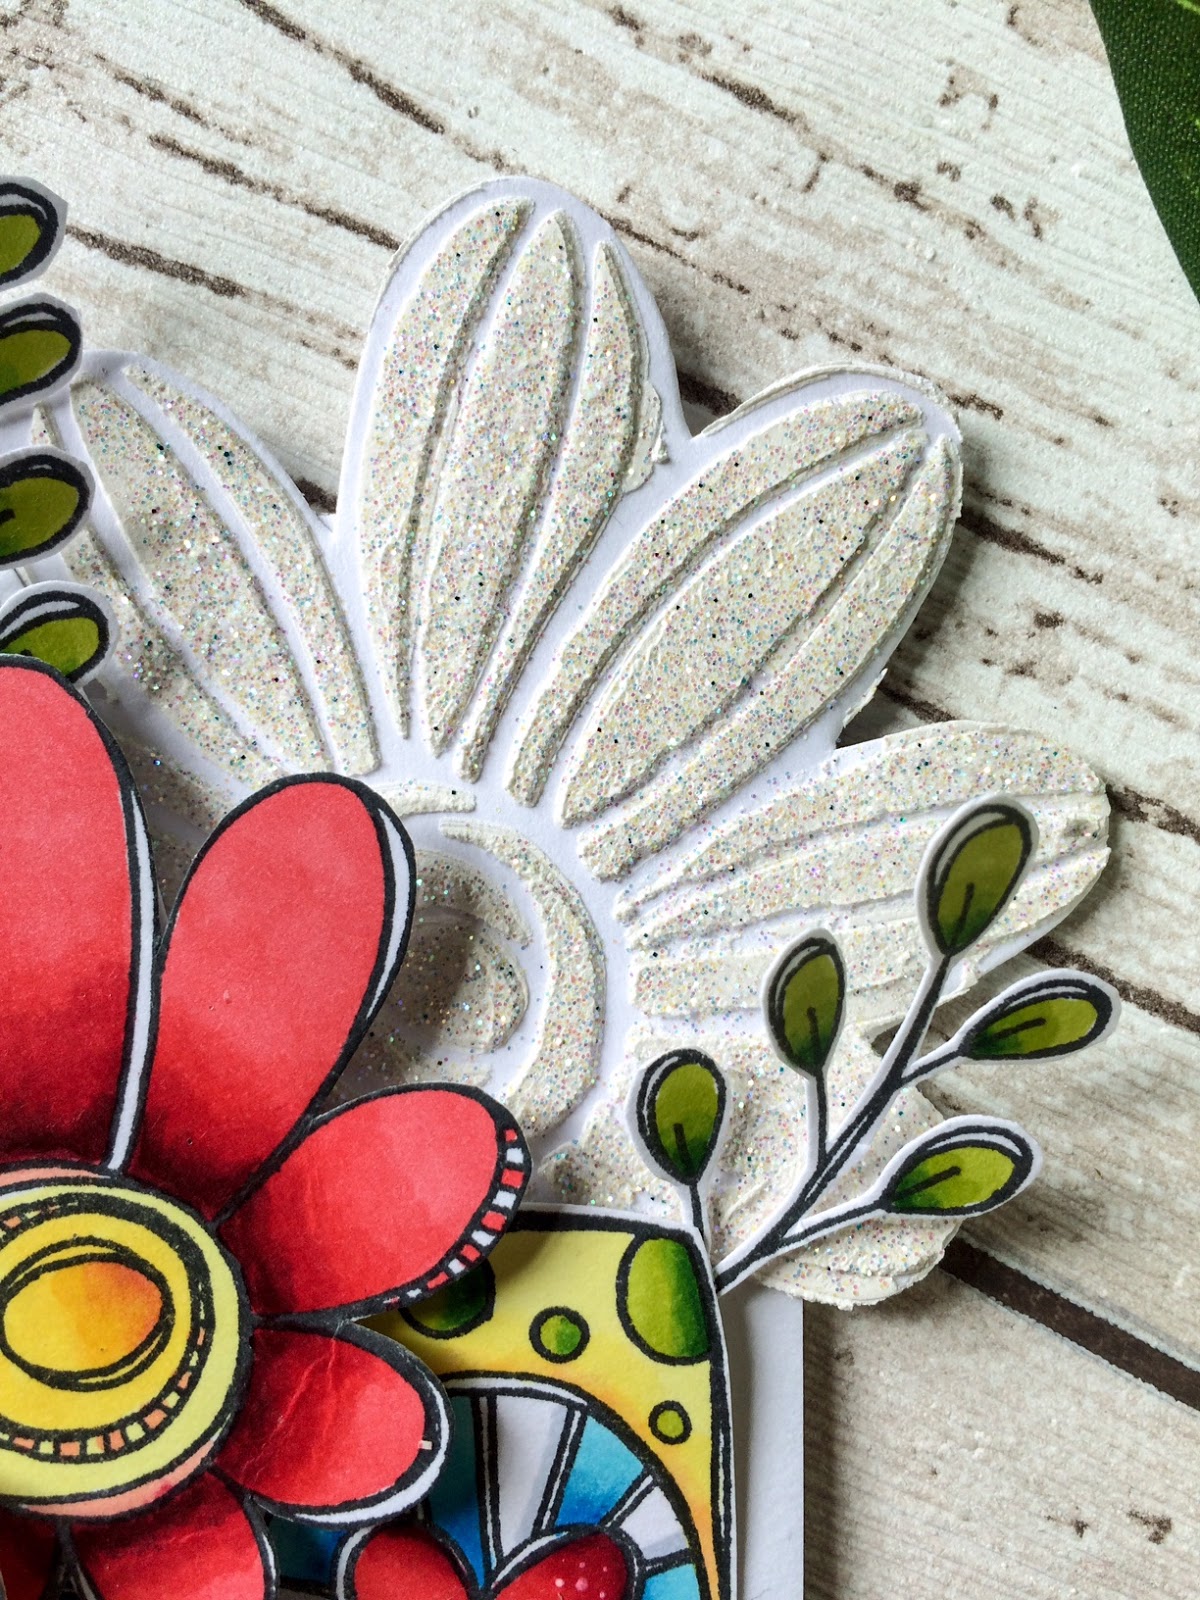
And Keren used alcohol ink pens to colour glitter paste!! Clever clogs that she is!


Topic 15 : Pearlescent

So glitter lead us nicely into the pearly area of mica, pearlescent paints and so on! You can see this really kicked us into a festive vibe in October! Plenty of cards and decorations were being made in readiness for Christmas!

I loved this frame by Autumn with the pearly vibe to the eggplant EP, but the panel inside was a gorgeous marbled effect! How elegant!


Helen made pearly skins....


And then stamped on them! How does she think this stuff up?!??


I adored Ruth's soft mosaic tiles! These would make an amazing frame for so many pieces of art!


And Bryan created some fast cards with his layering of pearl onto other shades for a quick 'pop' of pearl.


Topic 16 : Rustification

Well we couldn't miss out 'rust' in this round of metallic madness! Many people knew about our rusting powder, but never really played with it extensively! The trick is you need to glue it down first with a good gel medium, then spritz, keeping it damp until the colour is at a tone you prefer. My best results are direct onto untreated wood or fabric. (so no painty base layers) But our bloggers had other ideas to try!

Sue Carrington rusted everything in sight, then created a fabulous homage by the way of this collage.


Clare M used layers of paints to create her rusty effect. This is such a striking background!


Nikki nailed a patina effect (of course she did!!) as she is well known for her patination skills! The colours in this are amazing!And she also used that gorgeous star of Raquel's!


And finally for this topic we saw Miriam rust a stamp image onto fabric! Worked a treat too!


It is awesome to look back on what our bloggers have created. Tomorrow will be our final wrap up of the final 3 topics of 2017. Thanks for being part of our blog, and following along with our designers, and responding to their creativity!

Leandra 

Saturday, 14 October 2017

2017 #14 Glitter: Vintage Black Sparkle with Minis {by Debs Wainwright}

2017 Topic 14: Glitter


Tonight we have a striking clean Vintage idea from Debs. I love her painterly soft layer, and the black sparkle is perfect for that Vintage vibe this image evokes.

Hi everyone, Debs with you today, sharing a quick card using Glitter Embossing Powder. I do love a bit of sparkle, but seem to have moved away from it in my crafting of late. So playing with glitter  was really going back to my roots and early card making.


I chose to go Vintage with is card as you wouldn't normally see sparkle and vintage together and I wanted to see if it could work, which I think it did!


I wanted to keep the card quite simple to act as a contrast to the feature as I felt it would get lost if everything was too busy.


I used this old background card that I had lying around as I loved the colours and stencilling but felt it was too bright for what I wanted, so brayed on some Chalk Fresco Paint to knock it back. I loved how it still showed through. I loved it even more once I added some script. from Mini 61.


I played around with different colours of the Sparkle Embossing Powder but ended up going for the black as I found there was not enough contrast by using lighter values of colour. it all looked too bland.


I so loved how this looks with the texture of the glitter, but of course its difficult to get a clear image of the sparkle close up, as it  distorts the focus as it sparkles. 
This stamp is available in 3 sizes, as a small mini MN09 , a credit card sized stamp
Medium size in the A6 (quarter plate) Ink and the Dog range One Penny Plate 2


Or larger A5, half sheet size in the Vintage Ink and the Dog Collection VID02


As the powder is so heavy it filled in the gaps where the writing actually is, on the feature stamp Mini 09, so you have to be prepared for that if you use this method. I actually liked it as I felt it didn't distract from the overall affect, and again although not planned didn't overload the image. The birthday sentiment is from EM18.


I hope I have inspired you to dust off your Glitter Embossing Powders or just your plain glitter to have a play. Glitter isn't just for Christmas it can be used in many different projects to enhance your feature or add it  to some script to make it pop.

Take care everyone,
Hugs Debs xxx

You can see more of my work on my blog

I am Teaching at 
Handmade at Helen's on the 21st October 
Tullie House Carlisle 4th November
 
That background is a fabulous layer for the glittery girl to sit on, and black was a wonderful choice to offer just the right amount of sparkle! Beautiful Debs! ~ Leandra


We always hope that you  learn something interesting from our blog

Our creative team love to read your comments so much, so please take time to let them know you've been inspired!  

Why not join our 2-weekly challenge by blogging your create response to the current topic and link it here?

The current topic link Topic 14:Glitter will close 17:00 (London Time) Sunday, 15th October 2017, and the winner will be announced 2 hours later at 19:00.

All links go in the draw to win a £50 voucher to spend on products of your choice from the PaperArtsy online store.

Friday, 13 October 2017

2017 #14 Changing The Colour of Glitter with EKD {by Keren Baker}

2017 Topic 14: Changing The Colour of Glitter


She's back in the room. So I have coloured staples with alcohol markers to change the colour, but I have never thought to apply the same concept to glitter.

Hi everyone, it's Keren Baker with you today, and I'd like to share with you an easy technique; colouring glitter. I actually have a ridiculous amount of glitter (that I rarely use) but I wanted some more earthy and subtle colours so decided to try and colour my own!


To start with, I used the fabulous 048 PA stencils from Kim Dellow...


... along with some Grunge Paste onto some Smoothy Heavyweight Cardstock. Before the Grunge Paste dries, simply sprinkle over glitter and leave to dry completely.


The technique is pretty simple- although do be gentle with your alcohol markers- the grittiness of the glitter can cause problems with your nib and also some of the glitter will be removed whilst colouring so best to wipe your nib regularly. I found gentle 'dotting' onto the glitter removed the least amount and left my nibs intact. It also seems to spread the colour more than just on cardstock, so be careful around the edges of the glitter and blending is..let's just say, a little hit and miss.


It does however give a fab effect- and one that can be added to (colourwise) if the amount of depth of colour isn't quite what you want. I loved the plain glittered stencilled pieces so much, I added one in to the arrangement.


For the rest of the flowers, which I used more alcohol markers to colour with, I used the matching stamp set EKD06 from Kim Dellow...


Colouring using these type of markers means you can colour whole sections in the same colour, to get a cool effect


Just be warned- this technique is not for trying just before you go anywhere; this glitter gets EVERYWHERE! I like a little glitter with a bit of restraint and this technique means I can have both!


I loved creating bespoke colours- what would also be interesting would be to use translucent glitter over Fresco paints, as that type of glitter takes on the colour underneath it and would be a less messy technique. I also want to try putting an already coloured base (using alcohol markers and the stencil) and then using PVA glue and then translucent glitter to see what kind of effect that creates. It will end up with a better blended colour transition but how that looks under glitter would be really fascinating

Thanks for joining me- do excuse me whilst I go and cough up some more glitter stuck in my throat!
Keren xx

Blog: Keren Baker's Blog
Facebook:Keren Baker
Twitter:@craftstampink
Instagram:Craftstampink
Pinterest:craftstampink

I really like this idea Keren, and I'm amazed at the shading that you can get on top of the glitter too!! and you get texture, its all round totally fabulous! Thankyou! ~ Leandra


We always hope that you  learn something interesting from our blog

Our creative team love to read your comments so much, so please take time to let them know you've been inspired!  

Why not join our 2-weekly challenge by blogging your create response to the current topic and link it here?

The current topic link Topic 14:Glitter will close 17:00 (London Time) Sunday, 15th October 2017, and the winner will be announced 2 hours later at 19:00.

All links go in the draw to win a £50 voucher to spend on products of your choice from the PaperArtsy online store.

Wednesday, 11 October 2017

2017 #14 Glitter: Xmas Ornaments with ESC {By Raquel Burillo }

2017 Topic 14: Glitter


Another glitter-averse PaperArtsy blogger nails it with a glamourously glittery idea! And shows us how to make a flat stamps 3 dimensional to boot!

Hi everyone! Raquel from scrapcosy.com here. 

Today I come with a project which involves a very unusual (and unused) supply for me, which of course is: glitter! I haven’t used glitter (pure glitter, that is) for the past couple of decades perhaps… I think this is because when I think of glitter, I can already imagine the mess that I will get on me and on the area around me once I finish! 

However, after seeing the project that Alison Bomber did on her last release, that lady stamp (The fire of the frost) and the video of it, OMG! I felt the urge of getting THAT type of glitter (glass crushed glitter I believe), heavier and perhaps less messy than its plastic sister, and with a finish that just astounded me! So as usual, on my first shopping chance I had, I went crazy, and in Ally Pally I bought around 7 colours of that glitter. I couldn’t find the one Alison used, but still, I was happy with my shopping.

I had a project in mind: using it to create my own handmade Christmas tree ornaments using my new stamp set ESC08.


Initially I wanted to create 4 big ornaments using different colours of glitter, but instead of that I thought I would do a different thing: Just one stamp, the star, and 9 different techniques using all the glitter (and glitter-like, shimmer) supplies I had on my stash (most of them were presents gifted to me that I’ve never used) in 2 colours each, gold-like and copper-like. I have made a video will with all the steps shown below. There are many more videos on my YouTube channel and my blog.


I enjoyed so much doing all these stars and experimenting with my supplies! And I love the fact that the star can be folded to actually create a 3D ornament. 


It's really easy, and believe me, after 10 stars stamped, cut and folded, you get the hang of it and you can do it even with your eyes closed :)


Crushed glass glitterI just love the type of shine you get with this glitter, it seems to me real and proper shine. What do you think? 


I found that using 3D Matte Gel by Prima over my stamped 3D shaped star and pouring the glass glitter on top was the best approach for this technique (all thanks to Lauren who introduced me to this in Ally PallyYou can't imagine the joy of pouring the glitter to the star and see all the shine on it. I really had fun!


Classic glitter - Although I hate the mess this type of glitter gives you, I fell in love with this one. The glitter is so fine that it perfectly lets you see the shape of the star and the creases. I love it!


Glitter embossing powderI had some glitter embossing powder in bronze by stampendous and some in gold by ranger. First I used Infusions Golden Sands for the gold version and Infusions Rusty Car for the bronze/copper version to watercolour my paper and then I stamped and embossed. I’m really pleased with the gold version, but I don’t feel I’ll repeat the brown version with that background, I would perhaps colour that star into a more brown darker colour, with perhaps Rocky Road instead of Rusty car.


Distress Oxides and ZIGIt was hard to get a distress colour for “gold”, I chose Fossilized Amber Distress Oxide, I find the star ended up too bright. However, for the copper/bronze I went for Vintage Photo Distress Oxide (I know, not very coppery, but It’s my fab colour!) and I really like the result. The idea of this version is: you stamp with distress oxide, smudge with a sponge dauber or a piece of cun-n-dry foam and then you use the ZIG wink of stella glitter pen to add that shimmer. Since that pen is water based, you get an extra reaction on your distress oxides! I love it the combination! This micro-glitter is so fine...


Then I moved to less glitter and more metallic finish, still shimmering though. And I used in all cases the same base of infusions, again: Golden Sands and Rusty Car and then I used a different supply on each technique.


Bonding powder with foil - I love this one! I think I would love to have my xmas tree decorated just with the rose gold foil start. Don't you think it's gorgeous?


Fresco gold and copper mixed with glaze - I used Fresco Finish Satin Glaze mixed with some fresco paints for each star (Gold and Copper) to create a more translucent paint so I didn't cover entirely my stamped image. It's a nice soft shimmer, more subtle than using glitter, but still festive :)


Perfect medium and perfect pearls - This one was more shiny before, but after touching the stars so much with my fingers to glue them together it became a bit dull or matte. There is still shimmer although the pictures can’t reflect that. I would say I gave with my hands an extra distress vintage look to it, which I find pretty interesting.


Gold and Copper embossing powders and ZIG pen - This one is also a nice metallic effect, but after using other techniques I would say it’s not my favourite.


Kuretake watercolours - for this one I didn’t use infusions as a base, I just stamped and then painted with the watercolours. It's a pity that I can't capture the shine of it. Again this one is a matte distress look on a star. Next time I would perhaps add some colour to not get so bright white at the back, although for a simpler look it's a good option to leave it as is.


I'm really pleased with all my experiments for this Challenge. Perhaps it's not a finished project as such for the challenge, but it was a good exercise and it lets me get my hands on supplies that otherwise would still sit in my drawers.


So tell me, if you had to decorate a Xmas tree, which option would you choose? Which one is your favourite among the above? Or would you dress up the tree with all these 18 ornaments which are all different? I think I may do that :) 

And the other option: what if instead of ornaments, you use them as a label or a hanging for your gifts? Using some tissue paper and twine to wrap the present and then hanging the star from the twine. You would choose the technique for the star according to the person you'll give the present to.

That was all for today! If you want to stay in touch and see more, here are all my social media contacts. Thanks very much for reading and stopping by! See you soon! 
Raquel

Blog: https://scrapcosy.com
YouTube: https://www.youtube.com/c/scrapcosy
Instagram: https://instagram.com/scrapcosy/
Etsy: https://www.etsy.com/uk/shop/Scrapcosy

I think your tree will look amazing with all those co-ordinated stars across it! It's amazing how we can use elements we already own to create such a wide range of glitter effects! As soon as Raquel's video is ready we will drop it into this post, and alert you on socials! ~Leandra


We always hope that you  learn something interesting from our blog

Our creative team love to read your comments so much, so please take time to let them know you've been inspired!  

Why not join our 2-weekly challenge by blogging your create response to the current topic and link it here?

The current topic link Topic 14:Glitter will close 17:00 (London Time) Sunday, 15th October 2017, and the winner will be announced 2 hours later at 19:00.

All links go in the draw to win a £50 voucher to spend on products of your choice from the PaperArtsy online store.