Showing posts with label 2017 Topic 13. Show all posts

Thursday, 28 December 2017

PA 2017 : Blog year in review: Topics 13-16


Hello again from PaperArtsy HQ,

I hope your Christmas break is going well, although many of you will have had a day or 2 back to work, for many people its a relaxing time over the Christmas New year week. Here is another post looking back and celebrating the inspirational ideas presented on the PaperArtsy blog in 2017.

Tonight I'm sharing my picks from Topics 13-16

Leandra 

Topic 13: Metallics

Metallics have been such a strong trend in interior decor for a few years now, and naturally this is also reflected in our crafting. Gold leaf, metallic paints, embossing powders, mica powders and sprays, there are multiple ways that all these elements can successfully add the blingy 'magpie' effect into your work!

Autumn Clark created such gorgeous Xmas cards with Lynne Perrella stamps and a pop of shine. My first pick is this amazing beauty by. A very ...(link to original blog post)

Jennie's trademark soft shades contrast with gold perfectly in this textured assembly of vintage-looking elements.


I thought the delicate metallic embossed colour on Alison's post worked perfectly with the shades of brown. Both she and Raquel prefer to stamp in brown, than black, and i must push myself to stamp wit other coloured inks this year! There you go, one New Year's resolution sorted!


Topic 14: Glitter

Well, yes, we chose Glitter as a topic!!. So don't fall over in shock! But all these sparkly blingy things fell into the same zone for this round, so glitter it is...take a deep breath!

Chris Cresswell made a wonderful array of cards and these popsicle sticks fitted the tall zinski stamps perfectly, look at the cute glittery tops! Go and check out her post, so many card ideas here!


When Jo Firth-Young happened to drop into HQ, and saw me planning out the topics, she booked herself a glitter spot there and then! She LOVES glitter, and Christmas is always her perfect excuse! Here she has decorated an advent calendar perfectly!


The really funny thing about this topic was that (apart from Jo) almost ALL the bloggers were OUT of their comfort zone with glitter, so many went for the non-traditional glitter option, or used very little of it. This was one of those very subtle takes on the topic from Sue Carrington. Fabulous!


And Corrie added subtle holographic glitter to her Halloween backgrounds!


But I was blown away by Raquel's Star decorations. She turned her 'flat' star stamp into a whole bunch of glittered tree decorations!


And Keren used alcohol ink pens to colour glitter paste!! Clever clogs that she is!


Topic 15 : Pearlescent

So glitter lead us nicely into the pearly area of mica, pearlescent paints and so on! You can see this really kicked us into a festive vibe in October! Plenty of cards and decorations were being made in readiness for Christmas!

I loved this frame by Autumn with the pearly vibe to the eggplant EP, but the panel inside was a gorgeous marbled effect! How elegant!


Helen made pearly skins....


And then stamped on them! How does she think this stuff up?!??


I adored Ruth's soft mosaic tiles! These would make an amazing frame for so many pieces of art!


And Bryan created some fast cards with his layering of pearl onto other shades for a quick 'pop' of pearl.


Topic 16 : Rustification

Well we couldn't miss out 'rust' in this round of metallic madness! Many people knew about our rusting powder, but never really played with it extensively! The trick is you need to glue it down first with a good gel medium, then spritz, keeping it damp until the colour is at a tone you prefer. My best results are direct onto untreated wood or fabric. (so no painty base layers) But our bloggers had other ideas to try!

Sue Carrington rusted everything in sight, then created a fabulous homage by the way of this collage.


Clare M used layers of paints to create her rusty effect. This is such a striking background!


Nikki nailed a patina effect (of course she did!!) as she is well known for her patination skills! The colours in this are amazing!And she also used that gorgeous star of Raquel's!


And finally for this topic we saw Miriam rust a stamp image onto fabric! Worked a treat too!


It is awesome to look back on what our bloggers have created. Tomorrow will be our final wrap up of the final 3 topics of 2017. Thanks for being part of our blog, and following along with our designers, and responding to their creativity!

Leandra 

Saturday, 30 September 2017

2017 #13 Metallics: Weeping Over Lost Time [By Keren Baker}

2017 Topic 13: Colour Study: Metallics


I am always amazed at how Keren seems to pull something out of the bag with her innovative creative ideas. Life sure is a box of chocolates, and in this post she shares how a pick and mix of metallic products come together in a very clever arrangement!


Hi everyone, it's Keren Baker with you today, and I'd like to share with you a piece of artistic expression about lost time.

I wanted to use different types of metallic product and inserted as many as I could in this relatively small piece. It's less about technique, more about playing with products, trying to make images fit into a theme and trying watercolouring with metallic pens.


I'll explain the piece briefly so you understand what's going on! The eye (in which has numerals or time at the centre) is crying. She's weeping for lost time and wasted time (hence the numbers- be that seconds, minutes or years). The crowns are representing that fact that she thought she was in control of her life, when in fact, she was carried by circumstance and swayed by meaningless events. Now you've had a chance to digest that ;-) I'll explain what I've used and what I enjoyed! 


I began with an image from Hot Pick 1502 


and started to sketch out an eye. I wanted the numerals to be in the iris, which meant I had to make the eye be in proportion.


The 'number tears' are from a happy find in the Squiggly Ink range; Ding and Dong


The crowns are from another Squiggly Ink set- Crowns and Castles


You can just about see that the pupil has a little shimmer- I've used the Fresco Finish Metallic Glaze which when watered down slightly turns any base colour into a metallic looking one


I really enjoyed all the fussy cutting (i know, I'm strange !) and adding in as many metallic elements- from the metallic embossing powder, the Metallic Glaze, to the watered down metallic markers (Nuvo Glitter Markers) and the metal wire help tie it all together. 


I really enjoyed taking the Hot Picks image and trying to transform it into another type of image because I didn't have quite what I wanted in my stash. Linking separate elements like the numbers to create a more solid larger image was a challenge and I loved the happy accident where the crowns looked a little like false eyelashes from a distance. 


Do have a sort through your stamps and try transforming into a part of something else. Taking metallic pens and watering them down with a water-brush led to some delicate results and I really recommend you having a play. 

Thanks for bearing with me to the end- hope it's not been a 'wasted' read!!

Blog: Kerenbaker's Blog
Facebook: Keren Baker
Twitter:craftstampink
Instagram:Craftstampink
Pinterest:Craftstampink

Isn't this fun! I really love the eyelashes too, twinkling in the light. Small numbers, big numbers, they all work so well! thanks Keren, you always throw us a great challenge!


We always hope that you  learn something interesting from our blog

Our creative team love to read your comments so much, so please take time to let them know you've been inspired!  

Why not join our 2-weekly challenge by blogging your create response to the current topic and link it here?

The current topic link Topic 13: Metallics will close 17:00 (London Time) Sunday, 1st October 2017, and the winner will be announced 2 hours later at 19:00.

All links go in the draw to win a £50 voucher to spend on products of your choice from the PaperArtsy online store.

Friday, 29 September 2017

2017 #13 Metallics: Get Foiling with ELB {by Wanda Hentges}

2017 Topic 13:  Colour Study: Metallics


For many crafters, that molten embossing powder in shades of gold and silver were the first thing that got us hooked. In the last few years, we have found other ways to get that kind of metal effect and foil techniques have become really popular (again) be it with sticky embossing powders or hot/cold lamination. Wanda is here to share her insights, tips and tricks.

Hi everyone, it's Wanda (Art By Wanda Blog) with you today, and I'd like to share with you a few different ways to add foil to your projects.  

I love using foil!!!  Oh, the joy of seeing that shine on a project!! And it's a wonderful contrast to the matte look of the Fresco Finish Paints.  

There are many ways to use foil - even more than I am sharing today.  I'll cover the basics of each way here but you can find many more pictures and detailed information of the projects on my blog.

The foil I am using is the kind that comes on a release sheet.  The front is the shiny, colored side and this is the side to have up when you are working, placing the back side down onto what you want it to stick to. Always remember this!!    

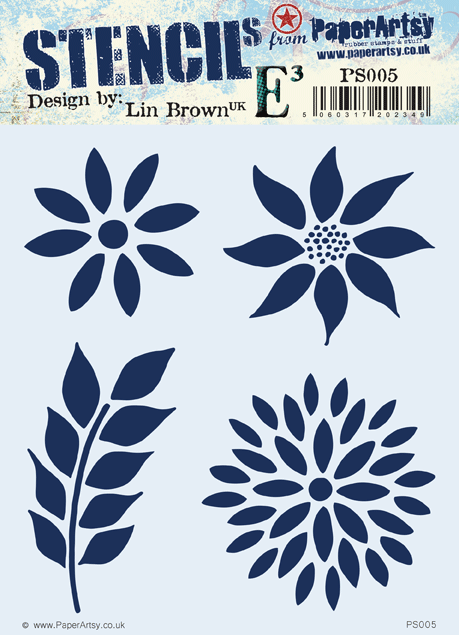
Stamps and Stencils used for these projects are all Lin Brown designs - ELB10, ELB11, ELB12, ELB29 and stencils PS005, PS044


One way to add foil is with warm, melted embossing powder.  I stamp and emboss my image then go back and rewarm the melted embossing powder where I want to add foil. 

You need to have your foil ready to press onto the warmed embossing before it cools as the foil only sticks when the powder is warm.  After pressing on the foil (shiny, colored side up) you then peel the sheet off.  For the leaf I just reheated along the center area so the leaves are two-toned with the Fern Green Powder and Green Foil.  On the Red Geranium Embossing Powder I went for a somewhat random look.  When trying to accomplish this, it can be helpful not to press to hard.


Another way to add foil is using a heat laminator. I just had to purchase a laminator a few months ago after finding out you can print something with a laser printer, place it with foil inside a folded piece of parchment paper, run it through the hot laminator and the foil will stick to the laser printer ink. Way Cool!!!!!  But....


... you can also use the laminator to add foil to gloss gel medium.  I used Golden's Heavy Gel Gloss to stencil, allowed it to dry completely and then ran it through the laminator with red foil.  I had done this before always smoothing the gel but decided to try and leave the gel more dimensional and uneven for this.  That is the image on the left.  It worked but definitely gave a more distressed look to the foiling as there are some spots the foil didn't stick (too much difference between the high and low spots) and also some extra spots that got some gel on them while removing the stencil.  I did it again smoothing the gel (the image on the right) and you get a more elegant look.  I think both a fabulous!!!     


Here I'm peeling the sheet off the first one after running it through the lamintor.  


You can also use double sided tape to add foil.  Stick the tape to your project, peel off the liner, press the foil onto the tape, peel back.  Double sided tape comes in many widths and you could even put wide tape onto cardstock, die cut it, and then add foil to the top. 


Finally you can use Sticky Embossing Powder.  The advantage to using sticky powder over regular powder is you have more work time and it's easier to foil a large, complete image. 

Sticky powder works exactly the same way as regular embossing powder except that it leaves the image sticky.  You stamp your image, pour on the powder, tap off the excess powder and then heat to melt.  When you melt the powder it's important to only heat until it turns clear and then move on.  If you heat it too much it will dry out the adhesive and it won't be sticky.  Once it's sticky, don't touch it!!... apply the foil pressing well over the image and peel off the release sheet.  If there are any spots left without foil just press foil again in that spot to fill in.  


If you've never used foil, I do hope you are inspired to try adding foil to your projects. If you like drawing your own images, try making a laser copy and then foiling using a laminator.  How cool would that be!!!!  Foil is available from several companies and although I haven't tried them all, any should work fine.  

Thanks for following along!!

Hugs,  Wanda
   
Blog:  https://artbywanda.blogspot.com/
Facebook:  https://www.facebook.com/wanda.hentges
Twitter:  https://twitter.com/WandaHentges
Instagram:  https://www.instagram.com/wandahentges/
Pinterest:  https://www.pinterest.com/wandah/
YouTube:  https://www.youtube.com/user/WandaHentges

OK fess up, who knew the gel trick?? What a great idea! These ideas are all wonderful for Xmas , and of course foil laminating is perfect on any Christmas card - we're all going to look super professional this Christmas!!!


We always hope that you  learn something interesting from our blog

Our creative team love to read your comments so much, so please take time to let them know you've been inspired!  

Why not join our 2-weekly challenge by blogging your create response to the current topic and link it here?

The current topic link Topic 13: Metallics will close 17:00 (London Time) Sunday, 1st October 2017, and the winner will be announced 2 hours later at 19:00.

All links go in the draw to win a £50 voucher to spend on products of your choice from the PaperArtsy online store.

Wednesday, 27 September 2017

2017 #13 Metallics: Memories Plaque with ESA {by Alison Hall}

2017 Topic 13: Colour Study - Metallics


After a series of shimmery glittery posts, Alison heads us into a more masculine metallic direction with a fantastic wall hanging!

Hi everyone, it's Alison/Craftytrog with you today, and I'd like to share with you a plaque on which I used various metallic elements, the main one being Woodware's Magic Metal Copper Sheet. When heated with a hot plate or heat gun, it turns gradually from copper to deep orange, then pink, then purple, so you can have a variety of colours if you wish.


I began by stamping Seth Apter's wonderful collage image from ESA05 onto the copper sheet, using Jet Black Stazon Ink, then used my heat gun to change the colour of the metal, and at the same time to dry the ink. It takes a little while, but it's amazing to see the copper changing colour. Care needs to be taken of course, as the metal gets very hot.


On the plaque I started with a base coat of Concrete Fresco Chalk Paint, then wanting to create some texture, I grabbed a piece of scrunched up kitchen towel, dipping it into Antarctic Fresco Chalk Paint and dabbing it on. I then dabbed on some Mermaid Fresco Chalk Paint. This technique produces a great bit of random texture.


I stamped the circle image from ESA05 with Jet Black Archival Ink, going over onto the edges. Then I used Metallic Glaze to stamp the writing from ESA04. I love the subtle shimmer of the glaze, another metallic element!


Going back to the copper image, I used metal tools to add texture and dimension. Then to get sharply stamped images of the collage and chevrons from ESA05 on the plaque, I stamped them onto white tissue, then adhered them with Matte Glaze


Rummaging through my stash, I found a copper key, some rusty wire and a bird's egg pendant. Spanish Topaz Treasure Gold accents and cream lace were the finishing touches. I really love the soft texture the lace adds to my piece, contrasting with the metal.


I hope I've inspired you to join in with our Metallics Challenge. As I've demonstrated, there are many ways to incorporate metallic elements into your art. I've had the copper sheet for a while, and this was the perfect opportunity to play with it. It had been a long time since I used the metal tools too, and I'll be honest, the lace hides a very ugly edge! Lol! 

Happy crafting!
Alison x

Blog: Craftytrog's Arty Adventures
Facebook: Alison Hall
Twitter: @craftytrog
Instagram: @craftytrog
Pinterest: Alison Hall

I haven't seen this copper sheet stuff for years, and forgot how it changed colour with heat! Doesn't it look amazing with Seth's stamp on top too! Lovely idea Alison!  ~ Leandra


We always hope that you  learn something interesting from our blog

Our creative team love to read your comments so much, so please take time to let them know you've been inspired!  

Why not join our 2-weekly challenge by blogging your create response to the current topic and link it here?

The current topic link Topic 13: Metallics will close 17:00 (London Time) Sunday, 1st October 2017, and the winner will be announced 2 hours later at 19:00.

All links go in the draw to win a £50 voucher to spend on products of your choice from the PaperArtsy online store.