

Hi everyone! It's Autumn Clark from SewPaperPaint with you today to share my portion of the 'With 3 Things' challenge. I hope you're following along with the blog posts to see what Liesbeth created yesterday, and what Ann has in store for you tomorrow with (these same) 3 things.

We bloggers generally have an idea of what we will make, but this challenge was so exciting to me because I didn't pre-plan or sketch out ideas. I received my 3 Things and immediately decided I would make a mini book/junk journal, covered in Crunch Waxed Kraft Paper. The funny thing is that Liesbeth and I had the same idea! Luckily I checked to see what she was up to before starting down that rabbit hole - ha ha! Otherwise, I would have created a book almost identical to hers. :) Well done Liesbeth!

I had to completely switch gears and decided, much like Ann, to approach these new products with playful experimentation. My first idea was to create some pocket envelopes with the Crunchy Waxed Kraft Paper for a junk journal spread. I used a Tim Holtz die by Sizzix to cut them. I wasn't sure if I liked the crinkled version or not. I had intended to fill the envelopes with postage stamps, but the Kraft Waxed Paper wasn't as transparent as I'd imagined and the postage didn't show through very well. I still love the envelopes and will incorporate them on another page in my journal.


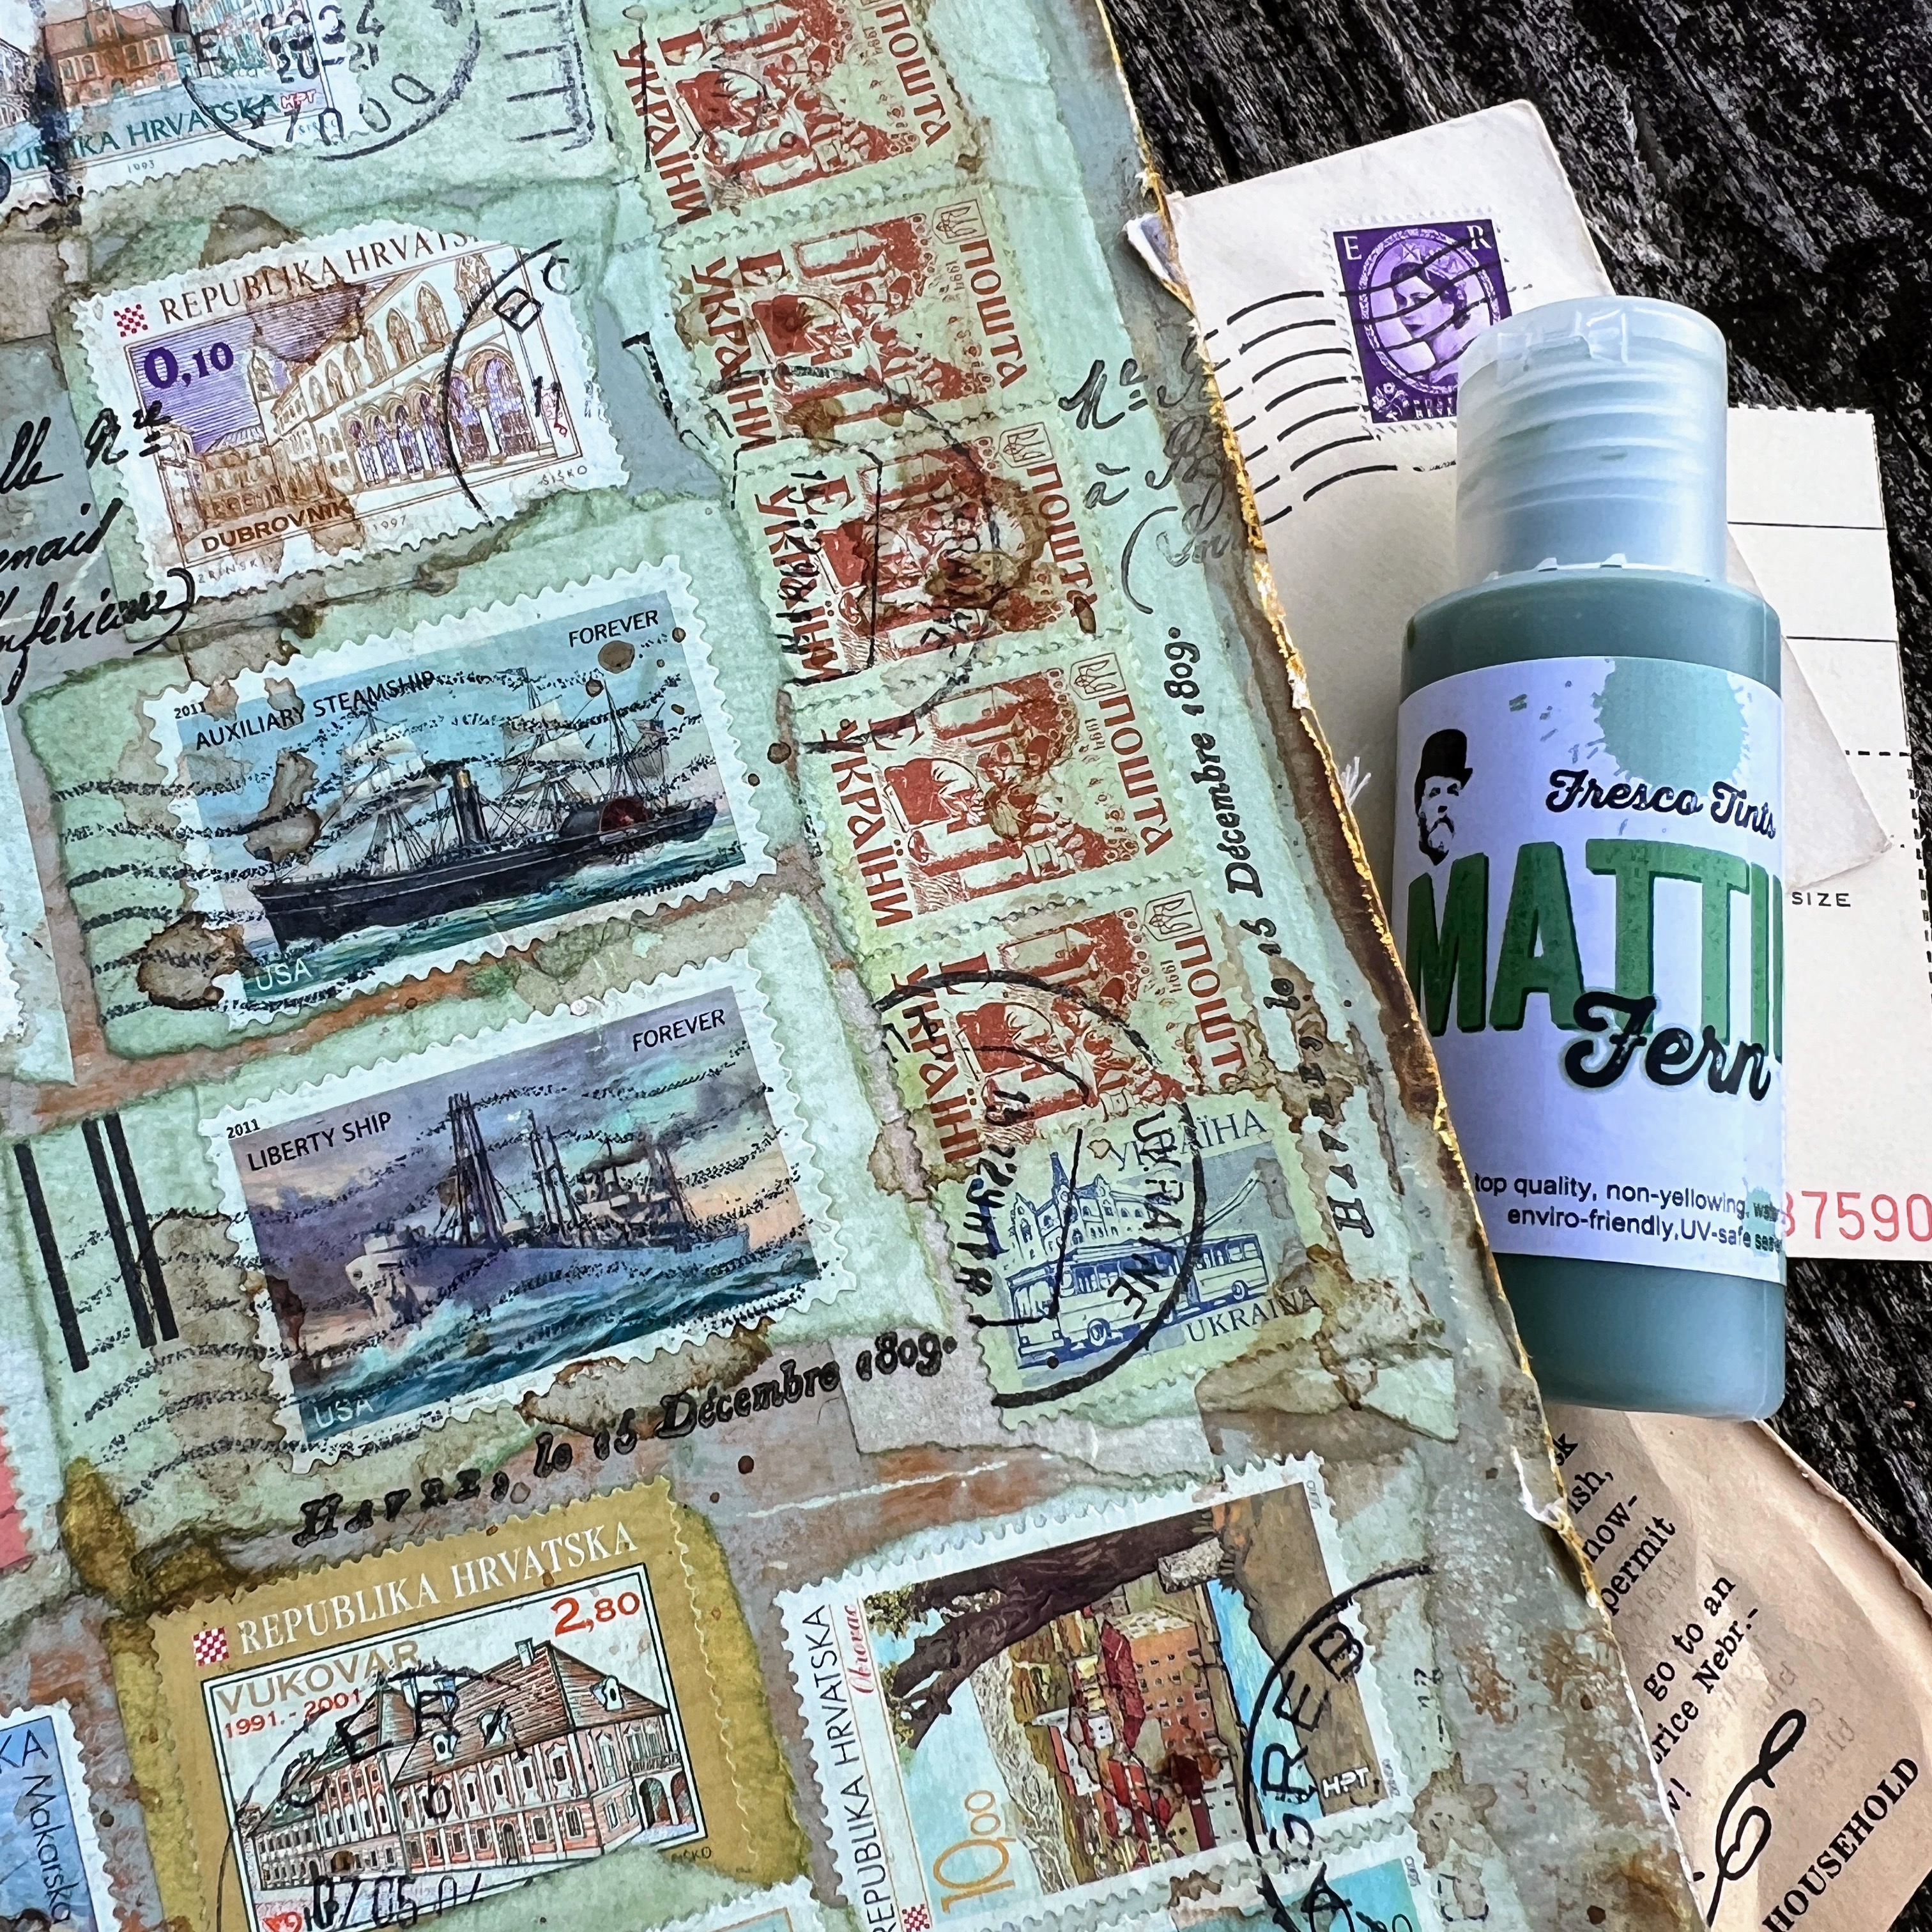
As we kick off the Mattints Topic soon ... I switched gears and decided to experiment with Mattints in Fern. In the introduction post to this fab new product it states, "Mattints are a TINTED MATTE GLAZE and GLUE." I was a little sceptical about the glue properties because the product is very thin. But I had a brave moment and decided to test it out right on the cover of my cardboard junk journal from THIS POST. You can see how I created the simple ring bound journal from gel printed cardboard pages.

I squished Mattints in Fern right onto my surface as I normally would do with matte Mod Podge, my go to collage medium.


I started brushing the medium around in small sections then added a cancelled postage stamp, then brushed more Mattints over the stamp and worked my way until I had covered the entire panel.

I was inspired by my dear friend Barbara, from @alteredart45, who had created this awesome postage roll in Fodder School. She and I found these cool large spools in a mountain shop in NC and always intended on making a scroll with them together, but after years of neglect she put hers to good use!

I let my panel sit for several hours and came back and was completely blown away by the result! Not only was the entire piece tinted beautifully in the Fern color, but the glue properties worked WONDERFULLY! And the best part was that the surface did not even appear to have been glued. To touch it, it felt like rubbing paper, unlike the "silky" feeling when you use Mod Podge. That's why this product fits well with the PaperArtsy Fresco Chalk Acrylic family at PaperArtsy, because it's wonderfully MATTE! :) It made me curious if regular matte medium was the same finish, so I did a test and it was also silky, though less shiny than Mod Podge. Side by side the Mattints was noticeably different. WOW!
I pulled out the awesome new HotPicks stamp set 2401 (HP2401) and used the awesome collage style text to blend the postage stamps together, doing first, second and third generation stamping in Versafine black. And of course, as the Fern Mattint is a matte finish (ie toothy), it is also super easy to directly stamp onto the glaze too!


I love that this stamp set has so many font styles and options for subtle background stamping, but could easily be used as a focal element too.

Next, I watered down the new Just Walnut Infusions powder to create a stain and brushed it randomly over my post to further blend and age it. This complimented my journal very well because I had previously dipped my pages in Infusions in The Sage and Golden Sands to distress all of the white edges and bare cardboard that wasn't gel printed.


I had initially hoped to add a collage cluster of 3D elements over the postal collage using the Crunchy Waxed Kraft Paper envelopes I had cut, but I couldn't bring myself to cover the postal collage and was afraid I wouldn't enjoy a heavily dimensional cover, since I had many more pages within the journal on which to create. In the end, I crunched up a long strip of the Waxed Paper to make it resemble washi tape. I reinforced the binding edge with the faux tape and just love how it looks, resembling leather. My next project is going to be making a sewn binding with CWKP as the spine, sewn beautifully in place!

After I saw how beautifully the Mattints in Fern looked on my front cover, I repeated the same style of collage on my back cover. I wish I had incorporated the CWKP on the back cover of my journal, but since this was sheer play and experimentation, I hadn't thought that far in advance and hated to cover up the beautiful stamping.

Reflections....
I've loved this mix up of our normal blogging style here on the PaperArtsy blog and the challenge of creating with an identical brief and two other fabulous designers. I really hope our posts will encourage you to play and experiment with these products yourself, because let's be honest - that's where the creative magic really comes out! xx, Autumn
Blog: SewPaperPaint
YouTube: SewPaperPaint
Facebook: Autumn Clark
Instagram: @sewpaperpaint
Pinterest: SewPaperPaint


1 comment:
I love Autumn's take on the with 3 things prompt, the gorgeous fern Mattint created such a lovely finish over the postage stamps, and the crunchy waxed paper on the cover looks amazing, Bravo! ~Ann
Post a Comment