Monday 4 March 2024

2024 Topic 1: Miniature {by Claudia Neubacher} on the PaperArtsy Blog


Servus, everyone!

It's Claudia from VonPappe II here with you today.

The current topic and theme - "Miniature" and "Glazed" - here on PaperArtsy both make me a very happy crafting girlie, as I loooove to do (very) small formats and to play with embossing enamels and glazes of all kinds!  And when it all comes together in a nature inspired project I am in crafty heaven! 


This little diorama (it's actually smaller than my flat hand!) in a flipped over miniature canvas makes my heart sing! And working with the awesomely beautiful stamp designs from the Scrapcosy stamp sets (in this case ESC05 and ESC24) just guarantees you'll love the result! So let me take you through the really easy steps so you can create your own tiny nature (or other) wonderland dioramas! Let's jump right in! 


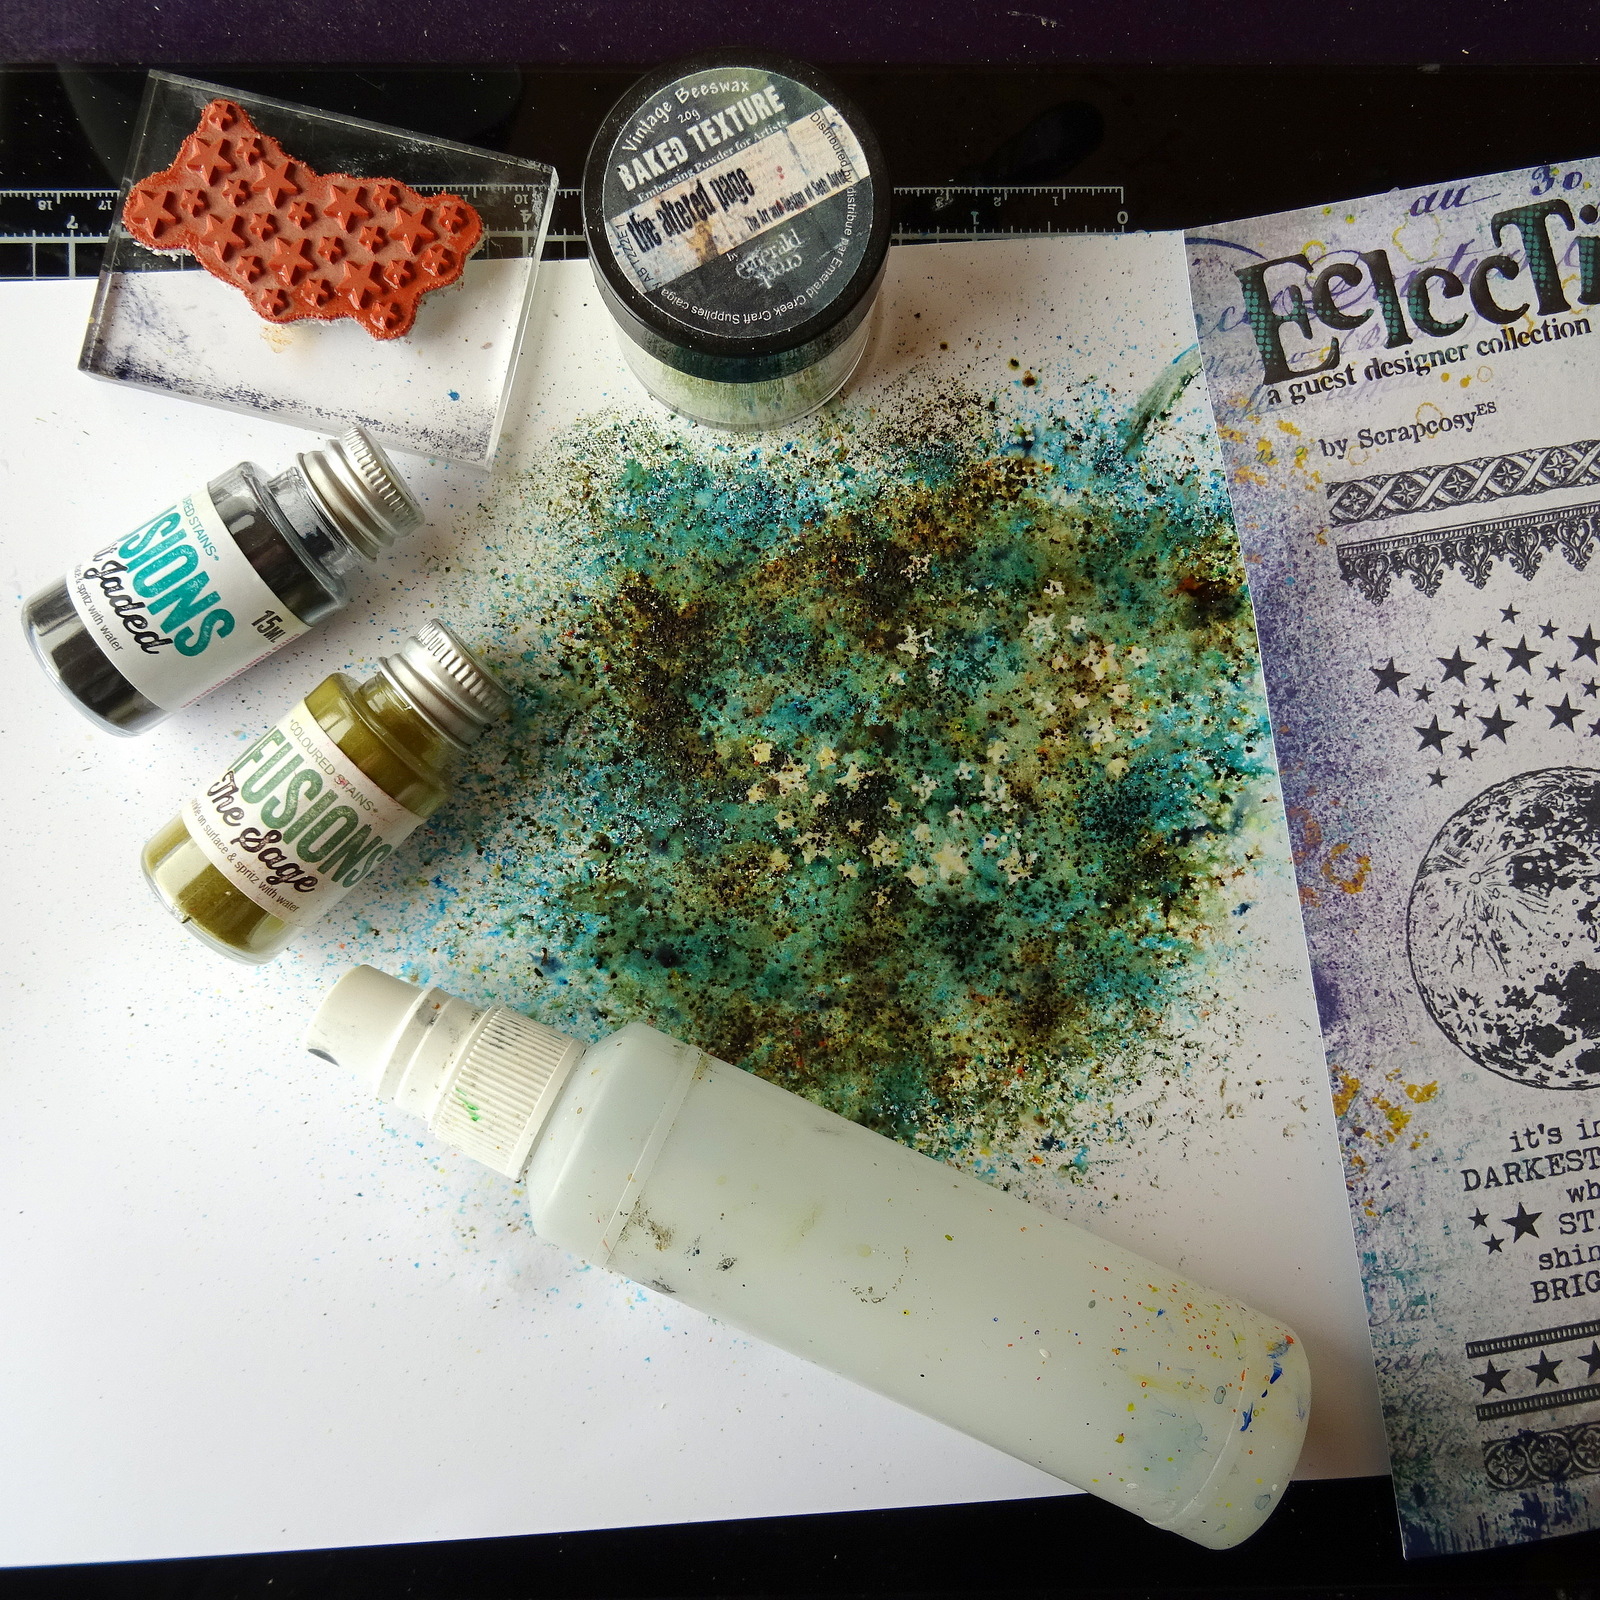
Besides the two gorgeous stamp sets I picked a bunch of colours from my PaperArtsy Fresco Finish Chalk Acrylic paints that I thought would work best to paint the stamped moon, acorn, mushrooms, the cute snail and leaves. My plan was to use the paints in a highly diluted water-colour-y way so I could layer them until I was content with the result. As my snail is making its way through the forest in the middle of the night, I picked two 
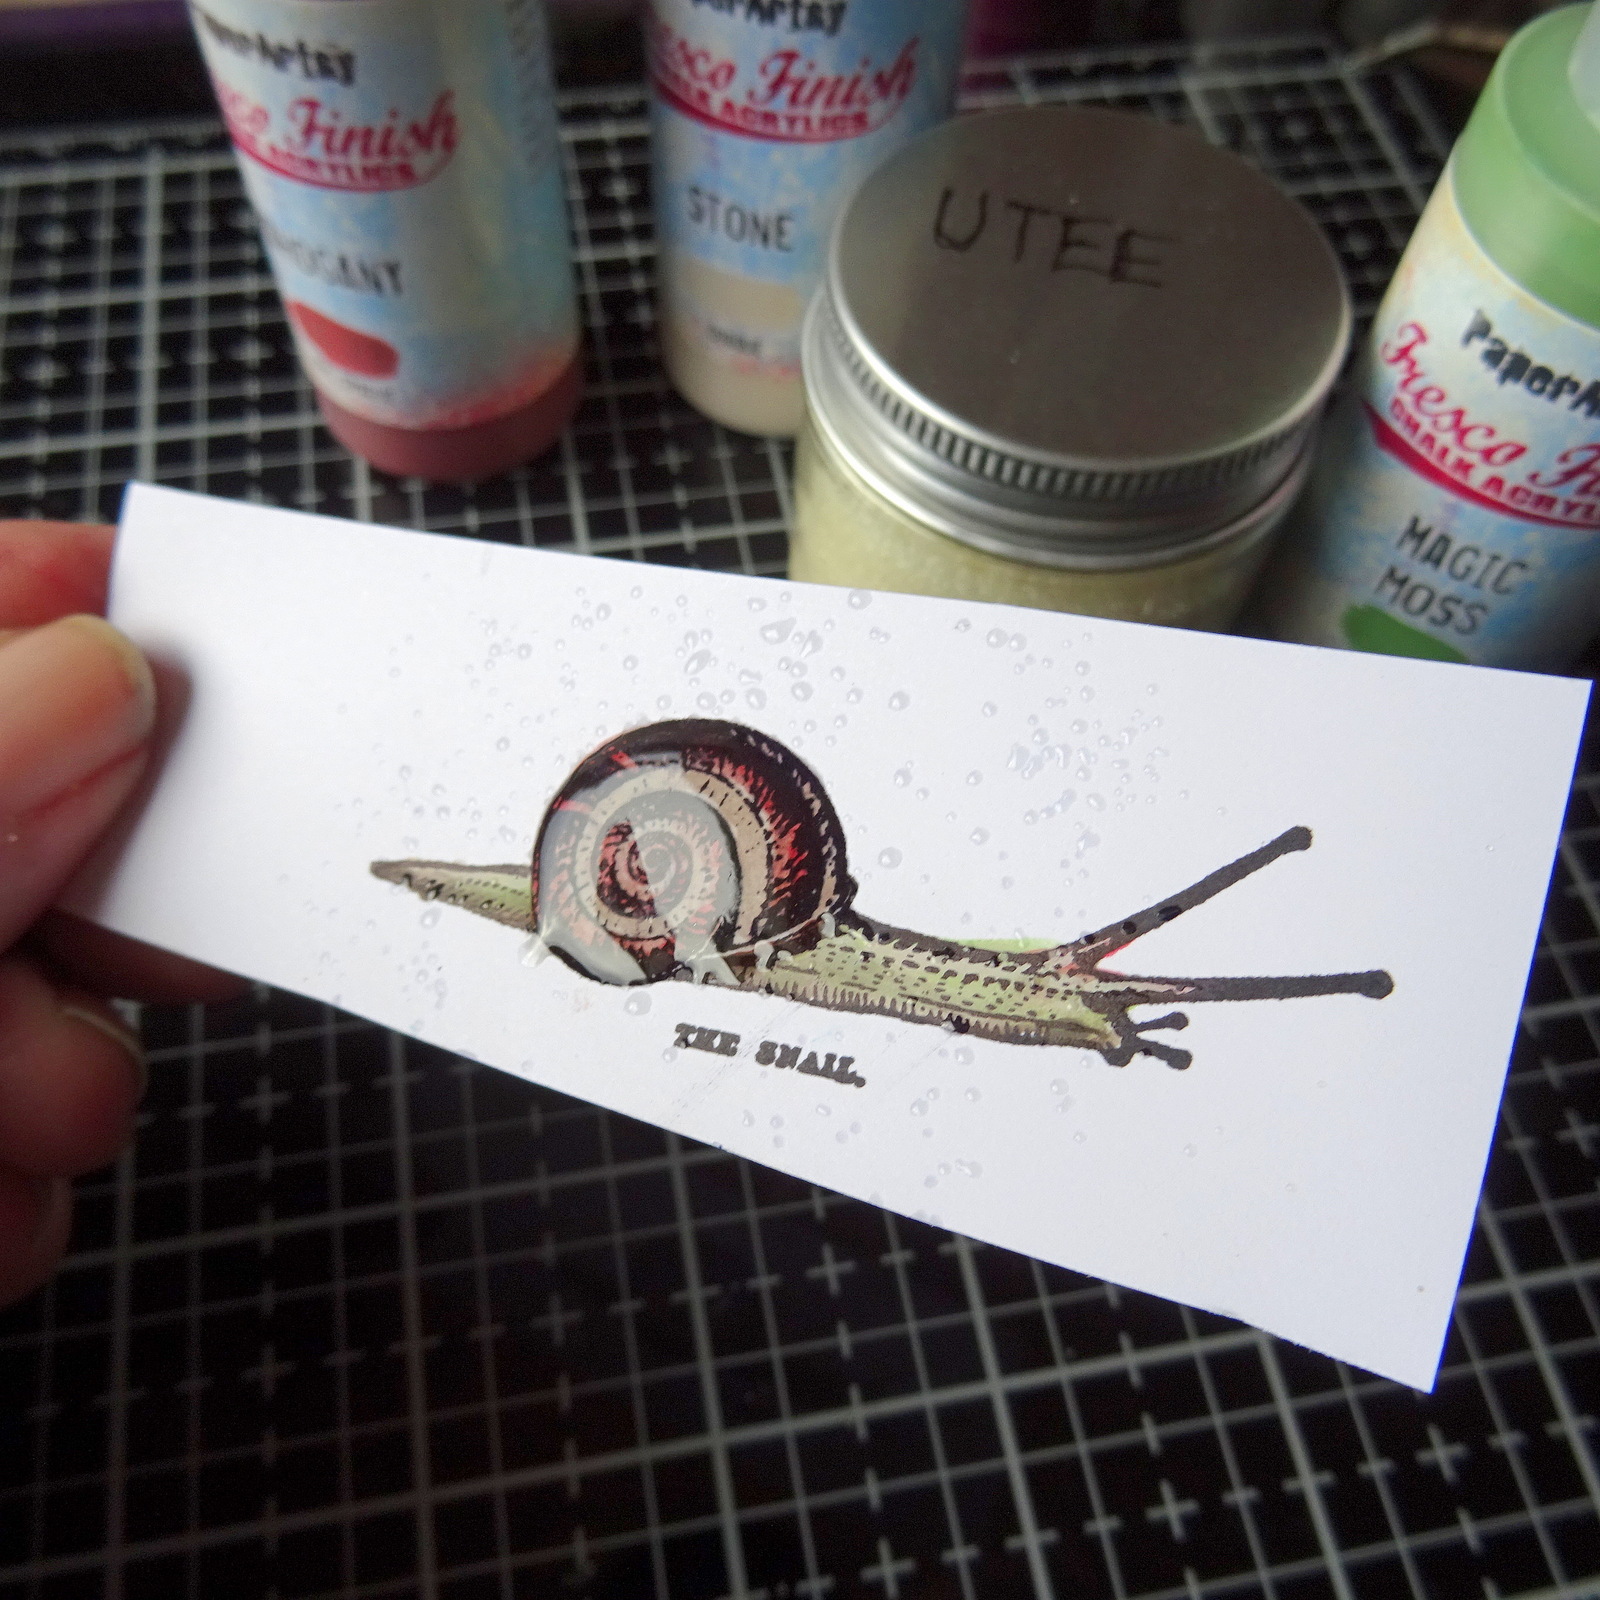
PaperArtsy Infusions tones to create a small background with. And for the soft satin gloss of the mushrooms and the snail's skin I decided to use 
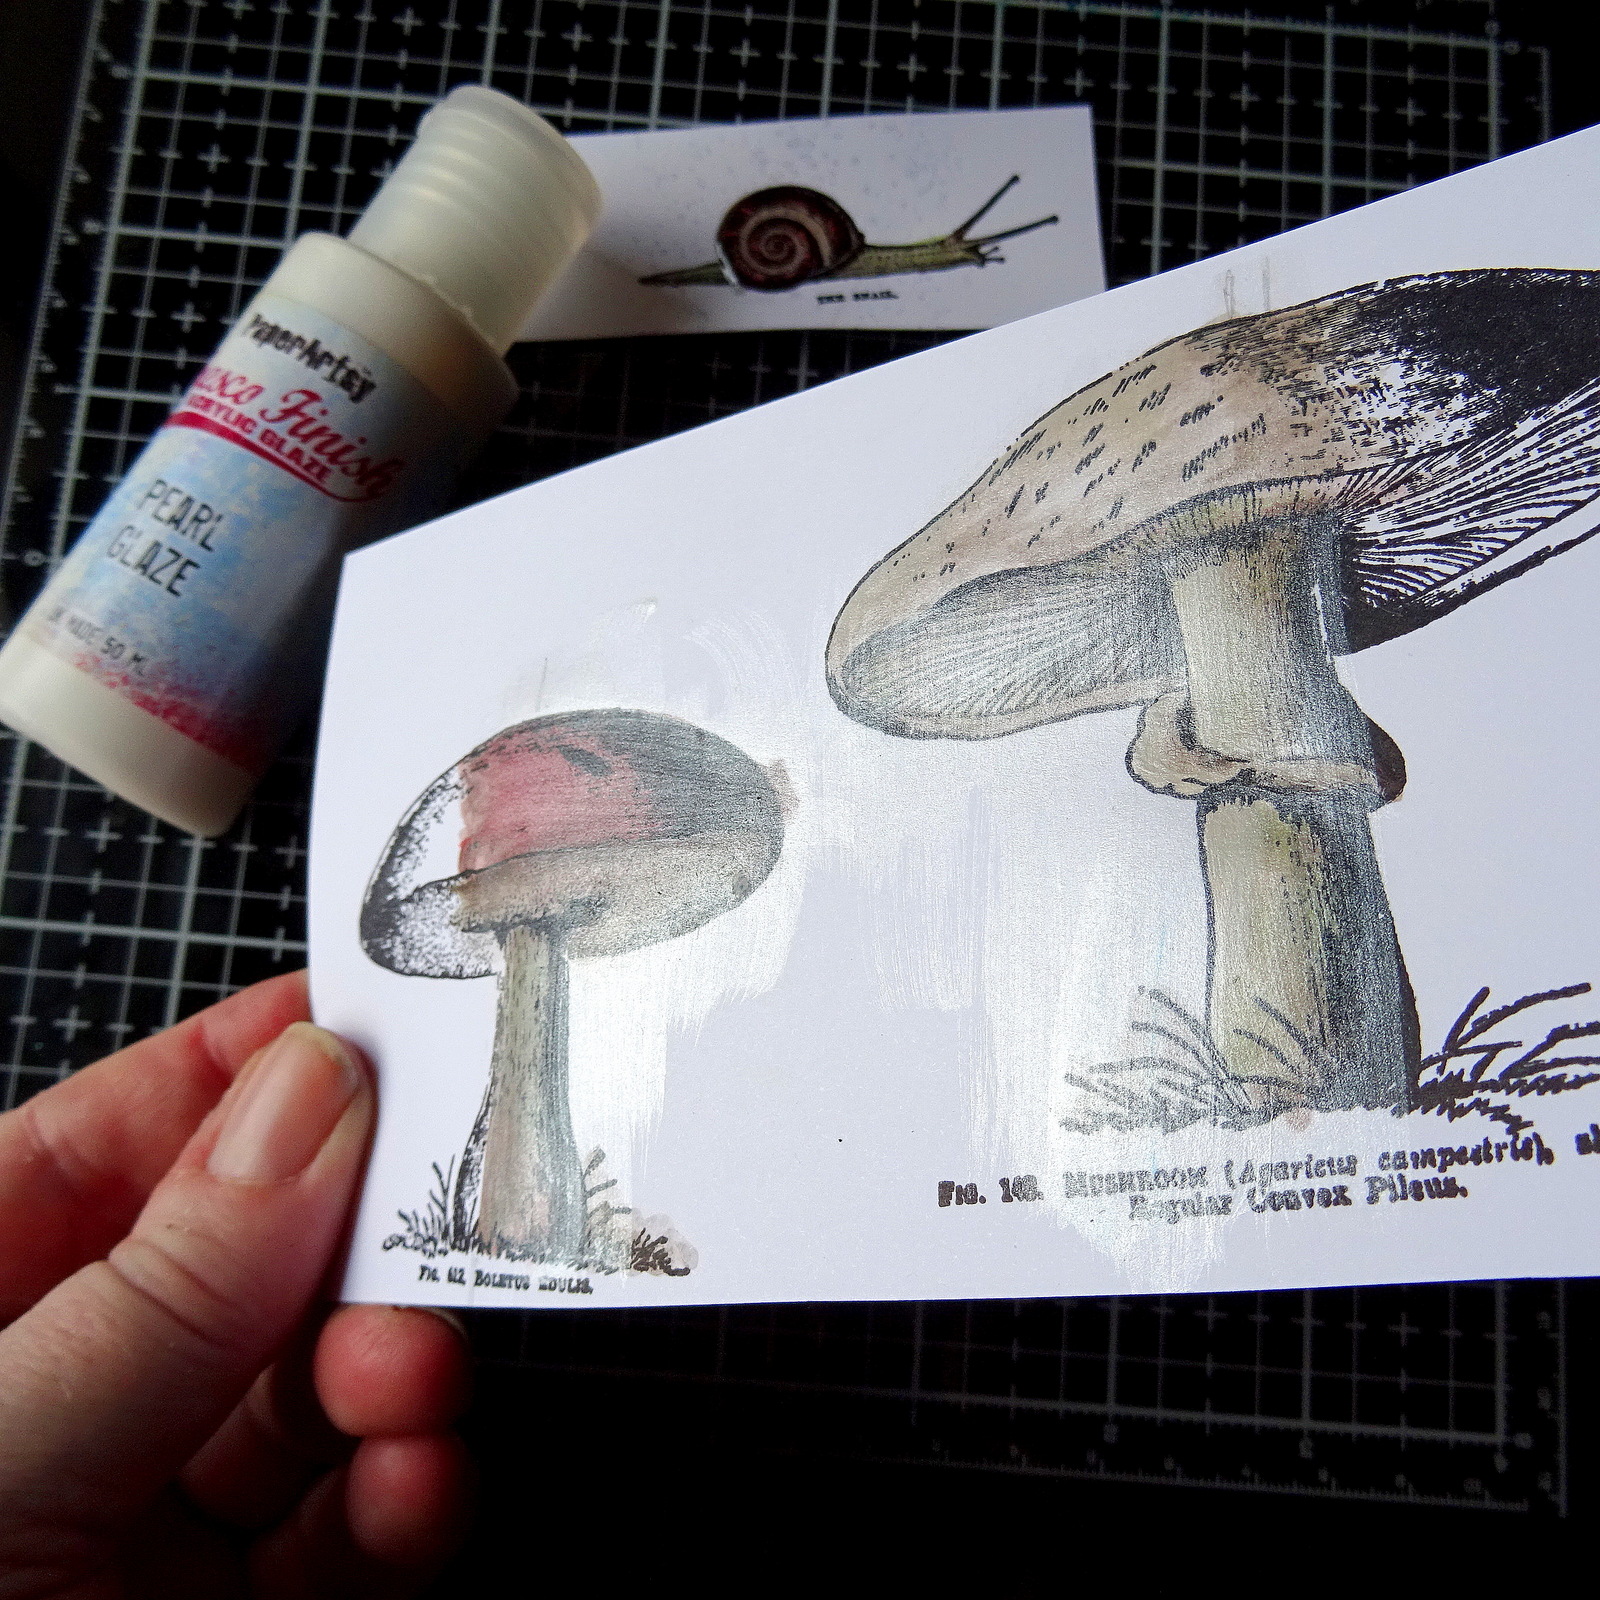
Fresco Finish Pearl Glaze - just perfect for a lightly moist appearance! And for the real bulky gloss UTEE (Ultra Thick Embossing Enamel) is always my first go-to medium! 


I had several small canvases of slightly different sizes to chose from - most of them gathered in one or the other dollar shop - because I wanted the mushrooms to fit perfectly and look kind of "gigantic" in the diorama. This way the look gets drawn right in and makes you feel as if you took a very close magical peek right into a world that only looks tiny to us but is full of wonder and "giants" when seen with the eyes of a small snail. 


As you can see the two canvases only differ very little in size, but actually the little difference was quite a crucial one I found. While the mushrooms fit into the larger flipped over canvas just as a whole, I had to cut off their hats' tips to fit them into the smaller one - and that made them look so much bigger! So I went for the smaller canvas - also because its frame wasn't covered by wrinkled canvas, which would make it so much easier to cover with paint! At that time I wasn't sure if I was going to use all the paints I had gathered, but sometimes mixing in little tones of a contrasting colour makes a huge difference. If you want to go for a more plain look, two greens, a grey, two browns and maybe a blue will do the job just fine. 


My focal colours I picked were Fresco Finish Chalk Acrylics Hyde Park (FF50), Magic Moss (FF130), Blueberry (FF106) for a contrast, Chocolate Pudding (FF42) and Taupe (FF60). 


Putting a bit of time and effort into building your diorama scene will pay off later! So take your time and try different versions until your arrangement really wows you! 

I had stamped the moon and ornate border from the Scrapcosy stamp set ESC24 and the acorns, the maple leaf, the snail and mushrooms from stamp set ESC05 in black archival stamping ink before I loosely fussy cut these to position them inside the flipped over canvas.


My first idea was to use the maple leaves as embellishments on the four corners of the slightly larger canvas, but I found these were way too big and thus would draw the focus from the scene. 


I also didn't like that the mushroom looked a bit lost in its spot and not at all "big". So I stamped the larger mushroom as well and went for a really "crammed" scenery in the smaller canvas. 


And that definitely made a huge difference! I loved how the two funghi looked as if they were way too huge for the small format! And I decided to use only one of the maple leaves on top as a kind of "shrine roof top". 


But I still didn't like how "lost" the snail at the bottom looked. I needed something that would make for a "forest ground". So I only used a part of the acorn twig design from the Scrapcosy stamp set as that had the perfect size and look (and also another acorn on it to add to the scene). 


Oh, yes! Much better this way! The more layers to create with my little diorama, the better! 

Time to create the background to put into the canvas! I stamped the stars from the Scrapcosy ESC24 stamp set onto a piece of heavy printer paper using clear embossing ink. Then I heat embossed these with Emerald Creek Baked Texture Vintage Beeswax to create a resist layer. Once the embossed stars had cooled down, I sprinkled PaperArtsy Infusions The Sage (CS02) and A Bit Jaded (CS03) across the paper and spritzed everything with water to activate the colour crystals. 


I dabbed off any excess using kitchen roll and put the background aside to let it dry naturally. 
In the meantime I painted another printer paper with a thin layer of PaperArtsy Fresco Finish Chalk Acrylic paint Sage (FF66) and heat dried that thoroughly. 


Then I stamped the moon stamp from the Scrapcosy ESC24 stamp set with embossing ink onto the painted paper, added UTEE over the still wet ink and melted it with my heat tool. 
 

I had also stamped the lovely ornate border from that stamp set in Ranger black archival stamping ink four times onto a paper that I had previously painted with Fresco Finish Magic Moss (FF130). 


Once all had dried I fussy cut the moon and the border elements and also cut out the dry background so it fit into the canvas opening and put everything in place to see how my diorama looked so far. I didn't glue anything in place yet (just in case I needed to make a little change of plans). But I was really content so far to be honest. 


Time to get out my stamping platform to stamp and paint all the elements for the little forest scene! The cool thing with the Ranger Stamping Platform is that you leave the stamps and stamped images in position so you can stamp, paint and then stamp over the paint one more time to make the detail you have painted over visible again. The magnets fix the paper in place, so nothing gets out of place during the process. I mixed and watered down the paints on the non-stick sheet of my Ranger Glass Media Mat. Additional tones I've used were: PaperArtsy Fresco Finish Chalk Acrylics Mud Splat (FF61), Stone (FF59) and Mahogany (FF124). 


You can see in the image above how the line work from the images got lost under the paint layers. And the image below shows the difference - after having stamped over the dried paint again. 


I could finally get to the glazing part of my project! First I covered the acorn with four layers of UTEE. This is very easy to do: you cover the part of the image you want to add the UTEE to with embossing ink (I smudged some onto my palette using an embossing dabber and used a detail brush to apply the ink to the image) and then add the UTEE and heat it up. As soon as the first UTEE layer has completely melted and is still hot, you sprinkle more UTEE on top and re-heat. You can repeat this step as many times as you want, depending on how bulky you want the UTEE layer to become.


I did the same on the snail's house. 


The mushrooms and the snail's body received a thin coat of PaperArtsy Fresco Finish Pearl Glaze (FF53). I simply applied that with a soft brush. I hope the light shows the soft pearl gloss! 


The canvas frame got a coat of PaperArtsy Fresco Finish Chalk Acrylic Blueberry (FF106) for a bit of a colour pop in all the green, brown and grey. 


The finished heat embossed snail and acorn got fussy cut as well as all the other parts that were to go in my canvas. Time to assemble my diorama and get it finished! 


I encountered a little problem at that point - I had cut one of the mushrooms too short so there was a nasty gap at the bottom between mushroom and frame. I decided to embrace this little accident and cover the gap with a piece of dyed mummy cloth (you can use any kind of gauze). 


I used PaperArtsy Infusions The Sage (CS03) and A Bit Jaded (CS02) again to dye my small piece of fabric. I just sprinkled some of it onto the dry gauze and then added water from a spray bottle. Then I worked the inks into the fabric by smushing it in the wet ink puddle. Afterwards I used my heat tool for drying and glued it in the corner using DecoArt matte Decou-Page. 


I used sticky foam pads and stacked these to achieve different levels of depth while fixing everything in place.


The tiny star embellishment found its way onto my diorama when I found that the maple leaf "roof" on top of my diorama-shrine should protect a little something in this spot. And I also decided at this point to move the moon a bit to the side instead of going for a symmetrical design. This way a bit of movement gets indicated and one can imagine the moon going down which makes the scene become even more lively. 


I love the various glossy textures and how they define the objects in their very nature! 


The PaperArtsy Fresco Finish Chalk Acrylic Blueberry (FF106) that contrasts and highlights the moon and the ornate border was the perfect choice! It also contrasts the dashes of orange-brown tones from the Fresco Finish Mahogany (FF124) in the scenery and makes them look even warmer.  


I am also really happy with the depth that I achieved by layering the elements each on a different level! 

Using flipped over canvases to create dioramas in is such great fun! And as there are a lot of different sizes you will always find the perfect frame for all the lovely stamp designs from the wide PaperArtsy range! You could also do a diorama in an emptied middle size matchbox, a chocolate box or tin can. Pick your favourite theme and colours and off you go!

Claudia xxx 

No comments: