Showing posts with label Journal Cover. Show all posts

Monday, 28 September 2026

3 Things - Traveler's Notebook {by Martine Dubé}


Hi everyone, Martine here from @martined.crafts with you today for a ''With 3 things'' challenge post.

For this challenge, PaperArtsy sends the same three items to 3 people from our blogging team. It is really interesting to see how each maker comes up with different ideas and techniques with the same 3 items.  Typically we will receive a stamp, a stencil and a colour product. We have no clue what PaperArtsy HQ is going to send, the whole idea is to do something crafty in our personal style restricted to these 3 items.

So let's take a look at what I received from PA HQ ...


When the PaperArtsy package arrived with the ''with 3 thing'' materials, I was surprised to find the Holiday!/New year Theme  stamp set ZA35 from Zinski Art, a Rusty Fresco Finish paint and a snowy stencil PS245. It was still summer  when I received the kit, so I wasn't ready  for winter yet ! That's when I decided to create something totally not holiday themed.


I also used other Fresco Finish paint colours in my project in my project. They are Buff, Magic Moss, Prawn and Snowflake, to complement the Rusty.


Lets go look at what I made.


The first thing to do is prepare the paper for the size of journal you want. I use a sheet of copy paper folded in half and cut my other papers the same size. 300gms watercolor paper is used to make the cover and the copy paper, the grid paper and the 200gms watercolor paper are used  for pages.


Now I have to decide what design I will make for my covers. I choose simple, clean shapes.


On the first one, I decided to do hand drawn lines in Fresco Finish Rusty. It doesn't have to be perfect  lines.


I added some black pen lines for more definition and texture.


On the second cover, I went with circles of all sizes to cover the page using Prawn. I will add some stencilling and black details to this one.


On the third journal cover, I used a paint brush to make some marks with Magic Magic Moss. 


I also added some black line details with a marker later. I outlined the shapes and sprinkled dots for more interest.


Next I prepared the fabric for the traveler's notebook cover. I cut 2 pieces that are about 1.5 cm or 1/2inch bigger then the papers for the journals. I created a template for the oval shapes I wanted to add. This helped me evenly distribute and align them.


I used the same 3 paint colours, Rusty, Prawn and Magic Moss to do my fill the shapes.


I use the stencil on the Prawn circle journal to make dots by using different parts of the stencil. You can even make some outside of the circles like I did.

 
I also added free hand black outlines to help make the circles look finished and tie the covers together.


With the journal covers ready, the next step is to create the booklets by folding everything in one go. This includes the cover and the inside paper pages. You then need to put something heavy on top of the booklets over night so they stay flat. 
    

When I folded the booklets, the edges became uneven so we need to trim them. I cut them to 20cm x13.5cm (about 5.25 x 8 inches).


Before sewing the booklets, we need  to pierce holes using a craft pick. I made a template for easy spacing!


The last step to finish the booklets is to sew them!
                                                       

Now, for the main cover. Using my 3 colors, I stencilled the ovals with different densities of dots using different parts of the stencils.                                        
                                                                        

I love the different effects it creates, while still being cohesive.


Instead of using a black marker on the fabric, I sewed some black lines around my ovals to create texture.


Don't forget to prepare the pockets before sewing around the cover! With all the structure done, I was then ready to work on my focal elements.


I stamped and coloured my images using the same colours of Fresco Finish paints. I know my stamping look bad, but I will stamp again once they are all colored. Stamping this way ensures the lines will be on top of the colours and the images will look nice and sharp.


The 3 bears worked perfectly for my 3 journals and the Fresco Finish Rusty makes a great bear fur color! Then I fussy cut my images and placed them on my 3 booklets.


For the fabric cover, I wanted a fabric embellishment. This step is always fun to do. I used one of the images I have coloured, scanned it and printed it on fabric with the help of freezer paper. Freezer paper can be found in sheets or rolls, it's used by quilters for paper piecing quilting. Since mine is a roll, I cut a piece the size of my copy paper and iron my fabric on it. I then put a piece of tape at the end going in the printer to help it stay put when printing, otherwise it will get stuck in the printer.


Before printing, I set my printer to enlarge the image 40%. I felt the bigger size worked better with the ovals, and made it different than the inside one.


Before sewing the contour of the cover, I sewed the bear on it. Since my cotton was on the thinner side, I used some double sided adhesive (for fabric not for paper) to secure my fabric to a second piece of cotton, ironed both piece together and then stitched it all around.


Here's my traveler's journal with 3 little booklets made of different kinds of paper!  You can sketch, paint or write and in the pocket you can collect tags ,ticket, stickers and much more.

I hope this project will inspire you to create your own and for anyone that is not into sewing, you don't have to made the cover out of fabric, it can always be made out of cardstock.


Meet the bears!


Thanks for stopping by hope you enjoy!
Martine


Facebook: Martine Dubé
Instagram: martined.crafts
Pinterest: Martine Dubé

Thursday, 7 March 2024

2024 With 3 things: Ring Bound Journal Cover {by Autumn Clark}


Hi everyone!  It's Autumn Clark from SewPaperPaint with you today to share my portion of the 'With 3 Things' challenge.  I hope you're following along with the blog posts to see what Liesbeth created yesterday, and what Ann has in store for you tomorrow with (these same) 3 things.  


We bloggers generally have an idea of what we will make, but this challenge was so exciting to me because I didn't pre-plan or sketch out ideas.  I received my 3 Things and immediately decided I would make a mini book/junk journal, covered in Crunch Waxed Kraft Paper.  The funny thing is that Liesbeth and I had the same idea!  Luckily I checked to see what she was up to before starting down that rabbit hole - ha ha!  Otherwise, I would have created a book almost identical to hers.  :)  Well done Liesbeth!


I had to completely switch gears and decided, much like Ann, to approach these new products with playful experimentation.  My first idea was to create some pocket envelopes with the Crunchy Waxed Kraft Paper for a junk journal spread.  I used a Tim Holtz die by Sizzix to cut them.  I wasn't sure if I liked the crinkled version or not.  I had intended to fill the envelopes with postage stamps, but the Kraft Waxed Paper wasn't as transparent as I'd imagined and the postage didn't show through very well.  I still love the envelopes and will incorporate them on another page in my journal.  


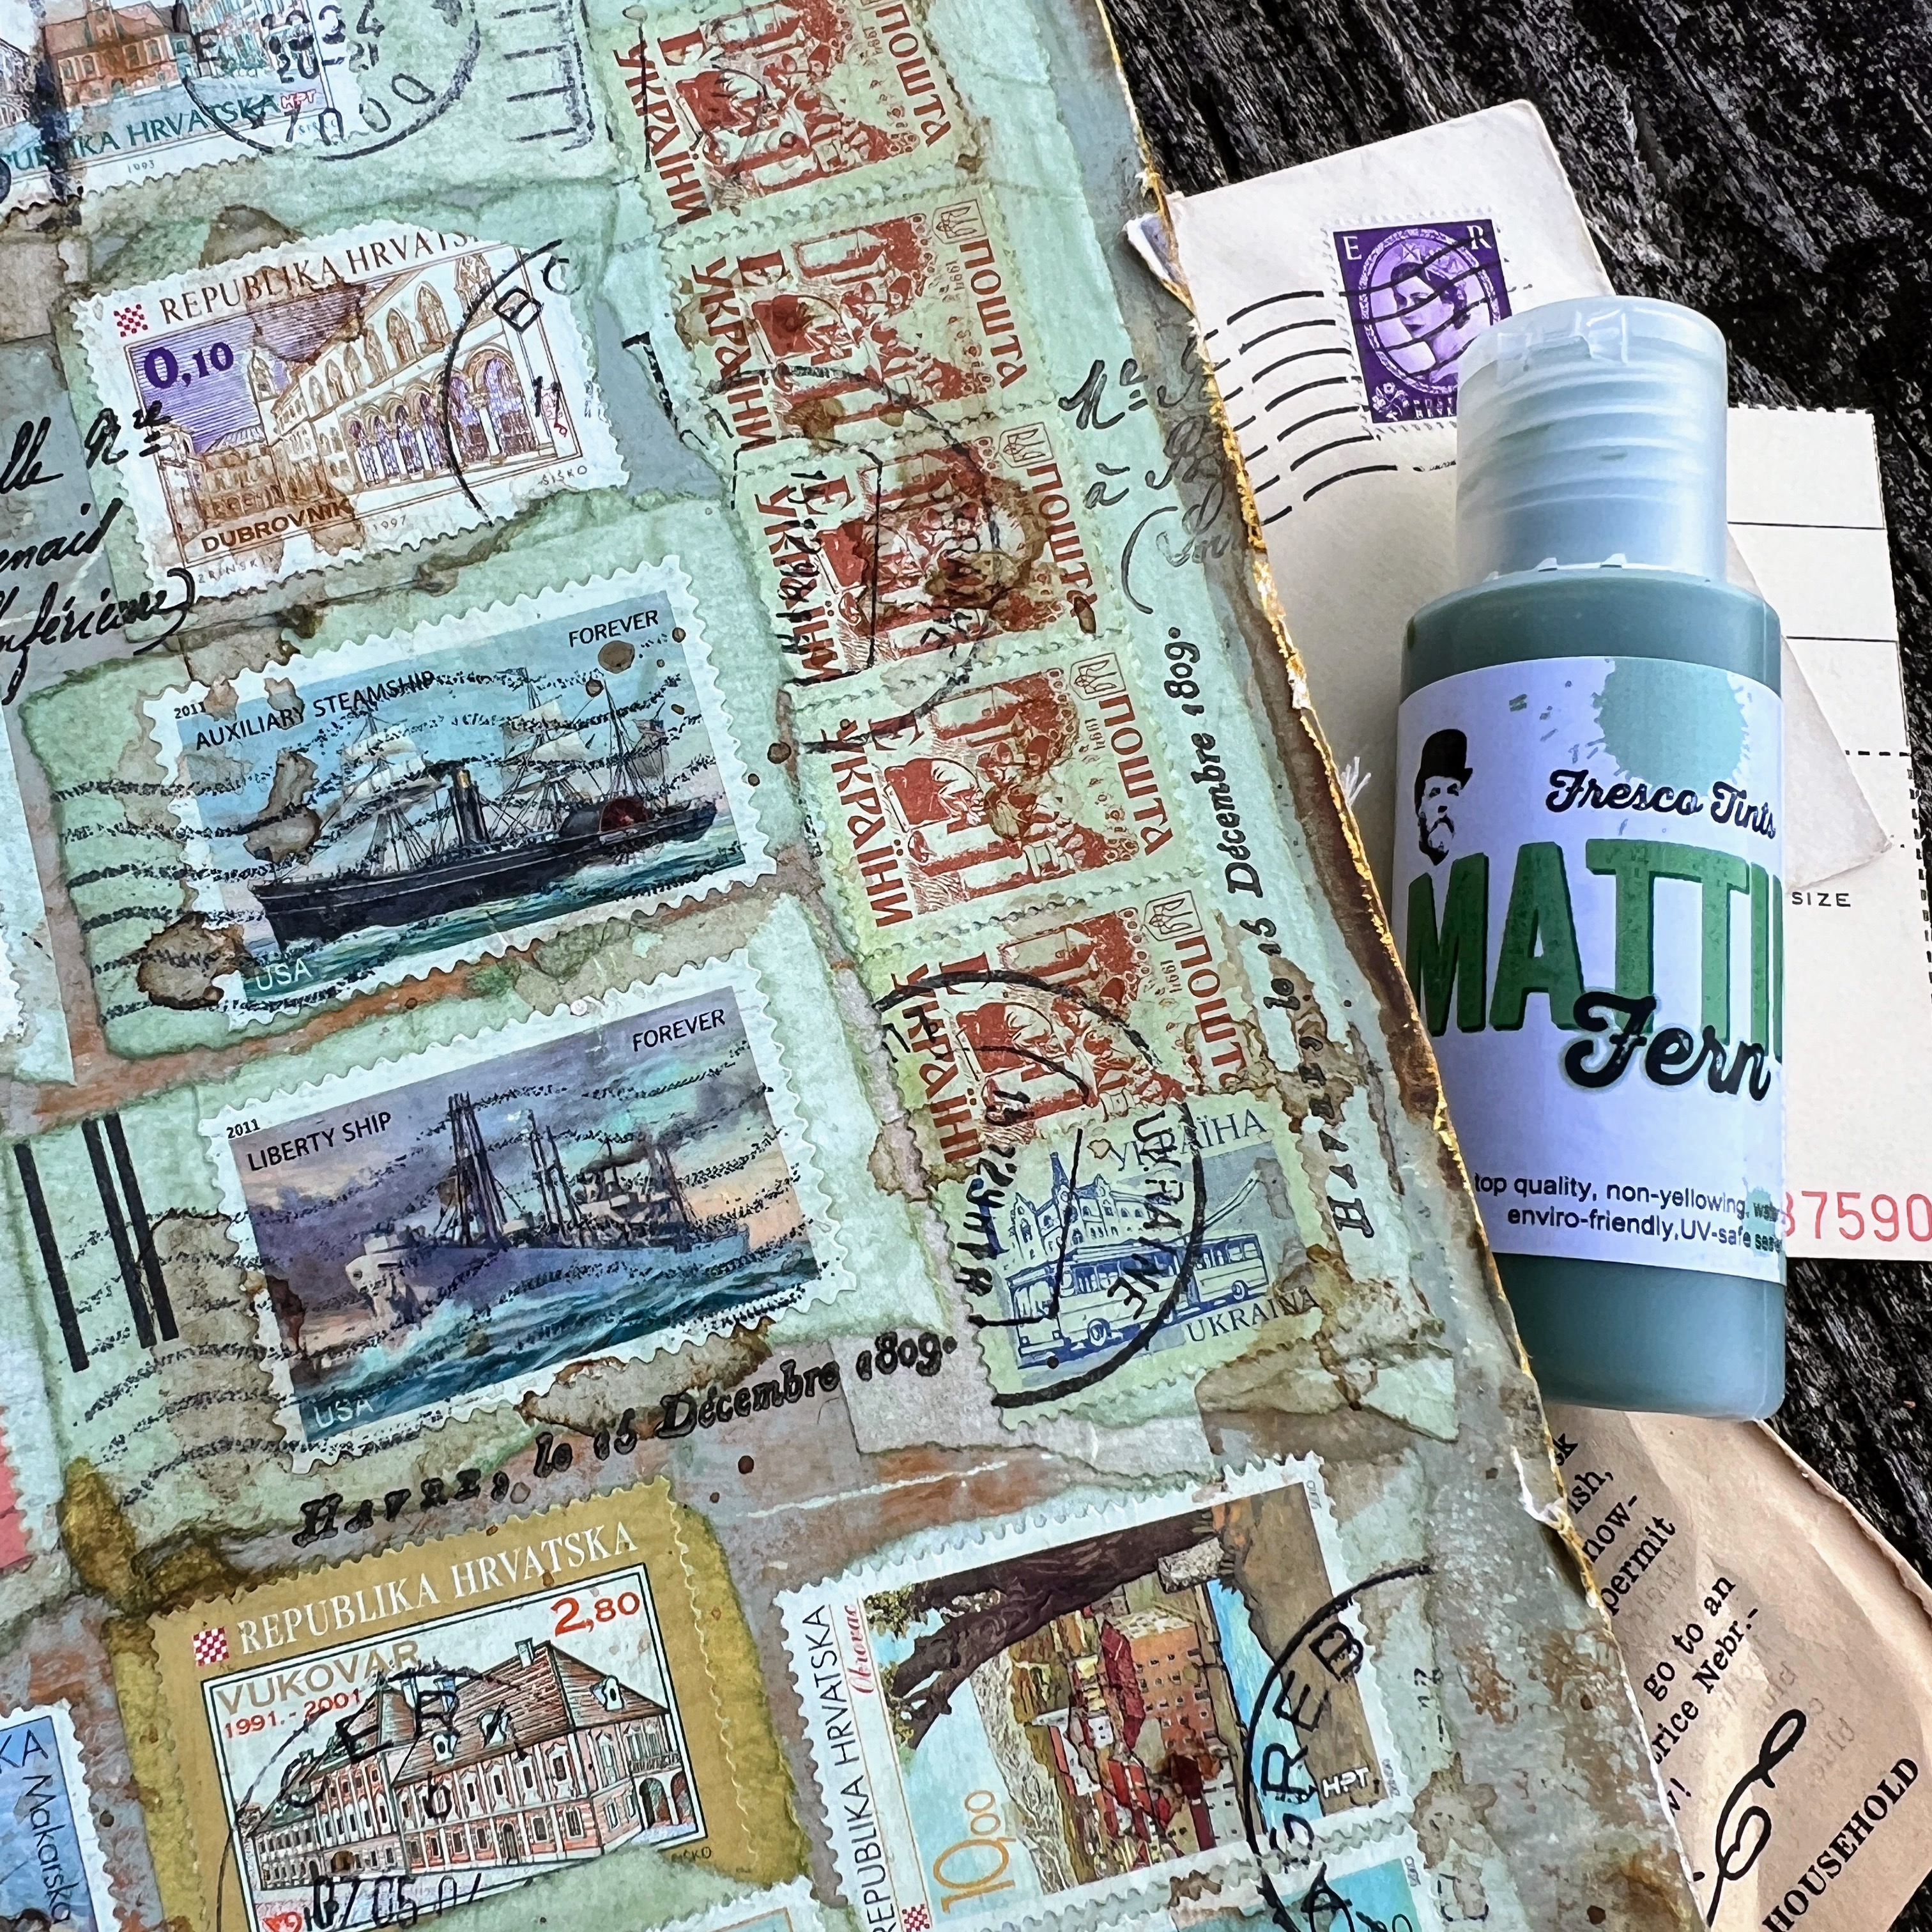
As we kick off the Mattints Topic soon ... I switched gears and decided to experiment with Mattints in Fern.  In the introduction post to this fab new product it states, "Mattints are a TINTED MATTE GLAZE and GLUE."  I was a little sceptical about the glue properties because the product is very thin.  But I had a brave moment and decided to test it out right on the cover of my cardboard junk journal from THIS POST.  You can see how I created the simple ring bound journal from gel printed cardboard pages.


I squished Mattints in Fern right onto my surface as I normally would do with matte Mod Podge, my go to collage medium.  


I started brushing the medium around in small sections then added a cancelled postage stamp, then brushed more Mattints over the stamp and worked my way until I had covered the entire panel. 


I was inspired by my dear friend Barbara, from @alteredart45, who had created this awesome postage roll in Fodder School.   She and I found these cool large spools in a  mountain shop in NC and always intended on making a scroll with them together, but after years of neglect she put hers to good use!  


I let my panel sit for several hours and came back and was completely blown away by the result!  Not only was the entire piece tinted beautifully in the Fern color, but the glue properties worked WONDERFULLY!  And the best part was that the surface did not even appear to have been glued.  To touch it, it felt like rubbing paper, unlike the "silky" feeling when you use Mod Podge.  That's why this product fits well with the PaperArtsy Fresco Chalk Acrylic family at PaperArtsy, because it's wonderfully MATTE!  :)    It made me curious if regular matte medium was the same finish, so I did a test and it was also silky, though less shiny than Mod Podge.  Side by side the Mattints was noticeably different.  WOW!


I pulled out the awesome new HotPicks stamp set 2401 (HP2401) and used the awesome collage style text to blend the postage stamps together, doing first, second and third generation stamping in Versafine black. And of course, as the Fern Mattint is a matte finish (ie toothy), it is also super easy to directly stamp onto the glaze too!


I love that this stamp set has so many font styles and options for subtle background stamping, but could easily be used as a focal element too.  


Next, I watered down the new Just Walnut Infusions powder to create a stain and brushed it randomly over my post to further blend and age it.  This complimented my journal very well because I had previously dipped my pages in Infusions in The Sage and Golden Sands to distress all of the white edges and bare cardboard that wasn't gel printed.


I had initially hoped to add a collage cluster of 3D elements over the postal collage using the Crunchy Waxed Kraft Paper envelopes I had cut, but I couldn't bring myself to cover the postal collage and was afraid I wouldn't enjoy a heavily dimensional cover, since I had many more pages within the journal on which to create.  In the end, I crunched up a long strip of the Waxed Paper to make it resemble washi tape.  I reinforced the binding edge with the faux tape and just love how it looks, resembling leather.  My next project is going to be making a sewn binding with CWKP as the spine, sewn beautifully in place!  


After I saw how beautifully the Mattints in Fern looked on my front cover, I repeated the same style of collage on my back cover.  I wish I had incorporated the CWKP on the back cover of my journal, but since this was sheer play and experimentation, I hadn't thought that far in advance  and hated to cover up the beautiful stamping.  


Reflections....

I've loved this mix up of our normal blogging style here on the PaperArtsy blog and the challenge of creating with an identical brief and two other fabulous designers.  I really hope our posts will encourage you to play and experiment with these products yourself, because let's be honest - that's where the creative magic really comes out!  xx, Autumn

YouTube: SewPaperPaint
Facebook: Autumn Clark
Instagram: @sewpaperpaint
Pinterest: SewPaperPaint