2020 Topic 16: Hinged
What a unique take on the topic. Helen has solved the mystery of how to create these clever books; I've always wondered how they were put together. What a fabulous use of Lynne Perrella stamps and such a unique way to give a gift
~ Keren.
Hi everyone, it's Helen with you today, and I'd like to share with you a little bit of magic! I don't know about you but these Magic Wallets used to fascinate me as a child. They rely on some very clever hinging which I've explained with step by step photos, but if you prefer a video, there's plenty online. Getting the ribbons in the right place can be a little fiddly, but well worth the effort.
I had a bit of a disaster with my photos for this post - some of them disappeared off into the ether never to be seen again - which is why the ribbon placing is shown on blank card not the finished pieces. Apologies for that!
These are the two covers side by side.
I've mocked up the covers here. Cut two lengths of ribbon in one colour and lay across as shown. Make sure the gift card or money will sit under the ribbon.
Fold under on the right and tuck the other ends under the left hand cover.
Flip over and stick to back of covers with tape or glue making sure the covers line up.
Take the other colour ribbon and lay in a cross on the left hand cover. The crossed ribbons must lie within the red ribbons. It's a good idea to secure with washi tape.
Tuck the right hand tails under and behind the right hand cover.
Flip over and stick.
The hinging is now done. You would do this after you've decorated the inside..
...so it looks like this.
I've used Fresco paint to colour: Snowflake, Zesty Zing, Cherry Red and Deep Sea.
The outside covers are cut from separate card. They are painted, stencilled and stamped, then the faces are stamped onto card, coloured, cut out and stuck on.
Where I've stencilled a lighter colour over a darker colour as here, I've stencilled first in white and then gone over in yellow.
Stick both covers onto the boards thus covering the ribbons.
The card is a blank credit card.
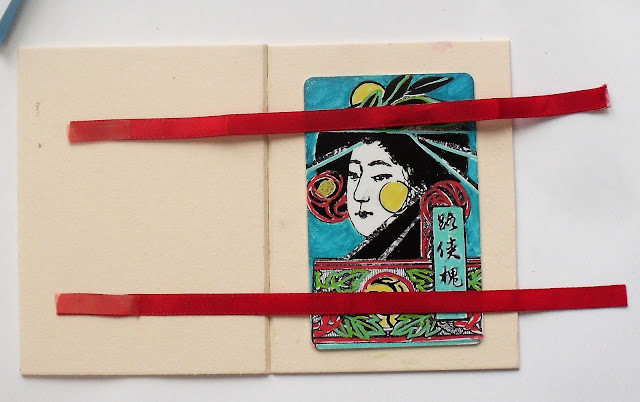
This is how it works: put your card in.
Close the wallet like this, bringing the right hand cover over.
Open the wallet.
And, hey presto, the card's moved to the other side!
Fun, eh? Although it looks complicated, once you've made one it gets easier and they're worth the effort. Great way of giving money/vouchers to children or teenagers, well, anyone really. It just adds a little something to the gift. Using washi tape or low tack tape to hold the ribbons in place while sticking is a great help.
Hope you've enjoyed this!
Helen.
Blog: A Splash of Colour


.jpg)
2 comments:
This is so clever Helen! Love it!
I just wish I could have a play with this book! I can’t access the video but would love to watch.
Post a Comment