
2019 Topic 18: Shaving Foam

Our
bloggers have found this topic a bit of a challenge, and very messy!
But it smells nice, and Corrie has certainly put this foam through its
paces with inks and stencils to create some interesting marbled
backgrounds! ~ Leandra.
Hi everyone, it's Corrie here with you today, and I'd like to share the projects I made with the shaving foam technique.
I
chose this topic because I had never tried the shaving foam technique
before. I really enjoyed creating the final projects with the
backgrounds I made with the technique but making the actual backgrounds
not so much. It is very messy ! On the upside: it smells really nice !
So let's start !

These are the backgrounds (all on PaperArtsy {Smoothy Card}
stock) that I created. I used Distress Oxide reinkers and a cheap can
of shaving foam. If you want to do this, make sure to use foam and not
gel. Here is the first finished project:


Start
with a plastic tray or paper plate, squirt on the shaving foam and
smooth out a little. I used a pallette knife for this. Then use your
reinkers to drop colour all over the foam. I used three shades of blue:
{Tumbled Glass}, {Faded Jeans} and {Broken China}.
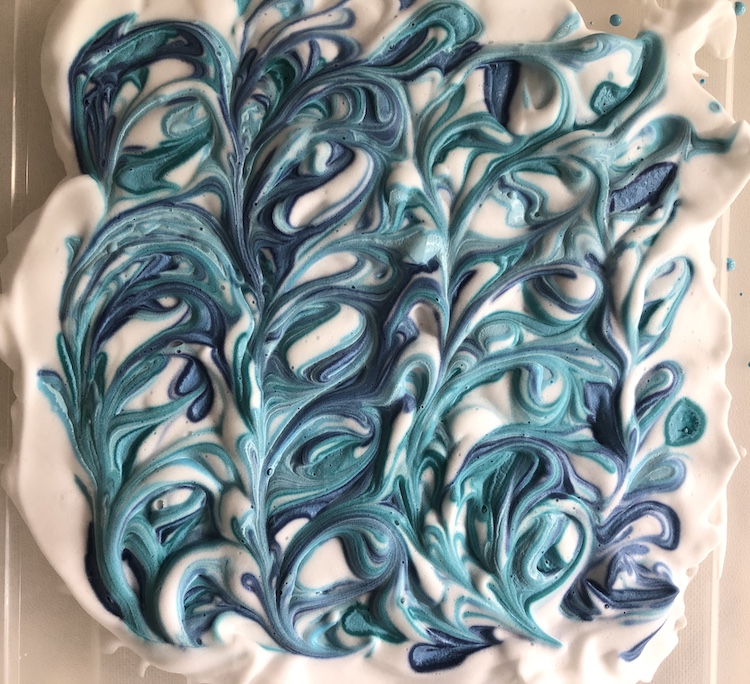
Next
use a cocktail stick or a knitting needle to create patterns, making
sure not to mix the colours up too much, then put your card in and press
gently into the foam and take it out again. Use an old credit card to
scrape off the foam and you end up with a nice marbled background.

I forgot to take a photo of when it was just printed. So here's one where I already started decorating it.


I stamped the background randomly using I&D {MN29} and {MN75} and then used a brayer and Fresco Finish Chalk Acrylic in {Antarctic} to tone it down a little. I was then ready for the main image:
I stamped the background randomly using I&D {MN29} and {MN75} and then used a brayer and Fresco Finish Chalk Acrylic in {Antarctic} to tone it down a little. I was then ready for the main image:
I altered the image by masking off the butterfly on his head and replacing it with a hat.


He is from I&D set {Wings2/WGS2}, the hat and the sentiment from I&D set {Pierrot2/PT2}.

Interesting
fact I saw on YouTube: if you leave your foam with ink sitting for 4-5
hours and then take a print, the effect is totally different as you can
see in the photos above. I think I prefer this to the sharp marbling.

For the next project I used greens and a beige: {Antique Linen}, {Twisted Citron} and {Peeled Paint}.

I used these ATC's for the next project:

These were made in the same way as the card by stamping the background randomly with I&D stamps {Man of Numbers 2/MON2} and {MN23}.


For the main images I used I&D {Wings2/WGS2}.
I added some colour the the faces and stamped the big butterfly with
Distress Oxide Ink so I could add a little more colour to it. I just
glued it over the top for the finished result.


This card is my favourite of the four projects I did, I love the colours and those girls are sooo cool! Here's how:

I used the colours {Mustard Seed}, {Fossilized Amber}, {Spiced Marmelade} and {Carved Pumpkin}. First I took some prints as before and then I used a stencil {PS016} by Emma Godfrey to make another background:

Cool I think. So this became the background for my girls.
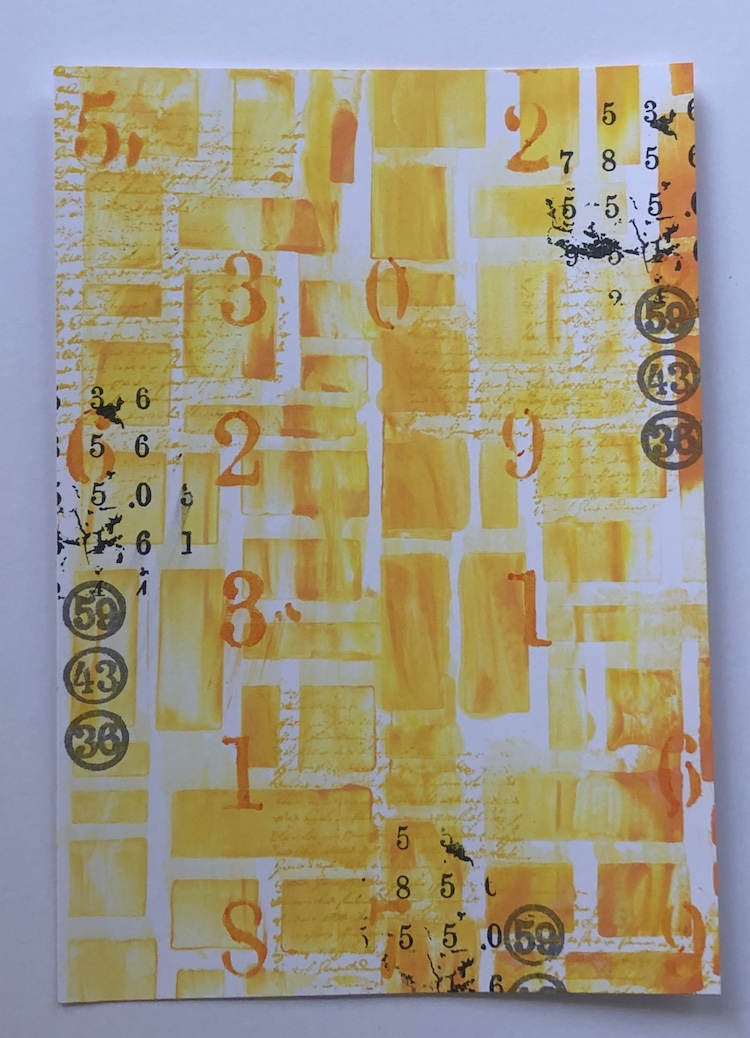
Again I stamped the background randomly using stamps I&D {MN23} and {MN75} and a small stamp from I&D {Pierrot2/PT2}. To add some more interest I added some stencilling with PA stencil {PS021}.

I
decided that because they are "mad as a hatter" to add some bunting to
the top of the card. I just used one of the hats from the set for this.


I
also have a bonus project. After I took the prints that I wanted I used
the leftover colour in the shaving foam and scraped it over another
piece of Smoothy Card through a PaperArtsy mask {PM007} by Emma Godfrey to
make another background. I then used this background for a journal
page. You can see all the backgrounds I made in the photo at the top of
this post.

Again
I created this in the same way as the other three projects by stamping
and stencilling the background. I used PaperArtsy stencil {PS021} and stamps I&D {MN23}, {Man of Numbers2/MON2}.

I added the Man of Numbers and the sentiment along with some doodling along the edges and it was done.


As
I said at the beginning, I really enjoyed making the finished projects
on the backgrounds I made with the shaving foam and reinkers and it
smells divine ! It is very messy though so if you are thinking of doing
it make sure you have enough kitchen roll to clean up. I do like the
results; my favourites are the blue ones I took after the foam had been
sitting for about 4 hours. The foam disintegrates and takes the ink with
it, it looks a terrible mess but makes lovely backgrounds.
Thank
you so much for spending some of your time over here at the blog today!
I really appreciate it. Please visit me in my other locations too:
Instagram
: https://www.instagram.com/corrie.herriman/
Pinterest
: https://nl.pinterest.com/corrieherriman/
YouTube
: http://www.youtube.com/c/CorrieHerriman


7 comments:
These are amazing Corrie. And so colourful too!
Love your colour combos. And the use of stencils is so clever and striking!
Stunning swirls of marbling!
Alison x
Fabulous creativity , Corrie . You have created some lovely effects on your backgrounds with the shaving foam and oxide Reinkers. Looks like you had lots of fun . TFS x
Love the marbling effect Corrie!
Corrie your finished projects look fabulous with those shaving foam backgrounds! xx
Wonderful projects Corrie and such great ideas and range of colours, love it all!!
Post a Comment