Showing posts with label MN75. Show all posts

Thursday, 19 August 2021

2021 Topic 10: My Favourite Colour with Minis {by Jennie Atkinson}

  2021 Topic 10: My Favourite Colour


There are always some classic colour combinations, and a soft blue and sepia are one of those combinations. Jennie uses colour with such a delicate touch, and you can see from this post how she manages a deft touch and uses white space cleverly too, with the steps explained in detail here today.
~ Leandra

Hi everyone, it's Jennie (Live The Dreamwith you today sharing my favourite colour ..... well actually two favourite colours! 

It will probably come as no great surprise that my favourite colour is tea dye. No matter whether I am creating something vintage or more modern, there will always be some tea dyed paper, lace or flowers somewhere in the mix. It is always a great base for any PaperArtsy stamps but also goes well with other colours too. And so I have added in another favourite - turquoise. My little pot of A Little Bit Jaded Infusions has been my go to so many times. 

I recently used some rather thick watercolour paper and decided to cut some up to make a journal. This is my first double page spread and I have used PaperArtsy Minis as background stamps, as individual layers and the main focus.


This detail shows a little more clearly how the text stamps have been used both in the background and for the layers.


And I have followed through with the same stamps on the opposite page but with less layering.


And the colour all came from this little pot of Infusions:


There is a bit of a French theme going on here! These are some of my most used Minis and all work so well as either background and focus stamps:


MN 45                                        MN79                                        MN23


MN74                                    MN72


MN85                                MN75


They are a good size for using up scraps of tea dyed copy paper - sometimes straight edged, sometimes torn.


And I use a selection of dies to cut different styles and tags. 


It also makes it easier to isolate individual words or parts of the stamp.


And so to the journal pages. I started with some old French text paper and Sara Nauman's stencil.


This gave me a good base for then adding the Infusions. I do use a lot of water which is why this really heavy watercolour paper is so suitable. I just keep spritzing and mopping up until I have the colour I want. I also like to move the Infusions around so it settles into the areas of the stencilled texture paste.


A Bit Jaded (no longer available)

So many of the Minis make superb background stamps - I find it easiest to ink the area of the stamp I want and then use my fingers to press the image onto the page.


It is easy to isolate small parts of the stamp - the postage frank on the larger stamp and the small flourish on the text stamp as this detail shows.


Once dry I was able to layer my pieces, adding in some additional embellishments to compliment the colours.


As I had used dies to cut my focus pieces I was able to also cut some light card so they were a bit more robust for layering.


The first two pages complete for my new watercolour journal. I may concentrate further on the French theme and include memories of a trip to Paris and our cycling holidays in France. These stamps are just a super size for this small page (approximately A5) and useful for both general journalling but also scrapbooking memories. 

So do check out the Ink and the Dog Minis ! There is an amazing range of text, sentiments, flowers, feathers, background and travel themed stamps to name but a few. 

Jennie x

Blog: Live the Dream
Instagram: atkinsonjennie
YouTube: Jennie Atkinson
  

Friday, 28 February 2020

2020 #4 Mighty Mica: Beautiful moments with EGL {by Corrie Herriman}

2020 Topic 4: Mighty Mica


Introduction:
The composition of this canvas has so many delicate details to be appreciated - tone on tone stamping, using white or light paints to knock back a darker paint colour, using a stamping platform to great effect, coloured pencils, and of course, mica! Corrie shares each step so well, I'm sure by the end you will see how all those steps make a difference!
~ Leandra

Hi everyone, it's Corrie with you today, and I'd like to share with you a 20 x 20 cm canvas that I made with the beautiful new stamps by Gwen Lafleur. 

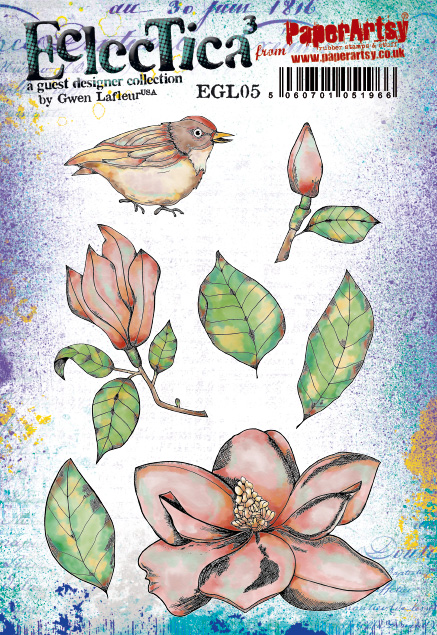
I was so excited when I received this gorgeous stamp set {EGL05} which is one of my favourites from the new release. I had never worked with mica, apart from with mica powder, so I went in search of some sheets it as I really wanted to try it. Unfortunately I could only find one pack and it was dark brown; not what I wanted so it was back to the drawing board to come up with another idea. When I found some mica flakes in the back of the cupboard that I had never used, I decided to use those instead.


This is what I came up with. It is a 20 x 20 cm (about 8" x 8") canvas. It was fun to make and putting the pieces of mica on the flowers was a labour of love. Here's how it came together:


I really enjoy colouring with Copic Markers but for this project I thought I would do something different. I stamped the whole set onto some {Smoothy Card} and left all the stamps in the stamping tool so I could re-stamp them later in the exact same spots. 


I used PaperArtsy Fresco Finish Chalk Acrylics to paint all the stamped images. Looks a mess like that but wait and see ! I used these colours : {Snowflake}, {Nougat}, {Gold Rush}, {Tinned Peas} and {Blue Bayou}. I used these same colours throughout the project. 


Remember I left all the stamps in the stamping tool. Here's why: all the stamp lines were gone because I painted over them, I just had to put it back into the stamping tool and re-stamp. I used Archival Ink in {Jet Black} to stamp before and after painting.


I then added a little bit of shading on all the images using coloured pencils. This worked a treat ! I then cut all the images out and went around the cut lines with a black marker to make it look like I cute them out perfectly!


Next I sat down with a cup of tea and added mica flakes, one by one to the flowers and the buds, so all the blue paint is covered in mica. It is such a shame that you can't really capture the shimmer/glitter in a photograph very well. Believe me though, it is very pretty and sparkly ! Next I turned my attention to the canvas.


I decided to keep the background really simple because I wanted those beautiful images to be the stars of the show. I painted the canvas with some Fresco Finish Chalk Acrylic in the colour {Nougat} and then added some stencilling with mask {PM008} By Emma Godfrey using the {Blue Bayou} Fresco Finish Chalk Acrylic. 


Because I wanted the images to shine I knocked the stencilling back with more Fresco Finish Chalk Acrylic, using the {Nougat} again and also the {Gold Rush}. I mainly used my fingers to do this. I also decided to add some dictionary words because I thought it would go well with my canvas. They are the words: Flora, Natural and Fauna.  After this I added the images together with a part of a word chip by Tim Holtz which I coloured with a Copic Marker to get it rid of the stark white.

When the images were adhered, I used some dimensional tape as well here and there, I thought it needed something else so I added a tiny bit of stamping. I used some Ink & the dog minis for this. They were {MN56} and {MN75}. 


As I said I really love this stamp set by Gwen Lafleur and I really enjoyed using it. I can see lots of other uses for it, including birthday cards, art journal pages (my next project) and even tags and ATC's. I really like how my canvas turned out and wonder how it would have looked in different colours and with maybe just a background made with mica powders or mica sprays. I hope I gave you some ideas to have a go yourself. 

Thank you very much for being here today and I hope you'll visit me at my other locations too : 

Wednesday, 13 November 2019

2019 #18 Shaving Foam: Wings, hats and numbers with I&D {by Corrie Herriman}

2019 Topic 18: Shaving Foam


Our bloggers have found this topic a bit of a challenge, and very messy! But it smells nice, and Corrie has certainly put this foam through its paces  with inks and stencils to create some interesting marbled backgrounds! ~ Leandra.

Hi everyone, it's Corrie here with you today, and I'd like to share the projects I made with the shaving foam technique.
I chose this topic because I had never tried the shaving foam technique before. I really enjoyed creating the final projects with the backgrounds I made with the technique but  making the actual backgrounds not so much. It is very messy ! On the upside: it smells really nice !  So let's start ! 


These are the backgrounds (all on PaperArtsy {Smoothy Card} stock) that I created. I used Distress Oxide reinkers and a cheap can of shaving foam. If you want to do this, make sure to use foam and not gel. Here is the first finished project:


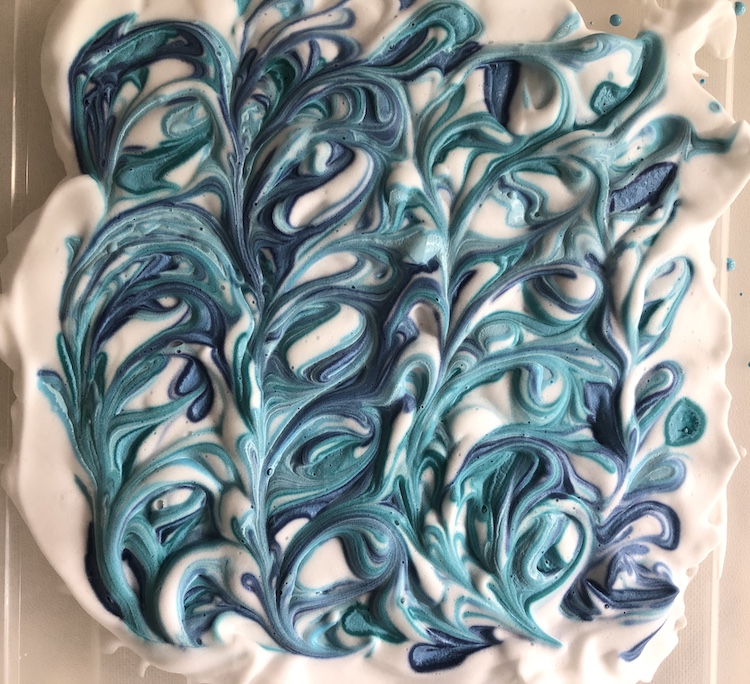
Start with a plastic tray or paper plate, squirt on the shaving foam and smooth out a little. I used a pallette knife for this. Then use your reinkers to drop colour all over the foam. I used three shades of blue: {Tumbled Glass}, {Faded Jeans} and {Broken China}.


Next use a cocktail stick or a knitting needle to create patterns, making sure not to mix the colours up too much, then put your card in and press gently into the foam and take it out again. Use an old credit card to scrape off the foam and you end up with a nice marbled background. 


I forgot to take a photo of when it was just printed. So here's one where I already started decorating it.

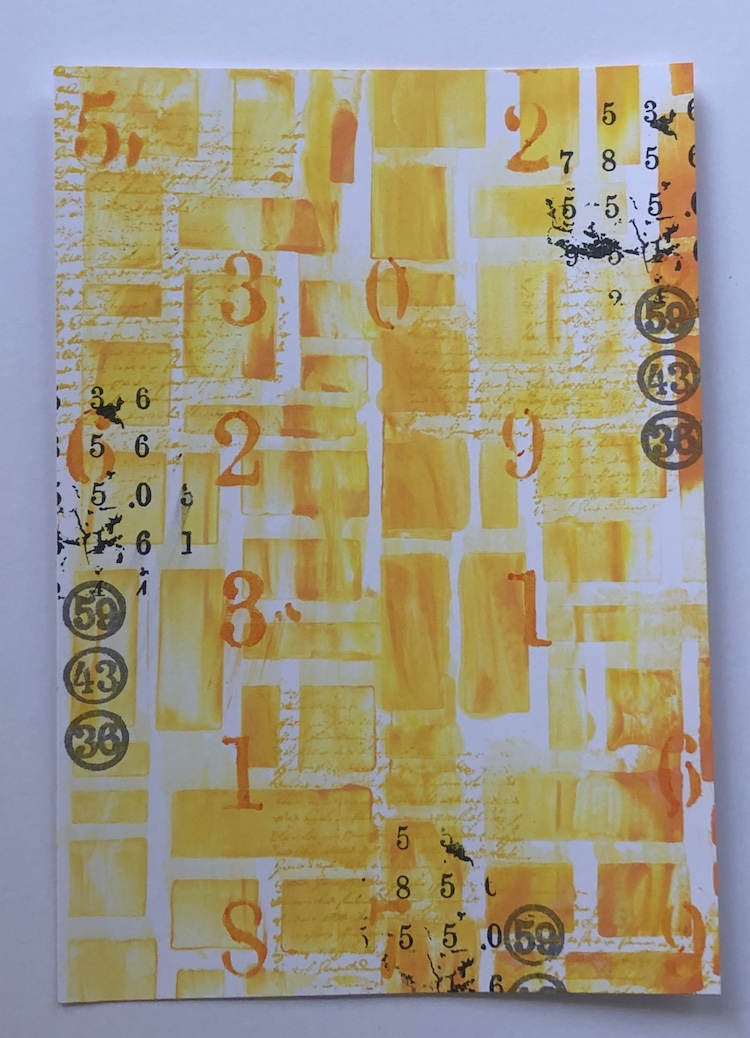
I stamped the background randomly using I&D {MN29} and {MN75} and then used a brayer and Fresco Finish Chalk Acrylic in {Antarctic} to tone it down a little. I was then ready for the main image:


I altered the image by masking off the butterfly on his head and replacing it with a hat. 


He is from I&D set {Wings2/WGS2}, the hat and the sentiment from I&D set {Pierrot2/PT2}.


Interesting fact I saw on YouTube: if you leave your foam with ink sitting for 4-5 hours and then take a print, the effect is totally different as you can see in the photos above. I think I prefer this to the sharp marbling.


For the next project I used greens and a beige: {Antique Linen}, {Twisted Citron} and {Peeled Paint}.


I used these ATC's for the next project: 


These were made in the same way as the card by stamping the background randomly with I&D stamps {Man of Numbers 2/MON2} and {MN23}.


For the main images I used I&D {Wings2/WGS2}. I added some colour the the faces and stamped the big butterfly with Distress Oxide Ink so I could add a little more colour to it. I just glued it over the top for the finished result. 


This card is my favourite of the four projects I did, I love the colours and those girls are sooo cool! Here's how:


I used the colours {Mustard Seed}, {Fossilized Amber}, {Spiced Marmelade} and {Carved Pumpkin}. First I took some prints as before and then I used a stencil {PS016} by Emma Godfrey to make another background:


Cool I think. So this became the background for my girls.


Again I stamped the background randomly using stamps I&D {MN23} and {MN75} and a small stamp from I&D {Pierrot2/PT2}. To add some more interest I added some stencilling with PA stencil {PS021}.


I decided that because they are "mad as a hatter" to add some bunting to the top of the card. I just used one of the hats from the set for this.


I also have a bonus project. After I took the prints that I wanted I used the leftover colour in the shaving foam and scraped it over another piece of Smoothy Card through a PaperArtsy mask {PM007} by Emma Godfrey to make another background. I then used this background for a journal page. You can see all the backgrounds I made in the photo at the top of this post.


Again I created this in the same way as the other three projects by stamping and stencilling the background. I used PaperArtsy stencil {PS021} and stamps I&D {MN23}, {Man of Numbers2/MON2}.


I added the Man of Numbers and the sentiment along with some doodling along the edges and it was done.


As I said at the beginning, I really enjoyed making the finished projects on the backgrounds I made with the shaving foam and reinkers and it smells divine ! It is very messy though so if you are thinking of doing it make sure you have enough kitchen roll to clean up. I do like the results; my favourites are the blue ones I took after the foam had been sitting for about 4 hours. The foam disintegrates and takes the ink with it, it looks a terrible mess but makes lovely backgrounds. 
Thank you so much for spending some of your time over here at the blog today! I really appreciate it. Please visit me in my other locations too: