Thursday, 5 November 2020

2020 Topic #19 Dream No Small Dream with VI&D (by Jennie Atkinson)

   2020 Topic 19: Words Of Wisdom


It's great to see bloggers using pieces of 'technical kit' that are inexpensive (read on to find out what it is!) and Jennie is treating us to a project that has royal hues and plenty of sage advice on it. Love the idea of the folded tag-booklet and another glimpse into someone's artistic process
~ Keren.

Hi everyone, it's Jennie (Live The Dream) with you today sharing a small booklet but one which is large on words.

I am a huge fan of Alison Bomber's wonderful quotes and love to get as many as possible in a project, but some of them are quite large. I was recently tidying up... (well moving things around!)...when I found some large tags which when folded make a lovely booklet and which are also large enough to take some of the wider and more expansive quotes in the Dreaming and Doing Set which I love. 

I have combined the quotes with a favourite Vintage Ink and the Dog set and a few bright Fresco's which combined well with tea stained paper and the more vintage sepia look inside.


I started by scoring my tag so I knew which areas I was working with; the tag measures 10½" x 5" so easy to cut if you don't have one in your stash. It is not easy to splosh around a lot of paint and not get the inside covered, so I did use plenty of scrap paper to try and protect it.  

I have used two Fresco's Byzantium and Sugar Plum which I have added to the tag with a really technical piece of kit...scrunched up kitchen towel!


I treated myself to a fresh piece of kitchen towel for each application and just kept splodging and smoothing it around until I got the colour I wanted.


It did dry a lot lighter and I loved how I achieved such a mottled look from just two colours. I have used some of the stamps from VID02 to initially stamp a little background interest.


I have used the same stamps on the tea dyed paper using different brown inks, sometimes stamping twice to get a lighter effect. At this stage I normally have no idea what I am going to use, but it is always good to have spares for the scrap box.

So now to the inside and adding the quotes.


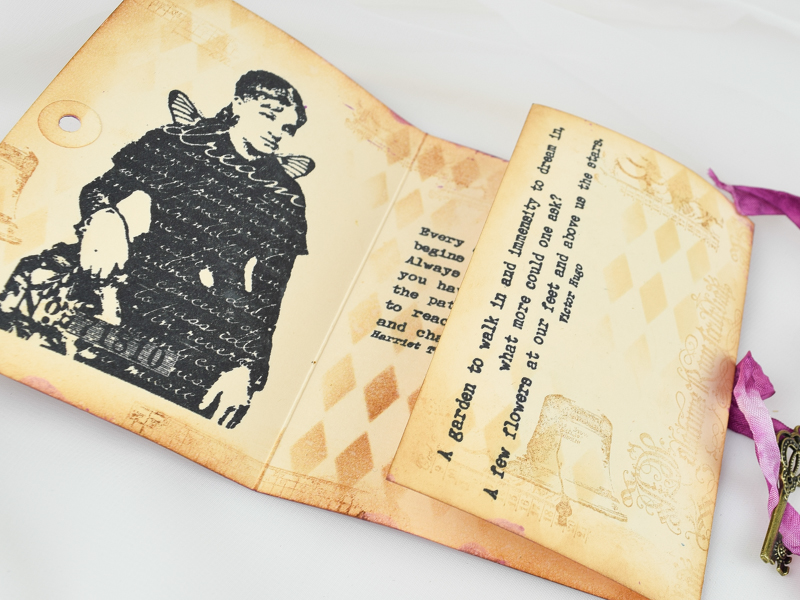
I liked the lighter look inside and started with some background stamping and stencilling using Distress Oxide Vintage Photo, but stamping off to get a lighter hue. There are a number of little stamps in this set and they look fabulous as background layers. 


I thought the black ink might be a bit stark but I think it works well against the brown ink. 


I felt the back of the tag was a bit lacklustre, so managed to recreate the Fresco paint effect for a strip to hold another tag. 


You can see how well the little stamps from VID02 layer over each other for a great background behind the quote.


The front was decorated with bits of the tea stained stamping which I collaged into a little stack and glued to the front. I wanted a small quote for the front cover but decided to isolate a sentence from a stamp.


It is possible to do this by using masking tape once the stamp has been inked. 


Using the giant tag was a great way of making a reasonably small project but using some of the larger quotes. It would make a nice birthday card for a special birthday but also is just nice to have on the desk as a spark of colour with some uplifting quotes on these grey days of winter.

As always thank you for joining me.

Jennie x

Tuesday, 3 November 2020

2020 Topic #19 Future Dreams with ESN {by Miriam Grazier}

       2020 Topic 19: Words Of Wisdom


Miriam has created a lovely tag here using texture from stencilled Grunge Paste along with a beautiful phrase from within the Sara Naumann range.
~ Leandra

Hi everyone, it's Miriam with you today, and I'd like to share with you a motivational tag that I have created using a quote from ESN25.  I love Sara's stamp sets - there are always so may beautiful quotes that it was difficult to choose one quote.

I chose to decorate a MDF tag as they are great surfaces and are versatile if I want to display my work.  I plan to display this above my home work station as motivation while I work.  The tag is a great size and I was able to use alot of texture and paint without affecting the tag. 


One of the features of Fresco Finish Acrylic paint is the inherent chalky nature of the paint means you don't need to gesso your surface first. Gesso is a chalky base, and these are chalk paints, so that is a totally unnecessary step with Frescos!


You can just see the coverage that the opaque paint gives - and this was the first layer of Koala on a blank MDF tag.
 

PS092 Is the stencil I used. I loved the look of the Grunge Paste through the Sara Naumann stencil.  It's interesting to only use small parts of a stencil too, not in whole blocks


I also learnt that if I went wrong - which I did in the photo above, that all I had to do was paint straight over it - this will only work with the opaque paints but, again, I painted one layer of Koala over the Midnight paint and I couldn't see any trace of the midnight at all.  This really is why I love Fresco Finish Acrylic paint.
 

The stamp chosen for the tag is from the Eclectica³ Sara Naumann Series, set 25 (ESN25). There are a lot of elements on here to make cards and tags with ease.


PaperArtsy stamps work so well stamped onto paint. 


I wanted my quote to be sat on top of the texture, so I stamped the Eleanor Roosevelt quote from ESN44 (available exclusively from PaperArtsy Stockists) onto 1 ply tissue using Archival ink.  I then tore around it and added it to the tag using matte medium.


I added a few touches of Gold Rush to the raised diamonds and the edges of the tag - I loved how the colour looked regal against the Koala and midnight.  


I layered the feathers to add dimension to my tag.


I was so happy with how this tag turned out.  And the quote is perfect in the current climate to keep me motivated.  

I really hope I have inspired you to create your own motivational tags.  I think we all need some words of wisdom in our lives at the moment.

Thank you for joining me this evening.

Happy Crafting!
Miriam


Blog: Miriam's Creative Dreams

Sunday, 1 November 2020

2020 Topic #19 A Beautiful Flower with HP {by Amanda Pink}

       2020 Topic 19: Words Of Wisdom


Amanda has chosen one of the most gorgeous flowers from our Hot Picks series to share some watercolour wisdom with you today! Infusions are a fun product, you can use them in different tonal values depending on how crazy you go with the amount of powder to water ratio. Amanda has a great bag of tricks to share!
~ Leandra

Hi everyone, it's Amanda (ink-a-pink) with you today, and I'd like to share with you the project I have created for the current topic 'Words of Wisdom'. 

I have created a piece of 'Art on the Round' for this topic where the focal imagery plays to my chosen 'Words of Wisdom'- a quote about seeing and accepting 'beauty in imperfection'. 
I've mixed up the creativity so there's some water colour painting with PaperArtsy infusions, some gelli printing with PaperArtsy Frescos and some stamping using a couple of PaperArtsy Hot Pick stampsets.   


Usually when I create I start with the backgrounds but on this occasion the creativity began with the flower. In fact, it was the flower that provided the inspiration and guided the way. 


I used a stamping platform to stamp it onto PaperArtsy Smoothy card. I find a platform to be a very useful tool as it enables me to stamp over the image with precision if I don't get a good stamped impression the first time. It also allows you to add colour, then stamp again in black over the top (as long as you manage to keep the item in position during that process!)


I have to show you a close up of the stamped flower as the crisp lines and fine detail is pretty impressive!   

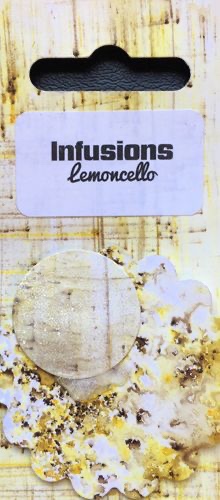
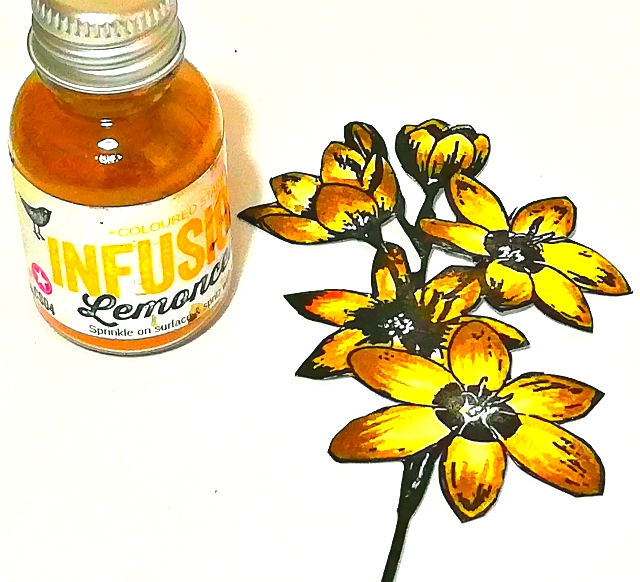
I used to love watercolour painting back in my earlier creative days and have neglected it in recent years so I thought I would re- kindle that love and watercolour the flower using PaperArtsy Infusions as my watercolour medium. Lemoncello was the infusion my hand went to first and I was ok with that as I thought the lemon/yellow tones would be a lovely colour for the flower. 

For anyone who isn't familiar with PaperArtsy Infusions heres a little info about them. They are water soluble particles made up of a fine dye colour pigment and walnut crystal particles that react at different rates when mixed with water. The colour pigment will react first to give instant colour  and then the walnut crystals will dissolve gradually to give a brown base.  
You can control the colour to brown ratio by the amount of water you add and how quickly you blot and dry as you work.

They are a really versatile medium and are available in a range of colours. If you type Infusions into the search bar at the top of this blog you will find many posts showing various ways in which they can be used. 
 

'A little goes a long way' with infusions. The tiniest of sprinkles when spritzed with water was  more than enough for painting the flower. 


The ability of being able to control the colour to brown ratio of the infusions was great for watercolour painting as it allowed me to gradually build up the colour of the petals to create light and shadow and give them depth and dimension. 
I was really pleased with the results of infusion water-colouring and enjoyed being reminded of  the 'inner calm' this type of painting gives me. 

As the saying goes 'after the calm comes the storm'  and that's what happened next with some, lets say, messier, unpredictable gelli plate printing to create the backgrounds. 
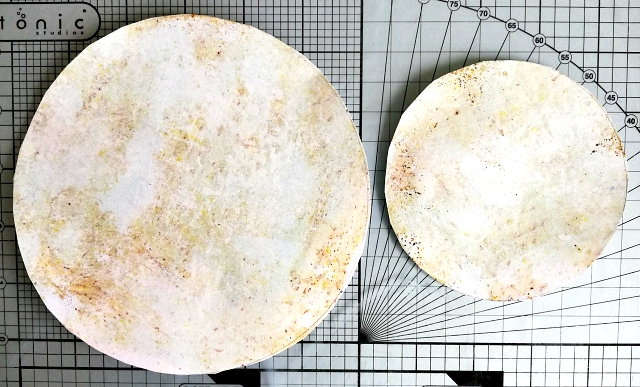
I worked with the following colours of PaperArtsy Fresco Acrylic Paints:  Eggshell, Honeydew, Antartic, Blue MoonSnowflake.


I created numerous prints but chose the two in the photo for the project. 
Give or take a pull here and there, they were all created by brayering a Fresco colour on the plate one at a time and pulling a print after each application. If I remember correctly the colour order went something like this: Eggshell, Honeydew, Blue Moon which proved to be camera shy so is missing from the line up in the photo above, AntarticSnowflake. I also added some Lemoncello Infusions to the mix thinking it would add some unity between the backgrounds and the flower.  
  

The prints were cut to cover the two White /Greyboard Rounds from That's Crafty (6inch and 4inch)  
 
I like to add some stamping to my backgrounds for extra detail and interest .


I used the thin number stamp from PaperArtsy Hot Picks 1604 (HP1604) ,stamping with black Archival Ink.


... and the small texture stamp from PaperArtsy Eclectica Seth Apter Collection (ESA13) stamping with Lemoncello Infusions 
 

 Stamping with infusions gives a lovely tonal watery impression. 
 

Around the circumference of the larger 'round' I stamped the grasses in black archival. The stamp is  from the same stampset as the flower: PaperArtsy Hot Picks 1009 (HP1009) 
You know I said how impressed I was with the fine lines and detail of the flower stamp well lets just say I was blown away with the crisp fine thin lines the grass stamp created! 

The circular backgrounds were adhered to the two rounds which were then adhered together  ready for the focal flower and the 'Words of Wisdom'.....


 .... 'Even When Petals have Flaws, All You See Is a Beautiful Flower!' 


These 'Words of Wisdom' haven't as yet been made into a PaperArtsy stamp (or at least I don't think they have ?) so they were created with the help of some PaperArtsy Smoothy (regular) card and a printer. 

 
To 'ground' the flower I created a vase for it to sit in using the base of the 'quirky girl' stamp from PaperArtsy Hot Picks 1604 (HP604) stamp set, mentioned and seen above. It's coloured with Lemoncello infusions and makes for a unique stylized flower holder to finish off the project.  

I have enjoyed creating for this topic as it allowed me to touch base again with my love of watercolour painting and enjoy some 'inner calm'. It also encouraged me to seek out some 'words of wisdom' that would work well with the imagery and try and enhance the wisdom they hold through creativity.  

I hope my 'Words of Wisdom' Art on the Round has offered some creative inspiration, maybe even a little 'pause for thought'?  

Thank you for joining me today/ tonight. 
Keep on Creating 
Take care 
Amanda 
x

Blog: ink-a-pink
Facebook: Amanda Pink
Instagram: p1nkart  
Pinterest: PinkArt