Showing posts with label Sustainable Crafting. Show all posts

Wednesday, 29 December 2021

2021: PaperArtsy - A Year in Review {Topics 10 to 12}


Hello from PaperArtsy HQ,

We're back for the penultimate round up post of 2021. And hold on to your hats, it's another goodie, full of inspirational ideas, techniques and crafty fun!

Today Dounia has her picks for you from Topic 10:My Favorite Colour, Topic 11:Twinkle, Twinkle and Topic 12:Sustainable Crafting.
 
Get ready for a bit of bling, brightness, and blooming good fun!

Leandra 

Topic 10 : My Favorite Colour

Here is a nice straightforward topic title! In the previous years, we tried to have regular colour topics on the blog but took a break in 2021. Therefore, for our one colour theme of the year, we let our bloggers make their choice and share a favorite combination. As expected, the resulting projects were wonderfully eclectic, from vibrant bright hues to subtle half-tones, from monochromatic cameos to the full rainbow, from barely there nuances to fully saturated splashes. Everybody loves colour, it creates atmosphere, invokes memories, shares feelings, but everyone's love for it is different, making this topic so interesting!

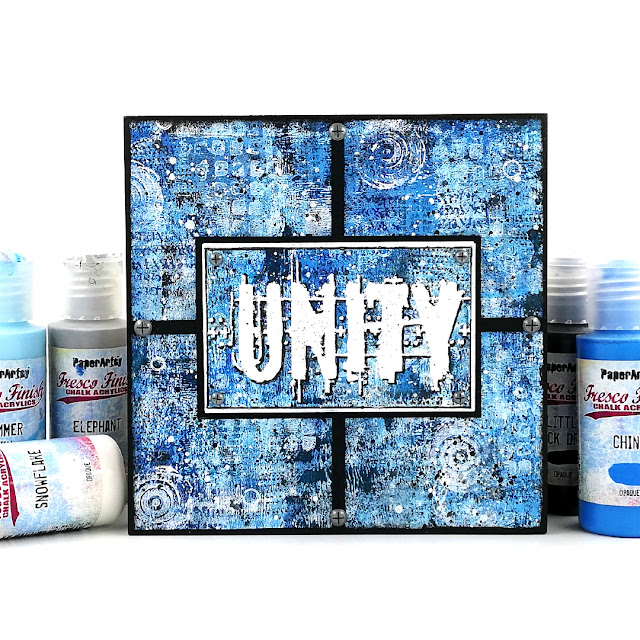
My first pick is this amazing art block by Amanda Pink. Blue is obviously her favorite colour, despite her name, and she rocks the monochromatic look. Check her original blog post to discover her process and watch her master-board develop layer after layer. I love her use of clean lines to cut through the background and how striking the embossed 'Unity' is. This piece is so bright, when blue is so often used as a soft colour.
Ellie Knol chose a combination of teal and reddish brown for her journal covers. The two mix in a gorgeous dark plum, making for a unusual palette. The obscure colours, added to subtle stencilling, create wonderfully atmospheric backgrounds. The focal images are an interesting contrast between realistic stamps and unreal colours. I love how all the elements combine to create a fairy-like dreamy world.(link to original blog post)


Jennie Atkinson's project is all about soft and subtle touches to showcase her favorite colour, tea dyed paper! I love how the Infusion in the background is so diluted, barely there, but still offers a lovely contrast to the focal images. The coordinating paper colours and inks are so skillfully balanced in her layers, providing both cohesion and interest. Jennie's original blog post is a masterclass in building a light and complex multi-technique background.


Claire Snowdon certainly does not hide her fondness for pink! She used it in 3 different media: acrylic paints, watercolors and Infusions. I love the variation of tone she achieves, making the flowers pop despite being pink on pink. They seem to burst out of those ATCs! Her original blog post beautifully shows all the details of the texture she create in her backgrounds, with lots of little touches that are not obvious but contributes to the overall style.


Topic 11 : Twinkle, Twinkle
🌟🎵Twinkle, twinkle, little star, How I wonder what you are...🎵🌟 This is basically what we asked our bloggers! Stars are probably one of the first things we doodle and are everywhere in craft products. If you also add everything sparkly, glittery or shiny, and expand the topic to space, galaxies and lights, the possibilities are endless! So what are stars to you? How do you use them in your crafting?

Tracy Springer's clever card has everything that comes to mind when thinking of stars: a galaxy purple background, white and yellow stars of all sizes, shiny gold, halo effects... Add the depth of a tunnel card and a cheeky Zini high priestess and you are in for a world of fun! In her blog post, Tracey shares her process, her struggles (not that you would guess looking at the finished project!) and the inside of the card, which is also gorgeous and star-filled.


Instead of indulging in all things sparkly, Kate Yetter went for star related stamps and a colour palette of neutrals and rusty-browns. She uses it skillfully to provide cohesion to her collage while letting the focal images pop on their white paper. Her original blog post usefully details her process to obtain this deliciously grungy background and gives you a closer look at all the ways she has used the stamps in her layers and elements.


For Jenny Marples, who likes playing with building and architecture in her art, twinkling is for windows at night, which she translated beautifully in this card. Even before she adds the focal image, her project is full of layers and textures, including the music paper, a nice nod the topic title. Despite what you might think, the window is not hand drawn and Jenny shares in her original blog post her technique to get this look from a photography, a must try.


Topic 12 : Sustainable Crafting
We are all becoming more and more conscious of our personal environmental impact so we wanted to explore how to reduce it in our small scale as creatives. Most of us already reuse packaging, empty containers or non-craft materials but there are lots of other ways we could modify our crafting habits: being mindful of the ethos of the companies we buy from, thinking about how much disposables we consume, checking how much water we use, etc. Let's not forget those products languishing in a corner of our craftroom that we just can't bin. Maybe it is time to push ourselves outside of our comfort zone and use them, or get together with other crafty hoarders and swap treasures!

Recently, lots of us have been ordering online, resulting in  mounds of cardboard and envelopes. Etsuko Noguchi chose to upcycle those parcel packaging into a bellowed folder and individual inserts. It can even be used sustainably to store left over odds and bits for future use. Check Etsuko's original blog post for details of all her layers and pictures of all the gorgeous and colourful removable envelopes.


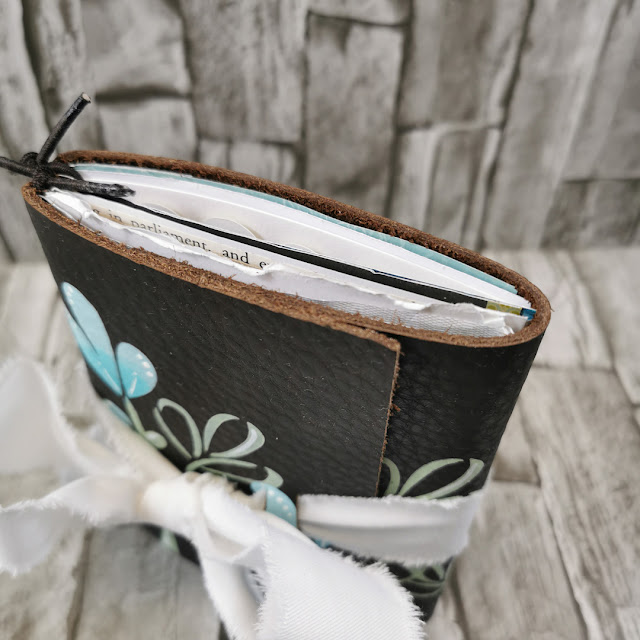
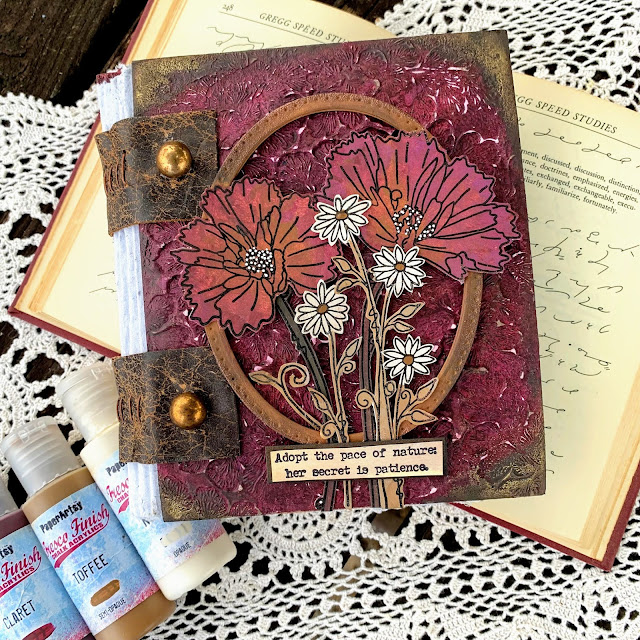
Autumn Clark went full on for her project. She made her own recycled paper to fill this lovely notebook and the leather used for binding it is from her old couch! The overall handmade and weathered look is lovely, especially paired with amazing texture and clean flowers of the cover. In her original blog post, Autumn also shares a trio of card where she experiment with her homemade paper, well worth the read!

Nikki Acton was inspired by the topic in both her use of recycled materials and the subject of her 'green' card. A simple, easily adaptable project, but where all details bring interest and harmony. I love how the circle pattern is repeated all over, on the leaves, in the additional stamps, stencilled in the background, through the translucent disc and the splatters. All the thought behind this piece is explained in her original blog post.


Well, wasn't that a fabulous array of wonderful!? We are so spoiled by our blogging team and the lengths they go to in their projects. I hope you can appreciate the time they put into each piece, but more importantly, how much they enjoy what they do while creating.

Leandra


Saturday, 16 October 2021

2021 Topic 12 : Sustainable Crafting with Hot Picks {by Keren Baker}

   2021 Topic 12: Sustainable Crafting


Hi everyone, it's Keren Baker with you today, and I'm here to share with you a little upcycling and an attempt to waste less.

I had several products I wanted to make better use of, and was determined not to buy anything new so headed off to my local charity (or thrift) stores. I'd already bought a vintage tape measure and an old botanical style flower book so wanted something to use them together.
 
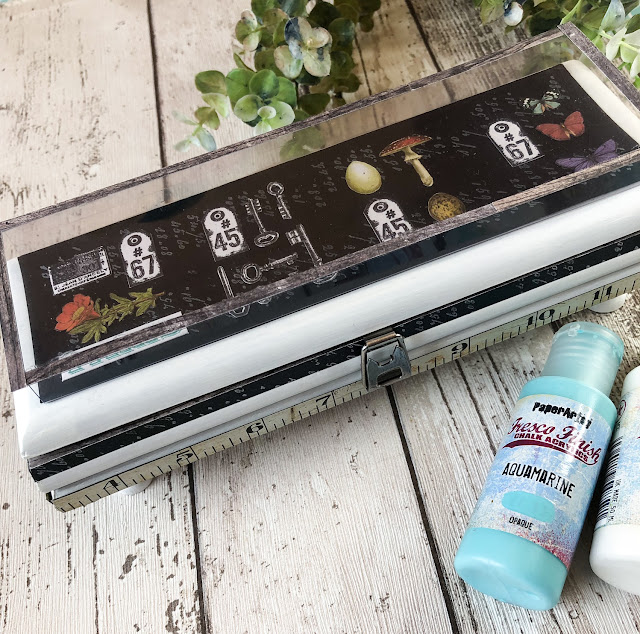
Creating it had more twists and turns than the average 'who dunnit' ! First it was going to be just a crackle glazed box, then a shrunken sized ATC holder. It wasn't coming together so then I decided upon a piano (right shape) that didn't work and then after painting it in Snowflake (& looking a little like a casket) I wanted to make a miniature Museum style display case.

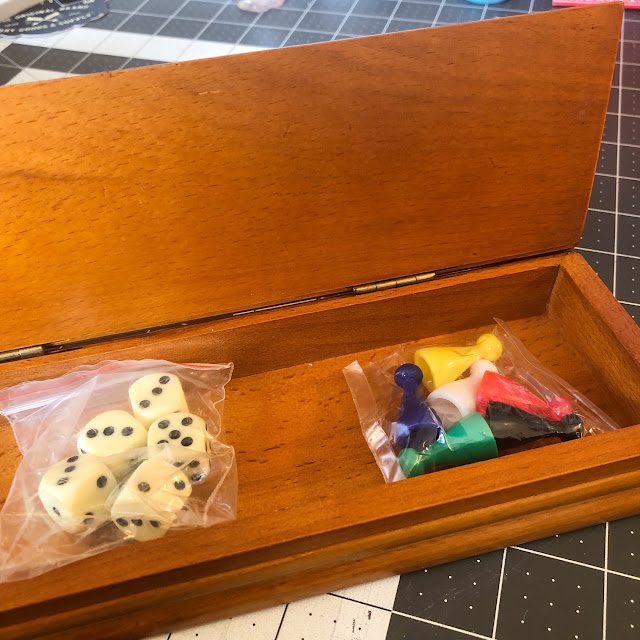
So, how did I begin- with a little games box I picked up in a charity shop for £2.


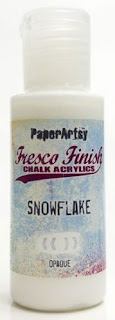
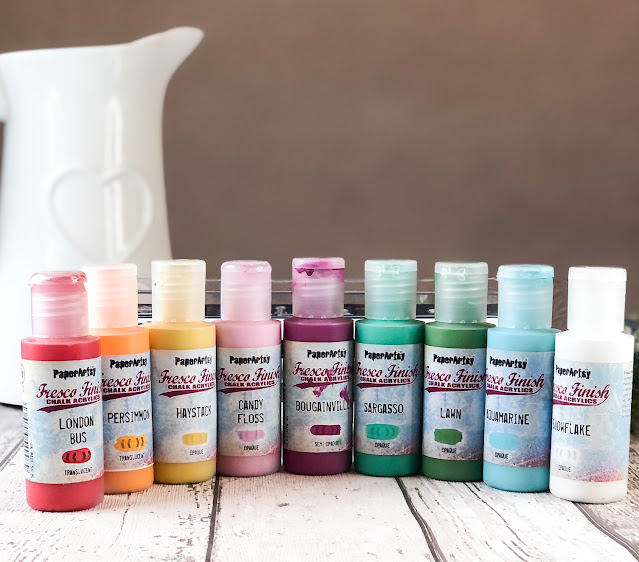
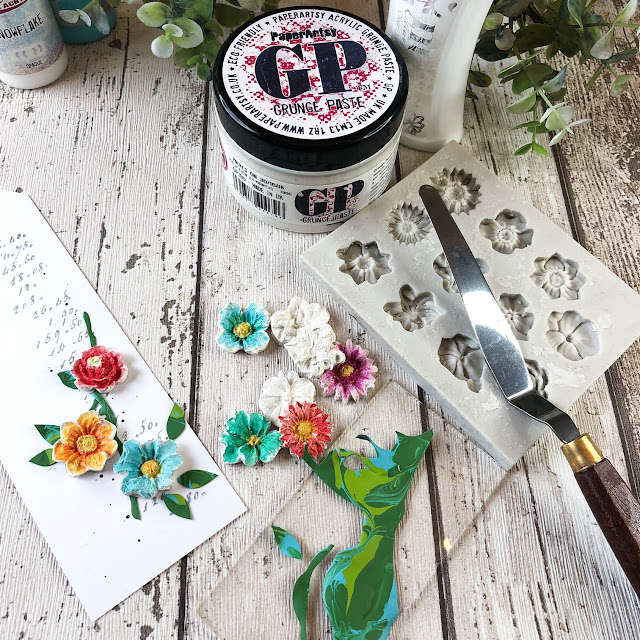
Most of the painting was just using Snowflake Fresco Finish Chalk Acrylic but later I painted some flowers with lots of rainbow colours, so here's all the paints I used.


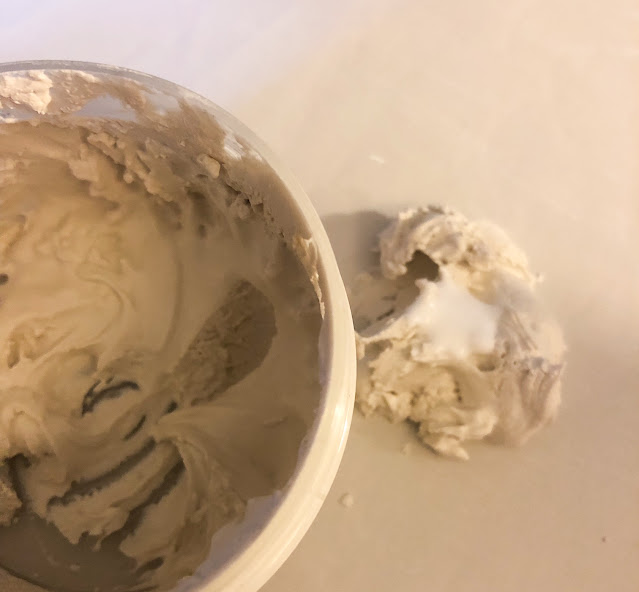
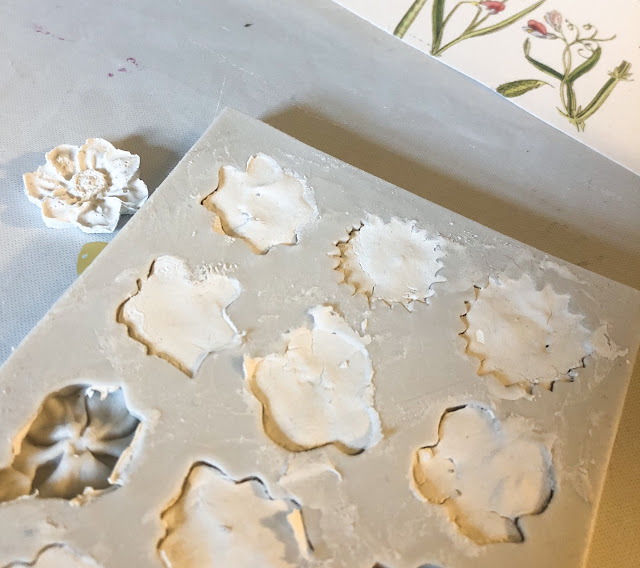
I had 3 issues I wanted to solve; 2 were about not wasting products. Part of being sustainable is reducing wastage. I was at the end of a post of Grunge Paste and the remainder was quite stiff (due to me not putting the top back on in good time!). I wondered if I could create some flowers with it using an old silicone mould. I knew that there needed to be a little flex so wondered about adding in some PVA glue. 


I allowed them to dry overnight (as it was a much thicker layer of Grunge Paste) and I was amazed after gingerly removing them from the moulds that they'd actually worked. The surface was quite rough but they looked natural and perfect for the inside.

The second issue was I don't like wasting the leftover paint- and it's nearly impossible to get some of it back into the bottle. I knew that Fresco Finish Chalk Acrylic paint creates little skins so thought I'd swirl the leftover paint from a project and leave overnight (on the PaperArtsy craft mat) and see if I could cut out leaves and stems from the 'skin'.


It was a perfect solution and trimming out paint skin is lovely- it's sooo smooth to cut! But what about the main project - what did it all mean?

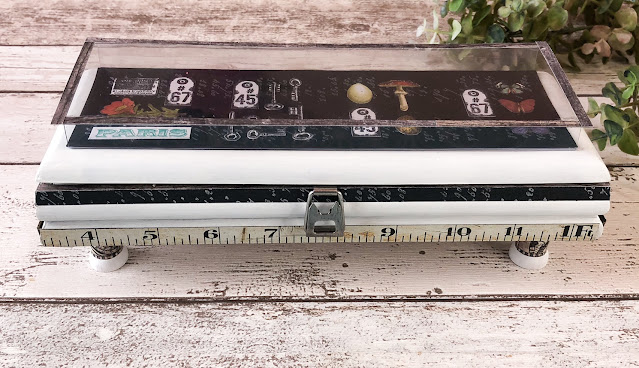
I created a museum display cabinet as we are becoming increasingly aware that if our situation (and us personally) don't change, then our museum cabinets may hold much more of our past than we ever want them to.
Being personally responsible for how I live, consume AND craft is important. I can't moan about governments and corporations if I don't take steps to reduce unnecessary waste, purchase more ethically and consume more considerately. I try to avoid fast fashion where I can, and buying products from charity shops is a good alternative. We'll always need consumables (like adhesives, paints etc.) and buying specifically for projects seems to be a better fit for me rather than just because..(although I'll always enjoy a little crafty retail therapy).

So I created the 'glass' from acetate, using a heavyweight acetate so it wouldn't bow in the middle. I scoured all of my Hot Picks sets, because I was looking for small stamps that might fit in with the theme.

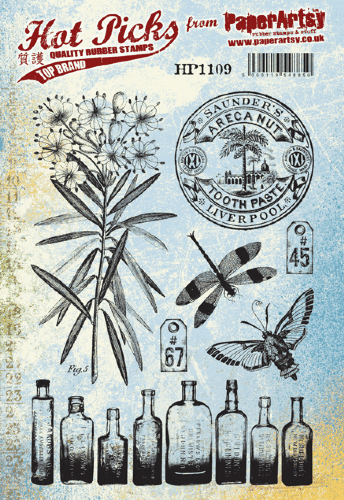
You can see stamps like the labels from HP1109. Granted, I needed more than just 2 numbered labels,


..plus the keys from HP2101. There are lots of keys to improving the way we life and choose. Being thoughtful about this topic is definitely one of them.


There is an official document and 'Paris' in the end of the cabinet. Paris, because of the international treaty on climate change (adopted by 196 parties in Paris in 2015).


...from HP1301.


The ledger style handwriting from HP1302 reminds me to keep recording those things that are important to me; holding myself to the standards and principles I've agreed on. Remembering the important stuff.


There is definitely a sense of urgency about this whole mission which I tried to reflect in the legs of the unit which were mini wooden reels, painted and stamped. You can see the lovely vintage metal measuring tape here too.


They're reels, moving and shifting with the movie of our past mistakes. Using HP1503.


My third challenge was how to use the book pages. I wanted to add them to fabric so I could create pockets in the lid- but traditional image transfer techniques often involve photocopies or photos and these are colour book pages. So- how about an experiment?!
I got some white fabric, some Gel Medium, PaperArtsy Gloss glaze and ordinary PVA glue. Grab your piece of book page, coat in a layer of chosen product and a thinner layer on the fabric and press onto the fabric. Burnish from the other side of the fabric with a bone folder or similar.


Leave to dry overnight and remove the paper, removing any leftover with some water and gentle rubbing to remove excess. Remember that it will be the mirror image so don't be too dependent on readable text. The winner (which did surprise me as I was sure it would be the gel medium) was...


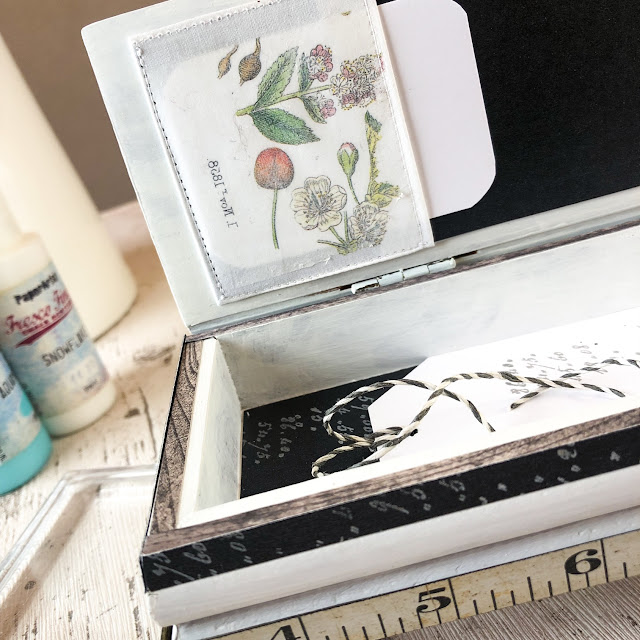
The inside of the box was important to decorate for my treasures.


I couldn't use the flowers on the top of the box as they'd get knocked, so I created a simple tag.


Truthfully though, I did think there was a better use for this box - a hiding place for crafting sustenance ;-)


I hope you enjoyed my quirky mini museum piece. It certainly was a challenge to create (and photography) but I loved experimenting and can't wait to find ways to incorporate paint skins again. I think I enjoy art that encourages reflection more than any other type and I've loved experimenting and being more thoughtful about my crafting habits.

Thanks for being with me today,
Keren x

Blog:
Twitter:@craftstampink
Instagram: @craftstampink
Pinterest: @craftstampink

Thursday, 14 October 2021

2021 Topic 12 : Sustainable Crafting with JoFY {by Jo Firth-Young}

   2021 Topic 12: Sustainable Crafting


Jo has always been a resourceful cookie, and today she has a gorgeous Journal cover idea for you using fabric from an old leather sofa. Plus, a cute storage tray, so read on.... oh and did you know that Frescos are wonderful on leather ?! Search the blog for leather, you will find other projects too!
~ Leandra

Hi everyone, it's Jo (www.jofy.co.uk) with you today, and I'm here to share with you my take on sustainable crafting and the project(s) I created for this topic.

I'm a big fan on using 'discarded' items to create projects - the phrase 'reduce, reuse, recycle' is a favourite of mine.  I don't like to see things go to waste (or landfill) - if I can reuse it or repurpose it then I will (perhaps I was a Womble in a past life! lol). In the past I have made pencil/journal bags using the legs of my husband's old jeans, created triptychs from surplus building supplies, created many many journals from junk mail and found papers, upcycled decorative glass wine bottles in to table decorations, and I could wax lyrical about corrugated cardboard until the cows came home! lol  And don't get me started on the versatility of bubble wrap!
Its really satisfying to take something that would otherwise be discarded and turn it into something useful or lovely - hopefully both!

A couple of years ago we replaced our two big boxy leather sofas. We arranged for them to be collected by the council for disposal - but I couldn't bear to think of all that lovely leather going into the big crusher machine - so I cut off all the leather panels that could be salvaged and reused. I also saved the feather cushions, which I've since recovered and are on our new sofas!... recycling to the max!

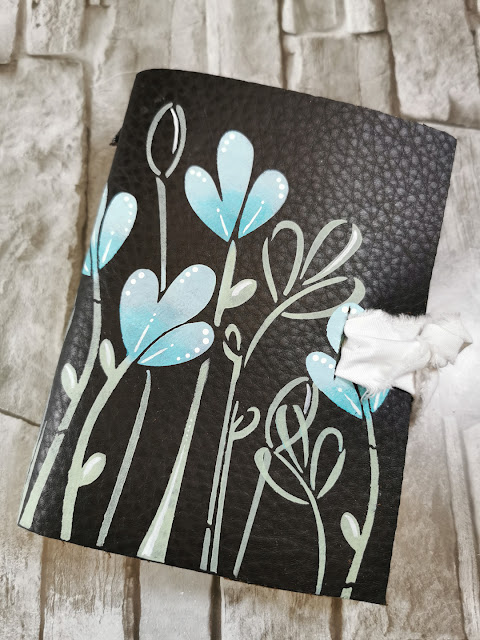
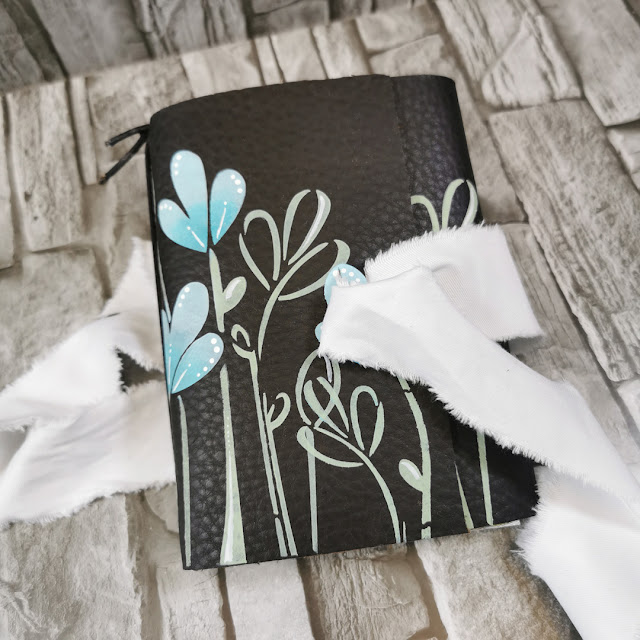
The project that I'm sharing with you in this blog post is made from the leather salvaged from those sofas.

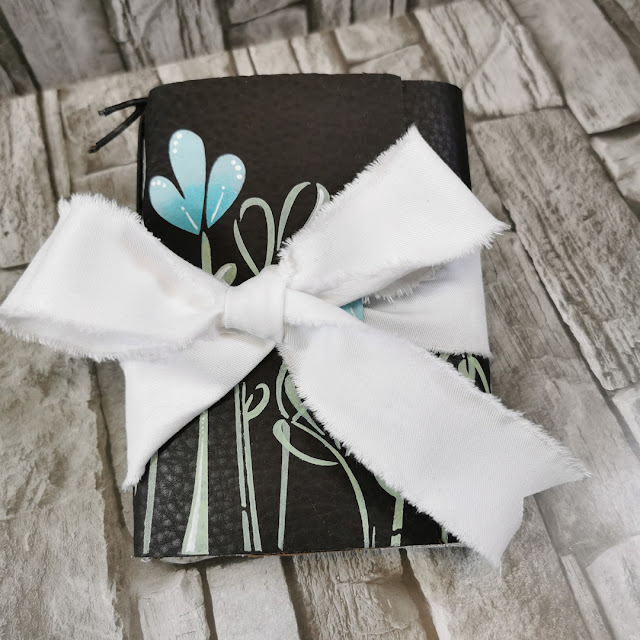
I've made several of these midori style journals - in all sorts of sizes - from the very small (4cm) to this one that will cover A6 size journals (10x15cm, 6x4inches). This is the size I like to use for 'junk journals' - a nice size to pop into a bag to take on a trip, or to hold in your hand while journaling.
The leather is thick but its also soft so it works really well for the wrap-around cover style I've used here.


The leather panel has been cleaned, dried and cut to size (16x32cm, roughly allowing to wrap 2.5 times around the width of the chosen journals). 

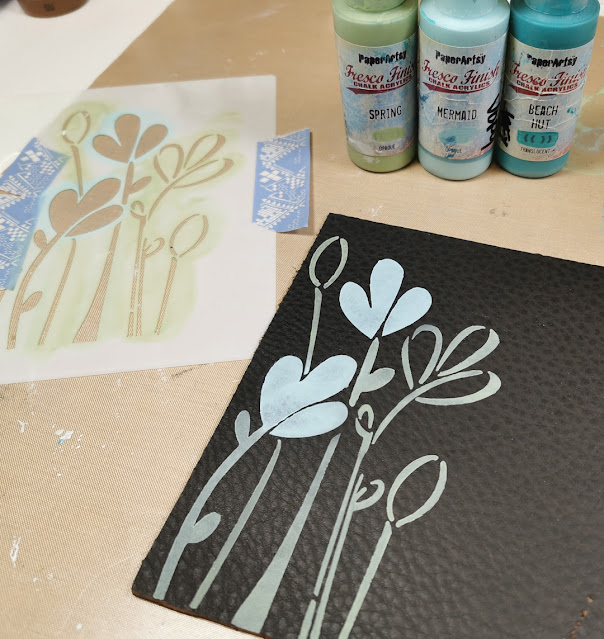
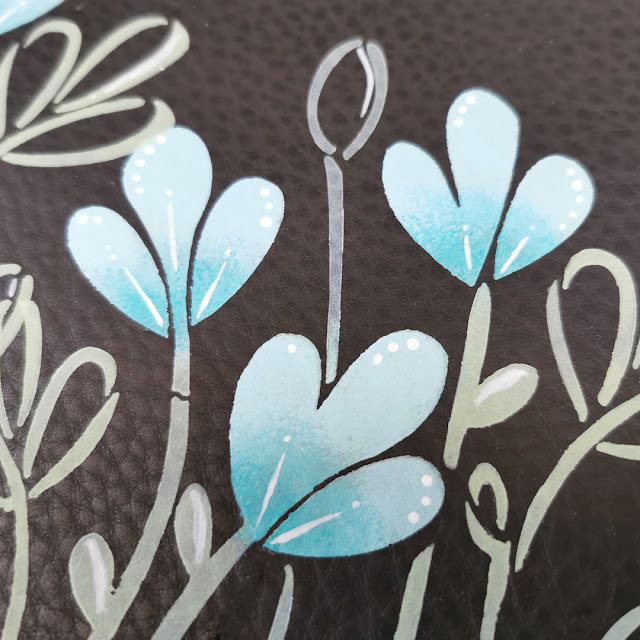
We all know that Fresco Finish paints can be used on any surface - and leather is no exception.  Pale OPAQUE colours were best suited to this project - I chose Spring & Mermaid and they look great against the dark brown leather.


I looked through my stencils for one that would fit the height of the journal cover.  PS164 is a lovely stencil that can be used as flowers or leaves and I thought it would suit being repeated across the leather panel, slightly varying the height of each repeat.
 

Once the Spring and Mermaid painted stems were dry I created shading to the 'leaves' by adding a fade of Beach Hut, easy to achieve with this translucent paint.


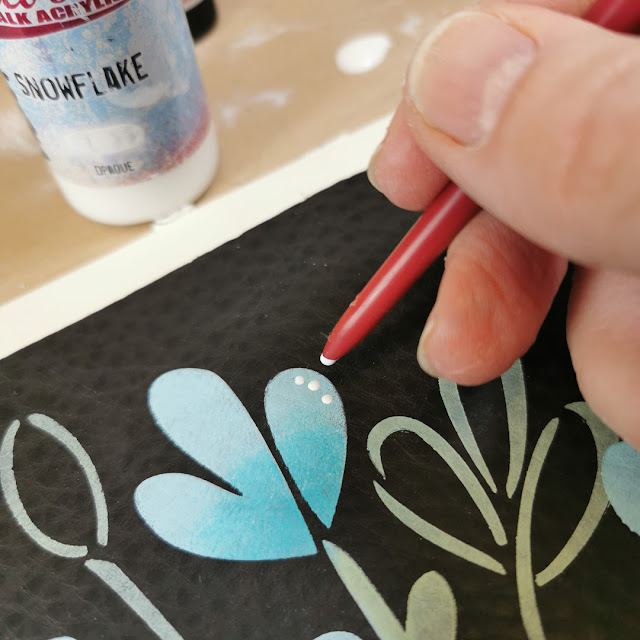
Additional details were added with Snowflake.
 
 
This leather and style of cover is very soft and supple and, because it wraps around the journals, I like to have a closure that also wraps around the journal - keeping all the pages (and the ever increasing thickness of the journal) nice and secure.
 

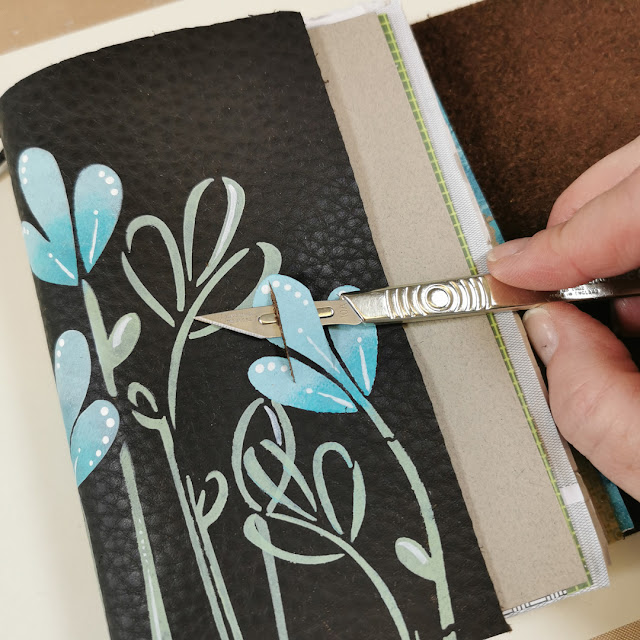
Two slits were cut in the leather with a scalpel, slightly smaller than the chosen ribbon, ready for the ribbon to be threaded through.


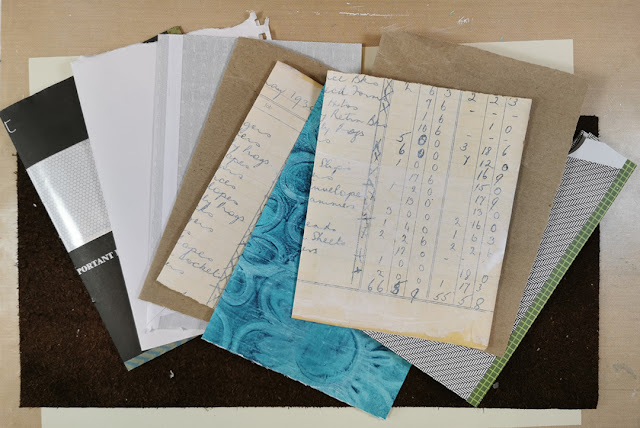
Of course a journal cover needs journals and carrying on the 'sustainable' topic I created 2 signatures/journals using junk mail envelopes, found papers, stash papers in colours coordinating with the cover, gel-prints, packaging paper, ledgers - anything that could be written or painted on!


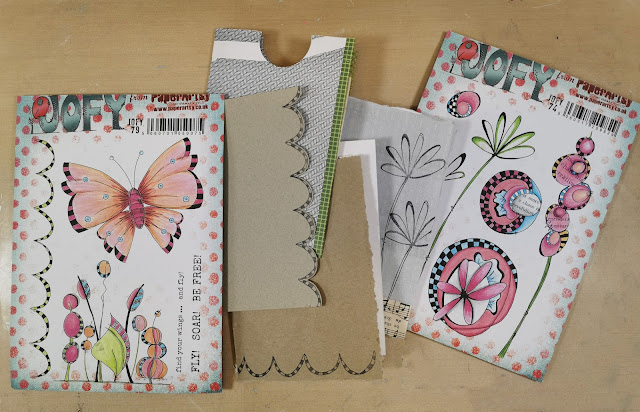
Journals, to me, are something you work on little by little - they're very organic and personal...  but I wanted to give you a couple of simple ideas how to use stamps to decorate pages. I grabbed a couple of sets of JOFY stamps - one with a scalloped border (use it to shape or decorate the edge of a page) and one with flowers to stamp at the side of the page (write journaling around the stamped image).


Here are the two signatures/journals inside the cover.  The signatures are bound by tying together with a length of covered elastic. The leather cover can then be fed through these loops of elastic which will hold the signatures in place, but allow them to be easily removed to work when needed.


EXTRA PROJECT

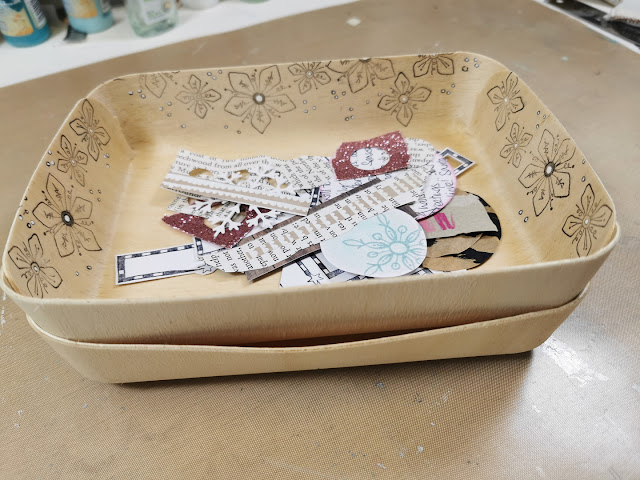
Sometimes I see an object (ok, lots of objects) headed for the recycling bin and think 'that is a useful/ interesting/ sturdy container, I could do something with that'... and that's how I feel about the wooden containers a particular brand of ready meals come in.  I like that the company is not packaging their food in plastic and also that I get to save the containers and turn them into something useful for my desk.

I gave this one a nice floral edge pattern with JM49.


They make nice, lightweight containers for holding bits and pieces on my desk that I want to keep close while working on a project.


and they stack inside each other... win win!


I like to upcycle pieces like this - it hasn't cost me anything, it serves a purpose and when I don't need it any more I can return it to the recycling bag!

I hope all the projects you've seen during the run of this topic make you look at items in a new way. Do they need to go to recycling? - could they be repurposed, even for just a short while, temporarily... give something a new purpose. 

There are so many ways to be a sustainable crafter. I'm trying to be better - recycling, and donating items/supplies to charities and groups. My next step is to use less baby wipes and paper towels in my studio.  

Every little bit helps doesn't it? 

Happy (sustainable) crafting!

Take care

Jo


Blog: www.jofy.co.uk
Facebook:  JoFY Jamboree!! Facebook group
Twitter: @jofyjo
Instagram:  @jofyjo
Pinterest:  @jofyjo

Teaching: In my JoFY Jamboree!! Facebook group I will be sharing a free demo/class each Sunday at 17.00 (uk time).  These 'Seasonal Sunday' events are free and each week I focus on a christmas stamp set from my back catalogue of over 30 seasonal sets.

16 October 2021  'Start with a Stencil' Facebook live workshop hosted by Stampers Grove. (www.stampersgrove.co.uk)
23 October 2021  'Light in the Dark' FB Live workshop hosted by me, detail in the JoFY Jamboree!! and PaperArtsy People Facebook groups.