Showing posts with label Scrapbooking. Show all posts

Friday, 18 August 2017

2017 #11 Books: Book in a Box with ETS {by Chris Cresswell}


2017 Topic 11:  Book in a Box by Chris Cresswell


Chris is here today to shows us a 'book in a box' idea. These are a lot of fun, but boy can they take longer than you expect, you finish one side, then there is the whole other side to go...and Chris toiled for 4 days to produce this wondrous scrapbooking-mixed-media hybrid book, and wait till you see how she's used Infusions with the Oxide inks!!
Hi everyone, it's Chris Cresswell from loopsandlines.blogspot.co.uk with you today, and I'd like to share with you my 'Book in a Box'. I have loved making this project for several reasons: it incorporates my 'go-to' favourite colour combo; I was given 'free-reign' as to what I could make; I could use some of Tracy Scott's fabulous stamp sets - brilliant for art journaling - and it was an opportunity to create a mini photo album of my favourite little people - my five gorgeous granddaughters!

I recently bought a medley of mini books from the lovely Carol Fox in Tracy Evans' Declutter group which included the 'Book in the Box' I have used here. I'm unsure of the make as it wasn't in its original packaging, but I'm guessing Creative Imaginations.


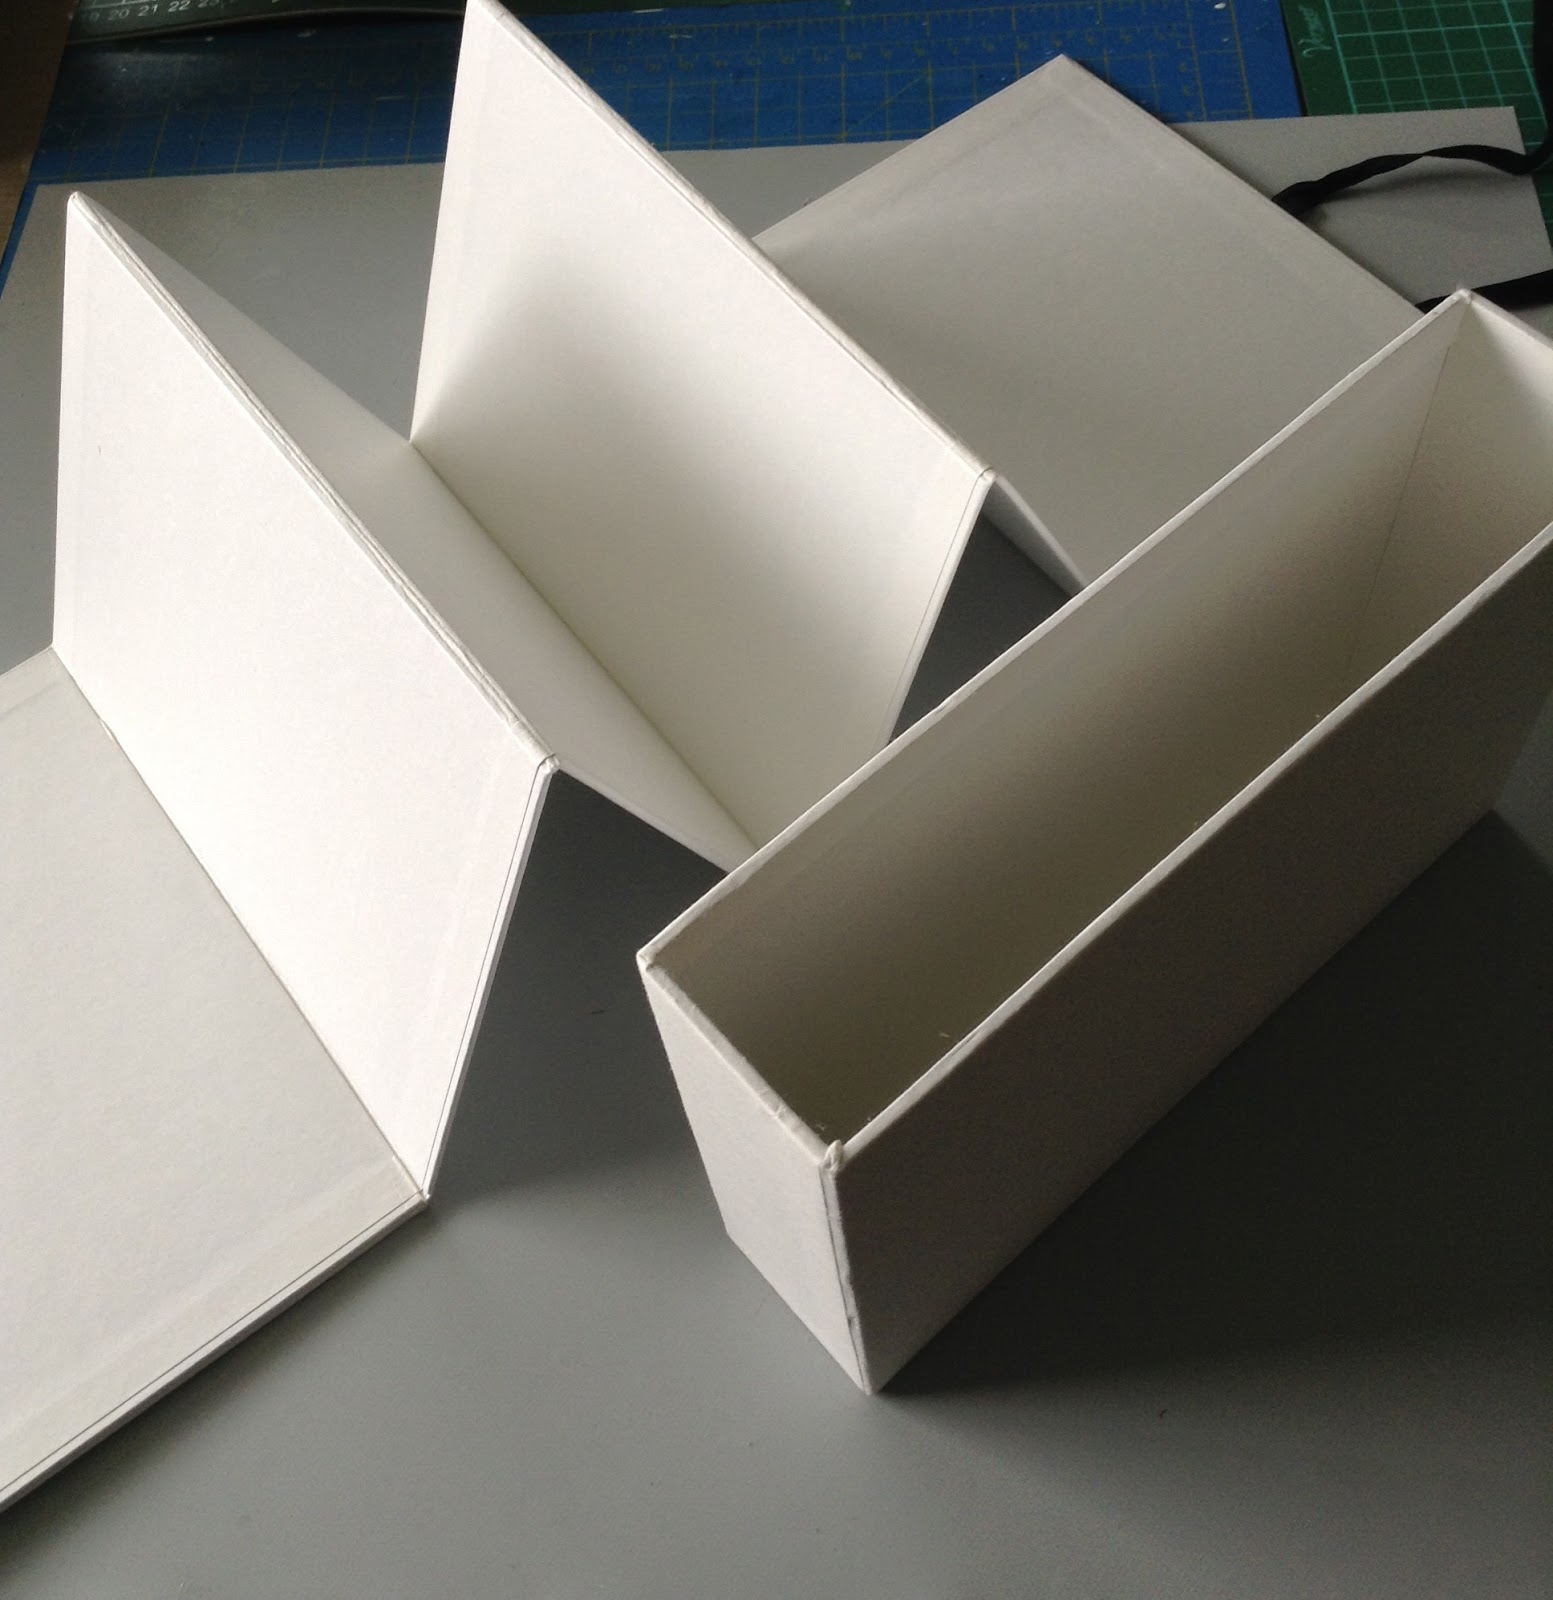
Tracy's stamps are perfect for art journaling which is my first love, so I treated each surface as a large art journal page. However, I also intended to use a variety of mixed media to complete the whole project which took me four days. No one day workshop here! So how did I get from this blank canvas to ... this?


When I'm art journaling, I use a lot of paint - and a lot of colours. These are the ones I started with but I probably added a few more along the way. My huge box of Frescos is right beside me and too easy to keep dipping into for 'just the right colour'.


I'm not going to explain the build up of the way I decorated the box (and the back of the concertina book inside) as I have done that on my blog, but I will show a few photos of the key steps I generally use: collage, paint, stencil, stamp. I love using this structure as it builds a page relatively quickly and puts me right bang into the middle of my comfort zone!


I've used a little Fresco Chalk Elephant across the spread, a tip I learned from Kate Crane @ TheKathrynWheel, which helps to 'neutralise' the use of so many bright colours. I've also used a bubble stencil to add some 3D gel medium through.


You can see here that I've completed the box cover in the same way as the concertina book. When adding a stencil layer, I start with the lighter colours, already used in the spread, before adding darker colours from the same colour pallette - Fresco Chalk Bougainvillea will always make an appearance somewhere in an art journal spread. I love that colour. I've also added touches of Fresco Chalk China to contrast against the yellows, oranges and pinks, just to add some interest. I've used a mixture of Crafter's Workshop stencils and PaperArtsy: PS031, PS021 and PS011.


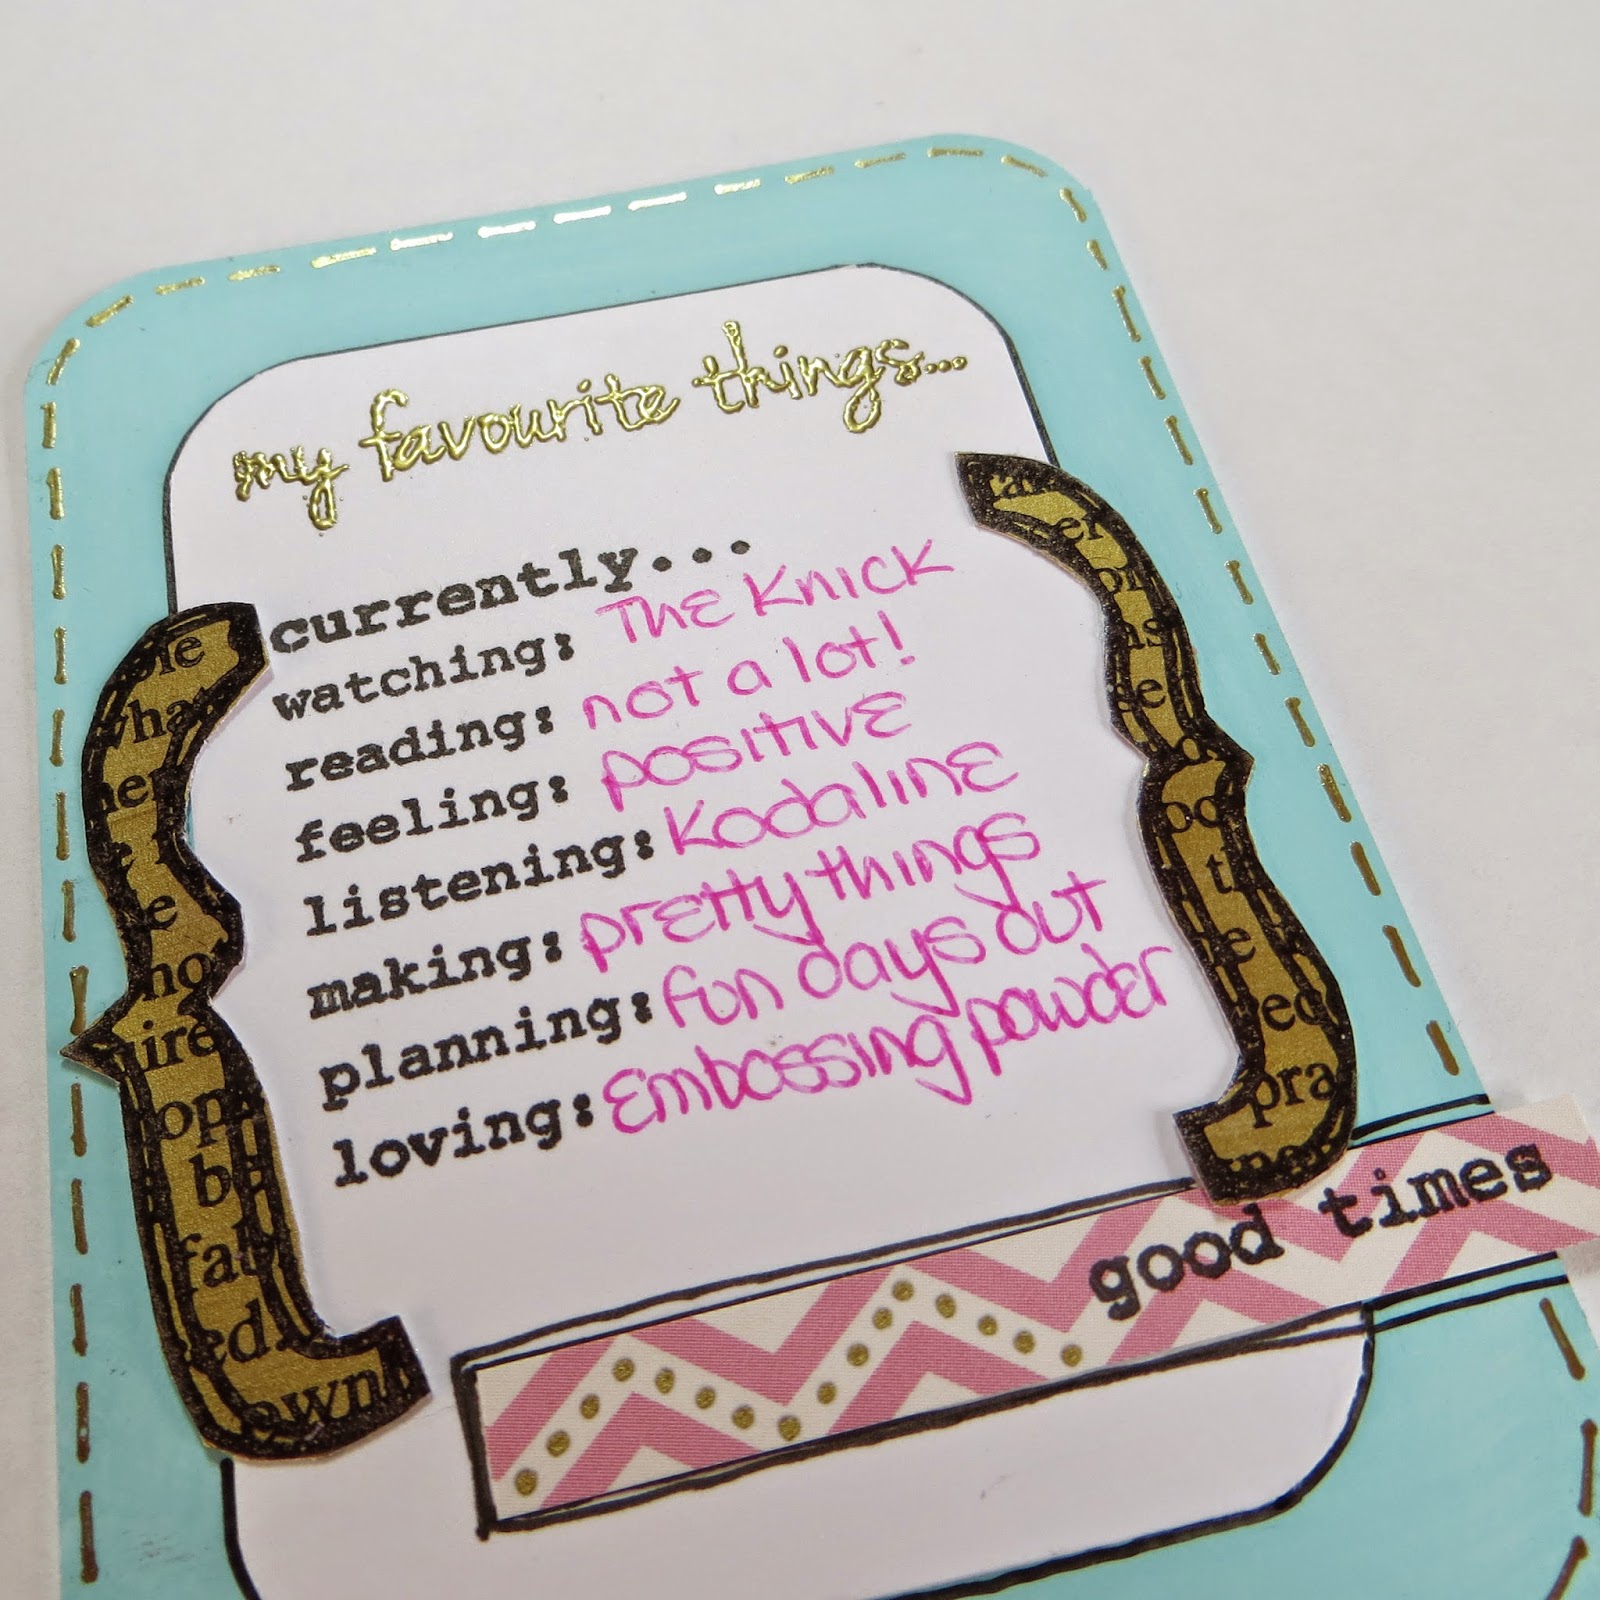
And now the stamping. These delicious stamps are taken from Tracy Scott's first set: ETS01.


I used Ranger's/Tim Holtz Distress pens to colour the stamps in after I had added more stenciling in black and a few extra marks here and there. I used Gelatos to add colour within the circles, created with bottle/jar caps, which added a lovely transparent layer to the colouring. A little doodling with a white gel pen completed the spread. Now for the inside pages. 


I used PaperArtsy Smoothy 240gms card to prepare some backgrounds for the photos, using Ranger Distress Oxides. I'm no expert with these oxides (I'm no Lesley Ebdon who is a whizz with these) but I am pleased with the ones I eventually selected to use. I tried to remember Lesley's tip of not swooshing the card through the saturated colour on the craft sheet, but just to dab. Easier said than done when you are heavy handed like me! They were vastly improved with the addition of some PaperArtsy Infusions I tried to match similar colours. I used: Golden Sands, A Bit Jaded, Olive Tree, Sleight Blue, Magenta and Frankly Scarlet. They add a gorgeous layer on top of those Oxides.
  

Before adhering the Oxides/Infusions backgrounds onto the book pages, I painted them with Fresco Chalk Bubble Gum and stenciled over it (using PS031) with Fresco Chalk Tango. After mounting the photos onto black card, I was then able to use Tracy Scott's gorgeous heart sets: ETS04/ETS05...


...to stamp and cut out the images to embellish the photos. Again, they were coloured in using a Distress pen. I will add some journaling to each page later.


I made good use of Tracy's stamps, as you can see from the final result. The box was completed in the same way as the reverse of the book, and only needed the addition of a title. Here I've used a Dylusions text stamp set from Stampers Anonymous to create the words. I have added more photos and more detailed explanations of how I created the journaled background, if you are interested, on my blog


It is such fun to create mini books and you have seen a wide variety over the past fortnight. I do hope it has inspired you to use some of these ideas to create your own. Mine has extra significance of course as it captures a few, small moments in the lives of my precious grandfairies. I like this art journal spread so much I might do something similar on a long, horizontal canvas, also using some Zinski monsters, for the littlest grandfairy's bedroom wall! Until next time...
Chris Cresswell.

Blog: www.loopsandlines.blogspot.co.uk
Facebook: Chris Cresswell
Twitter: artmadnana
Instagram: artmadnana
Pinterest: Chris Cresswell

Woohoooo what a brilliant burst of colour, and yes that box is from Creative Imaginations, sadly no longer available, but we used to sell them waaaaaay back! I'm pretty sure it would be easy enough to construct your own with greyboard, then cover it with copy paper and you'd be good to go! Love the amazing end result! What a fun 4 days you had!!! ~Leandra


We always hope that you  learn something interesting from our blog

Our creative team love to read your comments so much, so please take time to let them know you've been inspired!  

Why not join our 2-weekly challenge by blogging your create response to the current topic and link it here?

The current topic link Topic 11 (Books: Mini/ Maxi/ Binding) will close 17:00 (London Time) Sunday, August 20th 2017, and the winner will be announced 2 hours later at 19:00.

All links go in the draw to win a £50 voucher to spend on products of your choice from the PaperArtsy online store.

Wednesday, 5 August 2015

2015 #14 Scrapbooking with Flowers and Texture {by Jennie Atkinson}

2015 Topic 14: Flowers

Hello everyone! I am absolutely thrilled to be here with you all on the PaperArtsy blog. My name is Jennie Atkinson and my blog is Live The Dream and yes I do believe I live the dream! I live in Shetland, the most northerly island in the UK  (cold and windy at times but fabulous!) and my blog has been my link to the outside world and the opportunity to meet like minded stampers and crafters and of course to follow blogs, such as Paper Artsy, which have been my training ground ... not being able to get to workshops and craft events.

I love all aspects of stamping, inking, scrap-booking, art-journalling and mixed media work but I suppose my style is mainly vintage shabby chic. Those of you who know me know that I love making my own handmade flowers, this being borne out of the frustration of  never having the right kind of flower to hand and the disappointment of buying them on the internet.  So sharing a project with you on the theme of FLOWERS is just perfect for me !


Tonight I am sharing with you a mixed media scrapbook layout using some of my own flowers, but also one of my own photographs. I have recently taken up photography and am still in the very early stages.


When I saw Sara Naumann’s Wisdom stamps (ESN07) with the words 'Photographie Illuminating My Heart' I knew I had to use this stamp plate for my layout.


I used some strong linen style cardstock and got some texture on the page with texture paste and stencils and adding some tissue tape around the edges here and there. I had an idea where the photograph was going at this stage, but nothing else! Everything then got a coat of gesso.


When the gesso was dry I mixed some watery puddles of Fresco Finish Pansy and Spanish Mulberry on my craft mat and added them with a paintbrush slowly at first as it is always easier to add more than take it away. I kept spritzing with water, mopping up and then drying with a heat gun until happy with the colour.  I used Pansy on a mesh stamp here and there adding the paint to the stamp with a paintbrush. I also added splatters again in both Pansy and Spanish Mulberry.


With Jet Black Archival Ink I  used the music stamp from ESN07 and a vintage text stamp (one of those lovely freebies which Leandra is always so generous at popping into one’s parcel). Although somewhat randomly  I do try and keep these within the area of the photograph. Once I was happy with the background I used a sewing machine to attach it to the backing cardstock. I find this the easiest way of attaching the two pieces and I have added more stitching in various places as further texture.


I then started to put together the embellishments.  I used more of the stamps from ESN07 for my text and embellishments stamping with Watering Can Archival Ink and made some roses from white cardstock edged with grey ink.  There is a tutorial for these flowers on my blog HERE.  The leaf chippy was painted first with Sage Fresco Finish and then crackled with Crackle Effect and Snowflake. And then it was a case of layering everything around and under the photograph which is raised off the page on a large piece of greyboard. When everything is stuck down I usually finish off with some dry brush gesso here and there to tone everything together, especially on the metal and buttons.


I love the way the Fresco Finish paints merge together and give such a lovely light effect on the linen cardstock despite being such strong colours.  They are always my go to paint for covering chippies and the Crackle Glaze never disappoints! 

Sarah Naumann’s ESN07  stamp plate also provides wonderful opportunities for subtle stamping on the background as well as elements for layering.

I always wish I had planned things out a little more from the start. The photograph I was using was initially 4 x 6 but was too overpowering so I had to make it smaller which did expose more of the coloured areas on the background. Some gesso helped but I still think it is a bit heavy in the centre of the page.

When I teach scrapbook workshops here in Shetland I always show how turning the same design 90 or 180 degrees can make another great layout! Sorry there is no rotate button for you to try it out!

I do hope this might have inspired some of you to have a go at a mixed media scrapbook layout if you haven’t already done so. And also you might look at some of your smaller stamps in a whole new light.

If you are interested in seeing more of my flower tutorials please do visit my blog Live The Dream. You can access them either on the top bar or from scrolling down the side bar.

Thank you so much to the team at PaperArtsy for inviting me to share a project with you tonight – it has been such an honour!

Jennie


Ohhhhh Jennie, I do love how on the face of it your beautiful Scrapbook LO looks minimalist, but when you see how you have gently built layers, colour, textures, and embellished perfectly with such a fabulous eye for composition and placement, it's clear that you have put a lot of thought into this. Such a peaceful and elegant piece! Frame it! 
So lovely to have you share with us tonight! Thankyou! ~Leandra 


Bloggers and followers...we would love you to join in with challenge #14: Flowers.

If you are inspired by any of our guests who blog with us over the fortnight (July 26 - Aug 9th), or perhaps you want to just do your own thing with flowers...then please join in and link up your creativity HERE

All links go in the draw to win a voucher to spend on products of your choice from the PaperArtsy online store. The Flowers link will close 17:00 (London Time) Sunday, Aug 9th winner will be announced 2 hours later at 19:00.

Thursday, 5 February 2015

NEW {2015} PaperArtsy Products: Eclectica - Emma Godfrey

Hi everyone, Emma Godfrey here to introduce my new stamps and stencils.

Tonight I'm going to show you a few samples I have made with the new stamps, and I have a few other people who have joined me to show you their ideas too, more of that later.

First up here is the video from Leandra, and lots of samples!


I was inspired to design these stamps as I {love} the current trend for pocket scrapbooking.   However, I also wanted to make the stamps versatile so that they could be used for traditional scrapbooking, smash, cards, mini albums and journaling.   Each set is loosely themed, and is a collections of words, doodled images (that can be stamped individually or layered up) and of course a journaling type block that fits on a 3"x4" card.

The stamps...
EEG01
EEG02
EEG03


EEG04

 EEG05

EEG06


And here are the stencils....


So here are a couple of projects that I made...

(Please note: all cardstock is Smoothy. Stamping is with Jet Black Archival, or Versamark when embossing).

Project One: Pocket Scrapbooking by Emma Godfrey using EEG01 / EEG02 / EEG03
Step One: Cut up cardstock into four 3"x4" pieces and four 4"x6" pieces (mine were slightly smaller as for display purposes I had to put my cards onto a sheet of 12"x12" card rather than in a pocket page protector).  On another piece of cardstock stamp the calendar, and then stamp and pink emboss the circle over the date you need.  Stamp and emboss in black and blue the journal cards and tabs.  Cut them out.   Paint the 4”x6” cards with a wet wipe to create “swipey” backgrounds with Mermaid and Bora Bora, and Sherbet and Orchid Fresco Chalk Acrylics.


Step Two: When dry, layout the cards with your photos and cut out shapes – I find this helps me decide what I want to do next.  I also added small pieces of a co-ordinating patterned paper.


Step Three: I then started to add decorative elements:-
* I used Stencil PS001 and Snowflake Fresco Chalk Acrylic to add interest to the background of the 4"x6" pink cards.
*  I painted some cardstock with Old Gold Fresco Chalk Acrylic – which was used to create a background for the stripy journaling card, cut up into strips and also diecut into shapes (stars / number 2)
* I stamped the solid arrows in different colours of Fresco Chalk Acrylics, and then overstamped them with the outline arrows.
*  I stamped appropriate words around the cards.
*  I coloured in some of the outline words, the journaling cards and the calendar frame with the same Fresco Chalk Acrylics.  
*  I stamped the alphabet (in black ink, and stamped and embossed in pink), and cut up the letters to make other words.
*  I stamped and embossed in gold a few text circles, and cut them out. 


Here's a close up... so you can see some of the layout in more detail...


Here are a couple of other journaling cards that I made to use in future projects...


Project Two: Birthday Card by Emma Godfrey using EEG02 / EEG04 / EEG05 / EEG06
Step One: Firstly stamp and gold emboss the frame on cardstock, and then cut out the centre. Paint a piece of cardstock with Orchid Fresco Chalk Acrylic. When it is dry, stick it behind the frame and then stamp "hip hip hooray" in the centre. Paint a piece of cardstock with Sherbet Fresco Chalk Acrylic, and then stamp and cut out the flag. Stamp and gold emboss the words "happy" and "birthday" on the flag, and colour in "birthday" with a white Sharpie Extra Fine pen.


Step Two: Cut your card blank (6"x8") and fold in half. Cut a piece of patterned paper 1.5"x2.5" and ink the edges (you could instead paint a piece of cardstock with Mermaid and Bora Bora Fresco Chalk Acrylics for a similiar effect). Stick the piece down, and then gold emboss the solid dotty line underneath. Stamp the outline circles in three places so that they radiate out from the bottom of the blue piece of card (layout the pieces we prepared in Step 1 to see where you need to stamp). If the gaps in the stamping annoy you (they did me!) then fill them in with a black pen.


Step Three: Glue your frame in place, and stick the flag over the top using 3D foam pads. To finish, paint a piece of cardstock with Old Gold Fresco Chalk Acrylic, and then stamp the outline stars onto it.   Cut them out and stick them on.


Here's a close up ... I love the additional texture and bling that the gold embossing powder brings.


Project Three: Mini Scrapbook Page by Emma Godfrey using EEG02 / EEG03 / EEG04
Step One: Cut a 6.5"x6.5" piece of cardstock (I don't like to waste card, so I cut the centre out leaving a 1" frame all around - but you can leave it whole if you prefer). Paint the background with Mermaid Fresco Chalk Acrylic.


Step Two: Then cut a piece of cardstock 6"x6". Water down some Bora Bora Fresco Chalk Acrylic, and apply to the card with your finger making a chunky "L" shape. Apply Grunge Paste through the block part of Stencil PS016 and dry.


Step Three: Now you need to position where your photo is going to go (don't stick it down yet ... this is just to see where you need to stamp!). Stamp the solid dotty line and the outline small arrows in three areas. Press a bottlecap (I used a Fresco Chalk Acrylics lid) into the black ink pad and then stamp it randomly around the page (you will need to re-ink it each time). Glue a couple of pieces of co-ordinating patterned paper in place.


Step Four: Stick your photo in place. Stamp "dated:" along the side, and "this is the good stuff" below. Diecut a star from cardstock and paint that and some mini wooden stars with Old Gold Fresco Chalk Acrylic. Glue them in place. Use a gold paint pen to add some dots around the stars and photo. Finally, dip the handle end of a small paint brush into a small amount of Orchid Fresco Chalk Acrylic and "stamp" dots randomly (depending on how hard you stamp, you will get different sized dots).


And here's a close up... I love the way the paintbrush dots stay slightly raised after they've dried.


And here's some more great ideas...

Lythan Nevard (slightlysquiffy.blogspot.co.uk)

A 6"x6" mini book page with lots of layering, and everything inked around the edges.  Old Gold Fresco Chalk acrylic was splattered onto some of the layers with a paintbrush.


A 3"x4" journal card using the Fresco Chalk Acrylic paints to create an ombre style background.


Small Scrapbook Page: Paint the background with layers of colour, and dry brush with paint over the top.  Paint different colours onto the circle stamps to create multi-coloured images. Stamp sentiments over the top of the circles, and add the journaling card bits on top.


Weekly Planner: Paint stripes on cardstock and stamp the journaling blocks.  Stamp the individual elements with paint.   Make hinges with Old Gold painted card and attach the journaling cards to a decorated Smoothy base.


Card: Paint stripes onto a small strip of Smoothy. Water down Old Gold to create a spray. Spray top right of card. Stamp journaling block onto bottom left of card as a pattern, and colour in with watered down paints. Add extra stamping and individual letters to spell sentiment.


A 4"x4" page protector - with stamping and paint on the photo and protector to layer up the images and words.


And journal cards with the paints watered down to create watercolour style backgrounds. Grunge Paste on the bottom one to add some texture.


A 6"x6" journal page layering up the stamps with ink and paints, and some extra doodling.


A 4"x6" journal card with lots of layers.  Using the rectangular shapes as a background and outlining some of them with a white pen.


Emma Humphreys

A mini scrapbook page with a mottled background.  The words were stamped onto another piece of paper, cut out and stuck on the background to add another dimension.  It was then stamped with the outline circles.


A card using the text circle stamp to create a scalloped border around the journaling card. The heart, flower and sentiment are JOFY stamps.


Helen Chilton (helenchilton.blogspot.co.uk)

Two large tags using the arrow stamps to create the background.  Some of the arrows were stamped on another piece of card and cut out, before being stuck on.
.

Stamping on the ribbon ties everything together. And the journaling cards have been layered  up with words and a pointy border (made from stamping an arrow corner around the edge).


Theresa Goulder

A 4"x6" journal card with the journal block stamped in Old Gold Fresco Chalk Acrylic on the mottled background.   The "24/7" is stamped on shrink plastic to make a 3D embellishment.


A tag with the outline circle and rectangular shapes stamped to create a background. The solid black border on the left balances the tag with the words stamped on the right.


I would like to say a HUGE thank you to all of these creative ladies who have helped me by making these samples.   I knew how "I" wanted to use the stamps when I designed them, but it's brilliant to see other people's take on them.   Fabulous jobs ladies.  Thank you so much.

I've been teaching for 8 years, and hold regular monthly workshops at my crop in Upminster (Essex). Out next classes (card-making and scrapbooking) are on Saturday 21 February, and both are using my stamps.  You can find more information on them here.


I also plan to teach at various shops around the South East (and maybe further afield) this year, and the first of these is a mini album class using my stamps on Sunday 15 March at Birds In The Barn


If you would like to arrange for me to teach/demo at your shop or event, then please contact me at emmaimaginethatpapercrafts@yahoo.co.uk.


My brand spanking new blog is at imaginethatpapercraft.blogspot.co.uk. I also have a Facebook page here, and you can follow me on Twitter @emmaimaginethat.

I really hope you are going to enjoy using my stamps this year... I can't wait to see what you create with them!

Emma

PS Don't forget that the blog challenge for Topic 2: Shiny Stuff is still open until Sunday Feb 8th, until 5pm. If you'd like to take part, and show us your inner magpie skills, then go right ahead!