Showing posts with label Pocket Scrapbooking. Show all posts

Monday, 6 July 2015

NEW {July 2015} PaperArtsy Products: Eclectica³ Emma Godfrey - Part 1

Hi everyone, Emma Godfrey here to introduce my new stamps and stencils.

Tonight I'm going to show you a few samples I have made with the new stamps, and I also have a couple of other people who have joined me to show you their ideas too. More of that later, first up here is an intro video I filmed with Leandra, showcasing gorgeous samples!


If you want to see my release from Earlier in the year {February, 2015}, here is that video too...


In April we also added another 2 new sets, Plates EEG07 and EEG08, which both have phrases in French, as they are element-heavy,  If French is not your language, then as they are element-heavy there are still plenty of other stamps to use from both these sets!.

Here is a lovely card by Anneke de Clerck using the circles set. See it here.


As was also the case with my previous stamp sets, my inspiration for this release is the versatility of pocket scrap-booking, mini albums, traditional scrap-booking, and even mixed media concepts. I really love it when craft items can cross-over all these areas with ease.

These two new sets are perfect for this time of year (in the Northern Hemisphere) as the themes are Summer and Travel, and of course school holidays have started or just about to in the next week or two. Both sets can work brilliantly together, and naturally they are easy to mix with any of the earlier sets.

The NEW {July, 2015} stamps...
There are 2 new stamp sets in this release. Tonight we are focusing on Plate EEG09, and tomorrow come back to see what my helpers have done with Plate EEG10.


I have some talented assistants tonight who have made some items to show you with my newest stamps. All of the projects in tonight's post were given the Fresco Paint colour scheme of  Autumn Fire, Lake Wanaka, Haystack, Guacamole and Concrete. So let's see what they have made!

Anneke De Clerck is featured regularly in Craft Stamper magazine, and she also contributes frequently to the PA blog. You may already be aware her style is clean and simple, but she does love to splat paint about too....this fits perfectly with the EEG stamps of course! If you want to see more of her, visit her blog 'Some Fiddling on the Kitchen Table' ... or you can find her on Instagram, Pinterest, Facebook or Flickr. 


Art Journal Spread by Anneke de Clerck using EEG09

For the background of this card I did some mono printing with the 3 x 5" gel printing plate on wax paper. I overstamped the print with a spiral stamp from the EEG07 set. To add some dimension I layered up the clouds and flowers and did some machine stitching.


Clean and Simple Card by Anneke de Clerck using EEG09

I'm fond of CAS cards with lots of white space. Although these cards are not the easiest ones to make. 


Splish Splash by Anneke de Clerck using EEG09

During my recent visit to the UK I saw lots of beautiful beach houses. I tried to imitate beach house boards on this card. I love to mix and match text stamps and guess what...there are lots of beautiful text stamps in this EEG09 set! 


Summer by Anneke de Clerck using EEG09

I like creating patterns with text stamps, here I used one single word. I highlighted the beautiful border on the journal card by adding paint dots. 


Next up is Lynne Moncrieff. She is featured regularly in Stampington Publications and is well known for her minimalist Vintage style and beautiful composition. This year, she has been working regularly with PaperArtsy Fresco Paints, and the addition of new colours to her usual palette seems to be affecting her in a good way! She is moving in a different direction, and we love to see how she interprets these products in her own unique way. If you want to see more of her, visit her blog 'Adorn' ... or you can find her on Facebook too. 


Whatever The Weather by Lynne Moncrieff using EEG09

For this panel I wanted to convey that no matter the weather, especially days of grey clouds and rain, that life can still be a picnic!   The straight edge of the largest cloud stamp, along with a scattering of sequins, conveys the rain falling from the clouds.


Lazy Days by Lynne Moncrieff using EEG09

On first seeing Emma's stamp designs I knew I wanted to turn the two sizes of clouds into a grassy border and the two sun stamps become quirky flowers. The straight edge of the largest cloud was turned into a stem for each flower.


At The Beach by Lynne Moncrieff using EEG09


To create the beach scene two large clouds were transformed into waves layered with muslin painted with Lake Wanaka.  A liberal scattering of mica flakes and sequins bring shimmer to this panel to give the impression of sunlight bouncing off the water.

Summer Sunshine by Lynne Moncrieff using EEG09

The largest cloud became grass. For the flowers, the largest sun makes up the first layer of the flower with the smaller sized sun fussy cut to become the second layer.

Finally, I'd like to share with you a few items I have made with this stamps set.
 

Project One: Not A Cloud In The Sky by Emma Godfrey using EEG09

Step One: I cut up Heavy Smoothy into four 4"x6" pieces and four 3"x4" pieces. I rounded the corners of each piece. I had some grey/white chevron patterned paper in my stash, but wanted to tone it down a bit and add some interest to it, so I made my own cloud stencil.  I stamped the clouds onto an A5 size piece of Heavy Smoothy, and then cut the shapes out with a craft knife. I stenciled with Fresco Snowflake paint, and then stamped the cloud stamp over the top with a Versafine Smokey Gray ink pad.  I cut the patterned paper up and arranged it with my photos.


Step Two: I painted some pieces of Smoothy card with the other Fresco paints, and cut 1/4" strips and punched circles from them. I also stamped and cut out the sun and one each of the clouds. They were all edged in Archival Jet Black applied with a piece of Cut'n'Dry Foam. A small paper bag was stuck to one of the smaller journal cards to hold the ticket.

 
Step Three: To bring everything together I stamped the alphabet from EEG02 with a co-ordinating orange ink pad, and cut out the letters that I needed.  I stamped words in Archival Jet Black on each card.  I also painted some small wooden shapes and stuck them on. I added some extra words for the title card using Basic Grey Stickers and a corrugated card alphabet. To finish, all the pocket cards were inked around the edges with Archival Jet Black, and the clouds and sun were accented using a Sharpie Extra Fine White pen.


Here's a close up... so you can see the title card and stenciling in more detail...


Summer Days Notebook by Emma Godfrey using EEG09

Step One:  Stamp words all over the front of the kraft notebook using Archival Jet Black. Colour in the outline words with a Sharpie Extra Fine White pen (it will soak into the kraft, so you may have to do this twice). Cut a strip of Smoothy card and paint it concrete. Stick it just below centre on the front cover. Tie string around the spine of the book and tie a couple of buttons onto the string ends.


Step Two: Paint a piece of Smoothy with the other Fresco Finish Paints and stamp clouds, suns and borders (from EEG07).  Cut them out. At this stage I wasn't sure what I was going to use, which is why I stamped to many clouds and suns, and the borders in both colours.   Over the top of the clouds, I stamped dots (ESN09) using a blue metallic ink pad.


Step Three: I stuck the borders, sun and clouds to the front of the notebook. I painted some Basic Grey alphabet stickers with Fresco Finish Autumn Fire (it's Translucent so you can still see the book text printed on the stickers).  I added my title, and then finished by adding some detail with the Sharpie Extra Fine White pen and doodling a few extra lines with a black pen.

Here's a close up ...

And here's some more journaling cards...


And a couple of greeting cards...


I'll be back again the same time tomorrow night with more ideas with the other stamp set EEG10, and of course, some more wonderful assistants!

If you'd like to come to a class taught by me, I hold regular workshops at my monthly crop in Upminster (Essex) - y
ou can find more information on them here. You'll also find me teaching at Forget Me Not Kraft Kabin and Birds In The Barn later in the year.

If you would like to arrange for me to teach/demo at your shop or event, then please contact me at emmaimaginethatpapercrafts@yahoo.co.uk.

My blog Imagine That  is new for 2015, and you can also find me on Facebook, Pinterest or Twitter @emmaimaginethat .

I really hope you are going to enjoy using my stamps this year... I can't wait to see what you create with them!

Emma

The following shops have already ordered my stamps from PaperArtsy and the only place you can get them NOW is exclusively from them. Please try to support your local independent retailer, be they a physical shop, or online. All my stamps are red rubber and sell in the UK for £20.50 (incl VAT). They come individually trimmed on EZ mount foam, ready to use with your acrylic blocks.

Birds in the Barn, Marks Tey, Essex, UK. Telephone orders, or please visit the shop.
Countryview Crafts, Potton, Bedfordshire, UK. EEG stamps here.
Frantic Stamper Inc, Oregon, USA. EEG stamps here.
Imagine That Papercrafts, Essex, UK. EEG Stamps here.

PS Don't forget that the blog challenge for Topic 12: Stencils is still open until Sunday July 12th. If you'd like to take part, and show us your stencilling skills, then go right ahead!

Thursday, 5 February 2015

NEW {2015} PaperArtsy Products: Eclectica - Emma Godfrey

Hi everyone, Emma Godfrey here to introduce my new stamps and stencils.

Tonight I'm going to show you a few samples I have made with the new stamps, and I have a few other people who have joined me to show you their ideas too, more of that later.

First up here is the video from Leandra, and lots of samples!


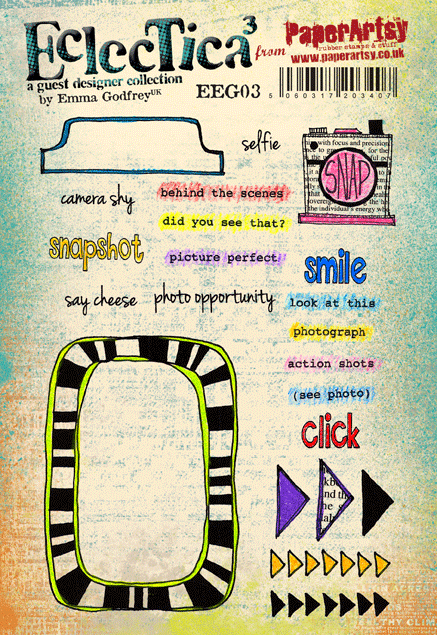
I was inspired to design these stamps as I {love} the current trend for pocket scrapbooking.   However, I also wanted to make the stamps versatile so that they could be used for traditional scrapbooking, smash, cards, mini albums and journaling.   Each set is loosely themed, and is a collections of words, doodled images (that can be stamped individually or layered up) and of course a journaling type block that fits on a 3"x4" card.

The stamps...
EEG01
EEG02
EEG03


EEG04

 EEG05

EEG06


And here are the stencils....


So here are a couple of projects that I made...

(Please note: all cardstock is Smoothy. Stamping is with Jet Black Archival, or Versamark when embossing).

Project One: Pocket Scrapbooking by Emma Godfrey using EEG01 / EEG02 / EEG03
Step One: Cut up cardstock into four 3"x4" pieces and four 4"x6" pieces (mine were slightly smaller as for display purposes I had to put my cards onto a sheet of 12"x12" card rather than in a pocket page protector).  On another piece of cardstock stamp the calendar, and then stamp and pink emboss the circle over the date you need.  Stamp and emboss in black and blue the journal cards and tabs.  Cut them out.   Paint the 4”x6” cards with a wet wipe to create “swipey” backgrounds with Mermaid and Bora Bora, and Sherbet and Orchid Fresco Chalk Acrylics.


Step Two: When dry, layout the cards with your photos and cut out shapes – I find this helps me decide what I want to do next.  I also added small pieces of a co-ordinating patterned paper.


Step Three: I then started to add decorative elements:-
* I used Stencil PS001 and Snowflake Fresco Chalk Acrylic to add interest to the background of the 4"x6" pink cards.
*  I painted some cardstock with Old Gold Fresco Chalk Acrylic – which was used to create a background for the stripy journaling card, cut up into strips and also diecut into shapes (stars / number 2)
* I stamped the solid arrows in different colours of Fresco Chalk Acrylics, and then overstamped them with the outline arrows.
*  I stamped appropriate words around the cards.
*  I coloured in some of the outline words, the journaling cards and the calendar frame with the same Fresco Chalk Acrylics.  
*  I stamped the alphabet (in black ink, and stamped and embossed in pink), and cut up the letters to make other words.
*  I stamped and embossed in gold a few text circles, and cut them out. 


Here's a close up... so you can see some of the layout in more detail...


Here are a couple of other journaling cards that I made to use in future projects...


Project Two: Birthday Card by Emma Godfrey using EEG02 / EEG04 / EEG05 / EEG06
Step One: Firstly stamp and gold emboss the frame on cardstock, and then cut out the centre. Paint a piece of cardstock with Orchid Fresco Chalk Acrylic. When it is dry, stick it behind the frame and then stamp "hip hip hooray" in the centre. Paint a piece of cardstock with Sherbet Fresco Chalk Acrylic, and then stamp and cut out the flag. Stamp and gold emboss the words "happy" and "birthday" on the flag, and colour in "birthday" with a white Sharpie Extra Fine pen.


Step Two: Cut your card blank (6"x8") and fold in half. Cut a piece of patterned paper 1.5"x2.5" and ink the edges (you could instead paint a piece of cardstock with Mermaid and Bora Bora Fresco Chalk Acrylics for a similiar effect). Stick the piece down, and then gold emboss the solid dotty line underneath. Stamp the outline circles in three places so that they radiate out from the bottom of the blue piece of card (layout the pieces we prepared in Step 1 to see where you need to stamp). If the gaps in the stamping annoy you (they did me!) then fill them in with a black pen.


Step Three: Glue your frame in place, and stick the flag over the top using 3D foam pads. To finish, paint a piece of cardstock with Old Gold Fresco Chalk Acrylic, and then stamp the outline stars onto it.   Cut them out and stick them on.


Here's a close up ... I love the additional texture and bling that the gold embossing powder brings.


Project Three: Mini Scrapbook Page by Emma Godfrey using EEG02 / EEG03 / EEG04
Step One: Cut a 6.5"x6.5" piece of cardstock (I don't like to waste card, so I cut the centre out leaving a 1" frame all around - but you can leave it whole if you prefer). Paint the background with Mermaid Fresco Chalk Acrylic.


Step Two: Then cut a piece of cardstock 6"x6". Water down some Bora Bora Fresco Chalk Acrylic, and apply to the card with your finger making a chunky "L" shape. Apply Grunge Paste through the block part of Stencil PS016 and dry.


Step Three: Now you need to position where your photo is going to go (don't stick it down yet ... this is just to see where you need to stamp!). Stamp the solid dotty line and the outline small arrows in three areas. Press a bottlecap (I used a Fresco Chalk Acrylics lid) into the black ink pad and then stamp it randomly around the page (you will need to re-ink it each time). Glue a couple of pieces of co-ordinating patterned paper in place.


Step Four: Stick your photo in place. Stamp "dated:" along the side, and "this is the good stuff" below. Diecut a star from cardstock and paint that and some mini wooden stars with Old Gold Fresco Chalk Acrylic. Glue them in place. Use a gold paint pen to add some dots around the stars and photo. Finally, dip the handle end of a small paint brush into a small amount of Orchid Fresco Chalk Acrylic and "stamp" dots randomly (depending on how hard you stamp, you will get different sized dots).


And here's a close up... I love the way the paintbrush dots stay slightly raised after they've dried.


And here's some more great ideas...

Lythan Nevard (slightlysquiffy.blogspot.co.uk)

A 6"x6" mini book page with lots of layering, and everything inked around the edges.  Old Gold Fresco Chalk acrylic was splattered onto some of the layers with a paintbrush.


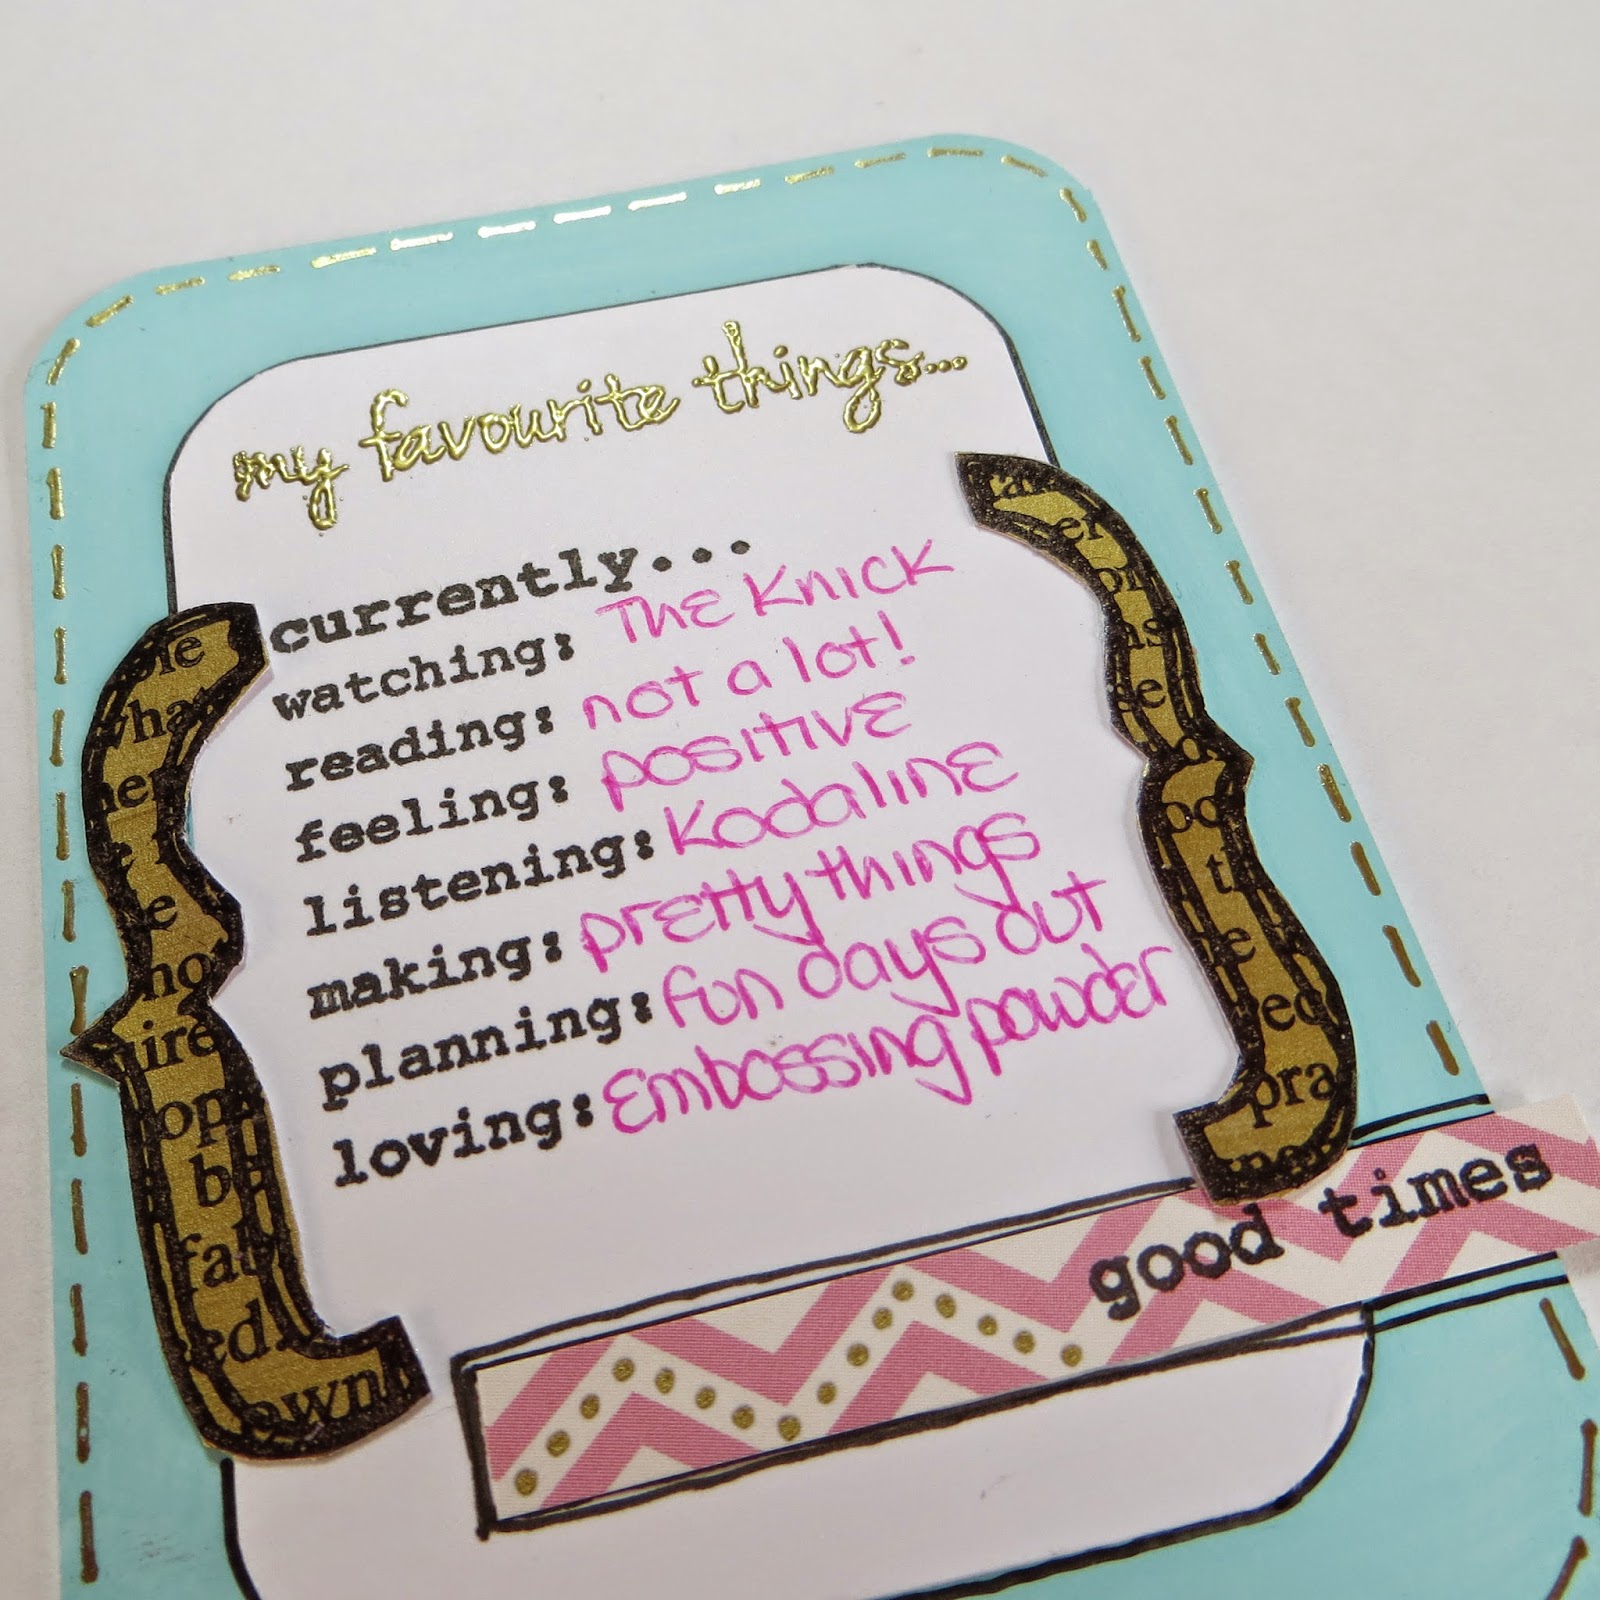
A 3"x4" journal card using the Fresco Chalk Acrylic paints to create an ombre style background.


Small Scrapbook Page: Paint the background with layers of colour, and dry brush with paint over the top.  Paint different colours onto the circle stamps to create multi-coloured images. Stamp sentiments over the top of the circles, and add the journaling card bits on top.


Weekly Planner: Paint stripes on cardstock and stamp the journaling blocks.  Stamp the individual elements with paint.   Make hinges with Old Gold painted card and attach the journaling cards to a decorated Smoothy base.


Card: Paint stripes onto a small strip of Smoothy. Water down Old Gold to create a spray. Spray top right of card. Stamp journaling block onto bottom left of card as a pattern, and colour in with watered down paints. Add extra stamping and individual letters to spell sentiment.


A 4"x4" page protector - with stamping and paint on the photo and protector to layer up the images and words.


And journal cards with the paints watered down to create watercolour style backgrounds. Grunge Paste on the bottom one to add some texture.


A 6"x6" journal page layering up the stamps with ink and paints, and some extra doodling.


A 4"x6" journal card with lots of layers.  Using the rectangular shapes as a background and outlining some of them with a white pen.


Emma Humphreys

A mini scrapbook page with a mottled background.  The words were stamped onto another piece of paper, cut out and stuck on the background to add another dimension.  It was then stamped with the outline circles.


A card using the text circle stamp to create a scalloped border around the journaling card. The heart, flower and sentiment are JOFY stamps.


Helen Chilton (helenchilton.blogspot.co.uk)

Two large tags using the arrow stamps to create the background.  Some of the arrows were stamped on another piece of card and cut out, before being stuck on.
.

Stamping on the ribbon ties everything together. And the journaling cards have been layered  up with words and a pointy border (made from stamping an arrow corner around the edge).


Theresa Goulder

A 4"x6" journal card with the journal block stamped in Old Gold Fresco Chalk Acrylic on the mottled background.   The "24/7" is stamped on shrink plastic to make a 3D embellishment.


A tag with the outline circle and rectangular shapes stamped to create a background. The solid black border on the left balances the tag with the words stamped on the right.


I would like to say a HUGE thank you to all of these creative ladies who have helped me by making these samples.   I knew how "I" wanted to use the stamps when I designed them, but it's brilliant to see other people's take on them.   Fabulous jobs ladies.  Thank you so much.

I've been teaching for 8 years, and hold regular monthly workshops at my crop in Upminster (Essex). Out next classes (card-making and scrapbooking) are on Saturday 21 February, and both are using my stamps.  You can find more information on them here.


I also plan to teach at various shops around the South East (and maybe further afield) this year, and the first of these is a mini album class using my stamps on Sunday 15 March at Birds In The Barn. 


If you would like to arrange for me to teach/demo at your shop or event, then please contact me at emmaimaginethatpapercrafts@yahoo.co.uk.


My brand spanking new blog is at imaginethatpapercraft.blogspot.co.uk. I also have a Facebook page here, and you can follow me on Twitter @emmaimaginethat.

I really hope you are going to enjoy using my stamps this year... I can't wait to see what you create with them!

Emma

PS Don't forget that the blog challenge for Topic 2: Shiny Stuff is still open until Sunday Feb 8th, until 5pm. If you'd like to take part, and show us your inner magpie skills, then go right ahead!