NEW Eclectica³ {Emma Godfrey} Jan 2018

We
find it super exciting when a designer goes in a new direction. And why
wouldn't you? In my world, life is all about change. I am not a
creature of habit, so I find it fills a real innate urge to forge ahead
and test new waters.
Hi everyone, Emma here to show you my newest stamps that I've designed for PaperArtsy.


I'll share my new stamps with you in this post, but also today, in just 30 minutes, there is another blog post where you will have a chance to have a look at what Autumn Clark has created with these stamp sets. I was blown away with what Autumn made, she is amazing at layering and adding those little touches that make a piece of art really special. Make sure you hang around to take a look.
But, first here are some of my ideas with each of the new stamp sets.
Eclectica³ Emma Godfrey Set 25 (EEG25)

Tile It Up using EEG25

I
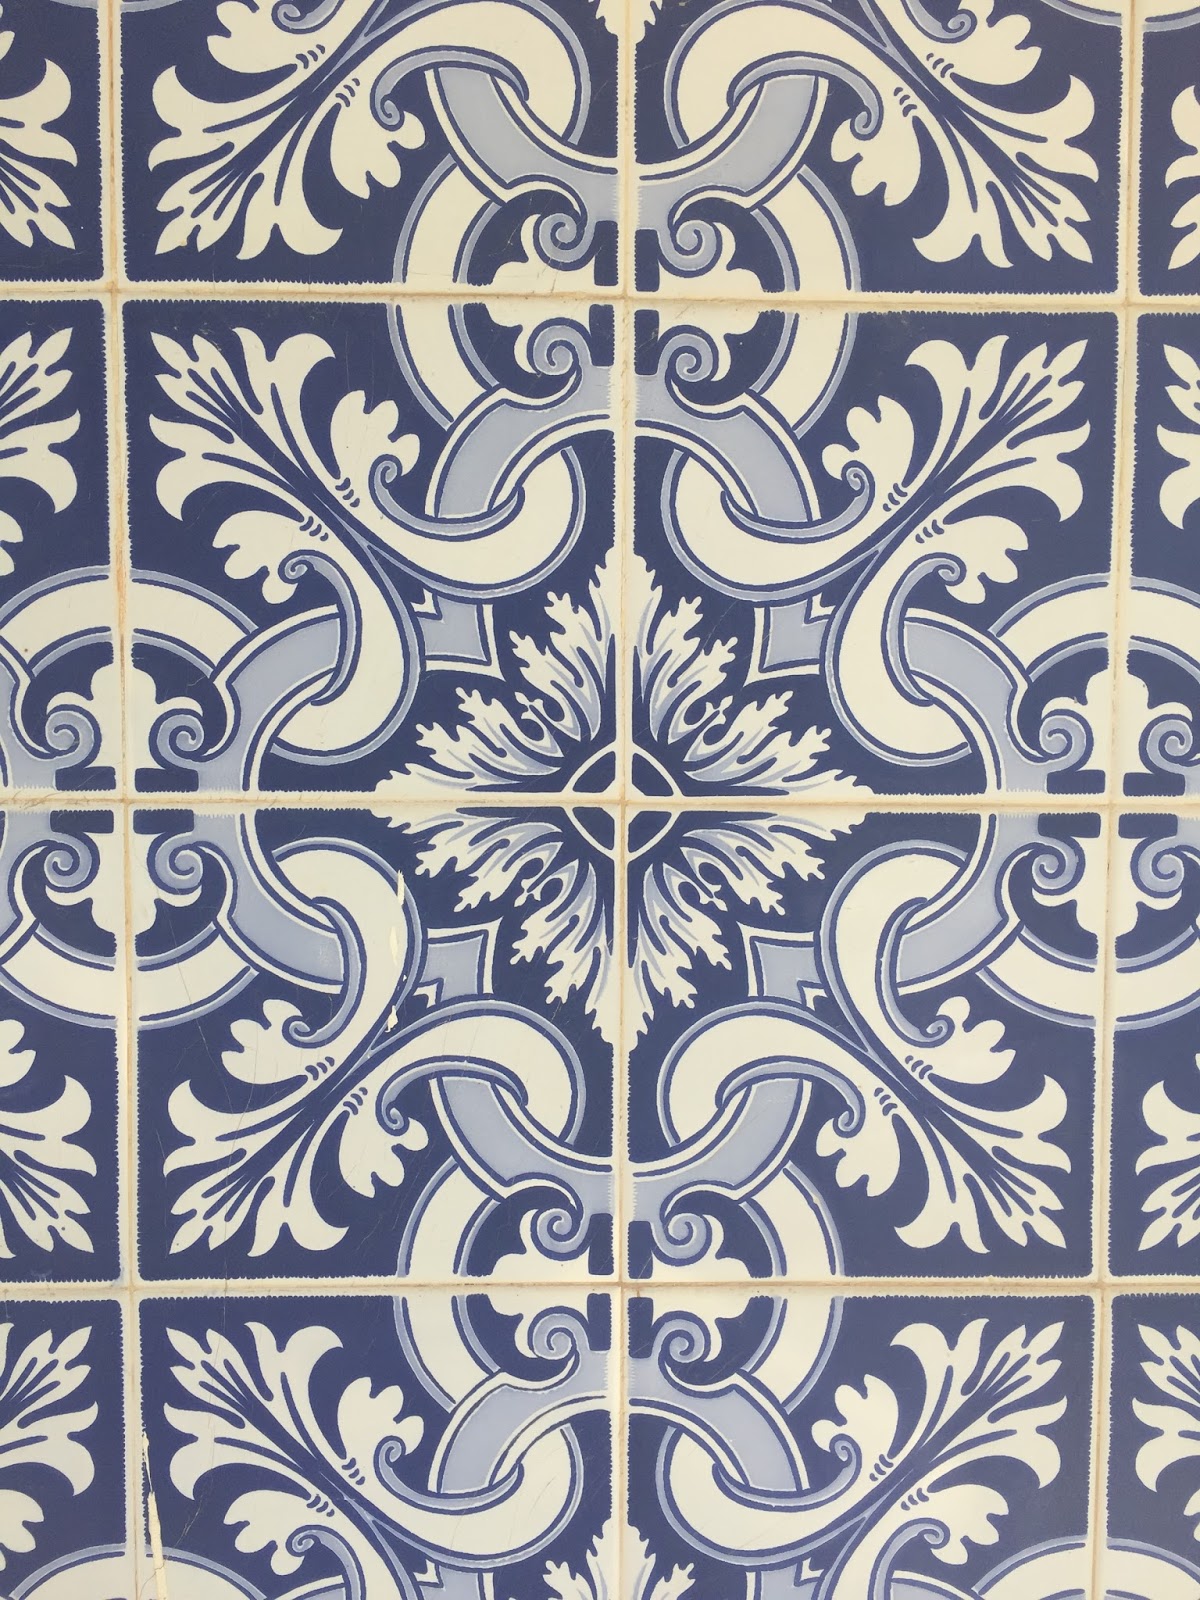
love how colourful some of the buildings are in Portugal, and that's
mainly down to their use of decorative tiles. I think the tile stamps in
particular will be really versatile, whether you want to use them to
build up a background, or as a focal point.

All
of the tile stamps in the two sets are roughly the same size, so I'm
thinking it would be fun to mix them up together to create a mosaic
effect. Or maybe just use one stamp and mix up the colours?
Eclectica³ Emma Godfrey Set 26 (EEG26)

For Sale using EEG26

The
window rubber stamp was just crying out to be "opened" and layered up. I
stamped with grey ink, but I think that using black ink would make some
of the details stand out even more.
I
wanted to keep the window surround soft, mottled and grungy, and I was
really happy with how using PaperArtsy Infusions with Ranger Distress
Oxide inks worked.
And here are a couple of other pieces that I made with both stamp sets...


And here are a couple of other pieces that I made with both stamp sets...


So
there you go, a completely new style and direction for me, but I hope
you like them as much as I do. I believe they could work well
I can't wait to see what you create with them.
I can't wait to see what you create with them.
Emma
Socials...
New
2018 Products are only available from the approved PaperArtsy stockists
listed below, they will not be available to purchase directly from
PaperArtsy until mid 2018.
We
encourage you to support independent retailers; they offer you valuable expertise and a wide range of
product choice outside of the big box stores. Buy in-store or online now from the following stockists:
Australia
Art and Soul Studio, Burrum Heads, Queensland www.artandsoulstudio.com.au
Auzz Trinkets and Crafts, Calamvale, Queensland https://atcraft.com.au/
Crafters Cupboard, Berwick, Victoria www.crafterscupboard.com.au
Crafters Cupboard, Berwick, Victoria www.crafterscupboard.com.au
Kreative Koncepts Pty Ltd. Burrum Heads, Queensland www.artandsoulstudio.com.au
Scrap Matrix, Port Elliot, South Australia http://scrapmatrix.com/
Scrap Matrix, Port Elliot, South Australia http://scrapmatrix.com/
Time To Create, Modanville, NSW www.timetocreate.com.au
Belgium
Canada
Czech Republic
Denmark
Germany
South Africa
Taiwan
United Kingdom
We do not supply chains, TV channels or discounters. Our brand is only available from established stockists who are VAT/ GST/ sales tax registered and for whom product education is a core principle. These retailers appreciate that PaperArtsy products are produced to the highest standards possible, and that we will not compromise quality for quantity. We would rather supply a few hand selected stockists, than the greater masses. If you would like to apply to be a stockist, you can find our more about our supply criteria here
Canada
Scrapbook Centrale, Dollard Des Ormeaux, Quebec www.scrapbookcentrale.ca
Treasured Memories, Duncan,BC www.treasuredmemoriesscrapbooking.ca
Simply Scrapbooking, Prince George, BC https://www.facebook.com/simplyscrapbooking/
Czech Republic
Hurapapir, Brno https://www.hurapapir.cz/
Denmark
Hobbyboden Scrapworld Samso www.hobbyboden.dk
Papir Ulven, Lejre www.papirulven.dk
Finland
Piia Takalo, Kittila, piiatakalo@gmail.com
France
Katzelkraft, Ingwiller http://www.katzelkraft.fr/en/
Kerglaz, Basse Goulaine, https://www.kerglaz.com/
Kerudoc Creation, St Yvi www.kerudoccreation.com
Kerglaz, Basse Goulaine, https://www.kerglaz.com/
Kerudoc Creation, St Yvi www.kerudoccreation.com
Germany
Paperbasics, Hessen, https://www.paperbasics.de/en/
Stempelbar, Berlin, http://www.stempelbar.de
Stempeloase Munich www.stempeloase.de
Stempelbar, Berlin, http://www.stempelbar.de
Stempeloase Munich www.stempeloase.de
Stempelfee Shop www.stempelfee-shop.de
Italy
Marte Savona, Savona, http://www.martesavona.it/
L'artistica Glo, Cinisello B (Mi), http://www.artisticaglo.it/
Japan
Creafine, Papendrecht www.creafine.nl
Doe@ding,Spijkenisse https://doeading.nl/
Hobbidee Breda, Noord-Brabant, https://www.hobbidee-breda.nl/
Hobbycompleet de Duif, Leeuwarden www.hobbycompleet.nl
Hobbidee Breda, Noord-Brabant, https://www.hobbidee-breda.nl/
Hobbycompleet de Duif, Leeuwarden www.hobbycompleet.nl
Papillon Hobby, Hendrik Ido Ambacht www.papillon-hobby.nl
Scrap & Co, Klarenbeek www.scrap-co.nl
Scrap & Co, Klarenbeek www.scrap-co.nl
Scrapbookdepot, Uitgeest, www.scrapbookdepot.nl
Stampingcorner, Capelle Aan Den Ijssel www.stampingcorner.nl
Stampingcorner, Capelle Aan Den Ijssel www.stampingcorner.nl
The Stamping Cottage, Schaijk www.thestampingcottage.nl
New Zealand
Norway
Spain
The Art of Craft, Papamoa, Bay of Plenty, www.artofcraft.co.nz
Norway
Hobbygarasjen, Kopervik, www.Hobbygarasjen.no
Spain
Cien por Cien Manualidades, S.L., Barcelona, Catalunya, www.100x100manualidades.es
Ideas 10 Manualidades Y Scrapbook, Bilbao https://ideas10manualidades.com/
Scraphouse S.L. Barcelona https://www.scraphouseshop.es/
The Paradise Corner, Barcelona, https://www.facebook.com/theparadisecorner/
Endulze & Crista S.L., Pamplona, Navarra, https://www.endulze.com/
South Africa
Taiwan
Mandy's Cards, Taipei www.facebook.com/mandy.card
United Kingdom
A Trip Down Memory Lane, Ipswich, Suffolk, http://www.atripdownmemorylane.co.uk
Aldridge Crafts, Attleborough, Norfolk www.aldridgecrafts.co.uk
Aldridge Crafts, Attleborough, Norfolk www.aldridgecrafts.co.uk
Amelia's Creative Crafts, Studley, Warwickshire www.ameliascreativecrafts.co.uk
Art from the Heart, Harrogate, Yorkshire www.afth.co.uk
Blade Rubber Stamps, London www.bladerubberstamps.co.uk
Clacton Art Craft Model Centre, Clacton on Sea, Essex, http://www.clactoncrafts.co.uk/
Countryview Crafts, Potton, Bedfordshire www.countryviewcrafts.co.uk
Countryview Crafts, Potton, Bedfordshire www.countryviewcrafts.co.uk
Craft World Scotland, Glasgow www.craftworldonline.co.uk
Crafty Snippets, Billingshurst West Sussex www.craftysnippets.co.uk
Crafts & Candlelight, Ipswich, Suffolk www.craftsandcandlelight.co.uk
Crafts @themalthouse, Herstmonceux, East Sussex, http://www.coldfusionglass.co.uk/
Craftylicious, Mildenhall, Suffolk www.craftylicious.co.uk
Craftrange, Burnley, Lancs, https://www.craftrange.com/
Imagine, Design, Create, Seaton, Exeter http://imaginedesigncreate.co.uk/shoponline/
Kay Carley http://www.kaycarley.com
Keep on Crafting, Bury St Edmunds, Suffolk www.keeponcrafting.co.uk
Crafts @themalthouse, Herstmonceux, East Sussex, http://www.coldfusionglass.co.uk/
Craftylicious, Mildenhall, Suffolk www.craftylicious.co.uk
Craftrange, Burnley, Lancs, https://www.craftrange.com/
Imagine, Design, Create, Seaton, Exeter http://imaginedesigncreate.co.uk/shoponline/
Kay Carley http://www.kaycarley.com
Keep on Crafting, Bury St Edmunds, Suffolk www.keeponcrafting.co.uk
Kraft Crazy, Amesbury, Wiltshire https://www.facebook.com/KraftCrazy/
Lisa B Designs, Maidstone, Kent, http://www.lisabdesigns.co.uk/
Lets Create, Lincoln, Lincolnshire, http://www.letscreateartandcrafts.co.uk/
Loobie Crafts, Leighton Buzzard, Bedfordshire, www.loobicrafts.co.uk
Lisa B Designs, Maidstone, Kent, http://www.lisabdesigns.co.uk/
Lets Create, Lincoln, Lincolnshire, http://www.letscreateartandcrafts.co.uk/
Loobie Crafts, Leighton Buzzard, Bedfordshire, www.loobicrafts.co.uk
Papermaze, Ipswich, Suffolk www.papermaze.co.uk
Paperstory, Norfolk www.paperstory.bigcartel.com
Poppycraft, Wallingford, https://poppycraft.co.uk/
Rowan Tree Crafts, Carnforth, Lancashire www.rowantreecrafts.co.uk
Fave Rave, Stourbridge, West Midlands www.shabbychicstencils.co.uk
Scrapbook Magic, Mullion Helston, Cornwall, www.scrapbookmagic.co.uk
Scrapcosy, https://www.etsy.com/uk/shop/Scrapcosy
Simply Crafts, Cardiff, www.simplycraft.com
Snazzy's, Swindon, Wiltshire. https://www.facebook.com/snazzystampingandscrapbooking/
Paperstory, Norfolk www.paperstory.bigcartel.com
Poppycraft, Wallingford, https://poppycraft.co.uk/
Rowan Tree Crafts, Carnforth, Lancashire www.rowantreecrafts.co.uk
Fave Rave, Stourbridge, West Midlands www.shabbychicstencils.co.uk
Scrapbook Magic, Mullion Helston, Cornwall, www.scrapbookmagic.co.uk
Scrapcosy, https://www.etsy.com/uk/shop/Scrapcosy
Simply Crafts, Cardiff, www.simplycraft.com
Snazzy's, Swindon, Wiltshire. https://www.facebook.com/snazzystampingandscrapbooking/
Stampers Grove, Edinburgh, Scotland www.stampersgrove.co.uk
Swanstitch, Deal, Kent www.facebook.com/swanstitch
That's Crafty, Romford, essex www.thatscrafty.co.uk
Swanstitch, Deal, Kent www.facebook.com/swanstitch
That's Crafty, Romford, essex www.thatscrafty.co.uk
The Artistic Stamper Craft Store, Faversham, Kent www.theartisticstamper.com
The Craft Barn, Merstham, Surrey www.thecraftbarn.com
The Craft Box, Barnsley, South Yorkshire www.thecraftbox.biz
The Craft Den, Wisbech, Cambridgeshire www.thecraftden.co.uk
The Craft Room, Newcastle-Under-Lyme, Staffs https://www.garnersgardencentre.co.uk/crafts/
The Craft Studio, St Austell, Cornwall https://www.facebook.com/thecraftstudio/
The Forget me not Kraft Kabin www.facebook.com/TheForgetMeNotKraftKabin
The Craft Box, Barnsley, South Yorkshire www.thecraftbox.biz
The Craft Den, Wisbech, Cambridgeshire www.thecraftden.co.uk
The Craft Room, Newcastle-Under-Lyme, Staffs https://www.garnersgardencentre.co.uk/crafts/
The Craft Studio, St Austell, Cornwall https://www.facebook.com/thecraftstudio/
The Forget me not Kraft Kabin www.facebook.com/TheForgetMeNotKraftKabin
Whichcraft, Wallasey, Merseyside
USA
Artistic Studio Creations, Fayetteville, Georgia www.facebook.com/ASCbyCrystal
Artistree Workshops, Fulton, New York, www.facebook.com/artistreeworkshops
Clay with Me, Colorado www.facebook.com/Claywithmestudio
Creek Bank Creations, Indiana www.creekbankcreations.com
Ephemera Paducah, Paducah, Kentucky www.ephemerapaducah.com
Everything Scrapbook & Stamps, Lake Worth, Florida www.everythingscrapbook.com
Frantic Stamper, Oregon www.franticstamper.com
Frantic Stamper, Oregon www.franticstamper.com
Guadalupe's Fun Rubber Stamps, Roswell, New Mexico www.santafe.com
PaperCraft Clubhouse, Old Lyme, Connecticut, http://papercraftclubhouse.com/
Sherries's Stuff, Warrenton, Virginia, https://www.facebook.com/sherriesstuff.va/
Simon Says Stamp, Columbus, Ohio www. simonsaysstamp.com
Sherries's Stuff, Warrenton, Virginia, https://www.facebook.com/sherriesstuff.va/
Simon Says Stamp, Columbus, Ohio www. simonsaysstamp.com
Stamplistic, Cleveland, Ohio www.stamplistic.com
The Queen's Ink Savage, Maryland www.queensink.com
Topflight Stamps, Irmo, South Carolina https://topflightstamps.com/
Topflight Stamps, Irmo, South Carolina https://topflightstamps.com/
Seth Apter, New York www.sethapter.com
Stamp Fever, Orange, California www.stpstamp.com
Whim so Doodle, Saint Petersburg, Florida, http://whimsodoodle.com/
Vintage in KC, Shawnee, Kansas, http://vintageinkc.com/
We do not supply chains, TV channels or discounters. Our brand is only available from established stockists who are VAT/ GST/ sales tax registered and for whom product education is a core principle. These retailers appreciate that PaperArtsy products are produced to the highest standards possible, and that we will not compromise quality for quantity. We would rather supply a few hand selected stockists, than the greater masses. If you would like to apply to be a stockist, you can find our more about our supply criteria here
PaperArtsy Links
YouTube youtube.com/user/PaperArtsy
Pinterest uk.pinterest.com/paperartsyhq
Twitter twitter.com/paperartsy
Instagram instagram.com/paperartsy