Showing posts with label PS110. Show all posts

Saturday, 31 October 2020

2020 Topic #19 Imagination Rules the World with ETS {by Helen Chilton}

      2020 Topic 19: Words Of Wisdom


Helen brings a splash of colour to the dreary wintery days we seem to be having more now that daylight saving is over here in Europe. She's made this lovely little floral number. A delightful idea; easy to make and a great way to cheer up a wintery day!
~ Leandra

Hi everyone, it's Helen with you today, and I'd like to share with you my Words of Wisdom project. I had several vague ideas for this theme but chose this one which is, in some ways, totally useless, has no function, but was great fun to make. I like projects like this where you can just create for the sake of it and let your imagination run riot - that's why I chose this quote.


a couple of stencils:


and the following paints:


I used a gel plate to make this print - I liked how the colours worked together.


 I cut it into strips to fit my spools and stuck them back to back.


The quote went along the whole length and I also added a yellow strip to make it stand out.
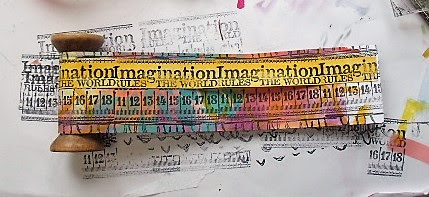

This is attached to the spools at each end.


The flowers are easy - stamped, painted and cut out.


I've just layered them up, added centres and wire.


To add a bit of bounce, I twisted the wire round a cocktail stick and inserted it into the spool.


The flowers I've used here have bold black outlines which show up well when painted. The layering adds a bit of dimension and depth. I just rummaged through my stash for the centres - beads, sequins, a metal flower. 

This sort of project is quite relaxing - there's no pressure for it to look a certain way as I made it up as I went along. You could also make flowers and stick them in a small terracotta pot. Tracy's stamps would be great for decorating that as well - small enough to get round the curve and bold enough to be seen.
I hope this project makes you smile and brightens up your day!

Thursday, 21 May 2020

2020 #9 The Eyes have it - with FP {by Nikki Acton}

2020 Topic 9: Collage It

PaperArtsy FP002 Collage by Nikki Acton

Nikki suggests that her collaged treatment of France's new stamps might be classed as weird, but I'm going with wonderful! Lots of lovely layers of paper, paint and tissue for a mix of opaque and translucent make for some unique collage journal pages with those fabulous faces.
...
~ Keren, Leandra

Hi everyone, Nikki from Addicted to Art here sharing some collage work with one of France Papillon's new stamp sets.

When the announcement was made about France joining the PaperArtsy team as a designer I was instantly drawn (like many of us) to FP002 - with the bold but attractive face and wonderful French sayings. These sorts of stamp sets make for great collage opportunities. My intention was to create a little book, but as I worked on my pre-folded pages I realised I had added way too much and they would no longer fold. So now they will be journal pages!

PaperArtsy FP002 Collage by Nikki Acton

PaperArtsy FP002 Collage by Nikki Acton


Often when I get a new stamp set I stamp all the images - maybe cut them out - and see how they work together. This is what I did here although I stamped onto different colours of painted card (quick swipe with the brayer) and tissue paper. I started cutting out images, tearing bits of card and moving things around.

PaperArtsy FP002 Collage by Nikki Acton

Each of my 4 base pieces of card were also brayered with a 2 or 3 different colours - as a starting point. Here are the colours I used:


PaperArtsy FP002 Collage by Nikki Acton


I like to use tissue paper in this sort of project as it provides translucent layers to work - the stamped words on the tissue below do not completely hide the face.

PaperArtsy FP002 Collage by Nikki Acton

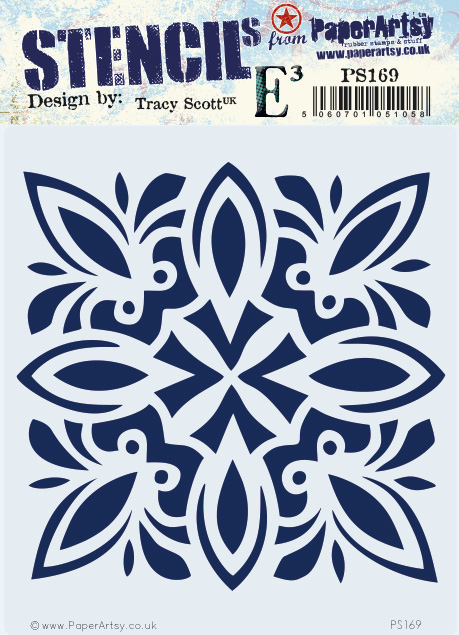
I introduced 2 stencils into the projects - initially to add interest to the backgrounds but this developed further as my compositions got even more weird as you can see below! I used PS110 and PS169 - both by Tracy Scott.


PaperArtsy FP002 Collage by Nikki Acton

Collage is a great opportunity to just play - some things work - some things don't! Despite being a little too symmetrical I think this one is my favourite - the 2 background faces are stamped on tissue but I have added extra paint once stuck down. Book pages and scraps of card with the numbers stamp added - plus the fabulous dots stamp and words stamp.


PaperArtsy FP002 Collage by Nikki Acton

PaperArtsy FP002 Collage by Nikki Acton

I am not sure this is quite how France envisaged her stamps being used and I acknowledge some might find these a little weird! But I had fun and that is the main thing. This is a great set for this sort of thing, pick your favourite stamp set or stamps and have a go!

Thanks for stopping by, I hope you have a great week of collage!


Nikki x


Instagram: @Nikki_Act

Pinterest: nikacton


Saturday, 6 April 2019

2019 #4 Tick Tock: Here's a Clock with JOFY {by Helen Chilton}

2019 Topic 4: Tick Tock


Helen is back with a colourful clock perfectly showing off how much fun those  new JoFY stamps are to use! Helen always creates fun and abstract backgrounds with plentiful stamped layers  and colour, so enjoy and perhaps your weekend will get your muse ticking and tocking along with us too! ~ Leandra

Hi everyone, it's Helen with you today, and I'd like to share with you a clock that I've made using some of the new JOFY stamps..

You can make a clock out of almost anything as long as you are able to punch or drill a hole for the clock mechanism. These can be bought from craft shops or just buy a really cheap clock and take it from there. As it happened I had this MDF clock frame that I bought years ago stashed away in a drawer and thought it would fit the stencil really well.
These new JOFY stamps are lovely - I like the little bit of book text in the centre of the flower and the scribbly outline flower that stamps brilliantly with paint.


The products I used are the JOFY76 set and PS110 from Tracy Scott.


This is the clock blank that I had - the frame is separate from the base which makes it much easier to decorate.


The stencil just fitted where the clock face was. I picked out my paints but then swapped the pink for Cherry Red - I was inspired by the gorgeous colours used in some of the samples made for the latest Tracy Scott stamps.


 Just used two colours here.


I then decided to stamp the sketchy flower in yellow, I wanted to both get the colour down and keep the petal shapes. I found it easiest to spread the paint out on a mat and dip the stamp in.


Lots of stamping but you can still see the shapes.


It took me quite a while to work out what to do with the frame. I didn't want a solid colour and I wanted to keep some of the white, so I decided to do the same as on the base.


Love how the colour builds up.


I finished off with black for more definition. I liked this effect - like a massive scribbly doodle! You can see all the paint pads spread out to the left.


I then outlined the frame with a chisel tip pen; a really easy way of finishing off an edge as it always goes in a straight line, no wobbles!


I stamped the images in black paint as well as ink wasn't quite intense enough.


Add numbers and hands.


I had the blank already for this project but wasn't quite sure how it would turn out. However I like it. Stamping with paint gives it texture and lets you keep the colours true as you layer them up; i.e. no mud! It was pure luck that the stencil fitted so well although with the wide choice of designs from PaperArtsy you're bound to find something that works. 
As I said before what you use for your clock is up to you - a box canvas, a plate, mountboard, MDF shapes, clay  - you've just got to be able to make the hole for the mechanism. The clock works on the back usually have a little hook for hanging built in as unless it's recessed like a canvas, it won't lie flush to the wall.
Enjoy your clock experiments!

Helen