Showing posts with label PS169. Show all posts

Sunday, 30 May 2021

2021 Topic 6 Mandala Mix with EEV/TS/ESC and more! {by Nikki Acton}

 2021 Topic 6: Mandala Mix


We all love a mash up and check out this amazing colour scheme by Nikki Acton!! What an absolute winner!
~ Leandra
 
Hi everyone, Nikki here from Addicted to Art. For my mandala project I have gone for a mandala mash up, featuring a number of stamps and stencils. 

I decided to create my own mandala with a nature theme. This project is 12x12 inches so took a bit of time and some careful measuring, but was great fun!


I usually avoid overly symmetrical projects! However this one is certainly an exception.


I drew out my planned layout on cartridge paper with measurements. I later chopped this up a little to form masks when painting and stencilling on the main project. I did paint a lot without a mask as I knew some pen work would hide any 'painting outside the lines'.
 

My starting colours are Electric Violet, Blueberry and Azure which is stencilled using PS234.


At this stage you can see I have competed most of the background with paint and either stencilling, stamping or pen work in each area. Additional colours used here are: Vanilla, Rose and Slimed. I used stencils PS108 and PS169.

Now for some fussy cutting! I created some backgrounds using the paints already used with the addition of Zucchini for the greens and Gold.


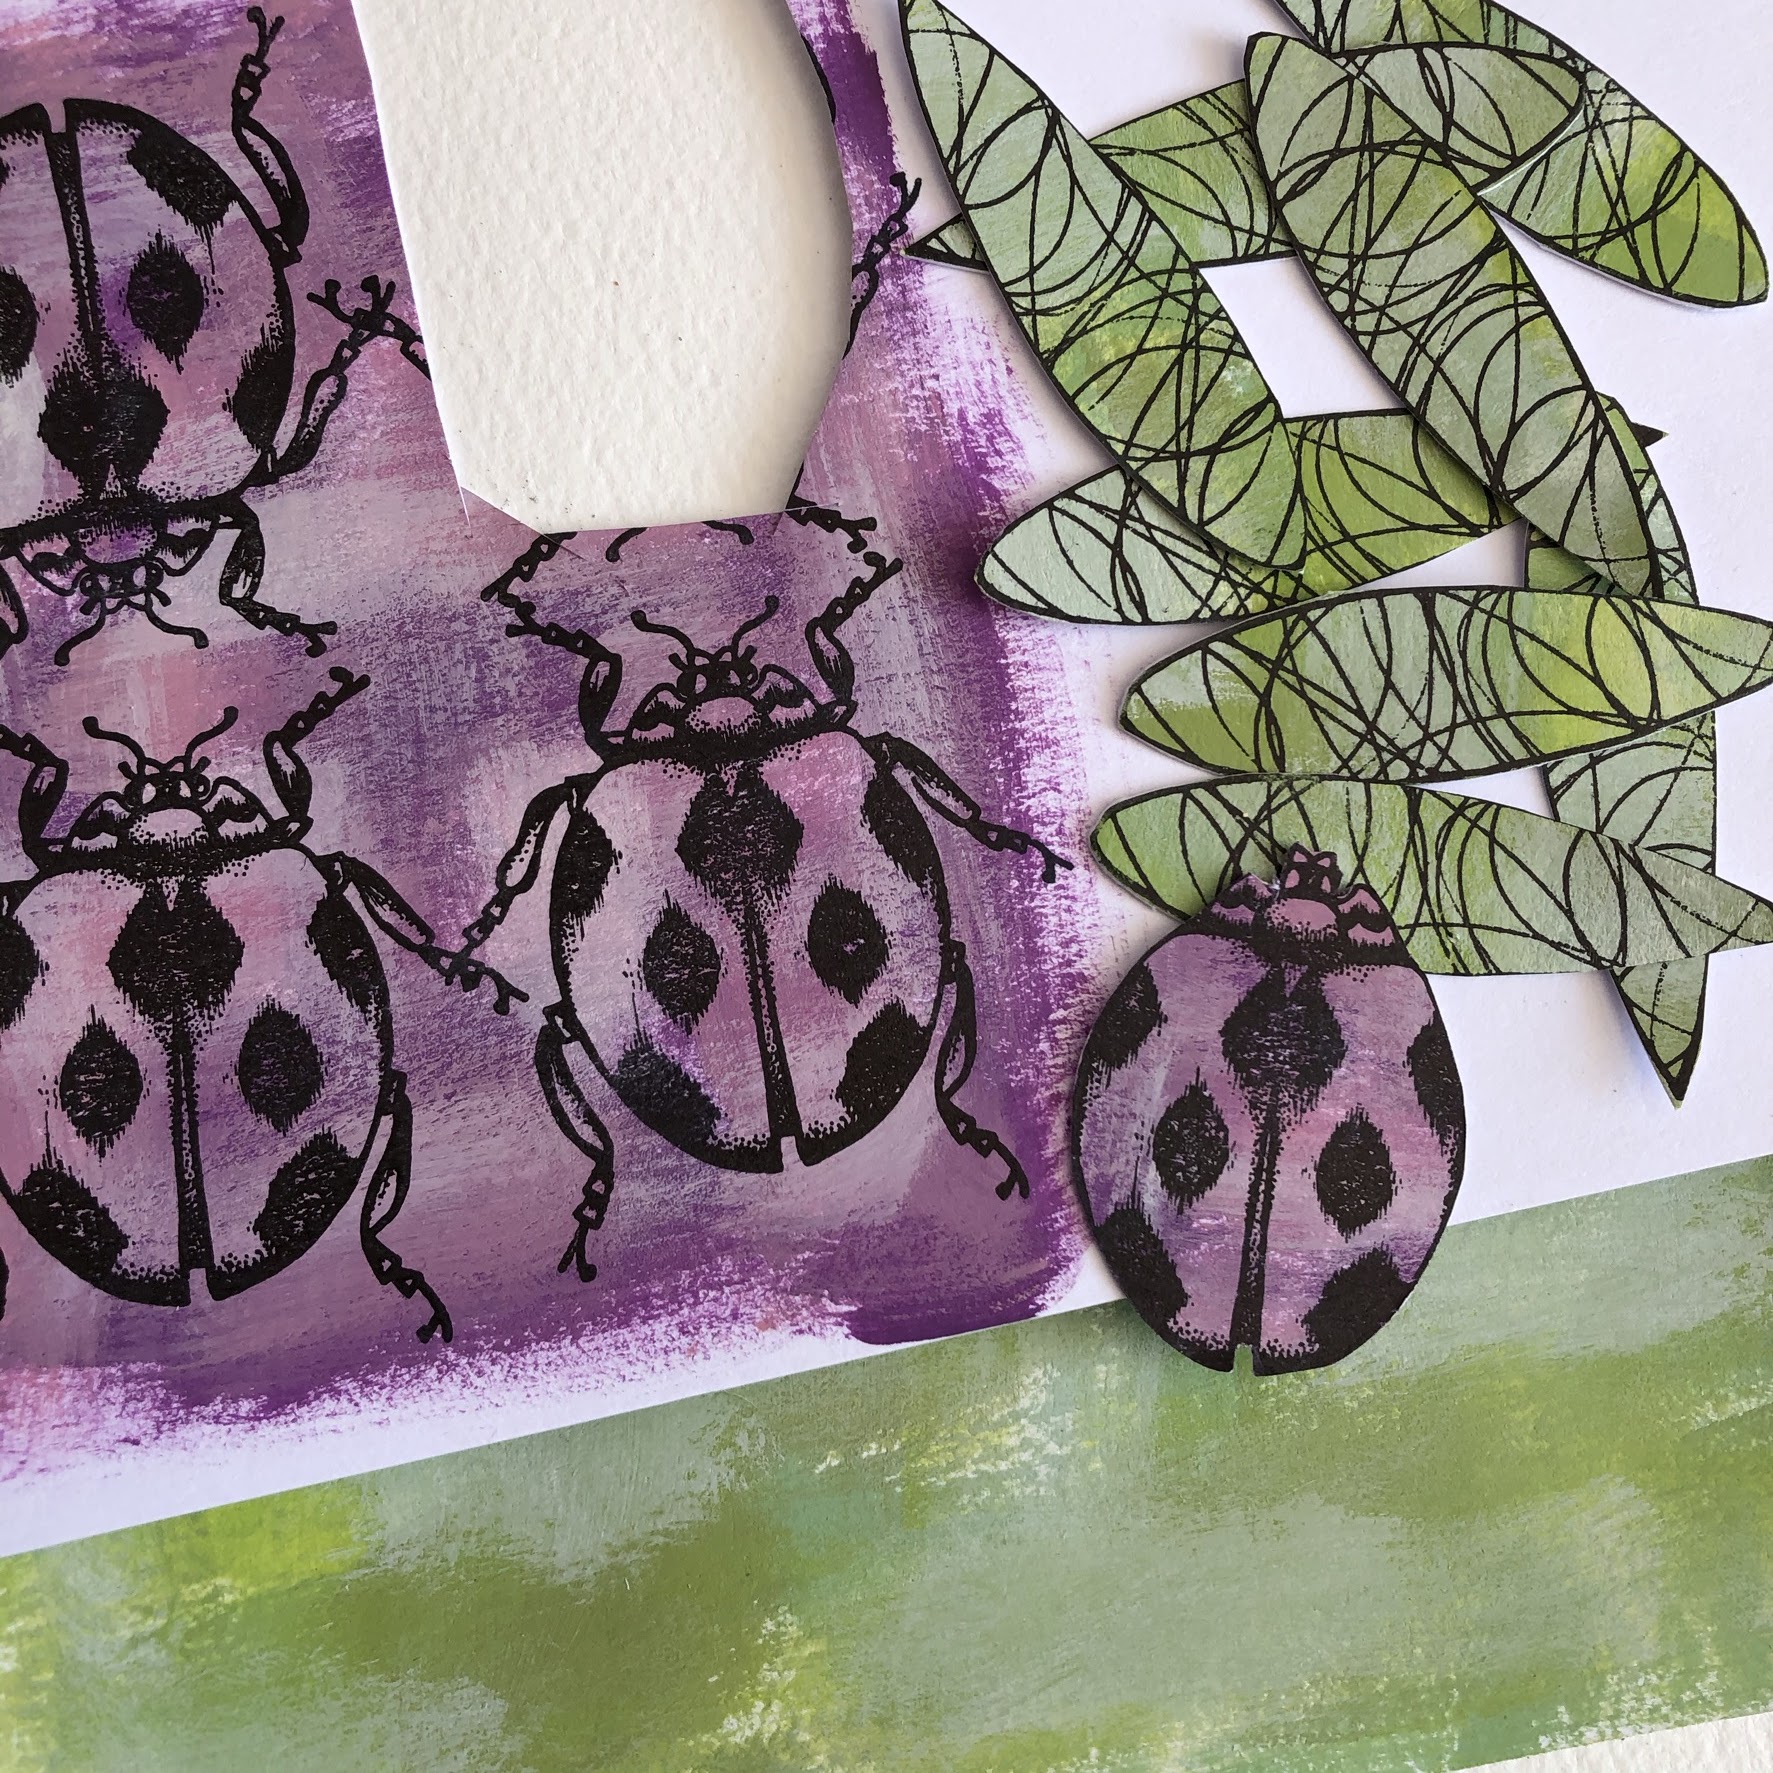
The main stamps include: the ladybird - Tracy Scott TS027, the leaves - Ellen Vargo EEV09 and the butterflies - Scrapcosy - ESC23.


I took my time getting everything positioned accurately. You can see how the black lines around each area add some emphasis and can mask any inaccurate paint marks!


For my dots and circles I used a combination of Fresco paint on the end of a ball tool and Posca pens.


This lady bird stamp is fabulous! I added touches of gold around his body. 

This really was great fun. My crafting tends to be done mostly in the evenings and often for just 30 minutes at a time. I love it when I have a project on the go that I can come back to and just do bits at a time.

Nikki x

Instagram: a2a.craft
Pinterest: nikacton
YouTube


Sunday, 2 May 2021

2021 Topic 5 Find Your Vibe with FP/ESC {by Nikki Acton}

 2021 Topic 5: Find Your Vibe


Finding your vibe doesn't always mean there's a clear and direct plan. Perhaps you have to trust the process like Nikki did and not be so constrained by an initial idea. Her patchwork scrap base is a fabulous idea and the layering is just beautiful. However you manage to find your vibe, just keep persevering!
~ Keren.
 
Hi everyone, Nikki, from Addicted to Art, here to share my 'Find your Vibe' creation! 

My creative vibe can vary, but I would say I nearly always add lots of layers (too many!) and don't always know where I am going to finish off when I start! I will often have an idea but get taken down a different path. I used to force my original idea to completion, but now try to go with the process of making rather than having a defined end goal.

This journal page is quite a good example of my process. Sitting on my desk were lots of scraps (mostly gel prints) from recent projects, so I decided to create a background collage with them, In the end a lot of this is covered up - but the patchwork still remains.


I realised there was just too much colour - or at least not enough cohesion of colour so needed to tone this down a bit, but also wanted some to show through. So I dry brushed Chalk Fresco Acrylic paint over the surface and stamped some images on tissue paper to outline a composition. The face is from FP002, the flowers and butterfly ESC18 and the letters from ESA21.


I now went to work adding more interest to the background and adding some watery washes to the underside of the tissue paper.


Lots of stamps and stencils were use on building up the background - here you can see PS102 with Pistachio Fresco Paint and PS169 with Rose Fresco Paint.


I continued adding lots more background interest....


The vertical numbers are from ID08, the red scripty circles ELB34, the French text from FP002 and the stencilled blue circles from PS234. 


Once happy with all my layers I adhered my tissue stamped images and added some pen work to enhance as required - eg the eye. I also added some paint spatters.


If like me, you enjoy doing backgrounds (don't we all) - using images stamped on tissue is a great way to add focal points once the background is done - even when it is very busy like mine! 

Enjoy!
Nikki x

Instagram: a2a.craft
Pinterest: nikacton
YouTube: YouTube 

Tuesday, 4 August 2020

2020 #13 Flower Lines with Elizabeth Borer Stamps {by Helen Chilton}

2020 Topic 13: Lines


I love how Helen has used the concept of repeat-stamping an image to create new patterns that catch your eye, in effect she creates new lines in an almost unexpected manner. Layer over that some translucent paint through stencils, and you get a pop of colour and more pattern.
~ Leandra

Hi everyone, it's Helen with you today, and I'd like to share with you my project on the theme of 'Lines'.
I have to be honest and say that this one stumped me a bit. I couldn't think what to make that would fit in with the topic until I looked at Elizabeth's flower drawings and realised that all stamp images are made up of lines, be they outlines, shading lines, pattern lines or whatever. I decided to go with outline images, lines of stamping and doodled lines of my own.


I first started by looking at different ways of stamping in lines. Straight lines:


Diagonal lines (interestingly with this one, you almost lose the original stamp image in the pattern):


And circular lines:


In the end though I went for a straight row design over stencilling. You can really do this with almost any stamp to build up a background. Just play around with the orientation of the stamp to see what fits.


Then, using translucent Frescos so the stencilling would show through...


...I painted in the flowers.


I stencilled and doodled on a central panel for my focal point.


And that's my 'Lines' project - you've got wavy lines, straight lines, hatching, outlining, framing. Quite often I also like to outline some of the stencilling but in this case I felt it wouldn't enhance the stamped images so managed to stop myself!

It certainly made me look at how stamps on a set can fit together and how they can be manipulated to create an overall pattern. I challenge you to pick any one PaperArtsy stamp set and build up a repeating pattern in this way! Enjoy!
Helen