Eclectica³ Collection {Gwen Lafleur}
Nov 2021 New Product Announcement
Nov 2021 New Product Announcement

A note from Leandra:
Another
fantastic series of stamps from Gwen, and wow has she been thinking
about making sure these chime with other stamps, like her previous
ticket release. There is a little bit of everything in this release:
Indian patterns and shapes, some geometrics, and the florals give a nice
soft touch too. I can't wait for you to see what Gwen has done with
them!
Gwen
will be sharing these stamps live in PaperArtsy People
shortly after this post publishes. I hope you can catch the live, but if
not the replay will be there. you will want to see how she is planning
on using these, there are lots of ways you can go with them! I know she
has some outside of the box ideas to share!
Remember,
these stamps are available EXCLUSIVELY from our
approved stockists for the next few months. With freight prices soaring
due to fewer flights worldwide, it makes sense to buy local within your
country, see the list and links at the bottom of this blog post.
Hi everyone, Gwen here!
I'm thrilled to share my latest release for PaperArtsy which includes three new stamp collections.
As per usual, the stamps in this release have a wide range of influences - everything from Indian block printing patterns to grids that work as part of what I call my "Gwenified Basics" to a new nature-themed Build-a-Collage set. I love how each of these sets can be used on its own to create lots of looks and at the same time, they work beautifully both with each other and with my previous sets.
I'm thrilled to share my latest release for PaperArtsy which includes three new stamp collections.
As per usual, the stamps in this release have a wide range of influences - everything from Indian block printing patterns to grids that work as part of what I call my "Gwenified Basics" to a new nature-themed Build-a-Collage set. I love how each of these sets can be used on its own to create lots of looks and at the same time, they work beautifully both with each other and with my previous sets.
New Stamps
Price: RRP €21.92 +VAT
Size:5" x 6" (13 x16.5cm)
All stamps are individually trimmed onto cling foam, presented in a clear hanging bag
with a laminated storage/index sheet.
Size:5" x 6" (13 x16.5cm)
All stamps are individually trimmed onto cling foam, presented in a clear hanging bag
with a laminated storage/index sheet.
Eclectica³ Gwen Lafleur Set 22 (EGL22)
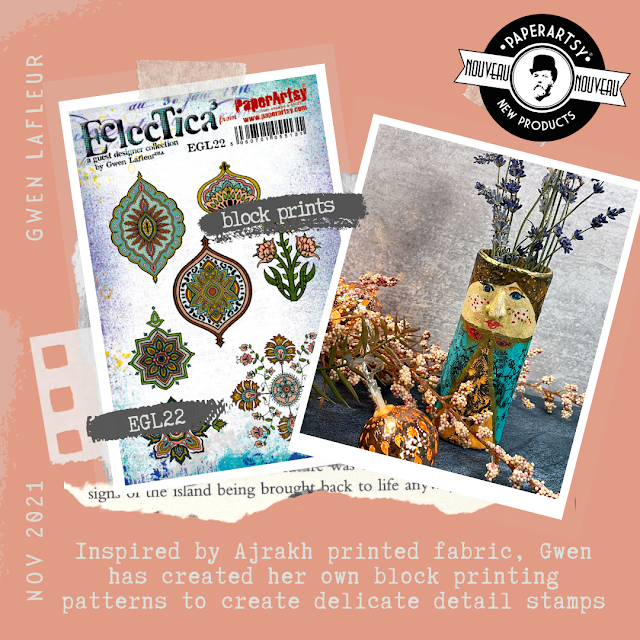
As
with all of my stamps, EGL22 is entirely hand-drawn and this particular
set is based on a very specific type of Indian block printing patterns
called Ajrakh. I have several pieces of Ajrakh printed fabric in my
stash and I love the intricate designs. I took inspiration from some of
my favorite patterns to create a set of highly detailed stamps that can
each be used individually or which can be combined to create cool
repeating patterns - great for backgrounds!

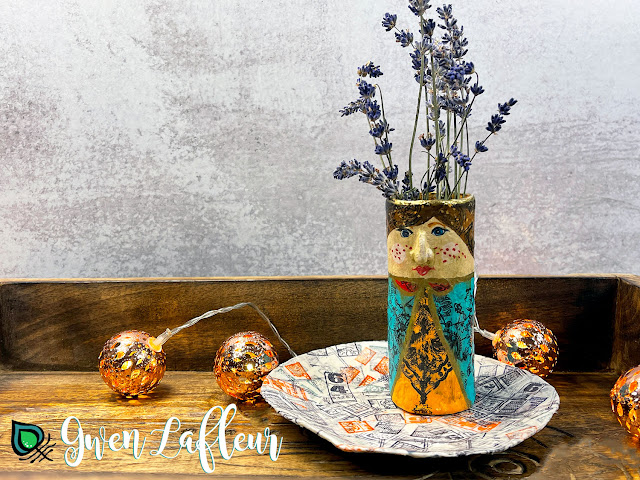
Since
Ajrakh patterns are typically found in textiles and clothing, I was
inspired to make something a bit fun and quirky where I could use the
stamps to add pattern to painted clothing on a figurative bud vase that I
made with chipboard, paper clay, and PaperArtsy Fresco Acrylic Paint.
(I'm lucky enough to have a view pieces by CeramiConnoisseur and this piece was inspired by those.)
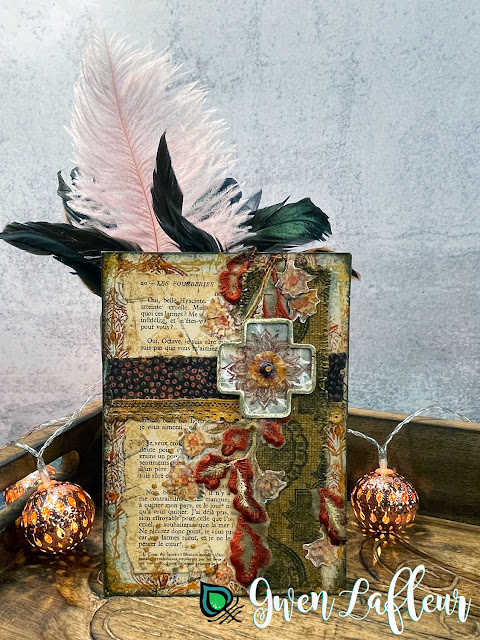
Of
course, having gone so far out of the box with the bud vase, I wanted
to show a bit of a more traditional application for these stamps and
used them to make this mixed media piece.
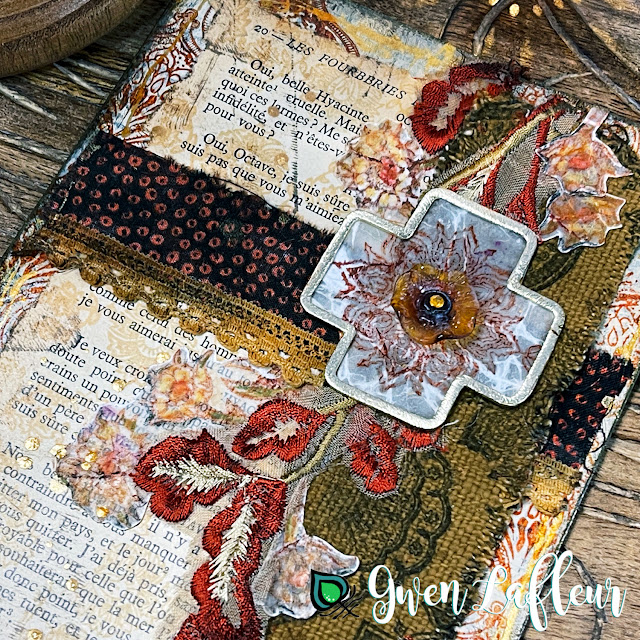
I
love how the same set of stamps worked to give me two different
repeating backgrounds as well as both focal and accent images. I also
really like how versatile they are - even though the designs were
inspired by Indian patterns, they work perfectly in all different kinds
of projects. Repeating the designs creates backgrounds for art journals,
scrapbook layouts, handmade cards, and even mixed media canvases while
just using them on their own turns them into great focal points. Gotta
love a multi-use stamp!
To
show some of the possibilities with this set, I put together some
sample boards with different ideas for combining and repeating the
designs.


I don't know about you, but seeing the different ways you can repeat and combine them makes my fingers itch to go stamp with them!
Eclectica³ Gwen Lafleur Set 23 (EGL23)

EGL23
is the second in my Build-A-Collage series with the idea being that you
have all of the elements you need in a single set to stamp patterns,
ephemera and collage papers, and focal images. When I was designing
these I had recently learned about the concept of Ullassa, which
is a Sanskrit term describing the feelings of pleasantness you get from
being in nature. I love to walk outside early in the morning in the
woods near my house so it's a concept that resonates with me and I
carried both the word and the idea of nature into the other elements of
this set.

With
this set I really wanted to convey how easy it is to create a collage
with nothing but a substrate, stamps and ink, and maybe something to
color with (I used colored pencils for these.) I love how beautifully
the images layer and work together on top of these antique postcards.
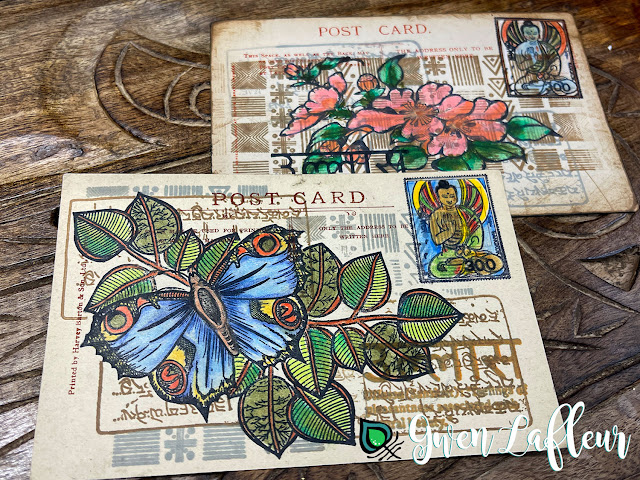
The
pattern I included with this set was inspired by a woodblock in my
collection originally made for printing African mud cloth. The text was
taken from a page in an antique Buddhist prayer book that I happened
across several years ago. And the postage stamp was inspired by a
combination of images and ideas from different stamps I collected in
China during one of my visits a few years ago.

Stamps,
ink, a bit of masking... et voila! Fun little collages ready to frame,
add to my art journal, or even send off in the mail.
Eclectica³ Gwen Lafleur Set 24 (EGL24)

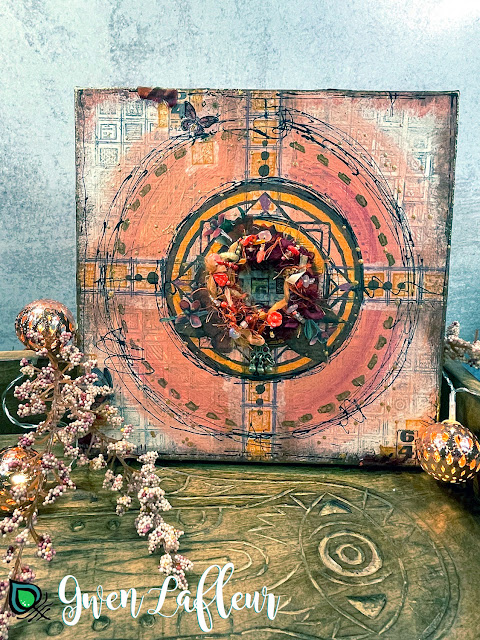
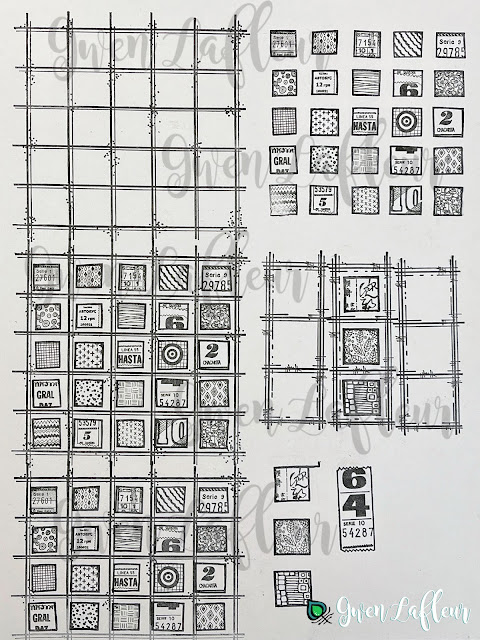
I
call this set Grids Gone Wild - Squares... I really wanted to start to
add some more textural patterning stamps into my line. I feel like this
fits perfectly with my "basics" (including my labels, tickets, alphabet,
and frames.) You can mix and match the stamps in this set to get
backgrounds, borders, and embellishments - it's so fun to play with and I
just adore the grid of squares filled with images inspired by vintage
Spanish bus tickets and Zentangle patterns.

You can see here how just changing the colors of the stamp inside the grid can completely change the look of the design.

I
love the patterned squares peeking through the center as part of the
focal point - adding some color gives yet another totally different look
to the same design that's used in multiple places on this canvas.
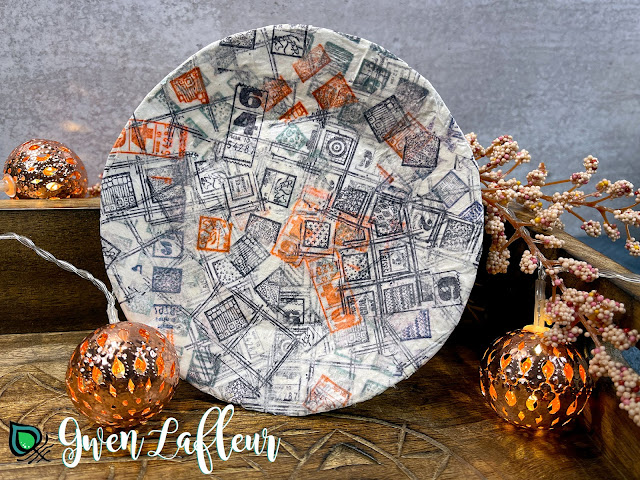
I
decided to go a bit out of the box again with this stamp to showcase
how fun it can be to create decoupaged elements using different
combinations of stamps from this set with pops of red. I made this
little trinket dish from chipboard and I love how the transparent layers
of stamped tissue paper worked to turn it into a cool little piece.
Below you can see how it looks laid flat and hosting my funky little bud
vase:
I
put together another sample board for this set to demonstrate how the
stamps can work individually, together, and repeated. (Pro tip: stamp
the grid first and then center the filler pattern over the stamped grid
design - it gets them aligned really well without a lot of fuss.)
Project
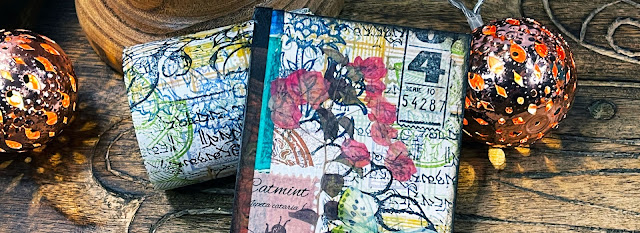
For
my project combining all three stamp sets, I was inspired by a trend
that I've been seeing in the bullet journaling world - register tape
collage! It's such a fun and easy way to use your stamps (with or
without additional products) to create your own collage fodder.
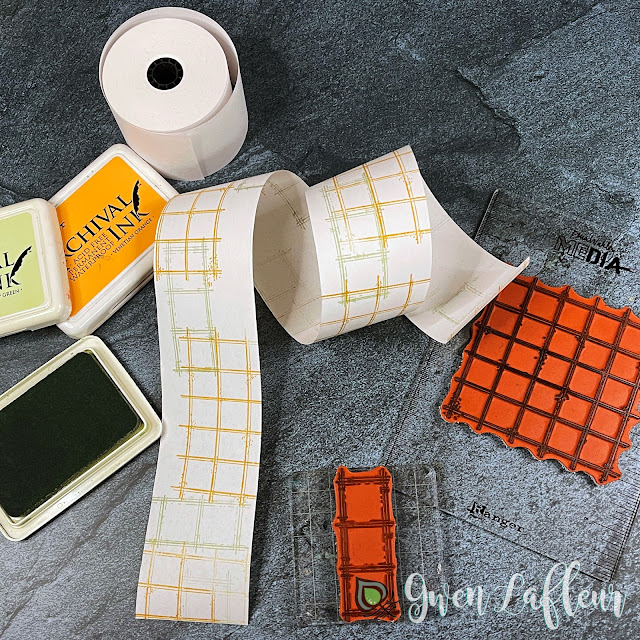
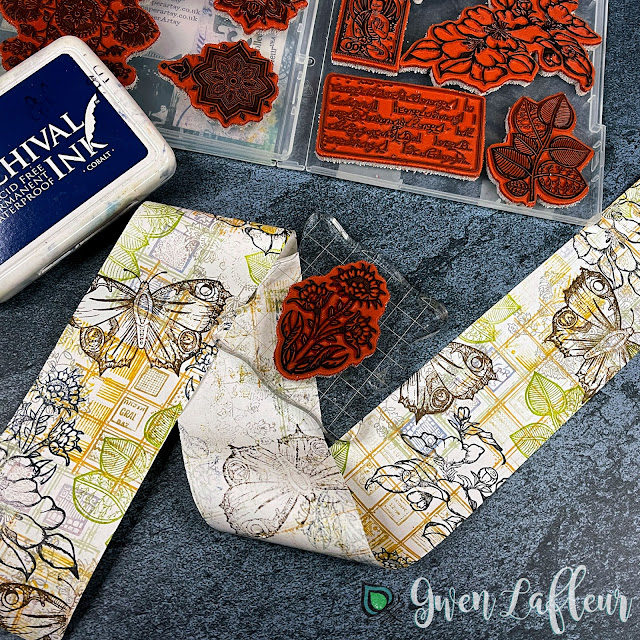
First,
start with your register tape. (If you don't have any, you can just use
long strips of copy paper and tape them together if you want a really
long piece.) I pulled out some lighter colors of Archival Ink and
stamped the two open grid designs from EGL24 randomly across the whole
length of paper.
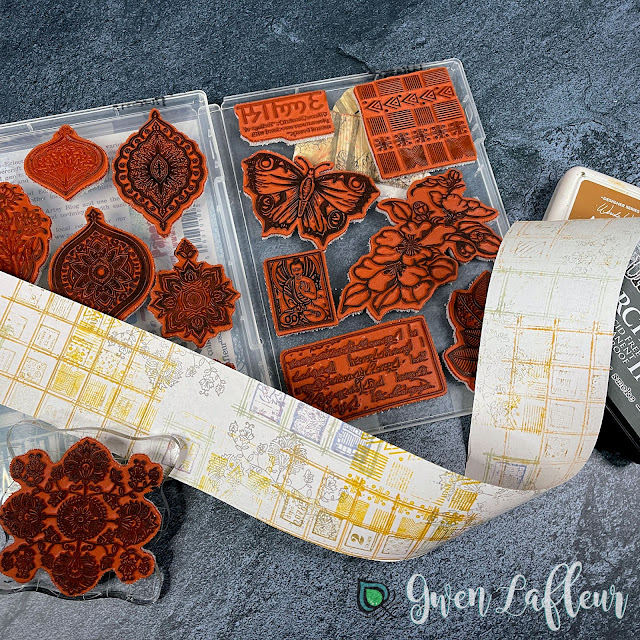
Next
I pulled out some slightly darker inks and stamped the grid filler
patterns (putting some inside the grids) as well as some of the more
background-type elements from EGL22 and EGL23.
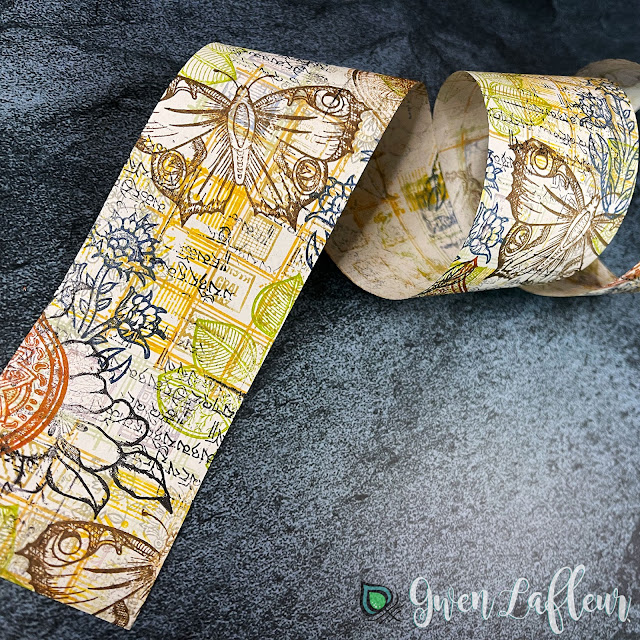
Then
I started to get some darker inks and more focal type images from EGL22
and EGL23 and randomly added those on top. One of my favorite things
about working this way and going light to dark as I add layers is that
you can get distinct images that play beautifully together without
having to do any masking.
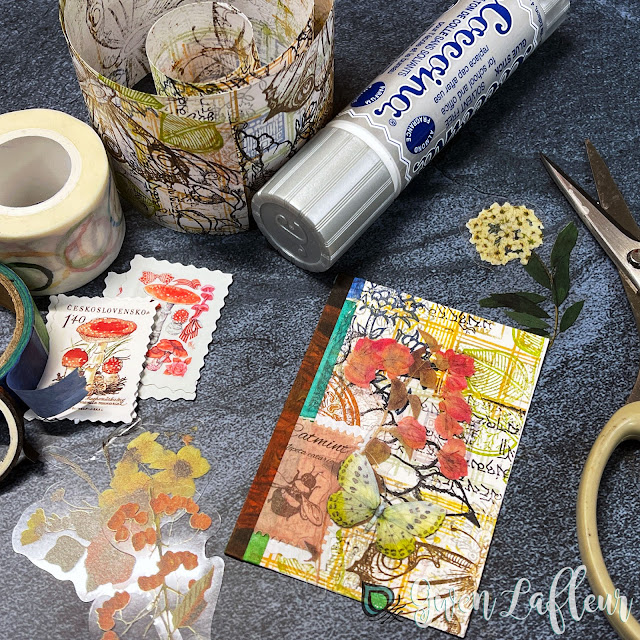
I
used a few other colors of ink to fill in with more stamped shapes and
kissed over top with the Sansrkit text stamps, then called it good. You
can really go as short or as long as you want with these collage strips -
it's such a versatile way to work! When you're done, you can just roll
them up and store until you need them (I use a paper clip to keep it
from unraveling.)
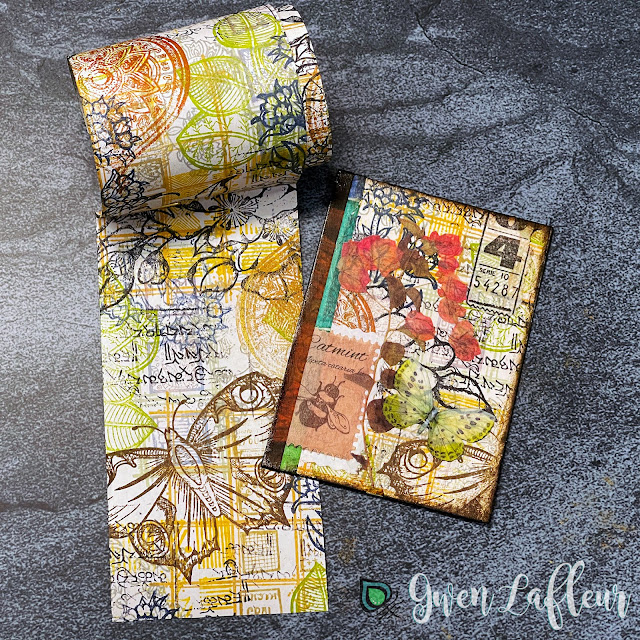
Once
the register tape collage is done, you can store it away to use as
needed or jump right into a project. Just unroll and cut off the length
that you need and then put the rest away again for another project.
Here
I just cut off a piece 3-1/2" long to use on an ATC. I adhered it to a
piece of 2-1/2" x 3-1/2" cardstock, added some washi tape and stickers,
and in about 5 minutes I had a finished ATC! (Not to mention a pretty
good-sized strip of stamped register tape collage left over for later.)
Whew!
That's it for now... I'm absolutely loving working with these new sets
and mixing them in with my other stamps. I hope you're just as excited
to use them!
Thanks
for joining me in my excitement for this release... I can't wait to see
how you all use these as they get out into stores and your studios.
Socials...
Website: https://www.gwenlafleur.com
Pinterest: https://www.pinterest.com/GwenLafleur
Facebook: https://www.facebook.com/gwenythlafleur
Instagram: https://www.instagram.com/gwenaval
Teaching Schedule:
Just announced! I'm joining for the 7th year in a row as a teacher in Creative JumpStart 2022 - registration opens on November 29th, but you can head over now for details.
March 15, 2022, Art & Soul Retreat, "Paper Prayer Flags"
March 16, 2022, Art & Soul Retreat, "Flip Art Folio"
March 18, 2022, Art & Soul Retreat, "Stitches + Glue: Mixed Media with Fabric & Paper"
I also have several online workshops available on demand. Those and future workshops are all listed on my website.
Below is a list of the retailers who have already got these new releases in stock ready for you to buy NOW!