Showing posts with label HP1502. Show all posts

Saturday, 22 February 2020

2020 #3 On This Tag: 'Time' for some Infusions with HP {by Amanda Pink}

2020 Topic 3: On This Tag


Amanda has jumped headlong into experimenting with Infusions, and just like her, we love the results. These little pots of pigmented magic have resulted in a vibrant journal page that she's really 'stretched' her stamps with too.

Hi everyone, it's Amanda (ink-a-pink) here with you today, and I'd like to share with you the project I have created for the current topic: 'On This Tag'. 

I have had some PaperArtsy Infusions in my stash for awhile now, patiently waiting for the day when I chose them over paints to create with. I shamefully have to confess to being an infusions 'newbie' so this topic gave me the opportunity to try them out as I often turn to either a tag or a journal when I'm using a product for the first time. I decided to combine the two and feature 'a tag on a page' that I will add to my journal. Given it was my 'first time' creating with Infusions I thought I'd make 'time' the theme of my project and PaperArtsy have no shortage of time related stamps to choose from. 


The PaperArtsy infusion colours I worked with were Magenta, Blackcurrant and In the Navy.


PaperArtsy Heavy Smoothy card proved to be a good substrate to use as it was durable enough to stand up to the water I used to activate the Infusions. I followed the principles of Tim Holtz 'wrinkle free distress technique' to apply the Infusions to the card. 


This allowed me to gradually build up layers and depth of colour and interest by smooshing, dipping and drying in between. 


This piece would be the journal page.
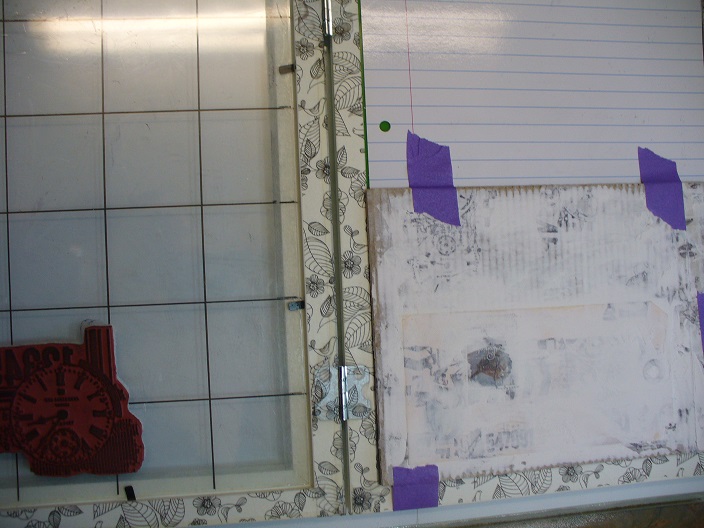

Using the same method of application I was also able to create some backgrounds that had fewer layers and depth of colour. I did this by using only Magenta and smooshing the card through the varied dilutions of colour just once.
These pieces I used for the tag (on the left) and the stamped elements.(photo on the right).

For a touch more background detail on both the page and the tag I used some of the stamps from the following stamp sets:


ECF04 is a slightly older release and it's one of my 'go to's as it has a good choice of texture/ detail stamps that lend themselves to almost any kind of project. The dot stamp is a real fave. EAB17 is a brand new release. It's called "The Time Edition' so seemed a good choice for my 'time themed' tag page.


I also added just a touch of stenciling to the tag using PaperArtsy stencil 016 (PS016).


For the focal tag image along with the additional elements I added around the tag I used the following stamp set: PaperArtsy: Hot Picks Collection Set 1502 on EZ mount (HP1502EZ)


The larger single clock (sat within its own detailed backdrop) was the stamp of choice for the focal image. I gave the clock a touch of dimension and additional focus by adhering a matt and layered smaller clock face over it.  I used the long stamp of clock faces in the set for this.


To extend the design of the focal image a little I also used the small 'squares' stamp from the set to add some additional detail along the bottom line and up the left hand side. A stamping platform helped with aligning the stamp.


I covered the small dial within the clock face with an infusions off-cut to bring just a touch of the background colour to the fore.


The top of the key on the 'key stamp' provided a couple of 'unique' accents for the tag.


Both the number stamped elements that I cut from the key stamp and the addition of some small 'square' stamped elements complimented the identical features seen in the focal image and with considered positioning they helped unify and finish off the design.  

It has to be said I do love a stamp set full of stamp designs that offer so much versatility in how they can be used. If its got the miles it gets my smiles, for sure. 


Creating with infusions was fun and a refreshing change from creating with acrylic paint. I loved the effects they created using them the way I did. I was so pleased this tag topic provided the push I obviously needed to finally break the seals of those little pots of water soluble particles.

There's  more info about infusions on the blog here and in designer blog posts throughout the PaperArtsy blog so feel free to browse at your leisure.


We've had a fortnight of tag creativity here on the blog so if you like to create with (or on) tags or are keen to start, you may like to check out the individual posts including the introduction to glean some wonderful inspiration.

Thanks for joining me today.
Keep on Creating 
Amanda 
x

Blog: ink-a-pink
Facebook: Amanda Pink
Instagram: Kynapi10
Pinterest: PinkArt

Sunday, 31 March 2019

2019 #4 Tick Tock: Gel-Printed Cards with Hot Picks {by Ellie Knol}

2019 Topic 4: Tick Tock


Gel-Printing seems to have become Ellie's thing of late, and on this occasion she has used bright paints with Vintage stamps to create a fresh modern effect  ~ Leandra


Hi everyone, it's Ellie from PAPER-STAMPS-COLOR with you today, and I'd like to share with you the joy I had making these four cards in the Tick-Tock theme.

My aim was to feature the beautiful new Hot Picks stamp sets and started on a project, an altered frame and got stuck, yes really!  The color scheme did not work for me and I couldn't get the collage as I wanted it. Oh well,  I will finish it in my own time another time!  

SO, I started plan B. ( I said it out loud, grin.)
I started with an A4 size gelliprint; with Fresco paints of course and cut it up in 4 even-sized quarters.
 

I really like the colors, but was not ready to use it in a project yet, as I liked it too much. I pinched myself and thought: it's only paper and paint, and where this one is coming from, there's a whole pile of other don't-use-me prints!!!!!!


I used the new stamp sets in the Hot Picks collection, which are HP1901 and HP1902, these were only released last week, stockist details can be found here.


When I started working on this card base, I thought I was not going to like it.. but it's my favorite card of the 4 now. There's so much detail in the background to enhance the beautiful script/clock stamp, and the contrasts just turned out beautiful. I love the edges of the monoprint to be part of the card design too! It gives it a peeled-paint look.   


On this close-up picture you can see the beauty of the clock, which has been sponged with a green distress ink and heat embossed in clear. As a matter of fact, I did this with the stamped focal-point clock images on all 4 cards! 


Another quarter of the monoprint resulted in this collaged stamped card. The text stamp has been heat embossed with sea-foam white embossing powder.. it almost looks a tiny bit yellow on this background, which I really adore!


The 
stencil I've used in the monopinting really does the job here with beautiful contrasts between the red and green Fresco Finish Paints! 


I LOVE this stencil from Scrapcosy: PS074


Quarter number three of the original monoprint also has beautiful edges... 

 
 The stamped image is from Hot Picks set, HP1502 


And now for the fourth one: yummy details from the new stamp designs! I punched the clock image out and adhered it back after heat embossing it in clear, and slid another clock image partially underneath it to add to the collage. 


The heat embossed text is from a golden-oldie set, Clocks Plate 6 from the Ink & The Dog collection.


Needless to say.. working on these cards, which will make for a gorgeous gift, made me happy and relaxed. I got into the flow real quick, and enjoyed making them. I like to just go with what I have, and (this time) not to try and use any new (to me) techniques.
I am happy with the results. 


There you are..
I hope I got you inspired.. get your crafty stuff out and relax!
And of course.. enter the challenge.. you wouldn't want to miss the chance to win this time!!

Monday, 22 October 2018

2018 #18 Stamping Platforms: Vintagy booklet with Hot Picks {by Ellie Knoll}

 2018 Topic 18: Stamp Platform Techniques


Ellie is stamping over lumps and bumps with great success!. She has a couple of platform tricks up her sleeve for you in this post, love how this little book turned out, feeling the urge to reach out and touch it!! ~ Leandra
 

Hi everyone, it's Ellie Knol with you today, and I'd like to share with you how to use your stamping platform in many different ways with different inks/paints and onto several substrates.
When starting this project I wrote down what I see as an advantage of a stamping tool; some of them were about the choice of multiple stamping, others about stamping onto textured surfaces to stamp on (cotton, structure paste etc), and of course: stamping with different mediums, like embossing ink, paints and inks. You'll see which ones of these I chose to make this project.

Let me guide you through a different approach of stamping as would have been possible with just an acrylic block to stamp with.


I used the beautiful Hot Picks stamp set HP1502  ... one of my favorites from Paper Artsy; it's so very versatile and beautiful for vintage projects as well. 


The finished booklet with covers from corrugated cardboard; the front and backside of it. 


I added 12 pages of white watercolor paper to it; not sure what I will be using the book for, but it would also make for a beautiful gift!!


Here you can see I prepped the surface of the corrugated cardboard with a tag and washi tape to secure the hinge on the left hand side (this is the front cover). I added white gesso with a palette knife to give the book a base to work on (a white base in particular!!). You can also use Snowflake Fresco Chalk Acrylic for this step if you like (think of a chalk paint as coloured gesso)


On these photographs above you can see I stamped onto tissue paper with the use of my custom made stamping tool. It's A4 and as far as I am concerned the best tool in the world (smile).  The reason I use the tool is because now I can line up the texts and other stamps  horizontally easily, and the tissue paper won't move around that much. I secured it into the tool with some painters tape.


I kept on stamping; and covering up the previous stamped images until the whole of the A4 sized tissue paper was filled up with random stamping. No skewed stamping here ... I also had the choice to stamp it a second time if it wasn't dark enough the first time.


I tore the tissue paper in strips and adhered it to the front and back cover randomly; I also added a postage stamp. I used a palette knife to add structure paste to cover up the stamping and postage stamp partially. 

 
Now, for stamping on this corrugated board, and the structure paste with all its texture was going to be a problem without a tool!  So, I attached one of the covers to my tool with some painters tape. 


WOW, multiple stamping! With a greyish ink first and then with some Fresco Finish paints - Beach Hut and Brown Shed (it's more a deep red, smile)
I added a little at a time, stamped it, cleaned the stamp etc. 

After the paints had dried, I decided to only stamp part of the stamp with a darker black to keep the red and blue part the way they were. I LOVE the effect! 


I painted the embellishments (frame and 2 corners) white Fresco Paint - Snowflake and when dry I sanded them to make them look vintage.

 A
ssembling all of the embellishments and frames was fun.
I distressed the edges of the book with distress ink and a little bit of red paint, just sparingly. I binded the book itself with a 
chinese binding.


I used the same techniques to create the back cover, except the clock part of the stamp has been done with distress inks first and then that color was used to color the image itself.  


I LOVE the possiblity of stamping with different colors and with different mediums! The sky is the limit here!   


This was a fun project to make! One that took a lot of prep work though, as there are not really that many techniques online to use with the stamping tool. I had to put my thinking cap on for the technique itself, but I am sure I will be using this method again now I know it works just fine.

I also had written down an idea to heat emboss part of the stamped images with different colors of embossing powder, but I was happy with how this turned out, so skipped it. Maybe for a next project, or perhaps you could give it a try?!


What are you waiting for: go create and enter the challenge...
To join our challenge and win a PaperArtsy £50 voucher:

Simply make something arty relevant to the topic, and link your creation from any social URL (eg. Instagram, Pinterest, Blog Post etc) sharing your original make to this challenge page.

The current topic link Topic 18: Stamp Platform Techniques will close 17:00 (London Time) Sunday, 28th October 2018, and the winner will be announced 2 hours later at 19:00.

All links go in the draw to win a PaperArtsy £50 gift voucher. Please make sure we can contact you as a prize winner - it helps if you share your contact info from the platform you opt to use.

Good Luck! If you have any questions, don't hesitate to ask!

More Posts to Enjoy