Showing posts with label Stamp Platform. Show all posts

Wednesday, 19 December 2018

2018 #22 C&S Christmas: Whimsical Cards with Zinski Art {by Josefine Fouarge}

 2018 Topic 22: Clean and Simple Christmas Ideas


It's so satisfying when you can make your own coordinating papers from scratch. Josefine shares how with her Frescos and wonderful Zinski Art stamps with a dress-a-bear brief...this would keep the kids quiet at Christmas too!!!! ~ Leandra

Hi everyone, Josefine here and I'm super excited to share my "clean & simple" Christmas cards with you. Clean and simple usually means one layer and white space. I stretched this a little bit. The project is still clean & simple (for me)!

Usually, I add a lot of layers of paints and patterns to my projects, so it was exciting to try something different and challenge myself. Even though, my cards have a few more layers, they are still simple designs. Enjoy!


I started by coloring my characters from the Zinsky set ZA35


But instead of just stamping and coloring them I decided to paper-piece them. To do that, I prepared a variety of scrap pieces of paper and brayered paint onto them. 


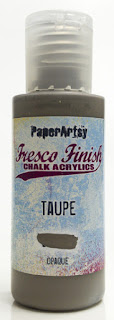
One in a brown tone using Taupe (FF60), Caramel (FF75) and Stone (FF59)


One in green using Hey Pesto  (FF49), Winter Green (FF118) and Green Patina (FF126)


One in red using London Bus (FF37), Peach Nectar (FF144) and  Lemon Meringue (FF142


And one in pink (using Blah-Mange (FF140), Vintage Lace (FF18) and  Eggshell (FF138).


Next, I stamped the bears. Not just once, but several times onto the differently colored paper.


Now I cut out all the pieces. The entire bear once, then just the trouser or the hat from the other colored pieces.


Once I had all the pieces cut out, I adhered them together. It's important to cut the main piece entirely, so all the smaller pieces have a base they can be adhered to.


Now I prepared the background of my card. First, I blended some Lemon Meringue (FF142) to the card stock.


... and then I used PS116 to add a Christmas tree with Green Patina (FF126) and Taupe (FF60).


Then I moved the stencil just a bit to the right and blended the tree again, using Winter Green (FF118).


Finally, I added a few snowflakes with Snowflake Color Fresco Paint (FF15) and the bear and adhered everything onto a card base.


I did the same for the second card.


The only difference is that I stenciled "Merry and Bright" from the PS117 stencil.


Aren't these bears just adorable? The good thing is that they can be used for so much more than just Christmas cards. The one with the glasses is the perfect California bear ;)
It's so easy to "color" them and put the individual pieces together.

Thanks so much for stopping by. I hope you enjoy this topic and checkout all the other posts from the design team.

Facebook: HolyLise
Instagram: @HolyLise
YouTube: HolyLise Designs

There will be no challenge for this topic as we know you are super busy in the lead up to Christmas! So kick back and enjoy the inspiration from our designers instead!

Sunday, 28 October 2018

2018 #18 Stamping Platforms: Art journal with ECF {by Kate Yetter}

 2018 Topic 18: Stamp Platform Techniques


Here's a bonus post for you from Kate who has a completely different take on the 'stamping platform' concept. She has created a fantastic 'guide', and also shares her wonderful use of colour, layers and texture. Enjoy! ~ Leandra


Hi everyone, Kate here today,sharing an art journal layout that I made using an improvised stamping platform. While I don't own a commercial platform, I used what I had lying around to accomplish a related idea. It's a useful guide tool.


I sprayed my piece of paper with infusions and cut it to my desired size. 


I used a glass mat with pre-etched squares and graph. I placed a piece of plain cardstock beneath the mat to reveal the lines. I lined my sprayed paper up with the edge of the largest square and taped it in place using washi tape.


I placed my un-inked stamp on top of the paper, lined the edge of my acrylic stamp block up with the corner of the square on the mat and then placed the acrylic block on top of the stamp to adhere it, being careful not to move the stamp.


Now that my stamp is properly positioned on the acrylic block, I inked up my stamp, lined it up on the grid and stamped the corners of my paper.


 For the background, I applied grunge paste through the Scrapcosy 105 Stencil.


Fresco Finish Paints were dripped in the background and a bit of embossing was added to the textured areas.


Tissue paper was layered in the background and I stamped using the Eclectica³ Courtney Franich Set 04 (ECF04). 


I also used Eclectica³ Scrapcosy Set 16 (ESC16) for the sentiment, which has been stamped on a tea bag.


Sewing scraps were added from one of my recent projects along with black thread to add a bit of texture.


I loved all of the textures included in this stamp set. They were perfect for my mixed media background.


I finished off the layout with black gesso splatters and doodling around the edges.


At first, I was a little worried about how I was going to incorporate stamping platforms into my journal spread, mainly because I only ever stamp randomly. But I liked that I was able to create a frame for my TH paper doll, using what I had on hand. 

So glad you stopped by the blog today. You've still got time to get you challenge entered!

Kate Yetter


Blog: kateyetter.com
Pinterest: https://www.pinterest.com/katesscrapyard/
Facebook:  https://www.facebook.com/katesscrapyard/
Twitter: https://twitter.com/katesscrapyard
  

To join our challenge and win a PaperArtsy £50 voucher:

Simply make something arty relevant to the topic, and link your creation from any social URL (eg. Instagram, Pinterest, Blog Post etc) sharing your original make to this challenge page.

The current topic link Topic 18: Stamp Platform Techniques will close 17:00 (London Time) Sunday, 28th October 2018, and the winner will be announced 2 hours later at 19:00.

All links go in the draw to win a PaperArtsy £50 gift voucher. Please make sure we can contact you as a prize winner - it helps if you share your contact info from the platform you opt to use.

Good Luck! If you have any questions, don't hesitate to ask!

Saturday, 27 October 2018

2018 #18 Stamping Platforms: Shift with ECF {by Etsuko Noguchi}

 2018 Topic 18: Stamp Platform Techniques


Wow!! Etsuko has a few platform ideas in this posts, shadows and spaced stamping! Great tips, I'm sure you'll think of many spin-off ideas! And she's ticking the spooky box too, only a few more sleeps! ~ Leandra 

Hi everyone, it's Etsuko My Favorite Things with you today, and I'd like to share with you  my Shift project using Stamp Platform with Courtney's favorite stamps.

I was so exited when Tim Holtz first introduced the Stamp Platform, and before I used a T-shaped tool for positioning but I could not do a variety of work like is possible with this tool. I am using it for most of my work now. Also I am very happy that Lynne Perrella's delicate stamps and stamps can be cleanly stamped without fail.


First I wanted to use it for positioning, so I set a plastic quilting section measure tool down onto the Platform. To use it stamp directly on the sheet and stamp it on the paper.
Next is a method of shifting the paper to make a stamped shadow.
Here I move the paper with the position of the stamp intact, first stamp the orange shadow, move the paper to the upper left, change the color to the brown and stamp again the darker image. To make a shadow of the same width, move the stamp and paper repeats the shift at the same position as shown above.
I used Halloween stamps by Hot Picks, HPHW02, HPHW04.


I used Fresco Finish -- Twilight, Double DenimVenice BlueSteel GrayGlacier Ice.

This is a continuous pattern of the same interval.
Make a measuring tape that calculates the pattern and spacing. Stamp with you paper in the normal start position top left corner of the platform, next move the paper by one graduated space to the right, stamp again, and keep moving the paper to the next marked line each time, then repeat stamp on the paper.


This is a process of making the stamp fixed and pink heart.
It is a simple technique but it is difficult to stamp many time in the same place without the tool.


The background is darker than Peach Nectar Fresco, so firstly I used Snowflake and Peach Nectar Fresco on it, added the little distress and finished with Seth's bee wax baked texture.


I really enjoyed this project with Courtney's images. Stamp Platform is very convenient tool and it is an innovation in the recent craft sector. I think there are still techniques to use this tool as much as possible. I am looking forward to seeing everybodys blog challenge.

Thank you so much and see you soon.
Etsuko xxx

Blog: My Favorite Things
Facebook: Etsuko Noguchi 
Instagram: Pixienest
Pinterest: Etsuko N

If you teach: add venue, dates, booking info with links here for the next 2 months 
 
To join our challenge and win a PaperArtsy £50 voucher:

Simply make something arty relevant to the topic, and link your creation from any social URL (eg. Instagram, Pinterest, Blog Post etc) sharing your original make to this challenge page.

The current topic link Topic 18: Stamp Platform Techniques will close 17:00 (London Time) Sunday, 28th October 2018, and the winner will be announced 2 hours later at 19:00.

All links go in the draw to win a PaperArtsy £50 gift voucher. Please make sure we can contact you as a prize winner - it helps if you share your contact info from the platform you opt to use.

Good Luck! If you have any questions, don't hesitate to ask!