Showing posts with label EKC59. Show all posts

Thursday, 5 March 2026

Flower Moon Art with EKC {by Victoria Wilding}


Hi everyone, it's Victoria here with you today, creating with Kay Carley products. I’m a sucker for a pretty floral, so Kay’s designs are the perfect choice for creating dreamy floral artwork that celebrates colour, texture, and nature. Today’s ‘Flower Moon’ project is all about building simple layers which show how easy it is to create depth using just a few thoughtful elements.


Here are the PaperArtsy products I’m using for today’s project. I choose two stamp sets, EKC59 and EKC68, and stencil PS298. The flowers in these designs should complement each other nicely and provide me with options for creating different flower heights in the piece. I also selected Fresco Finish Acrylic Paints in Chalk (FF83) and Blue Moon (FF170) as my base colours for the piece.


I started off by creating the moon element using a circular gel plate and the Fresco Finish Acrylic Paints in Chalk (FF83) and Blue Moon (FF170). To create some subtle background flowers I sponged some Blue Moon (FF170) paint through the stencil (PS298) onto the gel plate.


Once they were dry, I added a layer of Chalk (FF83) paint on top of the gel plate using a brayer to pull the print. Gel printing is a wonderfully playful process, full of happy unpredictability. It creates fabulous texture, and stencils are invaluable for adding depth and layered detail to your prints.


This is the first pull I made. Whilst I loved the texture, ultimately, when I started to add the stamping, I decided I wasn’t happy with the placement of the stencil flowers, particularly with the large gap between the first and second stems. I therefore end up using a second print, so you’ll notice that the ‘moon’ changes in the stamping steps below. 


The main focal point in this piece is the flower stamping. Creating layers when stamping is a simple yet powerful way to add depth, dimension, and a natural sense of composition to your designs. I started off by placing the bluebell style flower from stamp set EKC68 on the left hand side of the moon. I stamped the image using Archival Ink, as I wanted a waterproof base when I got to the colouring stages. 


There’s no limit to the compositions you can create when layering the flowers. This is definitely a project you can return to time and again, with very different results! I used some of the loose flower heads in stamp set EKC68 to extend the florals on each side of the moon.


Then I added some stems and leaves to match the stamp designs and create continuity in the design. 


Next I created a mask for the bluebell type flower by stamping on some lightweight paper and fussy cutting. With the mask in place I stamped one of the florals from stamp set EKC59. Masking is a simple but effective technique for creating dimension in your stamped designs. By covering parts of an image before stamping the next, you can build realistic layers that appear to sit naturally behind or in front of each other. 


You can see in this image the final composition and the stamping layers in the foreground. The silhouette stencil florals and the more prominent stamped flowers create real visual depth.
 

I decided to use watercolours to colour the flowers. The beauty of PaperArtsy Fresco Finish Acrylics, is their Matt finish which allows you to use other mediums on top of them and watercolours work wonderfully on top of the paints .


Using watercolours successfully is all about water control. Adjusting the ratio of pigment to water allows you to create everything from soft, translucent washes to deeper, more intense tones. By gradually building colour in layers and letting each one dry if needed, you can achieve beautiful depth while keeping your blends smooth and luminous.


Once the flowers were dry, I created some extra depth using Stickles for a glittery centre on some of the flowers. I enjoy a bit of sparkle in my makes and love how it instantly lifts a project from pretty to eye-catching. Whether it’s a subtle shimmer in the background or a touch of glitter to highlight key details, a little shine adds depth and draws the eye. Used thoughtfully, sparkle can enhance your design without overpowering it, giving your finished piece that perfect finishing touch.


I used the sentiment from stamp set EKC68, nestling it just about the flowers on the moon.


As a finishing touch I decided to add a touch more glitz and glamour to finish the moon and ground the florals. I achieved this by adding a touch of gold leaf to the top and bottom edges, spotlighting some of the outer edge.


Finally, I added some watercolour through stencil PS298 to create two shorter flower stems and fill some gaps at the bottom of the moon.


This Flower Moon piece brings together stamping, watercolour, and gel printing to create a layered design that feels both dreamy and full of quiet detail.


I love how the combination of soft watercolour and textured gel prints gives the flowers a beautiful sense of depth and atmosphere.


Whilst that touch of sparkle really draws the eye into the details. It’s a lovely reminder of how simple layers can come together to create something truly magical.


Until next time, wishing you a happy creative week!

Victoria 


Sunday, 15 May 2022

2022 Topic 07: Specimen Jar {by Victoria Wilding} with Kay Carley stamps


Hi everyone, it's Victoria with you today, and I'm here to share with you my idea for a flower hoop.


As soon as I saw the Specimen Jar topic, I knew I wanted to create a flower hoop. It's something that's been on my creative to-do list for a while and one of those fiddly projects that is right up my street!


To start off I gathered together the supplies I wanted to use. Kay Carley's flower designs were perfect as there were flowers of all different shapes and sizes which would add variety to the finished project. I selected two of Kay's newest sets, EKC58 and EKC59, and two of Kay's older sets, EKC15 and EKC20. 

 
Initially I thought I would use a neutral colour palette full of creams and browns, however, looking at the different flower stamps I was going to be working with, I thought some soft pastel colours would work really nicely, so I picked out three Fresco Finish Chalk Acrylic Paints (Niagara Falls, Pixie Dust and Koala). I also picked out a 6" embroidery hoop, some wool, ribbon and twine and sequins. With all my supplies picked out, it was time to get started.

The first step was to make the flowers for the hoop. Initially I thought I would make a selection of paper and material flowers, however, I didn't think that the cotton material I was going to use was stiff enough to hold the flower shape once I got to the stage of assembling the layers. So I chose a heavy weight piece of watercolour paper and started off by stamping out a selection of the different flowers in Distress Oxide. I then squirted a small blob of each paint colour onto my craft mat and added a little water using my paint brush, before colouring the flowers. It's important that you don't add too much water on this step or you will start shifting the ink as it isn't water resistant, but as you can see in the image below, with care and a light hand, the stamped image softens slightly but is still clearly defined.


Once the flowers were all painted, I went back in with glitter gel pens to add some sparkle to the details on each flower. I then fussy cut them all out and set them aside.
 

On looking at the flowers all cut out, I decided I needed some leaves to add more variety to the final design. Using Kay's new stencil PS326 and Fresco Chalk Acrylic (Slate) I stippled the leafy designs onto another piece of watercolour paper. Once dry I fussy cut them and set them aside with the flowers.
 

Before assembling everything together, I needed to prepare the embroidery hoop. As I wasn't sure how much of the hoop would show through the flowers, I decided to wrap the outer hoop with some wool and ribbon to add a pretty finish to the outside of the hoop. 


I then used some fine netting fabric to place between the outer and inner hoop, pulling the material tight before trimming the edges. This would provide a firm base to adhere the flowers to without being really obvious to the eye at a distance, which would be important as I wanted to leave some open space in the final arrangement of the flowers.
 

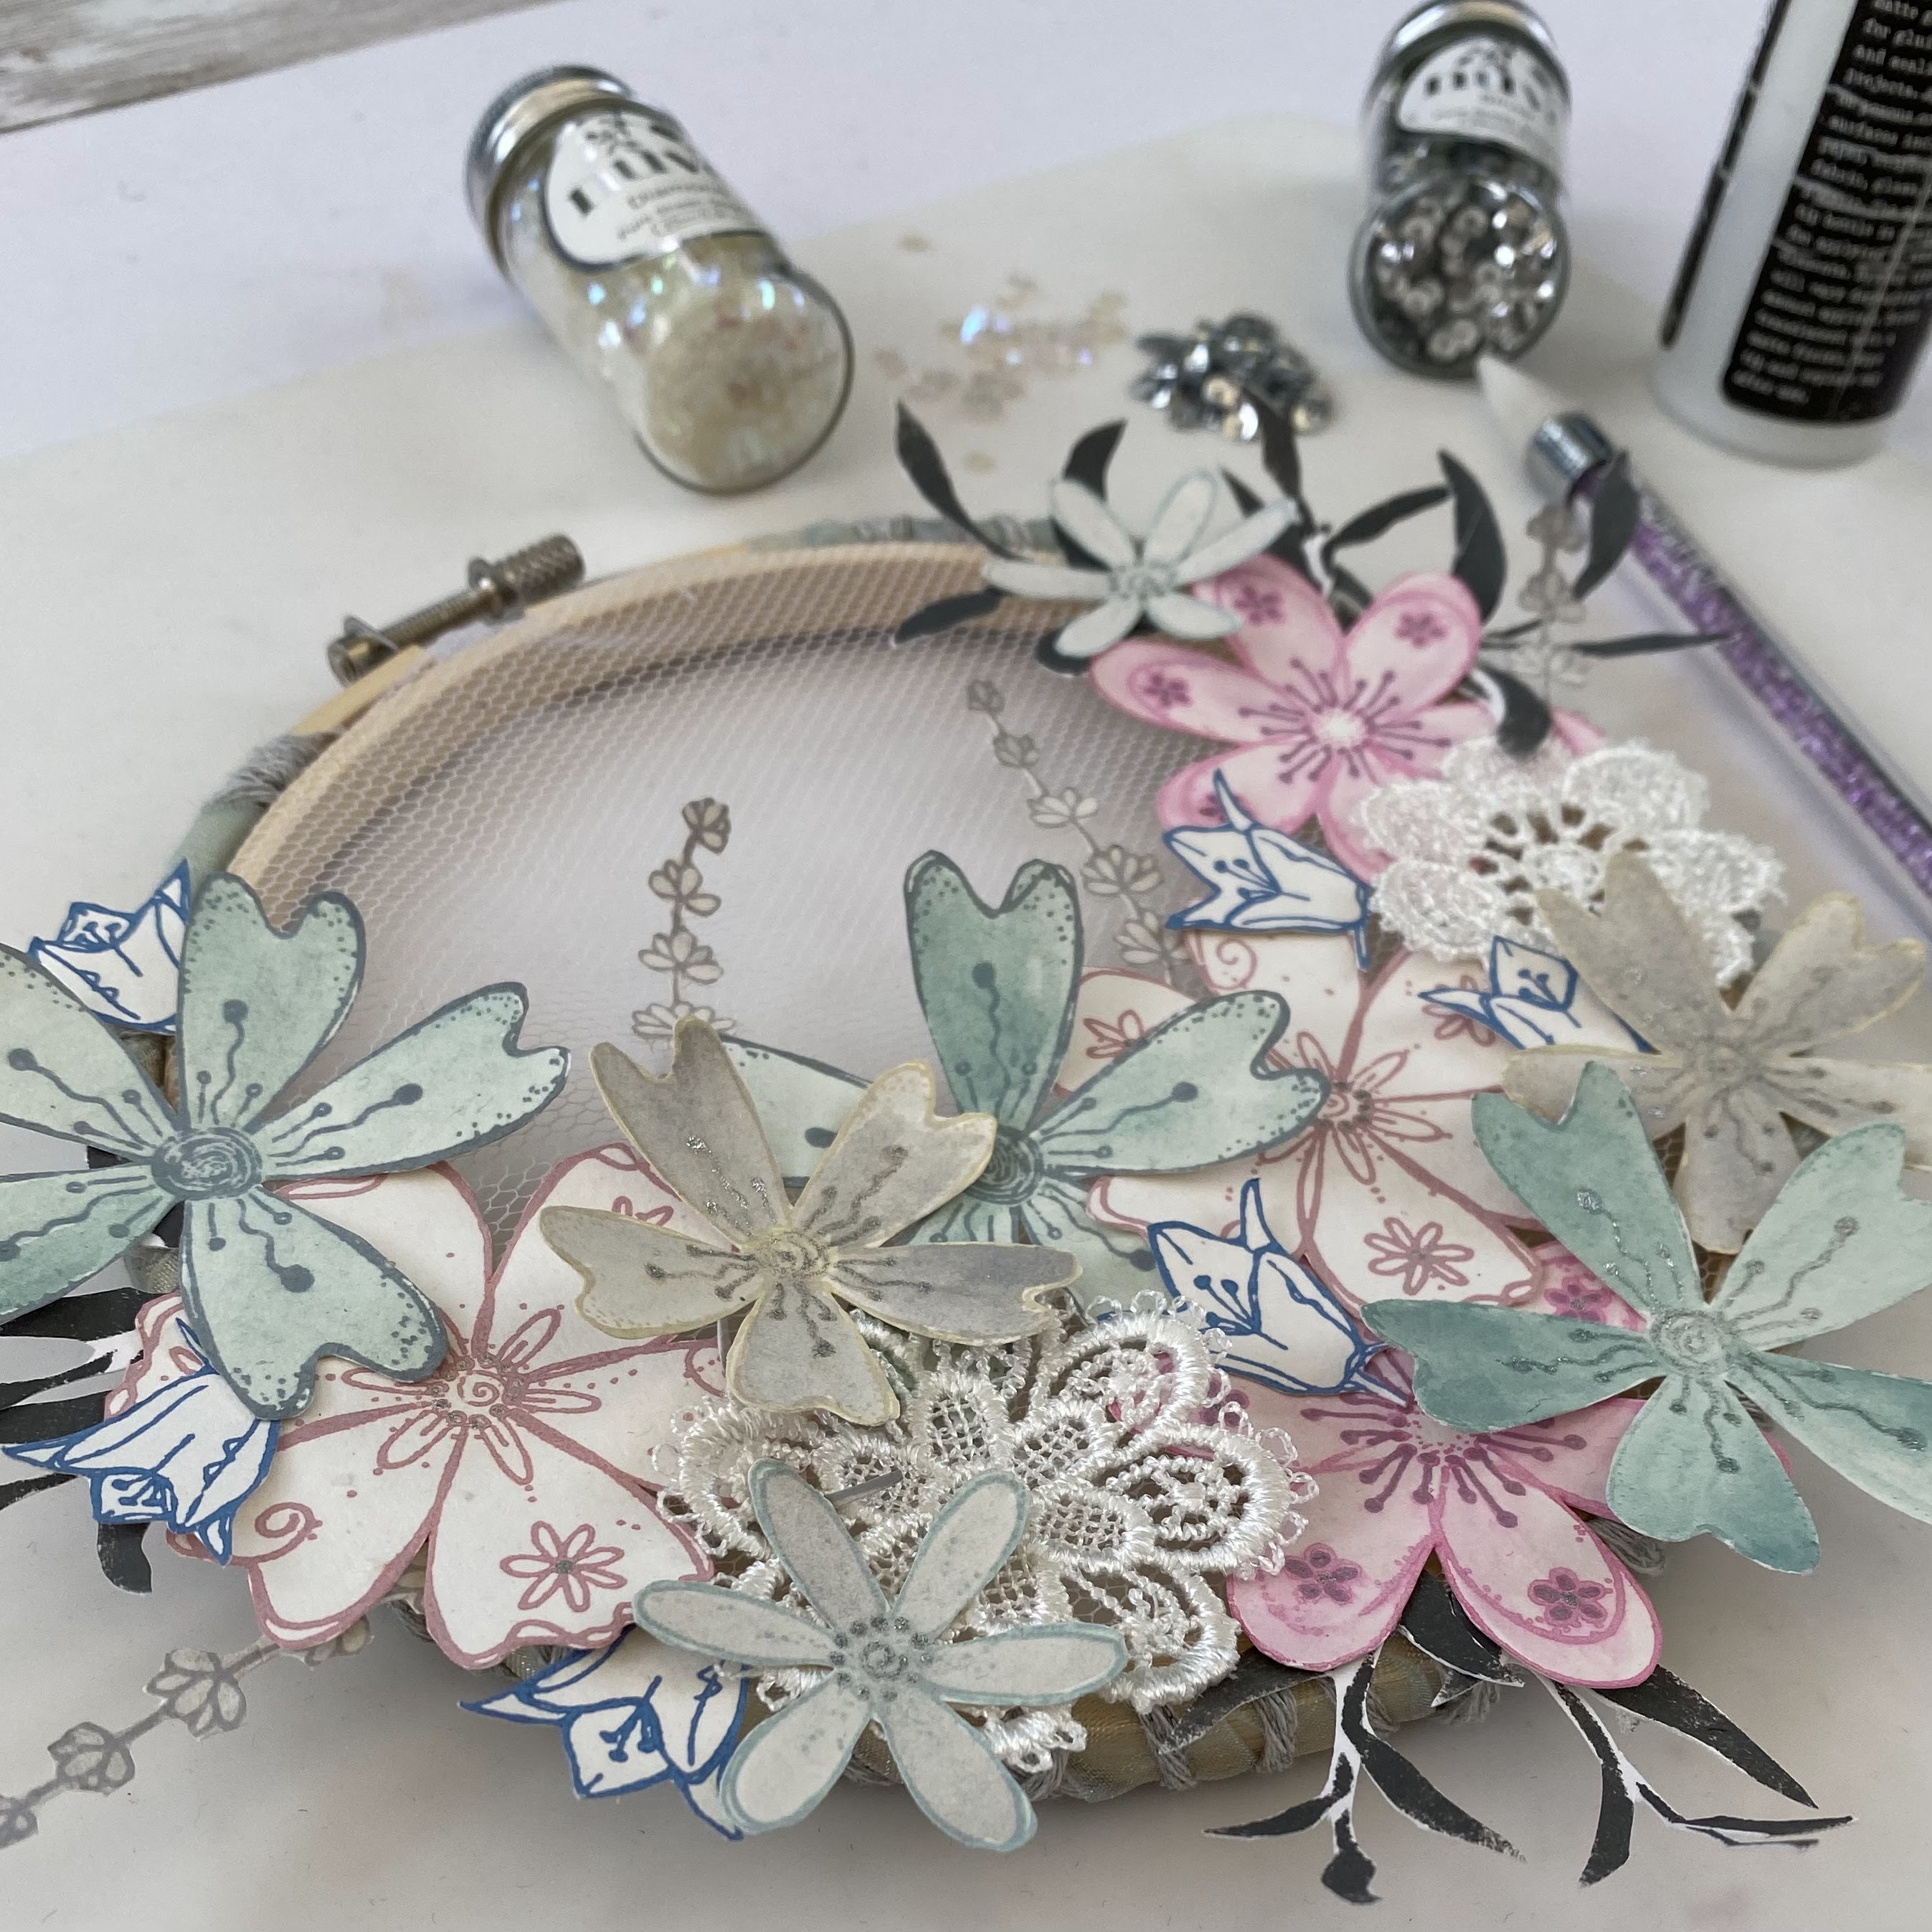
Next I arranged the paper flowers on top of the netting, leaving a small section of open space. I also included two crochet flowers from my fabric stash, to add a final bit of texture.
 

With all the flowers arranged and glued in place, I added some sequins for a final sparkly touch.


The fussy cutting of all the flowers was the most time consuming bit of this project. The rest of it came together really quickly and is one of those projects that in all its separate parts doesn't look like much, but once assembled it has a definite wow factor.  


I love how it turned out and can think of lots of variations to try the next time I make a project like this. Different flower combinations, colour palettes and materials would give a completely different finish. This would be a great project to make for a gift and you could easily add lettering or numbers to give it a personal touch.


Wishing you a creative, happy week.

Victoria